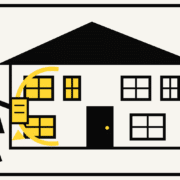
Gutter Fasteners or Rotted Fascia? Why a Gutter Pulls Away
Gutter Fasteners or Rotted Fascia? How to Tell Why a Gutter Is Pulling Away
A gutter that pulls away from the roof edge can look like a simple loose-screw problem. Sometimes the hangers have failed. Other times the wood behind them is soft, the gutter is holding too much water, or the run is pitched poorly. Tightening hardware without checking the fascia can hide the reason the gutter moved.
What Fastener or Hanger Failure Looks Like
Fastener problems are more likely when the fascia remains solid but individual hangers are loose, bent, missing, widely spaced, or no longer gripping correctly. The gutter may sag between attachment points while the wood around them still looks sound.
A repair can involve replacing the correct hangers and fasteners, restoring spacing, and checking the pitch. Hardware should be selected for the gutter and the material it is fastening into, not simply driven into the same enlarged hole.
What Fascia Damage Looks Like
Fascia problems can show as peeling paint, dark staining, softness, crumbling wood, repeated fastener pullout, or a gutter edge that moves with the board behind it. Water may have reached the fascia from an overflowing gutter, a roof-edge detail, failed flashing, or a leak at an end cap or corner.
New hangers cannot hold reliably in deteriorated material. The damaged fascia and the water source need attention before the gutter is reattached.
The Attachment Pattern Helps Narrow It Down
One loose hanger beside otherwise firm fascia suggests a localized hardware problem. Several fasteners pulling from the same soft or stained board point toward a substrate problem. A long section moving with the fascia requires a different repair scope than one bent hanger.
Overflow, standing water, or ice may have contributed load, but those symptoms do not identify whether the attachment or the wood failed. Note them, then keep the inspection centered on the connection between the hanger and fascia. If the board behind a loose gutter is soft or deteriorated, the repair should include finding the water path—not only replacing hardware—because USDA Guidance on Moisture-Related Wood Decay explains that decay fungi depend on sustained moisture conditions.
A Useful Fastener-and-Fascia Inspection Sequence
- Photograph the full loose section from the ground, not only the widest gap.
- Compare the failed section with nearby hangers that remain tight.
- Look for missing hardware, bent hangers, backed-out screws, or enlarged holes.
- Check visible fascia for peeling finish, staining, cracks, or crumbling material.
- Note whether the fascia itself moves with the gutter.
- Have the roof edge and flashing checked if the wood shows repeated moisture.
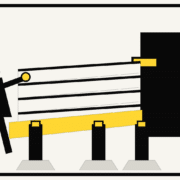
Do not climb onto the roof or lean a ladder against a loose gutter. Ground-level photos showing the attachment pattern are safer and more useful than forcing the section back into place.
What a Gutter and Fascia Inspection Should Actually Cover
When a contractor comes out to diagnose a pulling gutter, the inspection should go beyond the single loose section. A useful visit covers the gutter itself, the board it fastens into, the water path above and below, and the connections at both ends of the run.
Expect the following to be checked and photographed:
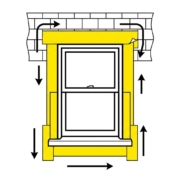
- Gutter condition along the full run: sagging between hangers, separation at seams or corners, dents that trap water, and whether the gutter still holds its original profile. A gutter that has been bent or dented by impact or hail may fail at the attachment even if the fascia is solid.
- Fascia board firmness: whether the wood is solid, soft, or crumbling where each hanger enters. Rotted fascia cannot hold new fasteners until the damaged section is replaced.
- Soffit condition at the eave: staining, softness, or separation at the underside of the eave can mean water has been traveling behind the gutter for some time. Soffit damage often appears alongside fascia damage because they share the same water exposure.
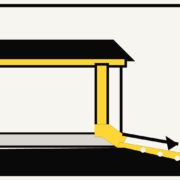
- Downspout connections and discharge path: a clogged or disconnected downspout can force water back into the gutter, adding weight that stresses the hangers. The discharge point matters too—water pooling near the foundation can trace back to a downspout extension that is too short or missing.
- Roof edge and flashing: water reaching the fascia from above, whether from a shingle edge that drips behind the gutter or from damaged drip edge flashing, is a common source of repeated wood decay that no amount of hardware replacement will fix.
- Wide and close-up photos of every affected area: a ground-level wide shot showing the full gutter line plus close-ups of individual hangers, stained boards, and gaps gives the contractor enough information to scope the repair accurately before ordering materials.
If the inspection only checks the loose hanger and skips the water source, the gutter may pull away again after the next heavy rain. The goal is to identify what caused the attachment to fail, not just which piece moved.
Fascia Repair vs. Replacement: What Usually Drives the Decision
The decision to repair or replace a fascia board depends on how much wood is sound and whether the water source has been stopped. A board with a small soft spot near one hanger may be repairable if the rest of the run is firm and the leak has been corrected. A long section of soft, stained, or crumbling wood usually needs replacement.
A few questions help narrow the scope:
- Is the fascia solid everywhere except the loose hanger? If yes, the repair may be limited to replacing the fastener or hanger and checking pitch. If the wood is soft around multiple hangers along the same run, the board likely needs replacement.
- Has the same section been tightened before? A fastener that has been re-driven into the same hole more than once is a sign the hole is enlarged or the wood no longer holds. Replacing the board gives the new hangers a clean surface.
- Is water still reaching the fascia from above? Replacing rotted fascia without fixing the roof-edge leak, overflow, or flashing gap means the new board will eventually decay too. The water source needs to be identified and corrected as part of the same repair.
- Does the gutter itself need work? If the gutter run is bent, leaking at seams, or undersized for the roof area, reattaching it to new fascia without addressing the gutter condition shifts the problem rather than solving it.
In cases where the fascia damage extends behind the gutter or into the soffit, the repair scope grows because the contractor needs to remove the gutter to access the wood, replace the damaged section, and then rehang the gutter with new hangers at the correct spacing and pitch. This is more involved than a single-hanger repair, but it is the path that keeps the gutter attached long-term.
Repair Paths Depend on the Cause
- Solid fascia with failed hardware: replace or reposition hangers and restore the gutter pitch.
- Damaged gutter section: repair or replace the affected run before reattaching it.
- Soft or rotted fascia: replace damaged material and correct the water source before installing hangers.
- Visible moisture at the roof edge: identify and correct the water source before replacing fascia or reattaching the gutter.
Do Not Keep Tightening the Same Loose Fastener
A fastener that repeatedly backs out is a symptom. The hole may be enlarged, the hanger may be wrong, or the fascia may no longer be sound. Reusing the same weak attachment point can leave the gutter looking fixed until the next heavy rain.
When to Schedule an Exterior Review
Get the area checked when the gap is growing, the fascia looks stained or soft, the gutter holds water, overflow appears during rain, or the same section has been tightened more than once. Keep people away from a visibly loose run, especially where it hangs above a door, walkway, or driveway.
Helpful Related Resources
- Gutter Installation and Replacement
- Dented Gutters: Repair or Replacement?
- Downspout Extensions and Drainage
- Common Gutter Problems and Home Damage
- Request an Exterior Inspection
Need to Know What Failed?
CoMo Premium Exteriors can inspect the gutter, hangers, fascia, roof edge, and downspout path, then explain which repair addresses the cause. Call (573) 284-3227 or Request an Inspection.