When Roof Valleys Overflow: Leaves, Lining, or Shingle Failure?
A roof valley that overflows is easy to blame on one thing: leaves, a worn lining, or shingles that have failed. Those are different problems. A valley is the low channel where two roof planes meet, so it collects more water than the open field of the roof. Overflow there can come from debris, from a lining that cannot carry the flow, or from shingles that no longer shed water. It is not the same question as a clogged gutter trough, an ice dam, or whether an old roof can be covered with a new layer.
This article helps a Mid-Missouri homeowner separate those causes and ask better questions before anyone treats the symptom as a repair recipe. It is not a do-it-yourself lining guide. The valley type on the house, the installed products, and the local authority having jurisdiction control the actual work.
Key Takeaways
A valley carries concentrated water. Leaves can block it, but a clean valley can still overflow if the lining or the planes feeding it are not doing their job.
Lining and field shingles are different materials. An open metal or roll-roofing valley can fail on its own, and shingles beside it can fail while the lining is still intact.
The captured code points to manufacturer instructions. In the Missouri Modular Residential Code 2021 text retrieved for this article, valley linings are installed according to the manufacturer’s instructions before shingles are applied.
Open metal valleys have a stated minimum width. That same capture says an exposed metal valley lining is not less than 24 inches wide and uses listed corrosion-resistant metals. Other listed roll-roofing options also exist.
Local review is not the model-code page. The capture is a model residential code viewer, not a Columbia ordinance file. Your authority having jurisdiction and the product instructions decide the scope.
What overflow in a valley usually means
Water from two slopes meets in the valley and has to leave the roof. When that path is blocked or undersized for the storm, water can climb out of the channel, run sideways under shingles, or spill toward a wall. From the ground, the visible clue may be a wet streak, a stain under the valley, or debris packed in the channel after a storm.
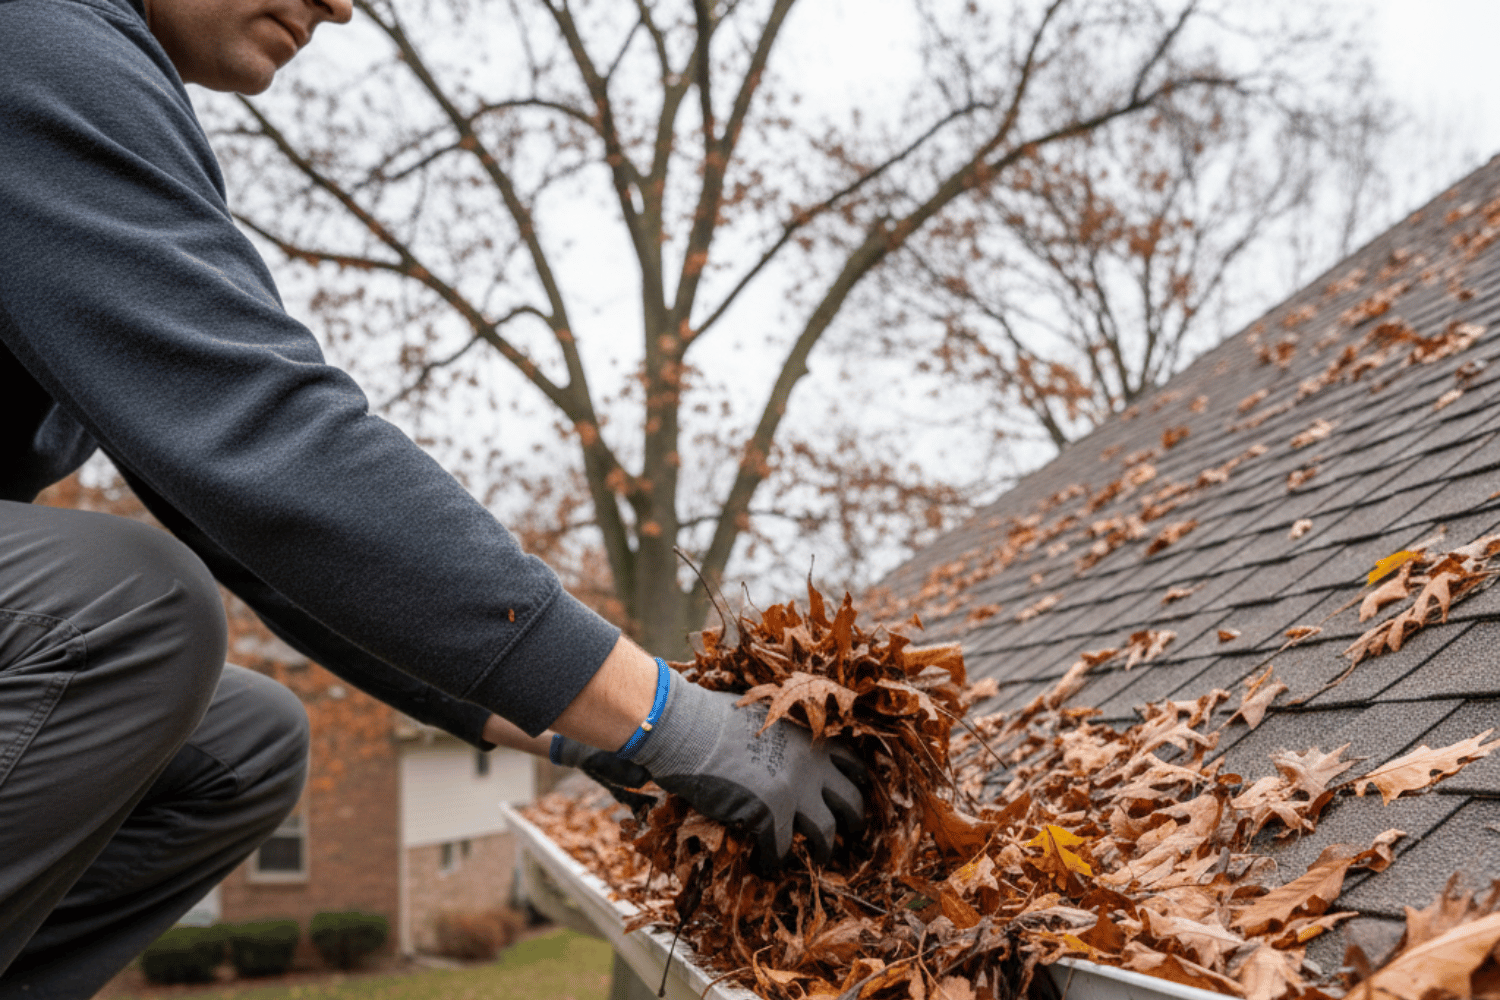
Leaves and seed pods are a real cause. They can form a dam in the same way they form a dam in a gutter. The difference is location. A gutter is a trough at the eave. A valley is part of the roof covering, higher on the slope, and it is lined before the shingles go down. Cleaning a gutter does not tell you whether the valley lining is continuous, wide enough for an open metal valley, or still fastened.
Capacity is the other half of the debris question. A valley that stays full of water after the leaves are gone may be receiving more water than the lining and the outlets below it can pass. A new dormer or porch can change that volume. That is a separate decision from the one in this article, which stays on the valley itself.
Leaves, lining, and field shingles are not interchangeable
Start with what you can see without taking the roof apart. Debris packed in the channel is a debris problem until a closer look shows something else. Granule loss, cracked tabs, or lifted edges in the shingle field, away from the valley, point at the field covering. Rust, splits, or a lining that has slipped out of the channel point at the valley lining. A stain that starts only at the valley and tracks downhill can fit more than one of those causes, so the location of the damage matters more than a single photo of wet shingles.
Open and closed valleys do not look the same. In an open valley the lining is exposed. In a closed valley the shingles cover the lining and the channel is less obvious from the yard. You cannot choose a lining repair from the curb. Someone has to identify which type is on the house before talking about metal width, roll roofing, or shingle weave.
Field-shingle failure is not proved by overflow alone. Shingles can be brittle at the valley because that is where water and debris sit, while the rest of the roof is still serviceable. The reverse is also true: a roof that is worn across the field can leak first at the valley because that is where the water is concentrated. The inspection has to say which of those is present.
What the captured code says about valley linings
The Missouri Modular Residential Code 2021 chapter on roof assemblies, as retrieved from the UpCodes viewer, includes section R905.2.8.2 on valleys. The captured sentence requires valley linings to be installed in accordance with the manufacturer’s instructions before shingles are applied. It then permits specific lining types. For an open valley lined with metal, the lining shall be not less than 24 inches wide and of the corrosion-resistant metals listed in the table in that section. The same section also permits other listed roll-roofing valley linings, including mineral-surfaced roll roofing that meets the standards named there.
That language is a boundary, not a shopping list and not an installation sequence. It does not say which lining is already on a Mid-Missouri house, and it does not say that every overflowing valley needs a new metal lining. Manufacturer instructions for the shingles and the lining still govern how those products are allowed to meet. Those product documents were not retrieved for this article. A contractor has to read the instructions for the products that are actually installed or proposed.
The capture is titled as a model residential code used in this viewer. It is not a City of Columbia ordinance file, and it is not a determination for Jefferson City, Moberly, Boonville, Sedalia, Osage Beach, or any other jurisdiction. For work inside Columbia, the City publishes Building and Site Development resources. Ask which authority applies to the property and which adopted text that authority uses. Do not treat the model-code page as a permit.
You can read the captured valley section in the Missouri roof-assemblies chapter on UpCodes. Use it to understand the questions. Do not use it as a pattern for cutting and fastening a lining.
Questions that separate the causes
A useful inspection report names the valley type, what is blocking it, and what the lining and the adjacent shingles are doing. These questions keep the conversation on that scope:
Is the valley open, with the lining exposed, or closed under the shingles?
Is debris holding water in the channel, or does water still leave the channel after the valley is clear?
Is the lining continuous, or is it split, rusted, slipped, or missing along part of the run?
Are the shingles failing only beside the valley, or across the field of the roof?
Where does the water go when it leaves the valley: into a gutter, onto a lower roof, or against a wall?
Which manufacturer’s instructions apply to the lining and the shingles that are there now?
Which authority having jurisdiction applies, and has anyone checked that the proposed work matches what that authority enforces?
If the answer to the lining question is that the metal is too narrow, rusted through, or no longer seated in the channel, the conversation is about the lining. If the lining is intact and the shingles around it are cracked or unsealed, the conversation is about the covering. If both are worn, replacing only the visible debris will not hold the next heavy rain.
What this is not
Gutter overflow at the eave is a different assembly. A valley can dump more water into a gutter than the gutter can take, but a gutter problem does not identify the valley lining. Ice dams and winter roof preparation are also different articles and different mechanisms. And a decision to roof over old shingles, or to tear them off, belongs to the recover rules for the whole roof, not to a single overflowing valley. Do not let a valley stain become a reason to skip looking at the lining.
Our roof maintenance service is the right place to start when the question is what the valley is doing. If the lining and the field covering both need to come off, the roof replacement page describes that broader scope. Neither page is a substitute for looking at the valley on the house.
Frequently asked questions
Can I tell a lining failure from leaves by looking from the yard?
You can see debris and some staining from the ground. You usually cannot see whether an open lining is the required width, whether a closed lining is still continuous, or whether the shingles are failing only at the valley. Those calls need a close inspection.
Does the code require every valley to be lined with 24-inch metal?
No. The captured R905.2.8.2 text gives that width for an open valley lined with metal, using the listed corrosion-resistant metals. It also permits other listed roll-roofing linings. The type on your roof has to be identified first.
Should an overflowing valley always lead to a full roof replacement?
Not by itself. Debris, a damaged lining, and worn field shingles are different scopes. A replacement conversation starts when the covering, the lining, or both can no longer be relied on, not when a valley holds leaves after one storm.
Ask for the valley, not a generic leak story
CoMo Premium Exteriors can look at a valley as part of roof maintenance for homes in Columbia, Jefferson City, and the rest of the Mid-Missouri service area. Bring photos of the valley after rain, notes about which storms cause the overflow, and any history of gutter work that did not stop the stain. Request a roof evaluation and ask the inspector to separate leaves, lining, and field shingles before recommending a scope.
Snow Melt, Refreezing, and Hidden Leaks: How Winter Moisture Gets Into Roof Systems
Key Takeaways
Mid-Missouri’s freeze-thaw cycles cause snow to melt during warm days, then refreeze at the colder eaves overnight. This creates ice dams that push water back up under shingles, leading to “mystery” winter leaks that appear without any rain.
Many winter leaks aren’t caused by faulty roof installations—they stem from ice dam formation, attic condensation, and poor insulation or ventilation that allow hidden moisture into the roof system from below.
Watch for warning signs between January and March: water stains on ceilings or exterior walls, wet insulation in the attic, large icicles at the eaves, and musty odors in the attic space. Early action prevents expensive structural repairs.
CoMo Premium Exteriors is Mid-Missouri’s only triple-certified roofing and exterior contractor (GAF Master Elite, Owens Corning Platinum, James Hardie Elite), equipped to inspect, diagnose, and permanently fix winter moisture problems—not just patch interior damage.
Schedule a free winter roof and attic inspection anywhere in Columbia, Jefferson City, Boonville, Moberly, or Lake of the Ozarks by calling (573) 424-9008.
How Snow Melt and Refreezing Create Hidden Winter Leaks
It’s mid-February in Columbia, and a winter storm just dropped six inches of snow on your roof. Two days later, the sun comes out and temperatures climb into the low 40s. You’re feeling good—the snow is melting, the worst is over. Then that night, the mercury plunges back below freezing.
The next morning, you notice a small brown ring on your living room ceiling. There’s no rain in the forecast. No pipes above that spot. So where’s the water coming from?
This scenario plays out in homes across Mid-Missouri every winter. The culprit isn’t a sudden roof failure or a burst pipe—it’s the melt-refreeze cycle that our region’s variable weather creates.
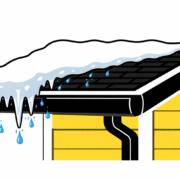
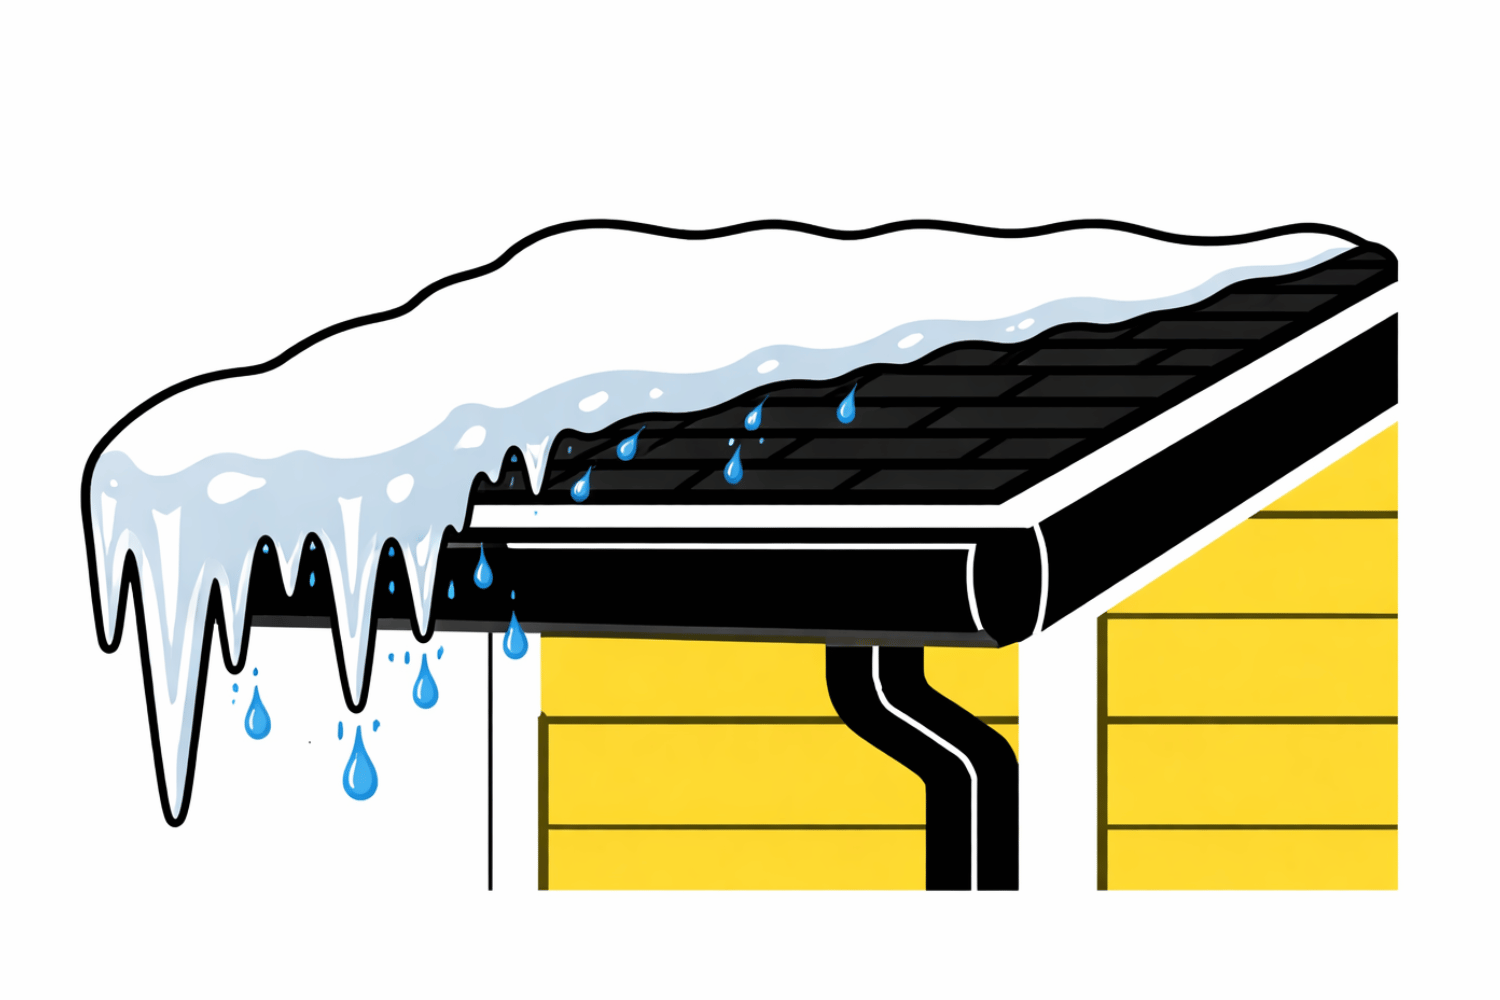
Here’s how it works: During the day, the sun and heat escaping from your attic warm the upper sections of your roof. Snow in these warmer zones begins to melt, and that water flows downhill toward the eaves and gutters. But those lower sections of the roof—especially the overhangs that extend beyond your heated living space—stay colder. When temperatures drop at night, that flowing water refreezes, building a ridge of ice along the roof edge.
This ice ridge, commonly called an ice dam, acts like a small dam on a river. As more snow melts and flows down, it has nowhere to go. Water pools behind the ice barrier and eventually finds its way under shingles, over underlayment, and into nail holes. From there, it can drip into your attic, run along wall cavities, or seep into light fixtures—sometimes showing up as a ceiling stain days after the snow event.
In central and northern Missouri—from Columbia to Moberly to the Lake of the Ozarks—this cycle can repeat dozens of times between December and early March. According to research from the Minnesota Department of Transportation (which shares similar winter patterns with our region), an average of 86 freeze-thaw cycles occur at shallow depths from October to April over a 10-year period. That’s 86 opportunities for water to infiltrate small cracks, expand by approximately 9% when it freezes, and gradually widen those entry points.
Many homeowners first notice issues as small ceiling stains or damp window trim, often assuming a plumbing leak. But when there’s no plumbing above that spot and the weather has been alternating between thaws and freezes, the real culprit is usually snow melt refreezing at the roof edge.
Ice Dams: The Visible Sign of an Invisible Moisture Problem
An ice dam is a solid ridge of ice that forms along the eaves and gutters, blocking normal snowmelt from draining off the roof. While the ice itself is visible from the ground, the moisture damage it causes is often hidden inside your roof system for weeks or months.
How Ice Dams Form
Ice dams form when temperatures across your roof surface are uneven. Here’s the typical sequence:
Heat escaping from your attic warms the upper portion of the roof above 32°F
Snow on this warmer section begins to melt, even when outdoor temperatures are below freezing
The meltwater flows down toward the eaves, which are colder because they extend beyond the heated living space
At the cold eaves, the water refreezes, building up a layer of ice
As more melt flows down and refreezes, the ice dam grows thicker
Eventually, liquid water pools behind the dam with nowhere to drain
The University of Minnesota Extension explains that for ice dams to develop, sustained average temperatures must keep lower roof areas below freezing while upper areas thaw snow. The dam essentially self-limits to these cold zones—but it traps water that exploits every crack in your roof’s exterior covering.
Visible Signs of Ice Dam Problems
What to Look For
Where to Check
What It Indicates
Thick icicles hanging from gutters
Roof edges, especially north-facing
Active ice dam with melt-refreeze occurring
Solid band of ice at roof edge
Along eaves above exterior walls
Significant blockage of normal drainage
Ice-filled or sagging gutters
All gutter runs
Debris may be trapping water; drainage compromised
Ice in roof valleys
Where two roof slopes meet
Vulnerable area for water backup
These signs are especially common on north-facing roof slopes in Columbia and Jefferson City, where the sun provides less warming and ice persists longer.
Hidden Effects You Can’t See from the Ground
The real damage from ice dams happens out of sight:
Water backing up beneath shingles saturates the roof deck
Wet insulation loses its effectiveness and can take weeks to dry
Moisture seeps into exterior wall cavities
Weeks later, you may notice bubbling paint, cracked drywall, or mold growth
Here’s an important point many homeowners miss: a good-quality, correctly installed roof can still experience ice dams if the attic isn’t properly insulated and ventilated. The “roof system” includes the attic, ventilation, and insulation—not just shingles. Addressing only the visible roof surface while ignoring what’s underneath often leads to recurring problems.
Attic Heat, Condensation, and Uneven Roof Temperatures
Ice dams and winter moisture issues almost always tie back to what’s happening under the roof deck—especially in the attic space above living areas and garages. Understanding this connection is key to solving the problem permanently.
How Warm Air Escapes Into Your Attic
Warm interior air from your furnace, showers, and cooking constantly tries to rise and escape through the building envelope. Common escape routes include:
Gaps around recessed lights (can lights)
Unsealed attic hatches and pull-down stairs
Plumbing stacks and electrical penetrations
Gaps at the top plates where interior walls meet the attic floor
HVAC ductwork running through unconditioned attic space
When this warm air reaches the attic, it does two things that cause winter moisture problems:
It melts snow on the upper roof – This creates the temperature differential that leads to ice dam formation
It carries moist air that condenses on cold surfaces – During January cold snaps, moisture-laden air hitting the cold underside of roof sheathing forms frost or dripping water
This condensation can mimic a roof leak in surprising ways: wet sheathing, dripping nails, damp insulation, and frost buildup that melts on the first warm day. Homeowners often assume their roof is leaking when the moisture is actually coming from inside the house.
Specific Contributors in Mid-Missouri Homes
In our 25+ years serving Central Missouri, we’ve identified common issues in local homes:
Bathroom fans vented into the attic – Instead of exhausting moist air outdoors, these fans dump humidity directly into the attic space where it freezes and later melts
Older masonry chimneys – The mass of brick retains heat and warms nearby framing, creating localized hot spots that melt snow unevenly
Uninsulated knee walls – Common in 1½-story homes, these walls allow significant heat loss into attic areas behind them
Cathedral ceilings with inadequate air channels – Without proper venting between insulation and roof sheathing, these areas trap heat
Common Indoor Heat Sources That Trigger Winter Moisture Problems
A thorough winter moisture inspection needs to look beyond shingles and flashing. Here are the interior sources we check:
Heat/Moisture Source
How It Affects the Roof System
Recessed (can) lights
Create hot spots that melt snow directly above; gaps allow warm air into attic
Unsealed attic hatches
Major air leakage pathway; warm air flows directly into attic space
Leaky HVAC ductwork
Heats the attic, melts snow above; can also add humidity if connected to humidifier
Whole-house fans
If not sealed in winter, allow significant heat loss to attic
Bath/kitchen exhaust vents terminating in attic
Add large amounts of humidity; condensation forms on cold sheathing
When we perform a winter moisture assessment, checking these penetration points is just as important as examining the roof surface from your driveways or walking the roof itself.
Where Winter Moisture Sneaks In: Typical Leak Paths in Roof Systems
Winter moisture doesn’t always come straight through obvious holes. Water often travels along framing members, nails, and joints, so the leak may show up far from the actual entry point. This is why dripping water in your living room doesn’t necessarily mean the problem is directly above.
Common Vulnerable Areas
Certain locations on any roof are more susceptible to winter moisture infiltration:
Roof valleys – Where two roof slopes meet, snow accumulates deeper and ice dams form easily
Chimney surroundings – Counter-flashing and step flashing joints are common failure points
Skylights – The intersection of glass, frame, and roofing creates multiple potential leak paths
Plumbing vent boots – Rubber and plastic boots crack in freeze-thaw cycles
Sidewalls – Where a lower roof meets second-story siding, step flashing must be correctly integrated
Low-slope sections – Porches, additions, and dormers with shallow pitches hold snow longer
During mid-winter thaws, backed-up snowmelt can push water up under shingles in valleys, around step flashing near second-story walls, and beneath metal counter-flashing at chimneys. The water doesn’t need a large opening—capillary action can draw moisture into surprisingly small gaps.
In homes built before about 2005 in Mid-Missouri, we commonly find limited or no ice-and-water shield membrane at the eaves and valleys. This self-adhering underlayment wasn’t required by code in many areas until more recently, leaving older roofs more vulnerable to wind-driven snow and ice dam backup.
A proper inspection by our team includes not only the top side of the roof, but also attic-side evidence: darkened sheathing, rusty nail heads, wet insulation, and staining around penetration points. Sometimes the attic tells us more about moisture problems than the shingles do.
How Hidden Leaks Show Up Inside the Home
Interior warning signs often appear in January and February, though they may not be recognized as roof-related problems at first:
Common indicators:
Faint yellow-brown rings on ceilings
Sagging or cracked drywall at exterior corners
Swollen or warped window trim
Peeling paint near outside walls
Bubbling wallpaper
Less obvious signs:
Musty smell in the attic
Higher-than-normal winter humidity on main floors
Frost on exposed nail tips in the attic
Ice forming on the underside of roof sheathing during extreme cold
Moisture can flow along the back of drywall or run down top plates, so the visible stain may be several feet away from where water entered the roof system. This makes diagnosis tricky without an attic inspection.
We recommend that homeowners in Columbia, Jefferson City, and surrounding areas do a quick attic check with a flashlight after major snowstorms followed by a warm-up. Look for dark spots on sheathing, damp insulation, or frost patterns—these are early warnings that moisture is getting where it shouldn’t be.
Long-Term Damage from Winter Roof Moisture (and Why Speed Matters)
One ice dam event or condensation episode may seem minor—a small stain, a little dampness. But repeated winter moisture can create serious long-term issues inside the roof system that become expensive to repair.
Structural Risks
When roof decking and framing stay wet through multiple freeze-thaw cycles, deterioration begins:
Rotting roof decking – Plywood and OSB sheathing absorb moisture and eventually delaminate or rot
Soft or spongy spots – Walking on the roof reveals areas where decking has weakened
Weakened rafters or trusses – Chronic dampness leads to wood decay in structural members
Corroded fasteners – Nails and screws rust, losing their holding power
Interior Risks
The damage doesn’t stop at the roof structure:
Mold growth – In attic insulation and wall cavities, mold can develop within 24-48 hours of sustained moisture. Studies suggest 60-70% of untreated attic leaks develop mold within months.
Deteriorating drywall – Repeated wetting weakens drywall, leading to sagging ceilings and crumbling walls
Ruined insulation – Wet insulation compresses and loses R-value, reducing energy efficiency
Increased heating costs – Damaged insulation means your furnace works harder, and you’ll see this reflected in higher energy costs throughout winter
Health Implications
Chronic attic moisture creates health risks for your household:
Mold and mildew can aggravate allergies and respiratory conditions
Spores spread through HVAC systems into living spaces
Winter homes with limited fresh air exchange concentrate these contaminants
Children, elderly residents, and those with asthma face heightened risk
Cost Implications
Here’s the financial reality: repairing minor insulation and flashing issues after the first signs of trouble is far less expensive than replacing sheathing, insulation, and interior finishes after several untreated seasons. What might be a $500-1,500 repair in year one can become a $10,000+ restoration project if moisture damage compounds over three or four winters.
How Winter Moisture Shortens Roof Lifespan
Repeated wetting and refreezing of the roof deck accelerates aging in several ways:
Sheathing warps, causing shingles to lose proper contact and adhesion
Freeze-thaw cycles loosen shingle fasteners
Ice pressing against materials creates new gaps and entry points
Granule loss accelerates on repeatedly frozen shingles
A well-installed roof with good attic ventilation and insulation can last 25-30 years in Mid-Missouri’s climate. A similar roof plagued by chronic moisture issues may show major problems in just 10-15 years.
An important note on warranties: Manufacturer warranties from GAF, Owens Corning, and other major brands assume proper ventilation and underlayment installation. Chronic ice damming and poor attic conditions can compromise warranty coverage, leaving homeowners responsible for repairs that might otherwise be covered.
Preventing Ice Dams, Condensation, and Winter Leaks in Mid-Missouri
Effective winter moisture control isn’t about any single fix—it’s about the whole system working together: roof covering, underlayment, ventilation, insulation, and air sealing.
Short-Term Emergency Measures
When you’re dealing with an active ice dam or leak, here are immediate steps:
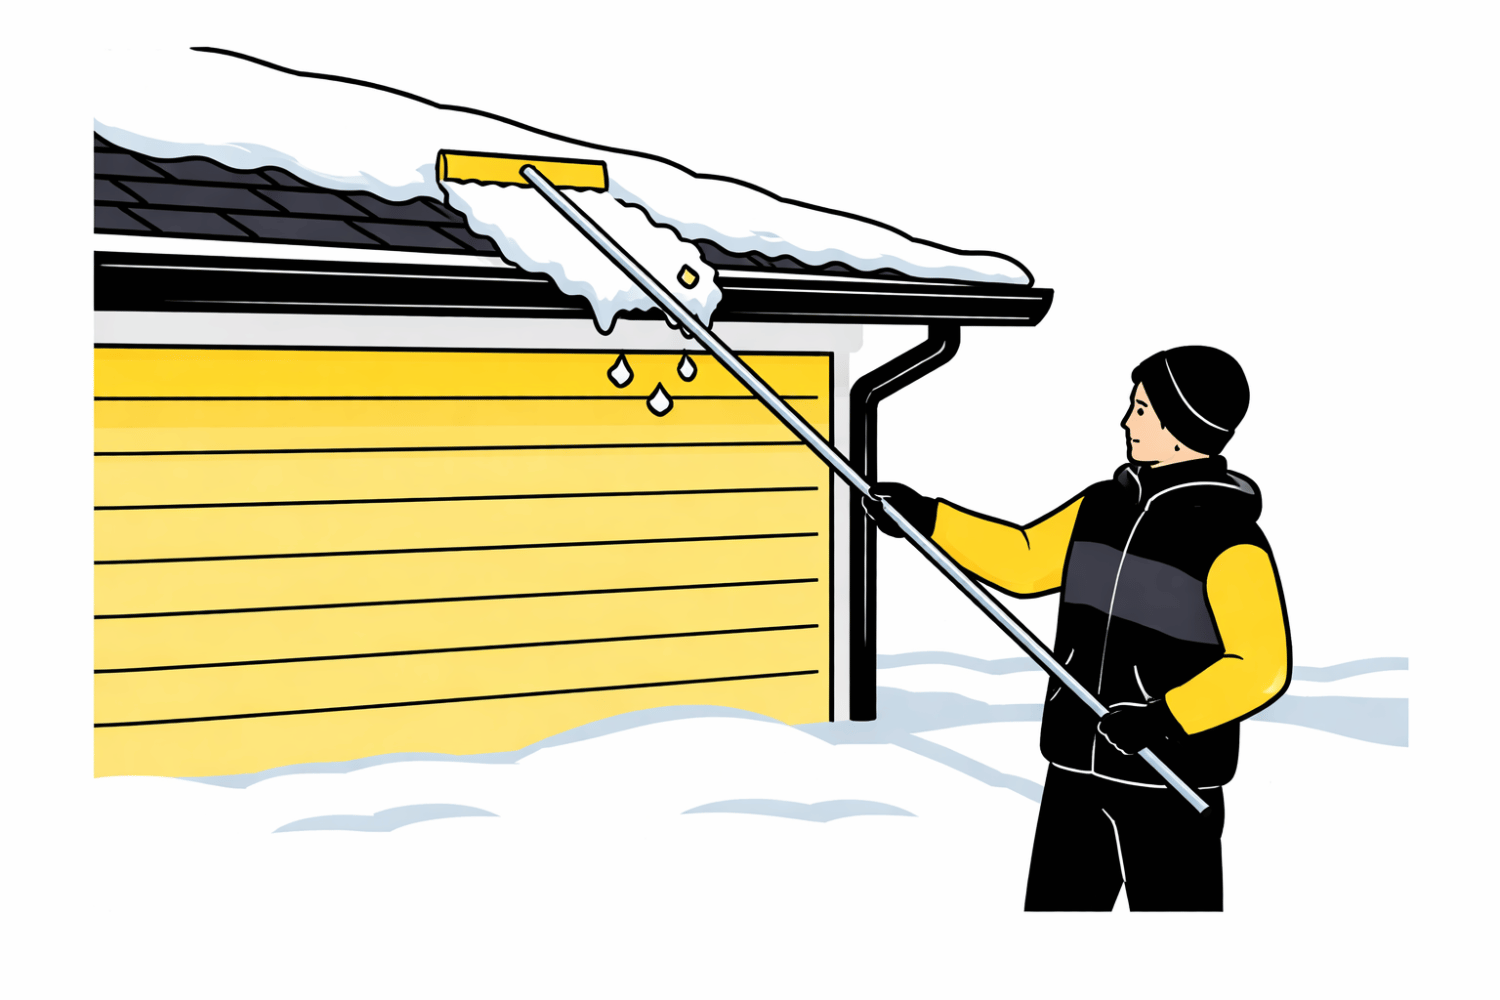
Remove snow from the roof edge – A roof rake (used from the ground) can clear the lower 3-4 feet of roof, reducing melt feeding the ice dam
Create drainage channels – In severe cases, professionals can carefully melt channels through ice dams to allow trapped water to escape
Control interior moisture sources – Run bathroom fans longer, reduce humidifier settings, and ensure dryer vents are clear
However, these are emergency measures, not long-term fixes. Roof raking every storm isn’t sustainable, and aggressive ice removal risks damaging shingles and gutters.
Long-Term Solutions
Based on hundreds of winter moisture cases across Mid-Missouri, here’s what we commonly recommend:
Upgrade attic insulation – Bringing insulation to R-49 (the current Mid-Missouri code minimum for attics) significantly reduces heat loss through the ceiling
Improve attic ventilation – Balanced intake and exhaust ventilation keeps attic temperatures closer to outdoor conditions
Air-seal ceiling penetrations – Sealing gaps around lights, plumbing, and wiring stops warm air leakage at the source
Install ice-and-water shield during reroofing – This self-adhering membrane at eaves, valleys, and penetrations provides a waterproof backup
Solutions should be tailored to each home’s design. Ranch homes in Columbia behave differently than two-story homes in Jefferson City, and lake homes with complex roofs at Lake of the Ozarks present their own challenges. There’s no one-size-fits-all approach.
The good news: properly addressing winter moisture issues often improves comfort and reduces energy costs year-round, not just during snow season.
Ventilation and Insulation Best Practices for Our Climate
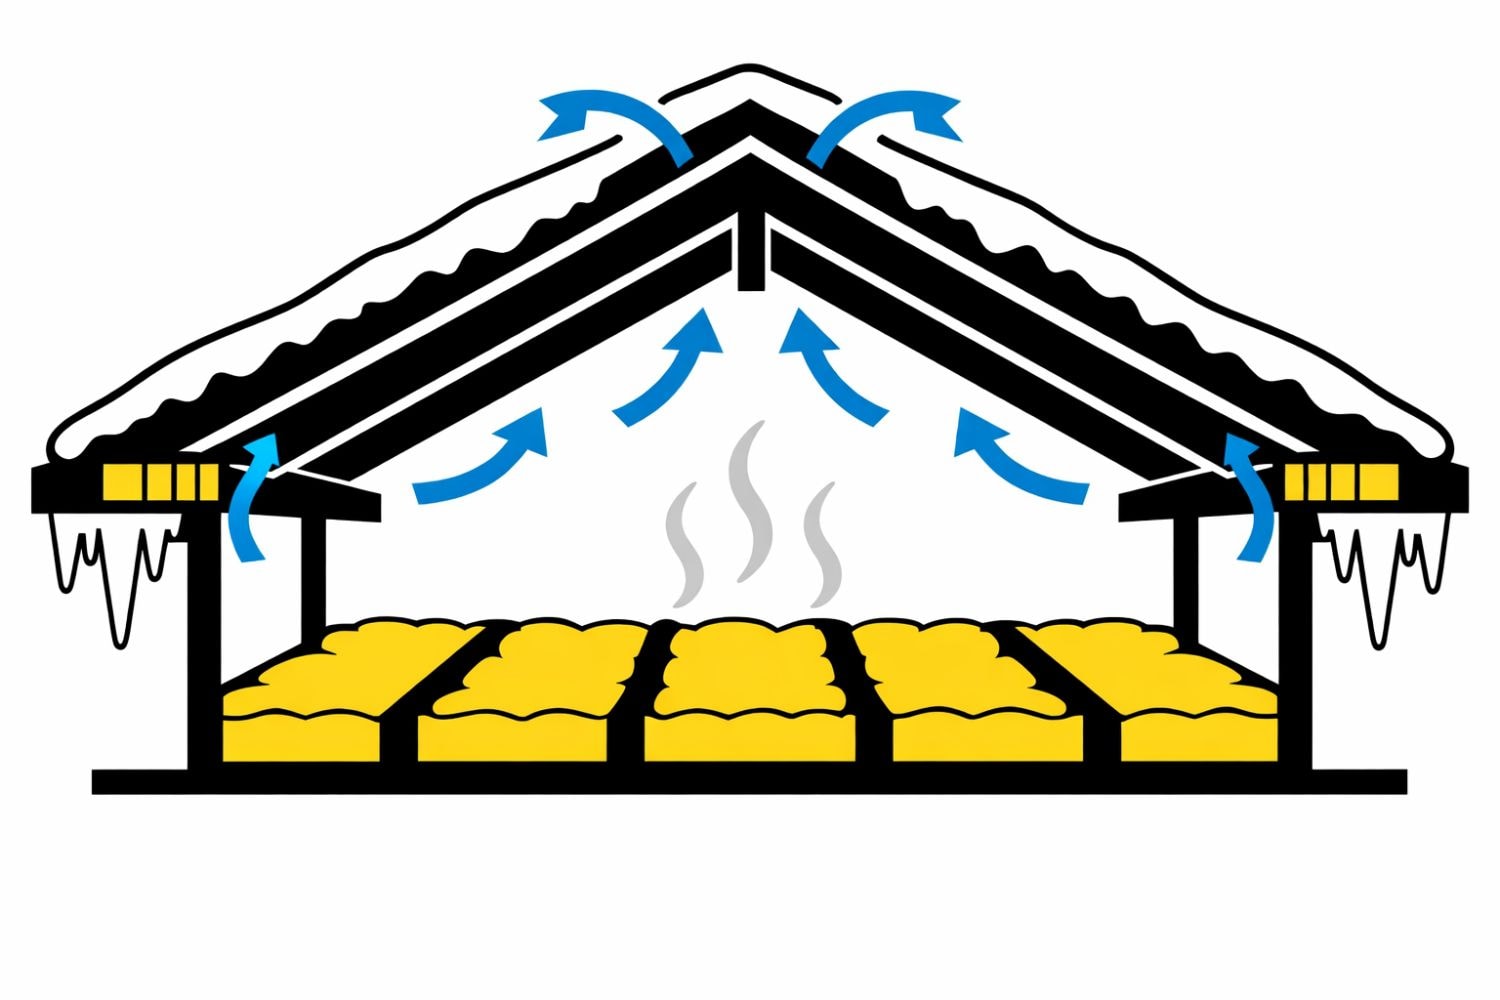
A balanced attic ventilation system works by creating airflow from intake to exhaust:
Intake vents at the soffits or eaves allow cool outside air to enter
Exhaust vents at the ridge or high on the roof let warm air escape
This circulation keeps attic temperatures more uniform, reducing the temperature differential that causes ice dams
For central Missouri homes, we typically follow current building code ratios for net free ventilation area—though many older homes fall short of these standards. The concept is straightforward: prevent your attic from becoming significantly warmer than the outdoors during winter.
Good attic insulation should:
Provide even coverage across the entire attic floor
Maintain proper depth (not compressed or settled)
Include baffles at the eaves to protect soffit vents from being blocked
Remain dry and fluffy, not wet or compacted
If insulation is damaged, wet, or missing in areas, it needs to be corrected before other improvements will be fully effective.
A word of caution: We don’t recommend DIY-ing major ventilation changes in winter. Cutting new vents in freezing weather creates its own risks, and improper vent placement can actually worsen moisture problems. Schedule an assessment with a certified roofing contractor who understands both manufacturer specifications and local conditions.
Roofing Upgrades That Protect Against Winter Moisture
When we install or replace a roof, specific components help limit winter leaks:
Ice-and-water shield membranes – Self-adhering waterproof layer at eaves, valleys, and around penetrations
High-quality synthetic underlayment – Better water resistance and durability than traditional felt
Properly flashed chimneys and sidewalls – Correct integration of step flashing, counter-flashing, and kickout diverters
Correctly sized gutters and downspouts – Adequate capacity to handle snowmelt without backing up
We typically extend ice-and-water protection beyond the minimum code requirements in known trouble spots like low-slope eaves and long valleys. Mid-Missouri’s weather demands this extra margin.
Our triple-certified installation approach (GAF Master Elite, Owens Corning Platinum, James Hardie Elite for siding tie-ins) ensures these details are done to factory standards. This matters for winter performance because manufacturers have engineered their systems to work together—when installation shortcuts happen, winter is often when problems appear.
If your roof was installed before modern underlayment and flashing practices became standard in the 2000s-2010s, a proactive evaluation may prevent potential water damage before it starts.
How CoMo Premium Exteriors Diagnoses and Fixes Winter Roof Moisture Issues
As a local Mid-Missouri contractor, we’ve seen hundreds of winter leak scenarios across Columbia, Jefferson City, Boonville, Moberly, and the Lake of the Ozarks. After 25+ years, patterns repeat—and that experience helps us quickly identify what’s actually going on with your roof system.
Our Inspection Process
When you contact us about a winter moisture concern, here’s what to expect:
Exterior roof assessment – When conditions allow safe access, we inspect the roof surface for missing shingles, damaged flashing, ice dam evidence, and vulnerable areas
Attic inspection – We check for moisture evidence, frost patterns, ventilation adequacy, insulation levels, and air leakage points
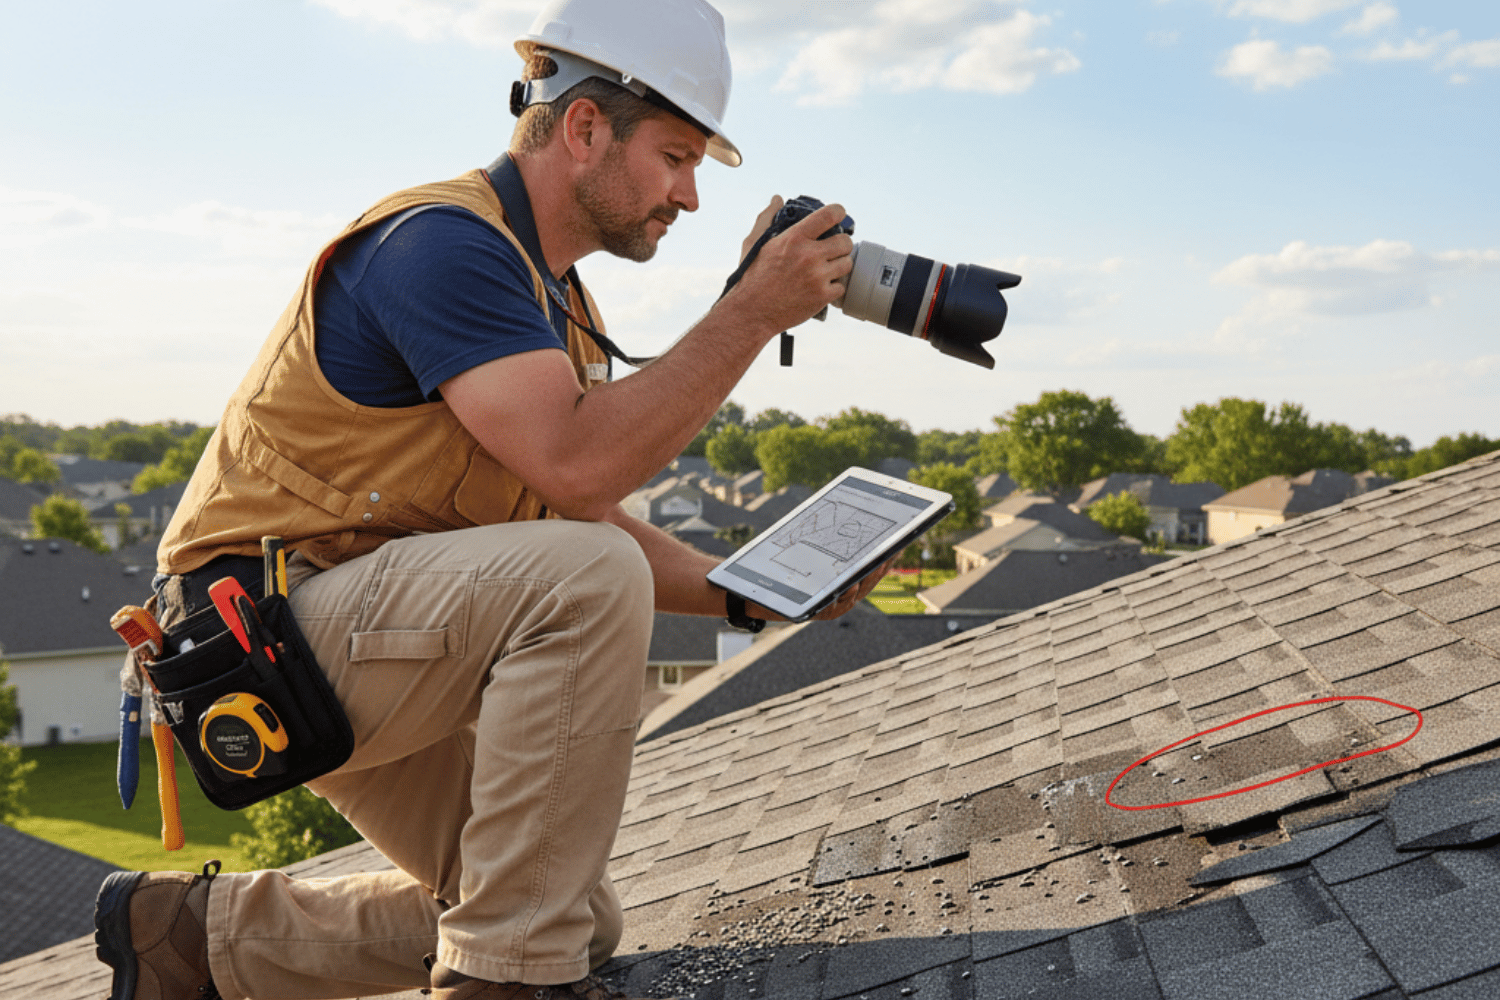
Documentation – We photograph conditions and explain what we’re seeing in plain English
Diagnosis – We differentiate between true roof failures (missing shingles, failed flashing) and building-science issues (heat loss, condensation)
This last point is critical. Sometimes the solution is a flashing repair. Sometimes it’s adding insulation and sealing air leaks. And sometimes it’s both. We want you to invest money where it actually solves the problem, not just where it’s most visible.
Creating a Prioritized Plan
Based on our findings, we develop a plan that addresses:
Immediate leak control – If water is actively entering your home, we prioritize stopping it
Short-term stabilization – Temporary measures to maintain safe conditions through the rest of winter
Long-term fixes – Air sealing, ventilation upgrades, insulation improvements, and targeted roof repairs or full replacement if necessary
We also offer free estimates and can coordinate with insurance when winter moisture stems from storm-related damage. We help homeowners understand what is and isn’t typically covered, and we’re experienced in documenting damage for adjusters.
When to Call Us (and What to Expect)
Contact CoMo Premium Exteriors if you notice:
A new ceiling stain appearing after snow, especially without rain
Recurring winter leaks in the same area year after year
Heavy icicles and thick ice bands at the roof edge
Visible frost, dripping, or moisture in the attic
What happens after you call:
We schedule an on-site assessment at a time that works for you
We perform a thorough inspection of roof, attic, and relevant interior areas
We explain our findings in clear, straightforward language
We provide a written estimate with options (repair vs. long-term solution)
There’s no high-pressure sales pitch. Our goal is to educate you and let you decide when and how to move forward. Many of our customers appreciate having the information even if they’re not ready to act immediately.
Ready to get answers? Call us at (573) 424-9008 or request an inspection through our website. With more freeze-thaw cycles ahead this winter, acting before the next major snow or temperature swing helps prevent the situation from getting worse.
FAQs
Can an ice dam damage my roof even if I don’t see water inside the house?
Yes. Ice dams can soak roof decking and insulation without immediately causing interior stains. The moisture may saturate sheathing and insulation for weeks before it eventually shows up as sagging drywall, a musty attic odor, or mold on stored items.
If you see heavy icicles or thick ice at the eaves during January or February, we recommend scheduling a roof and attic inspection even if there’s no active leak yet. Early inspections often let us identify and fix minor issues—like localized underlayment or flashing problems—before they lead to major repairs.
Is it safe to remove ice dams myself with a shovel, hammer, or roof rake?
Using a roof rake from the ground to remove fresh snow is generally safe when done carefully. However, aggressive chipping at ice with hammers, shovels, or picks can easily break shingles, dent gutters, and damage fasteners—creating new leak points that show up during spring rains.
For severe ice dams, professional steam-based removal is safer than mechanical methods. But the real answer is prevention: proper insulation, ventilation, and air sealing address the root cause so you’re not managing an emergency situation every winter.
Will my homeowners insurance cover damage from ice dams or winter roof leaks?
Many policies in Missouri cover resulting interior water damage from sudden ice dam events—things like stained ceilings, damaged drywall, and ruined flooring. However, policies typically don’t cover the underlying cause, such as inadequate attic insulation, poor ventilation, or pre-existing roof wear.
Coverage varies significantly by policy and carrier. We recommend reviewing your policy or talking with your agent to confirm specifics. When appropriate, CoMo Premium Exteriors assists homeowners in documenting winter damage and communicating with adjusters so they understand what repairs are needed. We can help you file a claim correctly when winter damage qualifies.
When is the best time of year to fix winter moisture problems with my roof and attic?
We can perform emergency leak-control work any time, including during winter weather. However, major fixes—like full roof replacements, extensive ventilation modifications, or large insulation projects—are typically best scheduled for spring through fall when weather conditions allow for proper installation.
The key is to call as soon as you notice an issue. We can stabilize the situation, prevent further damage, and plan permanent solutions for the next available weather window. Waiting multiple seasons often compounds the damage, increasing both repair cost and disruption to your household.
How do I know if I need a full roof replacement or just targeted repairs and attic improvements?
The answer depends on several factors: the age of your roof, visible wear patterns (curling shingles, significant missing granules, exposed fasteners), and how widespread the moisture damage is to decking and underlayment.
We evaluate both the roof surface and the attic to determine whether strategic repairs plus insulation and ventilation improvements will solve the problem, or whether a full replacement is the more cost-effective long-term option. Sometimes a 15-year-old roof with localized ice dam damage needs only flashing work and attic upgrades. Other times, widespread sheathing damage makes replacement the smarter investment.
We share photos and clear explanations so you can see exactly what we see before making any decision. Our role is to give you the information—not to pressure you into a particular choice.
Winter Roof Replacement: Can You Really Replace Your Roof in a Mid‑Missouri Winter?
Replacing your roof during the winter months might seem daunting, especially in Mid-Missouri’s cold weather. However, with the right conditions, materials, and experienced roofing contractors, a winter roof replacement can be both safe and effective. While colder temperatures do affect roofing materials like asphalt shingles, proper techniques and careful planning ensure your roof is installed correctly and protected against winter storms. In this guide, we’ll explore everything you need to know about winter roofing projects, including temperature considerations, safety precautions, and how to prepare your home for a successful winter roof replacement.
Key Takeaways
Yes, you can replace a roof in a Mid-Missouri winter, but it requires the right temperatures, materials, and an experienced crew. Most shingle manufacturers prefer 40°F and rising, though with hand-sealing and proper jobsite prep, we can work effectively down into the mid-30s on sunny, dry days.
Winter roof replacement stops active leaks, prevents ice dam damage, and often offers better scheduling flexibility and pricing than the spring rush. If your home’s roof is already compromised, waiting until April can turn small problems into major structural issues.
Cold temperatures change how roofing materials behave—asphalt shingles become brittle below 40°F, and factory sealant strips need heat to activate. Experienced roofing professionals compensate with warmed materials, manual sealing, and adjusted tool settings.
Is Winter Roof Replacement in Mid‑Missouri Really a Good Idea?
We get this question every December, usually from a homeowner staring at a ceiling stain or watching shingles blow off during a cold front. The honest answer? Winter roofing is absolutely possible—but it’s not ideal for every situation, and it takes a roofing team that knows what they’re doing.
In Central Missouri—whether you’re in Columbia, Jefferson City, or out by Lake Ozark—we typically see usable winter roofing windows on dry days in the 35–50°F range. When the sun’s out and the wind stays calm, that’s often enough to get quality work done. We’ve installed over 500 roofs across the region, and a good portion of those happened between November and March.
Here’s the thing: emergency situations shouldn’t wait. If you’ve got active leaks, damage from winter storms, or a roof deck that’s starting to fail, delaying until spring can mean thousands more in repairs. Water doesn’t care what month it is—it just keeps finding its way in.
That said, winter projects do come with tradeoffs:
Pros
Cons
Stops leaks before freeze-thaw damage worsens
Slower progress due to shorter days
Often faster scheduling (less backlog)
More weather delays possible
Prevents ice dam damage
Extra care needed with cold materials
Ready before late-winter storms
Shingle sealing takes longer
A trusted contractor should walk you through whether a temporary repair, partial replacement, or full winter reroof makes the most sense for your specific roof and budget. That’s exactly what we do at CoMo Premium Exteriors—no pressure, just straight answers based on what your roof actually needs.
What Temperatures Are Too Cold for a Winter Roof Replacement?
Temperature matters for two reasons in cold weather roofing: keeping workers safe on potentially icy roof surfaces, and making sure roofing materials perform the way they should. In Mid-Missouri winters, understanding these thresholds helps you know when winter work makes sense.
Manufacturer guidance is straightforward: Most standard asphalt shingles are designed for installation at 40°F (4°C) and above. The ideal range sits between 50–80°F, where shingles stay flexible and the thermally-activated sealant strips bond quickly.
Here’s how we break down the temperature ranges:
Temperature Range
Workability
What We Do
50°F+
Ideal conditions
Standard installation techniques
40–50°F
Good with care
Monitor sealant activation, work during warmest hours
32–40°F
Workable
Hand-sealing, warmed materials, midday scheduling
Below 30°F
Not recommended
Emergency tarping and temporary measures only
Between roughly 32–40°F, careful crews can still replace roofs using specific cold weather techniques. We store materials in warm spaces, apply roofing cement manually under shingle tabs, and schedule work during the warmest hours of the day—typically 10 AM to 3 PM.
A sunny 38°F January day in Columbia? That’s workable with the right approach. A 28°F cloudy, windy morning with frost on the roof surface? We’re rescheduling. CoMo Premium Exteriors will always reschedule rather than risk a poor install or unsafe winter conditions.
How Cold Weather Affects Asphalt Shingles and Other Roofing Materials
Cold doesn’t just make the job uncomfortable—it fundamentally changes how roofing materials behave and how long they’ll last. Understanding this helps explain why winter projects require different techniques.
Shingle flexibility is the biggest concern. Under about 40°F, asphalt shingles become stiffer and more brittle. The asphalt matrix that gives shingles their pliability stiffens up, and studies show cracking rates can increase by up to 30% if materials aren’t properly warmed before installing asphalt shingles. That means more care when handling, nailing, and walking on them.
Sealant behavior changes dramatically too. Every asphalt shingle has a factory adhesive strip designed to bond under the sun’s heat. In a July installation, this happens naturally within days. In January in Columbia, that bond might take weeks—or it might not happen at all until spring without intervention. That’s why manual sealing becomes essential in cold conditions, using quarter-sized dabs of approved roofing cement under each tab.
Other roofing materials have their own cold weather quirks:
Metal roofs can be installed in colder conditions since they don’t rely on adhesive bonding, but crews need to watch for condensation, thermal expansion, and proper fastener torque
EPDM and low-slope membranes often need 45°F+ to bond correctly
Slate tiles become more susceptible to cracking in freezing temperatures
An experienced crew adjusts everything—tool settings on nail guns, air pressure, storage locations, work timing—to match the actual temperatures on installation day.
Installer Safety and Project Timing in Winter
Ice, frost, and shorter December–February days change everything about how we plan roofing projects across Mid-Missouri.
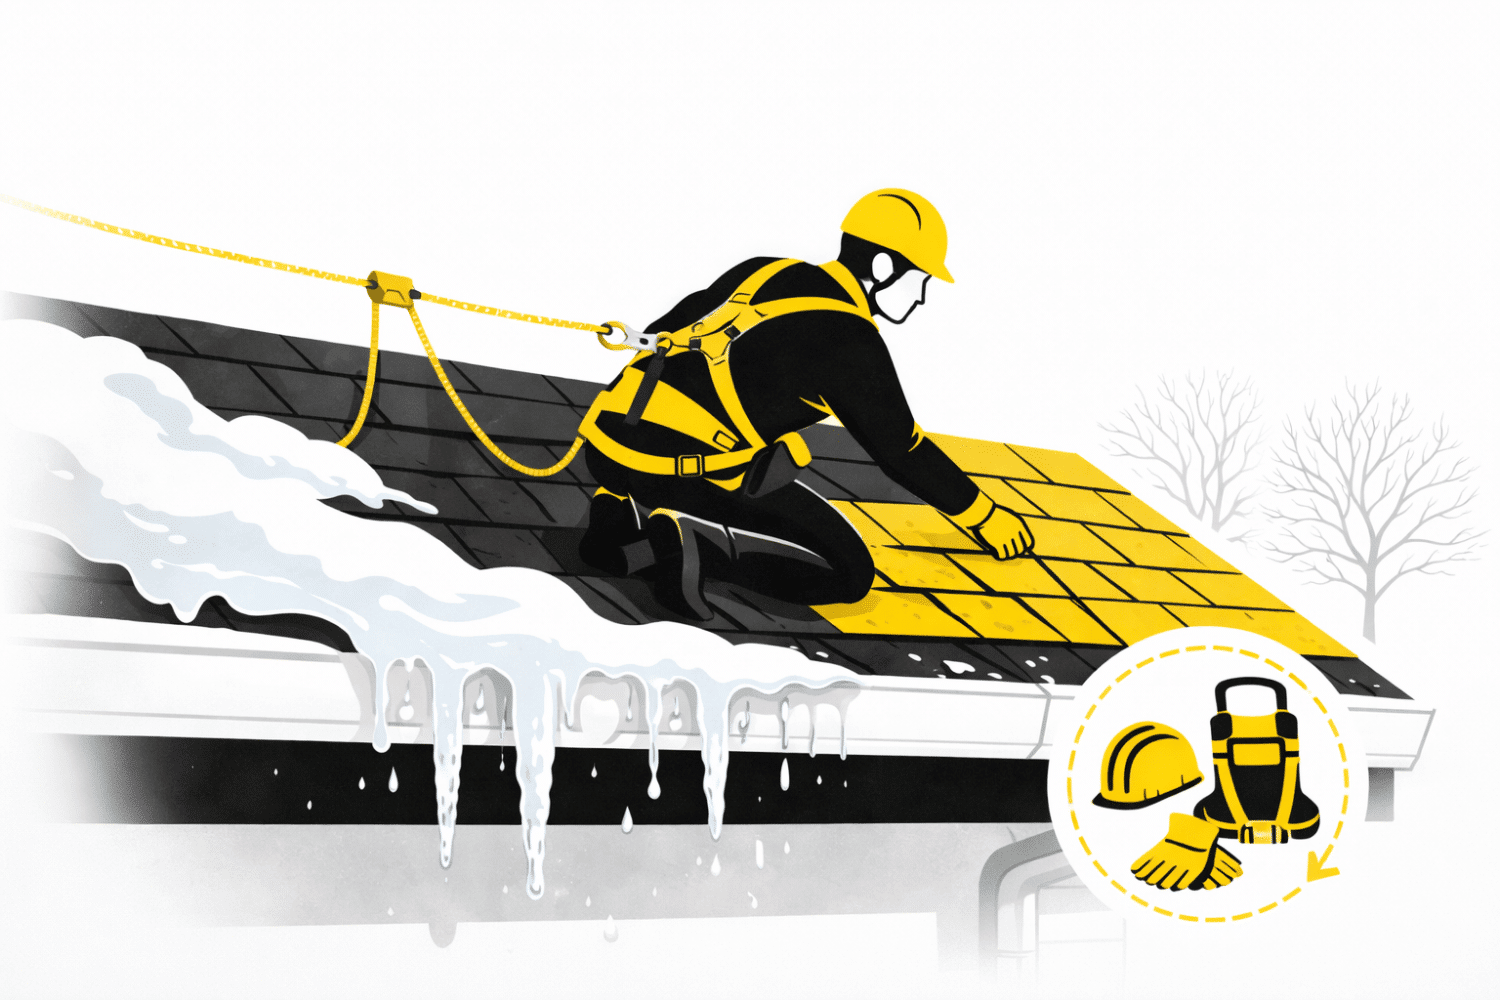
Safety comes first. Snow and ice, frost, and wet leaves make roofs dangerously slick. Our crews use harnesses, anchors, roof jacks, and winter-rated boots. They often work more slowly than in warm weather—and that’s intentional. The extra safety precautions aren’t optional when temperatures fall and surfaces get treacherous.
Winter days are simply shorter. A roof that might take two long summer days could require three or four shorter winter days, especially when start times get pushed back by morning frost. We typically wait until the roof’s edge and surface have thawed and dried before sending anyone up.
At CoMo Premium Exteriors, we build weather buffers into every winter schedule. If a cold snap or heavy snow hits, we pause the project, secure the site, and resume when conditions allow proper installation. The home stays “dried-in” each day before we leave—underlayment and flashings installed so you’re protected overnight, even if shingles extend into additional days.
Projects take a bit longer in January, but the focus is on correct installation and safety precautions, not rushing to finish by dark.
Pros and Cons of Replacing Your Roof During the Winter
Winter isn’t automatically bad or good for a new roof—it depends entirely on your roof’s condition and your timing. Let’s lay out the honest tradeoffs.
Advantages of winter roof replacement:
Potentially faster scheduling since there’s less backlog than April–June
Sometimes better pricing or off season promotions
Stops active leaks before freeze–thaw cycles cause additional roof damage
Gets your roofing system ready before severe late-winter storms
Insurance claims from winter storms can often be processed more smoothly in the off season
Drawbacks to consider:
More weather-related delays are likely
Longer total project timeline
Shingles need more careful handling to avoid cracking
Slower shingle sealing compared to a July installation
Crews work shorter days
Think about your specific scenario: A roof leaking in January after a windstorm near Jefferson City probably shouldn’t wait. But a cosmetically aged roof that’s still watertight? That might be a good candidate for a scheduled spring replacement.
CoMo Premium Exteriors will walk you through both options—winter versus spring replacement—so you can choose what fits your risk tolerance, schedule, and budget.
Potential Cost and Scheduling Benefits
Winter is typically a lighter season for roofing volume in Mid-Missouri, which can actually work in your favor.
Because many homeowners delay until warmer months, winter calendars often have more flexibility. That means faster start dates and more accommodating time slots. While you might wait 4–6 weeks for a spring appointment during peak season, winter projects often start within 1–2 weeks.
Some roofing contractors, including us, occasionally offer off-season bundled deals—like combining a roof with gutter upgrades—when schedules are less compressed. That said, quality and materials should never be discounted. Be wary of any reputable roofing company offering dramatically lower prices; it usually means corners are being cut.
The less obvious cost savings? Replacing a failing roof in winter avoids emergency call-outs, interior water damage, and the higher repair bills that come from waiting while problems compound. Melting snow finding its way through damaged shingles can ruin insulation, drywall, and even flooring—costs that dwarf the premium of a winter install.
Ask any contractor, including CoMo Premium Exteriors, about timing, availability, and whether winter scheduling might reduce wait time compared to peak season.
Risks of Waiting Until Spring
Sometimes waiting for warmer temperatures makes sense. But if your roof is already compromised, that delay carries real risks.
Freeze-thaw cycles are the enemy. From December through March in Central Missouri, water gets into small openings—missing shingles, cracked flashing, worn pipe boots—then freezes and expands overnight. This repeated cycle turns minor issues into rotten decking, soaked insulation, and interior ceiling damage. We’ve seen homeowners turn a $12,000 roof into a $20,000 project by waiting.
Ice dams form when poor attic insulation and ventilation combine with an aging roof. Heat escapes through the attic, melts snow on the upper roof, and that water refreezes at the roof’s edge where it’s colder. The ice dam formation backs water under shingles and into walls or soffits. Proper ventilation helps, but a compromised roof makes ice dams far more damaging.
Spring backlogs catch homeowners off guard. Many roofing contractors see their schedules explode in March and April. If you postpone a January decision, you might find yourself behind dozens of hail claims after an early-spring storm hits Columbia or Lake Ozark. Nationally, 15–20% of roofs are replaced during winter months, but that rises to 25% in Midwest storm zones like ours—because smart homeowners know waiting creates problems.
Have a professional roof inspections done before deciding to wait. CoMo Premium Exteriors can document your roof’s condition with photos and explain which issues can safely hold and which really shouldn’t.
How CoMo Premium Exteriors Handles Winter Roof Replacements
Winter roofing projects simply require more planning. After 25+ years in Mid-Missouri, we’ve learned how to work with our weather—not against it.
Our triple certifications—GAF Master Elite, Owens Corning Platinum, and James Hardie Elite —require ongoing factory training and strict quality standards that we maintain year-round. GAF’s cool-weather testing shows that properly sealed roofs withstand 110 mph wind speeds even when installed in cold climates. That’s the standard we hold ourselves to.
Here’s how we evaluate each winter job:
Forecast review – Looking at temperature ranges for the entire project window
Sun exposure assessment – Different roof slopes get different amounts of warming
Roof complexity analysis – Valleys, chimneys, skylights, and wall intersections need extra attention
Material planning – Ensuring everything stays warm and flexible until installation
We prioritize “dry-in” each day. That means underlayment and flashings are installed so your home is protected overnight, even if shingles or finishing details extend into additional days. If a cold snap hits, we pause, secure the site, and resume when the roof can be installed correctly to manufacturer standards.
We never force a job into unsafe or below-spec weather conditions.
Cold-Weather Installation Techniques We Use
Winter roof replacement isn’t about magic products—it’s about disciplined techniques, proper storage, and quality control on site.
Material storage matters. We store shingles, sealants, and coil nails in heated or insulated spaces—trailers, garages, or hot boxes—so they stay at 50–55°F and remain flexible. Power blanket-style material warmers can maintain 70°F in bundles, reducing brittle failures by up to 75% according to industry studies.
Manual sealing is essential. On colder days, especially along rakes, eaves, and ridges, our crews apply approved roofing cement manually under each shingle tab. This mimics the waterproof seal that would normally form from solar heat. Using a caulk gun or trowel, we apply quarter-sized dabs of adhesive to ensure proper bonding even before warm weather arrives.
Tool adjustments prevent damage. We dial in air pressure on nail guns so nails set correctly without over-driving through cold, brittle shingles. We monitor for jams caused by condensation or freezing moisture. GAF Master Elite guidelines require checking compressor pressure hourly in cold conditions.
Our crews pay extra attention to key details in winter:
Valleys – Where two roof planes meet and water concentrates
Pipe boots – Rubber seals that crack in extreme weather
Step flashing – Where roof meets walls, common leak points
For information on flat roof materials, including their longevity and best practices, see our comprehensive guide.
These are the first places winter leaks show up if not installed correctly. We install ice-and-water shield underlayment in all valleys and along eaves for enhanced protection.
Safety, Site Protection, and Clean-Up in Winter
Winter isn’t just harder on workers—it affects your landscaping, driveway, and how debris gets handled.
Pre-work preparation:
We clear snow, frost, and loose ice from work areas before starting
Morning start times may be delayed until roof surfaces are safe
Heavy snow gets removed using safe methods that avoid structural damage
Safety systems we use:
Guardrails or roof jacks on steeper shingle roofs
Harnesses and anchors on every project
Warning lines to protect both crew and anyone on the ground
Winter-rated footwear with aggressive tread
Property protection:
Layered tarps catch shingles and nails on snow or frozen ground
Dumpsters placed where driveway ice won’t create hazards
Magnet sweeps performed even when winter snow is present
Landscape protection in frozen conditions
We leave the site safe at the end of each day—no exposed roof deck, no loose materials at risk of blowing off in high winds, and clear communication on what’s completed and what’s scheduled next.
Preparing Your Home and Roof for Winter (Whether or Not You Replace It)
Even if a full winter replacement isn’t needed, every Mid-Missouri homeowner can take steps to protect their roof before and during the winter season.
Schedule an inspection. Either inspect your roof yourself from the ground using binoculars or have a professional evaluation done by a reputable company. Look for missing shingles, cracked pipe boots, or failing flashing. Catching problems early is always cheaper than emergency roof repairs.
Clean gutters and downspouts. Do this in late October or early November before temperatures drop below freezing. Clogged gutters contribute to ice dam formation along eaves. Roof rakes can help manage winter snow buildup, but clean gutters are the first line of defense.
Check attic insulation and ventilation. Proper ventilation keeps roof temperatures more even, lowering ice dam risk and improving your home’s energy efficiency. Most Mid-Missouri homes should have insulation meeting R-49 standards—we always inspect this during evaluations.
Trim overhanging branches. Heavy, wet Mid-Missouri snows can break limbs onto shingles and gutters. Removing overhanging branches before winter storms prevents damage and costly repairs.
Know your roof’s age. Most asphalt shingles last 20–30 years depending on quality and maintenance. If yours are approaching that range, a winter inspection helps you plan rather than react.
Addressing Small Problems Before They Become Winter Emergencies
Winter is not the time you want to discover a “small” issue has turned into a ceiling stain or sagging drywall.
Watch for these early warning signs:
Lifted or missing shingles after a November windstorm
Granules building up in gutters (a sign shingles are deteriorating)
Flashing pulling away from chimney or sidewall
Daylight visible in attic spaces
Moisture or frost in the attic
Minor roof repairs—securing loose shingles, resealing flashing, replacing a cracked pipe boot—can often be done quickly in winter-friendly weather windows. These small fixes can add years of life to an otherwise sound roofing system.
CoMo Premium Exteriors documents all findings with photos and walks homeowners through whether they’re looking at a simple repair, a “watch and wait” situation, or a roof nearing the end of its service life.
Don’t ignore ceiling stains, attic moisture, or moldy insulation during winter. These signs mean water is already getting in and should be evaluated promptly. Waiting typically means the problem spreads—and the bill grows.
How to Decide: Repair, Temporary Fix, or Full Winter Replacement?
Deciding what to do in January when you spot damage can feel overwhelming and urgent. Let’s simplify the decision.
The choice usually comes down to three paths: for example, deciding how often you need a roof inspection is an important consideration.
Option
Best For
Considerations
Targeted repair
Isolated damage on newer roofs
Quick, affordable, preserves existing roof
Temporary protection
Emergency situations, severe weather coming
Buys time until full replacement in warmer months
Full replacement
Older roofs, widespread damage
Best long-term solution, requires careful winter planning
General guidelines:
Roofs under 10–12 years old with isolated damage from a recent storm are often good candidates for repair, especially if the rest is in solid shape
Very old roofs (20+ years for standard asphalt shingles) with widespread cracking, curling, or missing granules often make more sense to replace than keep patching
Active leaks almost always require immediate action—at minimum, temporary protection
Shingle manufacturers like GAF and Owens Corning design their products to last, but every roof has a lifespan. When repairs start costing more than they’re worth, it’s time for a conversation about replacement.
Get a written inspection and photo documentation so you can make the decision with clear information—not just urgency or guesswork. That’s exactly what we provide.
Insurance, Storm Damage, and Winter Claims
Winter storms in Mid-Missouri—especially strong winds and sub zero temperatures followed by rapid warming—can create damage that may be covered by homeowners insurance.
Timely documentation is critical. Photos of missing shingles after a December windstorm, interior water damage, or damaged flashing can support a claim even if full replacement happens weeks later. Don’t assume damage isn’t covered just because it happened in winter.
As experienced insurance claims advocates, CoMo Premium Exteriors helps homeowners understand the difference between ACV and RCV:
ACV (Actual Cash Value) – Insurance pays what your roof is worth today, accounting for age and wear
RCV (Replacement Cost Value) – Covers the full cost of a new roof
We’ve recovered full costs on 95% of claims by speaking adjusters’ language so homeowners don’t have to.
Insurers typically require the roof to be protected from further damage—temporary tarping or emergency repairs—which is another reason not to wait until spring if you already see active leaks. Failing to mitigate damage can actually hurt your claim.
Call us if you’re unsure whether winter damage might be an insurance claim. We can inspect, take photos, and help you have a more informed conversation with your adjuster.
Conclusion
Your roof shouldn’t have to wait until April to get the protection it needs. Whether you’re dealing with winter storm damage, an active leak, or just want professional eyes on that aging roof, CoMo Premium Exteriors is here with honest answers and proven cold weather expertise.
Give us a call at (573) 424-9008 for a no-pressure winter roof evaluation. We’ll document everything with photos, explain your options, and help you make the right decision—whether that’s a quick repair, an immediate replacement, or a plan for spring. That’s what neighbors are for.
FAQ: Winter Roof Replacement in Mid‑Missouri
Can you replace only part of my roof in winter and finish the rest in spring?
Partial replacements are sometimes possible—for example, repairing a heavily damaged slope while leaving intact sections alone. However, transitions between old and new roofing must be carefully detailed so warranties and waterproofing aren’t compromised. We’ll advise on a case-by-case basis whether this makes sense for your specific situation, and help you understand how long your roofing lasts in Missouri.
Will my shingle warranty still be valid if the roof is installed in January?
Warranties depend on following roofing manufacturers’ instructions, not the month on the calendar. If temperature protocols, installation techniques, and materials meet guidelines—including proper hand-sealing in cold conditions—a winter installation can qualify for full manufacturer coverage, including GAF’s 50-year warranties.
How long will it take a winter-installed roof to fully seal?
The adhesive strip continues to bond as warmer temperatures return and the sun hits the roof. In Mid-Missouri, that typically means full sealing happens over the first few warm spells of late winter and early spring. Hand-sealing done during installation speeds this process significantly at critical areas like rakes, eaves, and ridges.
Will a winter roof replacement make my house very cold while you work?
Our crews tear off and replace in sections, keeping the home dried-in as they go. Attic insulation remains in place throughout the project. Most homeowners notice indoor temperatures drop only a few degrees while work is underway—far less than you might expect.
How do I know if I should call now or wait until warmer weather?
Simple guidance: If you see active leaks, missing shingles, sagging areas, or storm damage, call for an inspection right away. If the roof simply looks older but isn’t leaking, a scheduled evaluation can help plan for spring or summer replacement without pressure. Either way, knowing what you’re dealing with is better than guessing.
Storm Damage Roof Repair in Columbia MO: How Your Roof Protects Your Home
Columbia, Missouri sees its fair share of severe weather, and those frequent storms can really do a number on your roof. Between hail, high winds, and falling debris, your roof works hard to shield your home—but it has its limits. When Missouri weather strikes, getting timely repairs is crucial to prevent leaks, avoid more extensive problems, and save you from shelling out for a full replacement down the road. This guide walks you through everything you need to know about roof restoration after storms in Columbia, from common issues to practical solutions that’ll keep your Mid-Missouri home safe.
Key Takeaways
Columbia MO experiences frequent hail and wind damage, with 79 reported hail incidents and 36 severe weather warnings in the past year.
Missing shingles and leaks are common after a bad storm—putting off repairs can lead to bigger problems and steeper bills later.
Getting professional help with storm damage is essential for lasting protection and can save you from needing a new roof before its time.
Understanding Storm Damage Roof Repair in Mid Missouri
Living in Mid Missouri means dealing with a climate that can turn on a dime. According to the Missouri Climate Center, 2024 was particularly active, with 105 tornado reports and a massive hail event on May 8. At CoMo Premium Exteriors, we witness the aftermath of these events season after season. Storm damage isn’t always as obvious as a fallen tree—sometimes it’s subtle shingle bruising that develops into a leak months down the line.
According to the National Weather Service, 73% of significant hail reports in Missouri occur between March and June. This spring surge keeps Columbia roofers like us busy restoring homes across the area. Boone County’s adoption of the 2015 International Codes means any quality repair must meet specific safety standards, and being local means we know these requirements inside and out.
Common Types of Wind Damage and Storm Damage
Mid Missouri storms can wreak havoc on your roof in several ways:
Hail damage – Dents, cracks, or granule loss that weakens shingle integrity.
Wind damage – Missing or lifted shingles and exposed underlayment that let water sneak in.
Debris impact – Fallen branches puncturing the roof deck or denting the flashing.
Water leaks – Usually caused by compromised shingles or damaged gutters that can’t channel water away properly.
Why Immediate Repair Prevents Further Damage
Turning a blind eye to storm damage can trigger mold growth from trapped moisture and compromise your home’s structural integrity as water seeps deeper. Those small holes or cracked shingles might seem minor now, but once the underlying wood starts rotting, you’re looking at a much bigger bill. Tackling these problems quickly keeps your home dry and protects your investment for the long haul.
Signs You Need Storm Damage Repair After a Bad Storm
Once a storm clears out of Columbia, take a walk around your property and glance up at your roof. No ladder required to spot the most common warning signs. Keep an eye out for missing shingles or pieces of flashing that might have landed in your yard. Dark spots on shingles or “bruises” resembling thumbprints usually mean hail damage that calls for professional attention.
Peek inside your gutters for granule buildup—they look like coarse sand. Shingles shed these protective granules when pounded by hail or stressed by high winds, leaving the asphalt layer exposed to harsh UV rays. Inside, scan the ceilings of your upper floors. Water stains or bubbling paint are telltale signs that a leak has already begun. Spotting any of these red flags means it’s time to call a trusted Columbia storm restoration company to assess the full scope of the problem.
At CoMo Premium Exteriors, we frequently guide homeowners through the insurance claim maze. According to the Missouri Department of Commerce and Insurance, claims spike between March and July. Getting a professional assessment early smooths out the entire process. We’ll document the damage thoroughly so your insurance company has everything needed to process your claim efficiently.
The Cost of Storm Damage Roof Repairs vs. Roof Replacements
Homeowners often wonder whether a few missing shingles warrant a complete roof replacement. The answer really comes down to your roof’s age and how intense the storm was. While a full replacement in Missouri averages around $12,767, plenty of storm-related problems can be solved with targeted repairs. That said, Missouri and Kansas roofs frequently fail to reach the eight-year mark thanks to our brutal weather patterns, making the repair-versus-replace decision a major financial consideration.
Localized damage confined to one slope or a small section typically calls for a repair—the most sensible approach. But when a storm causes widespread granule loss or multiple punctures across your roof, investing in a full replacement often makes more sense for the long haul. Most homeowners insurance policies do cover hail and wind damage, with average payouts hovering around $12,000—often enough to cover a substantial portion of a new roof when damage is extensive.
Keep in mind that Boone County Building Inspections requires permits for most roofing work. At CoMo Premium Exteriors, we take care of all that paperwork for our clients, making sure every job meets code. Whether you’re looking at a simple patch job or a complete overhaul, premium materials like GAF or Owens Corning shingles will help your roof weather the next decade of Missouri’s unpredictable climate.
How to Protect Your Roof from Future Storm Damage
While you can’t control the weather, you can definitely prepare for it. Preventive maintenance is your best defense against a roofing emergency when the next big storm rolls in. Begin by trimming any overhanging branches that could break off and pierce your roof during high winds. Clean gutters are equally important—when water backs up, it can sneak under shingles and cause rot or even ice dams during Missouri’s frigid winters.
Thinking ahead to your next roof replacement? Consider upgrading to impact-resistant shingles, which are engineered to take a beating from larger hail without cracking. Don’t forget to inspect your attic ventilation, either. Good airflow stops heat and moisture from accumulating, keeping your roof deck healthy and preventing shingles from “baking” from the inside out. This straightforward measure can tack years onto your roof’s lifespan.
Make it routine to book a professional inspection annually or following any major weather event. Nipping small problems in the bud keeps them from ballooning into major disasters later. At CoMo Premium Exteriors, we provide honest assessments of your roof’s condition and help you determine the smartest way to protect your home.
FAQ
How soon should I repair storm damage?
Acting fast is crucial to prevent leaks and stop small issues from snowballing. Even tiny openings let water soak into insulation and drywall, creating mold and structural problems that cost far more to fix than replacing a few shingles.
Does homeowners insurance cover storm damage roof repair in Columbia MO?
Most policies do cover hail and wind damage, though you’ll want to verify your deductible and coverage limits. Having a professional inspection before filing a claim helps ensure the damage qualifies for a successful payout.
Can I inspect my roof myself after a storm?
You can spot obvious signs from the ground, but a professional evaluation is safer and more comprehensive. Trained experts can detect “bruised” shingles and subtle flashing problems that untrained eyes typically miss.
What’s the most common storm damage in Mid Missouri?
Hail and wind top the list of roof problems in our region. High winds can peel shingles back, while hail strikes strip away protective granules and crack the asphalt mat underneath.
How long does a roof repair take?
Most minor repairs wrap up in a single day. Full replacements generally require two to five days, depending on your roof’s size and complexity.
How to Read Your Roofing Estimate: What the Numbers Really Mean
Key Takeaways
Roofing estimates should be itemized with separate costs for materials, labor, permits, and disposal clearly listed
Labor typically accounts for 60-70% of total project cost, while materials make up 30-40%
Roofing squares (100 sq ft units) are the standard measurement – your 2,000 sq ft home likely needs 20-22 squares
Watch for red flags like missing insurance proof, unusually low bids, or large upfront payment demands
Quality estimates include material specifications, warranty details, and clear project timelines
Understanding the Basic Structure of Your Roofing Estimate
When you receive a roofing estimate from Como Exteriors or any roofing contractor, understanding its basic structure helps you evaluate whether you’re working with a professional roofing company. A comprehensive roof replacement estimate should contain several essential sections that provide complete transparency about your roofing project.
The company information section serves as your first indicator of professionalism. This area should display the roofing contractor’s license number, liability insurance details, workers compensation insurance coverage, and complete contact information. Como Exteriors always includes our roofing contractor’s license verification and current insurance certificates, ensuring most homeowners can verify our credentials before signing any agreement.
Your roofing estimate should clearly outline the project scope, describing specific work to be performed on your existing roof. This section details whether you’re getting a complete roof replacement, roof repairs, or roof installation on new construction. The scope should specify roof removal procedures, roof inspection protocols, and protection measures for your property during the roofing work.
The itemized cost breakdown represents the heart of your roof replacement estimate, separating material costs from labor costs and additional services. Professional roofers like Como Exteriors list every component individually, from asphalt shingles to roof flashing, allowing you to understand exactly where your investment goes. This transparency helps you compare estimates effectively and saves money by avoiding hidden charges.
Timeline information with estimated start and completion dates provides realistic expectations for your roofing job. Weather delays, permit processing times, and material delivery schedules all factor into the project timeline. Como Exteriors includes contingency planning in our estimates, acknowledging that roofing work depends heavily on weather conditions.
Payment terms and warranty information should be clearly outlined in every professional estimate. The payment schedule typically includes a small deposit, progress payments tied to project milestones, and final payment upon completion. Warranty details should cover both workmanship warranty from your roofing team and manufacturer’s warranty on roofing materials.
Decoding the Cost Breakdown Numbers
Material Costs: What Each Line Item Means
Understanding material costs in your roofing estimate requires familiarity with how roofing materials are measured and priced. Roofing contractors typically price materials per square foot or per roofing square, with one roofing square covering 100 square feet of roof surface. Your roof size determines the total quantity needed, though roof’s decking conditions and architectural complexity affect the final material count.
Roofing shingles represent the largest material expense in most roof replacement projects. Asphalt shingles remain the most popular choice, with architectural shingles offering enhanced durability compared to basic three-tab options. Metal roofing costs significantly more upfront but provides longer lifespan and energy efficiency benefits. Clay tiles, wood shingles, and slate roofs command premium pricing due to specialized installation requirements and material costs.
Underlayment costs typically range $50-$100 per square depending on quality and type selected. Synthetic underlayment outperforms traditional felt paper in moisture resistance and durability. Water shield, also called ice and water barrier, protects vulnerable areas like valleys, eaves, and roof penetrations from water intrusion.
Flashing materials appear as separate line items, priced by linear feet for valleys, chimneys, and roof penetrations. Proper roof flashing prevents water damage and extends your roof’s lifespan significantly. Como Exteriors uses high-quality flashing materials that exceed manufacturer requirements for superior protection.
Additional materials include fasteners, starter shingles, ridge capping, drip edge, and ventilation components. Professional estimates include a waste factor of 10-15% for normal projects, accounting for cuts, damaged pieces, and future repairs. Complex roofs with multiple angles and dormers require higher waste allowances.
Labor Costs: Understanding the Work Breakdown
Labor costs represent the largest portion of most roofing projects, typically accounting for 60-70% of the total cost. Understanding how roofing contractors calculate labor hours helps you evaluate estimate accuracy and identify potential red flags in competing bids.
Roof removal or tear-off labor typically costs $100-$150 per square for single-layer removal. Multiple layers of old roofing materials increase removal time and disposal costs significantly. Steep roofs, limited access areas, and complex architectural features require additional labor hours and specialized safety equipment.
Installation labor ranges $200-$400 per square depending on roof complexity and material type. Asphalt shingle installation requires fewer labor hours than metal roofs or specialty materials like slate. The roofing industry recognizes that quality installation directly impacts your new roof’s performance and longevity.
Additional labor charges apply for specialized work like chimney flashing, skylight installation, or extensive roof decking repairs. Multi-story homes require additional safety equipment and procedures, increasing overall labor costs. Difficult access situations, such as homes surrounded by landscaping or tight spaces, also affect labor pricing.
Clean-up and disposal represent often-overlooked labor components. Professional roofing companies include thorough site cleaning and proper disposal of old roofing materials. Construction debris removal typically costs $250-$500 per truckload, depending on local disposal costs and hauling distances.
Como Exteriors provides detailed labor breakdowns in our estimates, explaining why certain aspects of your roofing project require additional time and expertise. Our experienced roofing team completes projects efficiently while maintaining the highest quality standards.
Additional Costs and Fees Explained
Beyond materials and labor, several additional costs contribute to your overall roof replacement cost. Understanding these fees helps you budget accurately and avoid surprise expenses during your roofing project.
Building permits range $100-$500 depending on your local municipality requirements and project scope. Most roof replacements require permits to ensure work complies with current building codes. Como Exteriors handles permit applications and inspections, streamlining the process for homeowners.
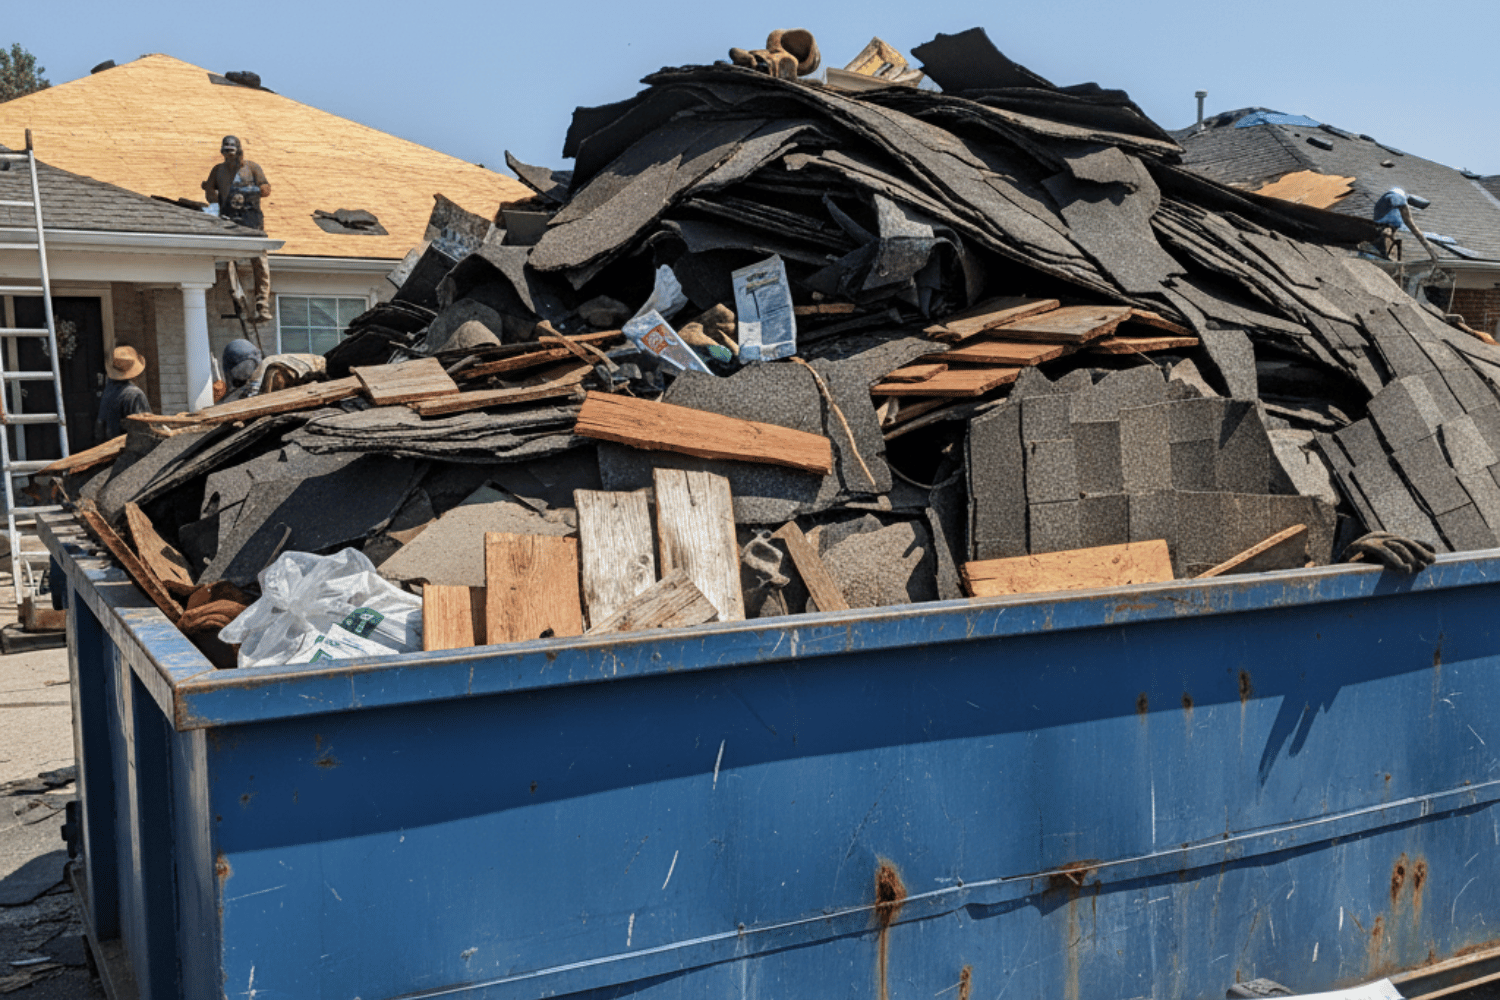
Dumpster rental or debris disposal fees typically cost $300-$800 per project, varying by roof size and local disposal rates. Proper disposal of old roofing materials protects the environment and complies with local regulations. Some roofing companies include disposal costs in their labor rates, while others list them separately.
Equipment rental costs for scaffolding, lifts, or specialized tools appear on estimates for multi-story homes or challenging installations. Safety equipment and proper access tools ensure worker safety and protect your property during construction. These overhead costs reflect professional standards and insurance requirements.
Potential roof decking repair charges address structural issues discovered during tear-off. Water damage, insect infestation, or age-related deterioration may require partial or complete deck replacement. Quality estimates include contingency allowances for these discoveries, typically 5-10% of the project total.
Upgrade costs for enhanced ventilation, improved insulation, or premium materials provide opportunities to improve your roof’s performance. Proper ventilation extends roof life and improves energy efficiency. Como Exteriors discusses upgrade options during the estimation process, helping you make informed decisions about your investment.
Transportation costs may appear as separate line items, covering material delivery and equipment transport to your job site. Remote locations or challenging access situations increase these expenses. Professional roofing contractors factor these logistics into their estimates rather than surprising customers later.
Red Flags in Roofing Estimates to Watch For
Identifying problematic roofing estimates protects you from substandard work, cost overruns, and potential scams. Como Exteriors helps homeowners recognize warning signs that indicate unprofessional or potentially fraudulent roofing contractors.
Estimates lacking specific material brands, grades, or quantities represent major red flags. Vague descriptions like “standard shingles” or “as needed repairs” prevent accurate cost comparisons and create opportunities for substitutions or upcharges. Professional estimates specify exact materials, including model numbers and color choices.
Missing insurance certificates or license verification information indicates potential liability issues. Uninsured contractors expose homeowners to significant financial risk if accidents or property damage occur. Como Exteriors provides current insurance documentation and license verification with every estimate.
Vague language throughout the estimate, particularly regarding potential additional work, creates confusion and dispute opportunities. Phrases like “additional charges may apply” without specific pricing leave customers vulnerable to unexpected costs. Professional estimates address common contingencies with clear pricing structures.
Unusually low bids that fall 20% or more below other estimates often indicate corner-cutting, substandard materials, or contractors planning to demand additional payments during the project. Extremely low bids rarely represent genuine savings and frequently result in higher actual costs and inferior results.
Large upfront payment requests before work begins signal potential fraud or cash flow problems. Reputable roofing contractors require minimal deposits and structure payments around project milestones. Never pay large sums before materials arrive and work commences.
Missing warranty information or unclear warranty terms create problems when issues arise after project completion. Professional estimates detail both workmanship warranty coverage and manufacturer’s warranty terms. Como Exteriors provides comprehensive warranty documentation with every roofing job.
Door-to-door solicitation, especially following storms, often involves scam artists targeting vulnerable homeowners. Legitimate local roofers build reputations through quality work and customer referrals, not aggressive sales tactics.
Comparing Multiple Estimates Effectively
Effective estimate comparison requires ensuring all roofing contractors bid on identical project scopes and material specifications. Small differences in scope or quality can create significant price variations that don’t reflect true value differences.
Start by verifying each estimate includes the same work scope and materials for accurate comparison. One contractor might include roof removal while another assumes you’ll handle disposal separately. Material specifications should match across estimates – comparing basic asphalt shingles to architectural shingles creates meaningless price differences.
Compare labor hour estimates between contractors to identify potential issues. Significantly lower labor hours might indicate rushed work or insufficient crew experience, while excessive hours could signal inefficiency. Como Exteriors provides realistic labor estimates based on our extensive experience and efficient processes.
Evaluate material specifications to ensure quality equivalence between bids. Different roofing shingles brands offer varying lifespans, warranties, and performance characteristics. Understanding these differences helps you make informed decisions rather than simply choosing the lowest price.
Consider warranty terms and contractor reputation alongside pricing information. Longer warranties and established local presence provide value that extends beyond initial cost savings. Como Exteriors’ reputation in the community and comprehensive warranties justify our competitive pricing.
Focus on total project value rather than lowest price alone. Quality materials, professional installation, proper permits, and reliable warranties contribute to long-term value that exceeds initial cost savings from low-quality alternatives.
Review each contractor’s approach to potential complications like roof decking repairs or weather delays. Professional contractors address these possibilities upfront rather than surprising customers with additional charges later.
Questions to Ask About Your Estimate
Asking specific questions about your roofing estimate clarifies unclear items and demonstrates the contractor’s knowledge and professionalism. Como Exteriors welcomes detailed questions and provides thorough explanations of every estimate component.
Request clarification on any line items that seem unclear or unusually priced compared to other estimates. Understanding why certain costs differ between contractors helps you evaluate true value rather than simply comparing numbers.
Ask about material upgrade options and associated cost differences. Higher-quality underlayment, enhanced ventilation systems, or premium roofing materials might provide better long-term value despite higher upfront costs. Como Exteriors discusses upgrade benefits and costs transparently.
Verify what happens if additional repairs are needed during tear-off. Discovering rotted roof decking or structural issues is common in roof replacements. Understanding pricing for these contingencies prevents surprise costs and disputes during construction.
Understand the payment schedule and what triggers each payment milestone. Professional contractors structure payments around material delivery, project phases, and completion milestones rather than demanding large upfront payments.
Confirm project timeline expectations and weather delay policies. Roofing work depends heavily on weather conditions, and professional contractors plan accordingly. Understanding delay policies and revised timelines prevents frustration during your roofing project.
Inquire about permit handling, inspection scheduling, and code compliance requirements. Professional roofing companies manage these administrative requirements, ensuring your project meets all local requirements.
Ask about crew size, project supervision, and quality control measures. Understanding who will work on your roof and how quality is ensured provides confidence in the contractor’s professionalism.
Como Exteriors encourages homeowners to ask detailed questions about their roof replacement estimates. Our team provides comprehensive answers that demonstrate our expertise and commitment to customer satisfaction.
Reading your roofing estimate effectively requires understanding industry terminology, recognizing quality indicators, and identifying potential red flags. Como Exteriors provides transparent, detailed estimates that empower homeowners to make informed decisions about their roofing investments.
Professional roofing estimates should clearly separate material and labor costs, address potential complications, and provide comprehensive warranty information. By understanding what the numbers really mean, you can confidently select a roofing contractor who will deliver quality results at fair prices.
Como Exteriors’ commitment to transparency ensures our estimates provide all the information needed to understand your roofing project completely. Contact us today for a detailed, professional estimate that explains every aspect of your roof replacement or repair project.
FAQ
What does “per square” mean in roofing estimates?
A roofing square equals 100 square feet of roof surface area. Most contractors price materials and labor per square rather than per square foot to simplify calculations. A typical 2,000 square foot home requires about 20-22 squares of materials depending on roof pitch and complexity.
Why do labor costs vary so much between different roofing estimates?
Labor costs depend on crew experience, project complexity, roof accessibility, and local wage rates. Steep roofs, multiple stories, or intricate designs require more time and specialized skills, increasing labor costs. Geographic location also significantly impacts prevailing wage rates for roofing work.
Should I be concerned if one estimate is significantly lower than others?
Yes, estimates that are 20% or more below others often indicate potential issues like substandard materials, corner-cutting on labor, or contractors who may demand additional payments during the project. Always verify the scope of work and materials are equivalent before choosing the lowest bid.
What additional costs might not be included in my initial estimate?
Common additional costs include deck repair if rotted sheathing is found during tear-off, upgraded ventilation requirements, additional flashing for complex roof areas, and permit fees that vary by municipality. Quality contractors should address these possibilities upfront in their estimates.
How can I verify that the materials listed in my estimate are appropriate for my home?
Research the specific shingle brands and grades listed to ensure they meet manufacturer requirements for your roof pitch and climate. Verify that underlayment and flashing materials comply with local building codes. Como Exteriors always specifies materials that exceed minimum requirements for superior performance and longevity.
Preparing Your Roof for Winter in Mid Missouri: 5 Must-Do Steps Before the Snow
Mid Missouri’s unpredictable winter weather creates unique challenges for homeowners across Columbia, Jefferson City, and Boone County. With freeze-thaw cycles that can wreak havoc on roofing materials and the potential for heavy snow accumulation, preparing your roof for winter in Mid Missouri requires a strategic approach tailored to our region’s specific climate patterns.
At Como Exteriors, we’ve spent over a decade helping Mid Missouri homeowners protect their most valuable investment. Our local expertise in dealing with everything from sudden ice storms to heavy snowfall has taught us that proactive roof maintenance is far more cost-effective than emergency repairs during the harsh winters that define our region.
The five essential steps outlined below will help ensure your roof is ready to handle whatever Missouri winters throw at it, from the first freeze in November through the unpredictable weather patterns that can persist well into March.
Key Takeaways
Schedule a professional roof inspection by mid-October to identify and repair damage before Missouri’s first freeze typically hits in November
Clean gutters and ensure proper drainage to prevent ice dams, which are common in Mid Missouri’s freeze-thaw cycles
Improve attic insulation to at least R-38 and ensure proper ventilation to combat Missouri’s temperature fluctuations
Remove tree debris and trim branches overhanging your roof before winter storms arrive between December and February
Install ice dam prevention measures like heated cables or improve roof edge protection before temperatures drop below 32°F consistently
Step 1: Schedule a Professional Roof Inspection
When preparing your roof for winter in Mid Missouri, timing is everything. We recommend scheduling your professional roof inspection by mid-October, well before Missouri’s average first freeze hits in mid to late November. This timing allows for necessary repairs while temperatures remain conducive to proper material adhesion and safe working conditions.
At Como Exteriors, our winter preparation inspections focus specifically on vulnerabilities that Missouri’s climate tends to exploit. We examine damage from the spring and summer storm season, which often includes hail damage that may not be immediately visible to untrained eyes. Our thorough inspection process identifies weak points that could become major problems when subjected to Missouri’s winter freeze-thaw cycles.
The roof’s current condition determines how well it will handle the winter season. We look beyond surface-level issues to identify structural concerns that could lead to costly damage once heavy snow and ice accumulate.
What We Check During Winter Prep Inspections
Our comprehensive inspection process addresses the unique challenges posed by Missouri winters. We examine asphalt shingles for granule loss and cracking that commonly occurs after Missouri’s intense summer heat and storm activity. Missing shingles or loose shingles are flagged for immediate repair, as these vulnerabilities can quickly lead to water infiltration during winter weather.
Flashing around chimneys, vents, skylights, and other roof penetrations receives special attention. Missouri’s temperature fluctuations cause expansion and contraction that can create gaps where ice and water can penetrate. We also check the roof deck for soft spots or water stains that indicate previous water damage, which could compromise the roof’s ability to support snow loads.
Our team evaluates the overall structural integrity to ensure your roof can handle Missouri’s average 20-40 inches of annual snowfall. We look for signs of sagging, damaged rafters, or other structural issues that could lead to catastrophic failure during heavy snow events.
Timing Your Inspection in Mid Missouri
The key to successful winter roof preparation lies in completing inspections before Halloween, when temperatures in central Missouri consistently drop below 50°F. This timing allows 2-3 weeks for necessary repairs before winter weather systems typically arrive in December. Cold weather can make roofing materials brittle and affect the performance of sealants and adhesives.
Como Exteriors maintains a flexible schedule throughout the winter months to provide emergency inspections when needed. Winter storms in Columbia and Jefferson City can cause unexpected damage, and we’re prepared to assess and address issues quickly to prevent further deterioration.
Early signs of problems caught during fall inspections can prevent emergency repairs that are both dangerous and expensive during Missouri’s unpredictable winter weather patterns.
Step 2: Clean and Maintain Gutters and Downspouts
Missouri’s abundant fall foliage from oak, maple, and hickory trees creates significant challenges for gutter maintenance. Clogged gutters are one of the primary causes of ice dams during Mid Missouri’s winter months, making thorough cleaning by early November essential for winter roof preparation.
Clear gutters ensure proper drainage during winter thaws, preventing water from backing up and refreezing at the roof’s edge. When gutters cannot drain properly, melting snow has nowhere to go, creating ice buildup that can force water under roofing materials and into your home’s interior.
The installation of gutter guards can significantly reduce maintenance requirements during Mid Missouri’s unpredictable winter weather. These systems help keep debris out while allowing water to flow freely, even during the freeze-thaw cycles that characterize our regional climate.
Preventing Ice Dams in Missouri’s Climate
Ice dam formation is particularly problematic in areas where Missouri’s fluctuating winter temperatures create repeated freeze-thaw cycles. Warm air from poorly insulated attics melts snow on the roof, which then refreezes at the colder eaves, creating dams that force water back under shingles.
Installing heated gutter cables in problem areas provides an effective solution for homeowners who have experienced ice dams in previous winters. These systems create channels for melting snow to escape, reducing the risk of ice buildup that can damage both gutters and roof shingles.
Proper gutter slope is crucial for preventing ice dams. Gutters should slope toward downspouts at a rate of 1/4 inch per 10 feet to ensure adequate drainage. Any gaps between gutter sections should be sealed to prevent water from freezing and expanding, which can damage the entire gutter system.
Gutter Maintenance Schedule for Winter
A final comprehensive cleaning should be completed by Thanksgiving, before winter weather intensifies across central Missouri. This cleaning removes all accumulated debris and allows for a final inspection of gutter condition before the winter season begins.
Monthly checks during January and February thaw periods help identify problems before they become severe. Missouri winters often feature periods of warming that can cause rapid snow melts, putting stress on gutter systems. Safe removal of icicles may be necessary during Missouri’s typical ice storms, but this should be done carefully to avoid damage to gutters or injury.
When gutters are too high or dangerous to access safely, professional cleaning services provide the expertise and equipment necessary to maintain your system without risk. Como Exteriors offers comprehensive gutter maintenance as part of our winter preparation services.
Step 3: Address Attic Insulation and Ventilation Issues
Proper attic insulation serves as your primary defense against ice dam formation and energy inefficiency during Missouri’s cold months. The Department of Energy recommends a minimum R-38 insulation value for Missouri’s climate zone 4, though R-49 to R-60 provides optimal performance during our region’s variable winter conditions.
Adequate insulation maintains a consistent temperature in your attic, preventing warm air from melting snow unevenly on your roof surface. When combined with proper ventilation systems, quality insulation helps prevent the conditions that lead to ice buildup and the potentially damaging water backing that can result.
Air leaks around chimneys, recessed lights, and attic access points can undermine even high-quality insulation. Sealing these gaps is essential for maintaining the thermal barrier that keeps your attic at ambient temperature during winter weather.
Missouri-Specific Insulation Requirements
Missouri homeowners should target R-49 to R-60 for optimal energy efficiency during our winter months, which can extend from November through March. Blown-in cellulose or fiberglass batts work well in our climate, providing the thermal resistance needed to combat Missouri’s temperature fluctuations.
Vapor barriers installed on the warm side of insulation help manage moisture levels that can be problematic during Columbia and surrounding areas’ humid winters. This is particularly important in Mid Missouri, where temperature swings can create condensation issues that compromise insulation effectiveness.
Homes with metal roofs, which are common in rural Mid Missouri, may benefit from radiant barriers in addition to traditional insulation. These systems help manage heat transfer that can contribute to uneven snow melting and ice dam formation.
Ventilation Solutions for Winter
Continuous ridge vents work effectively with Missouri’s variable winter wind patterns, providing consistent air movement that helps maintain proper attic temperatures. These systems work in conjunction with soffit vents to create the air circulation necessary during still winter days when natural convection is limited.
Baffles installed between rafters maintain air flow pathways while preventing insulation from blocking ventilation channels. This is particularly important in older Missouri homes where insulation may have settled or been improperly installed.
The general rule of thumb for Missouri homes is one square foot of ventilation per 150 square feet of attic space. Good ventilation helps prevent moisture buildup that can lead to mold, rot, and other problems that compromise your roof’s structural integrity.
Step 4: Remove Debris and Trim Overhanging Branches
Missouri’s abundant tree cover, while beautiful, poses significant risks during winter storms. Trimming branches to maintain at least 10 feet of clearance from your roof should be completed before the winter storm season, which typically runs from December through February in our region.
Dead or diseased branches are particularly dangerous during the ice storms common in January and February across central Missouri. These weakened limbs can break under the weight of ice accumulation, potentially causing severe damage to roof shingles, gutters, and even structural components.
Removing debris from the roof surface prevents moisture retention during freeze-thaw cycles that can accelerate deterioration of roofing materials. Accumulated leaves and organic matter can also provide ideal conditions for moss and algae growth that compromise shingle integrity over time.
Tree Management for Missouri Winters
Large hardwood trees typical in Mid Missouri landscapes, including oak, maple, and ash trees, require special attention before winter arrives. These species are common around the Columbia area and can pose significant risks when branches overhang rooflines during severe weather events.
Professional trimming should be scheduled in late fall when trees are dormant but weather conditions still permit safe work. This timing minimizes stress on trees while ensuring the work can be completed before winter weather makes the job dangerous or impossible.
Branches showing signs of disease or damage from summer storms should be removed immediately, as these are most likely to fail during winter weather. A qualified arborist can identify problem areas that may not be obvious to homeowners but could pose serious risks during ice storms or heavy snow events.
Roof Surface Preparation
Cleaning your roof surface requires gentle techniques that won’t damage asphalt shingles or other roofing materials. A soft brush or leaf blower can effectively remove debris without causing the granule loss that can result from more aggressive cleaning methods.
Moss or algae growth, which is common in Missouri’s humid climate, should be addressed before winter arrives. These organisms can retain moisture and create conditions that accelerate freeze-thaw damage to roofing materials. Professional treatment may be necessary for severe infestations.
Special attention should be paid to roof penetrations like vents and chimneys, where debris commonly accumulates. These areas are already vulnerable to leaks, and accumulated debris can exacerbate problems during winter weather. Roof valleys also require careful cleaning, as they naturally collect debris and are critical drainage areas during snow melts.
Step 5: Prepare for Ice Dam Prevention
Ice dam prevention requires a comprehensive approach that addresses both immediate winter preparations and long-term system improvements. Installing ice and water shield membrane in vulnerable areas before winter provides additional protection against the water backing that occurs when ice dams form along roof edges.
Self-regulating heated roof cables offer an effective solution for areas that consistently develop ice dams during Missouri’s winter weather patterns. These systems activate automatically when temperatures drop, creating channels for melting snow to drain properly even during extended cold periods.
Planning your snow removal strategy using proper roof rakes designed for Missouri’s typical snow loads helps prevent the excess snow accumulation that contributes to ice dam formation. Professional removal services should be considered for steep roofs or when conditions become dangerous.
Ice Dam Prevention Systems
Self-regulating heat cables installed along roof edges where ice typically forms provide automated protection against ice buildup. These systems are particularly effective in areas of your roof that receive less direct sunlight or where architectural features create cold spots that promote ice dam formation.
Ice and water shield extending 24 inches past exterior walls provides additional protection against water infiltration when ice dams do occur. This membrane creates a watertight barrier that can prevent interior damage even when surface water cannot drain properly.
Zinc strips installed near roof ridges can help prevent ice buildup in gutters by creating a chemical reaction that inhibits ice formation. While not a complete solution, these strips can be part of a comprehensive ice dam prevention strategy for Missouri homes.
Emergency Winter Preparations
Keeping a roof rake accessible allows for safe snow removal from ground level when accumulation becomes excessive. Missouri homeowners should plan to remove snow after every 6-8 inches of accumulation to prevent the weight buildup that can stress roof structures and contribute to ice dam formation.
Emergency roofing materials including tarps and roofing cement should be stored in an accessible location for temporary repairs during severe winter weather. While permanent repairs should wait for appropriate weather conditions, emergency materials can prevent further damage during active storms.
Como Exteriors maintains 24/7 emergency services during the winter months to address urgent roofing issues that can’t wait for regular business hours. Having our contact information readily available ensures quick response during winter storms common in Jefferson City and surrounding areas.
Documentation of your roof’s current condition with photographs before winter begins provides valuable evidence for insurance purposes if storm damage occurs. This documentation can expedite claims processing and help ensure proper coverage for necessary repairs.
Why Choose Como Exteriors for Your Winter Roof Preparation
Como Exteriors brings over a decade of specialized experience in Mid Missouri’s unique winter weather challenges and local building codes. Our understanding of central Missouri’s climate patterns, from the freeze-thaw cycles that plague our region to the ice storms that can develop suddenly, allows us to provide targeted solutions that work in our specific environment.
Our expertise extends beyond roofing to include understanding of Columbia area soil conditions and how they interact with foundation systems that can affect roof performance. This comprehensive knowledge helps us identify problems that other contractors might miss and provide solutions that address root causes rather than just symptoms.
We maintain extensive experience with Missouri’s insurance requirements and storm damage claims processes, helping homeowners navigate the complex requirements that can determine whether repairs are covered. Our detailed documentation and professional reporting meet insurance industry standards and can support claims when storm damage occurs.
Emergency services available 24/7 during winter storms ensure that urgent problems receive immediate attention when they can’t wait for regular business hours. Whether you’re in Jefferson City, Columbia, or anywhere in central Missouri, our emergency response team can address critical issues that threaten your home’s integrity during severe weather.
Frequently Asked Questions
When should I start preparing my roof for winter in Mid Missouri?
Begin preparations by early October to complete all work before Missouri’s first freeze typically occurs in mid to late November. Schedule inspections and major repairs during September and October when weather conditions remain mild and conducive to quality work. Complete final preparations like gutter cleaning by Thanksgiving before winter weather intensifies across the region.
How much snow can my Missouri roof typically handle?
Most Missouri homes are built to handle 20-30 pounds per square foot of snow load according to state building codes. Fresh, powdery snow weighs about 5-10 pounds per square foot, while wet, heavy snow can weigh 15-20 pounds per square foot. Consider professional snow removal if accumulation exceeds 18 inches or if you notice any signs of roof sagging or stress.
What are the signs that my roof has ice dam damage?
Water stains on ceilings or walls near exterior walls typically indicate ice dam leaks have occurred. Icicles longer than 2 feet hanging from gutters often suggest poor attic ventilation and potential ice dam formation. Ice buildup in gutters or along roof edges that persists after snow melts from other areas is a clear sign of ice dam problems that need immediate attention.
Should I remove snow from my roof myself?
Use a roof rake from ground level only – never climb on an icy or snow-covered roof due to extreme safety risks. Remove snow after every 6-8 inches of accumulation to prevent excessive weight that can stress roof structures. Contact Como Exteriors for professional snow removal if you’re uncomfortable doing it safely or if your roof design makes ground-level removal impossible.
How often should I have my roof inspected in Missouri?
Schedule annual inspections each fall before winter weather arrives and after any severe weather events throughout the year. Missouri’s frequent hail storms and high winds during spring and summer require additional inspections after major storms to identify damage before it worsens. Consider bi-annual inspections if your roof is over 15 years old or has experienced previous problems.