Is It Worth Upgrading to Impact-Resistant Shingles in Missouri?
Key Takeaways:
Impact-resistant shingles withstand hail better: Class 4-rated shingles absorb hail impact without cracking, reducing the need for frequent repairs or replacements after storms.
Insurance discounts may offset costs: Many Missouri insurers offer premium discounts of 10-30% for Class 4 roofs, potentially saving thousands over the roof’s lifespan.
Upfront cost is higher: Impact-resistant shingles cost 20-40% more than standard architectural shingles, adding $2,000-$5,000 to a typical Mid-Missouri roof replacement.
Not all Class 4 shingles are equal: Polymer-modified asphalt shingles perform differently than traditional rubberized versions; research manufacturer testing data before choosing.
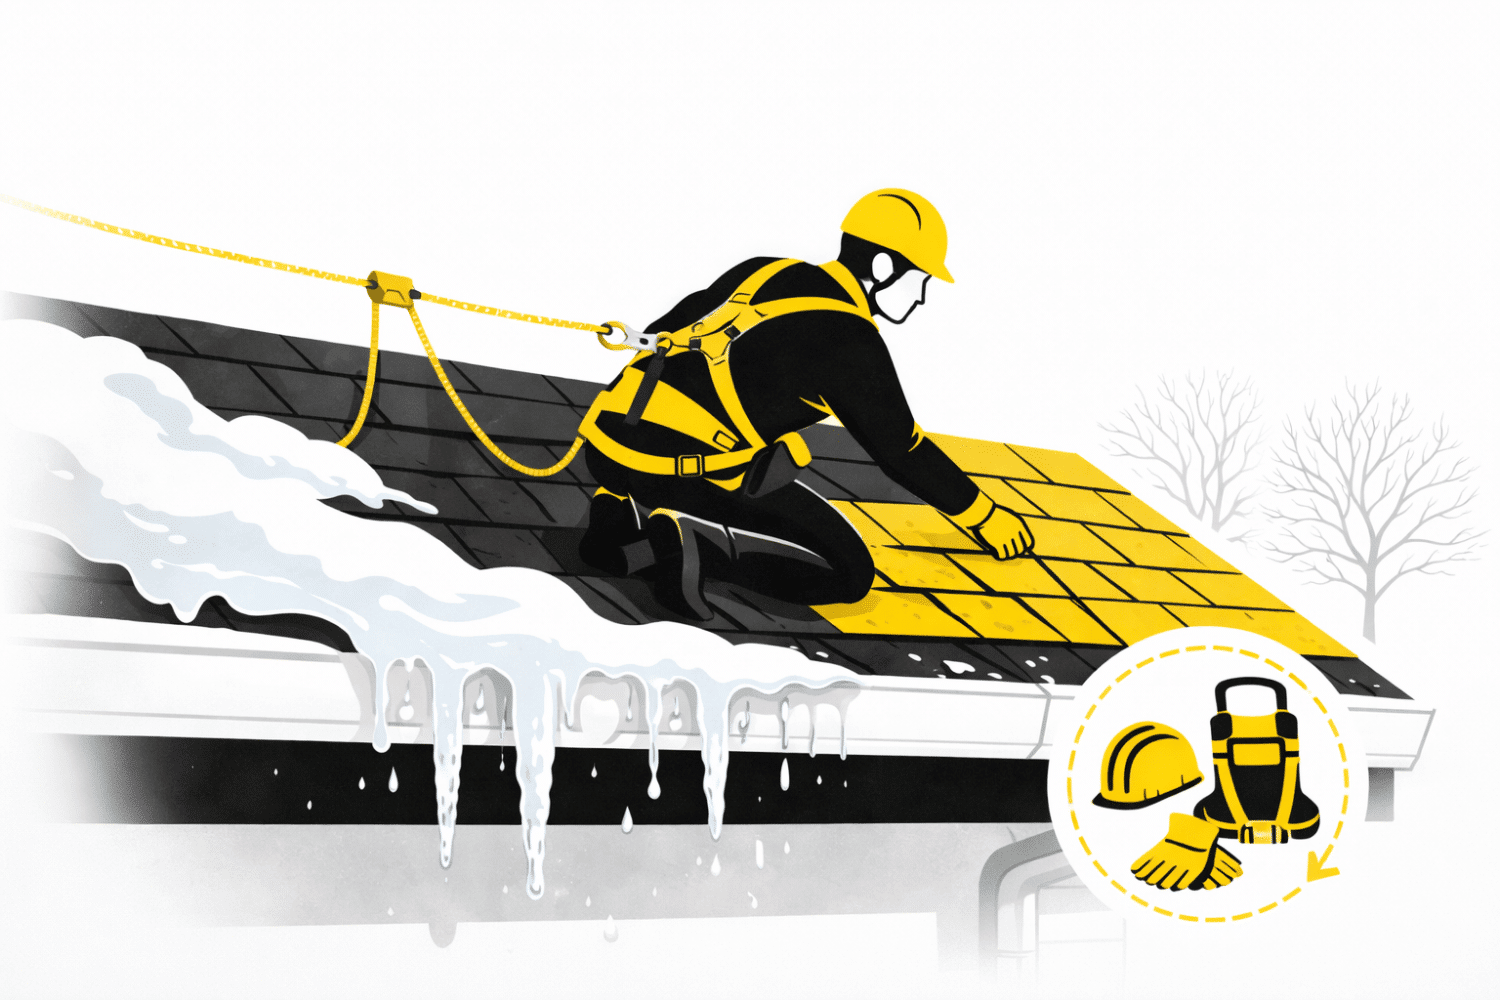
Certified installation matters: Manufacturer warranties for impact-resistant shingles often require installation by certified contractors like GAF Master Elite or Owens Corning Platinum Preferred professionals.
Get the rating in writing: Before you count on an insurance discount, ask for the shingle product name, Class 4 documentation, and any ventilation or accessory requirements your insurer may request.
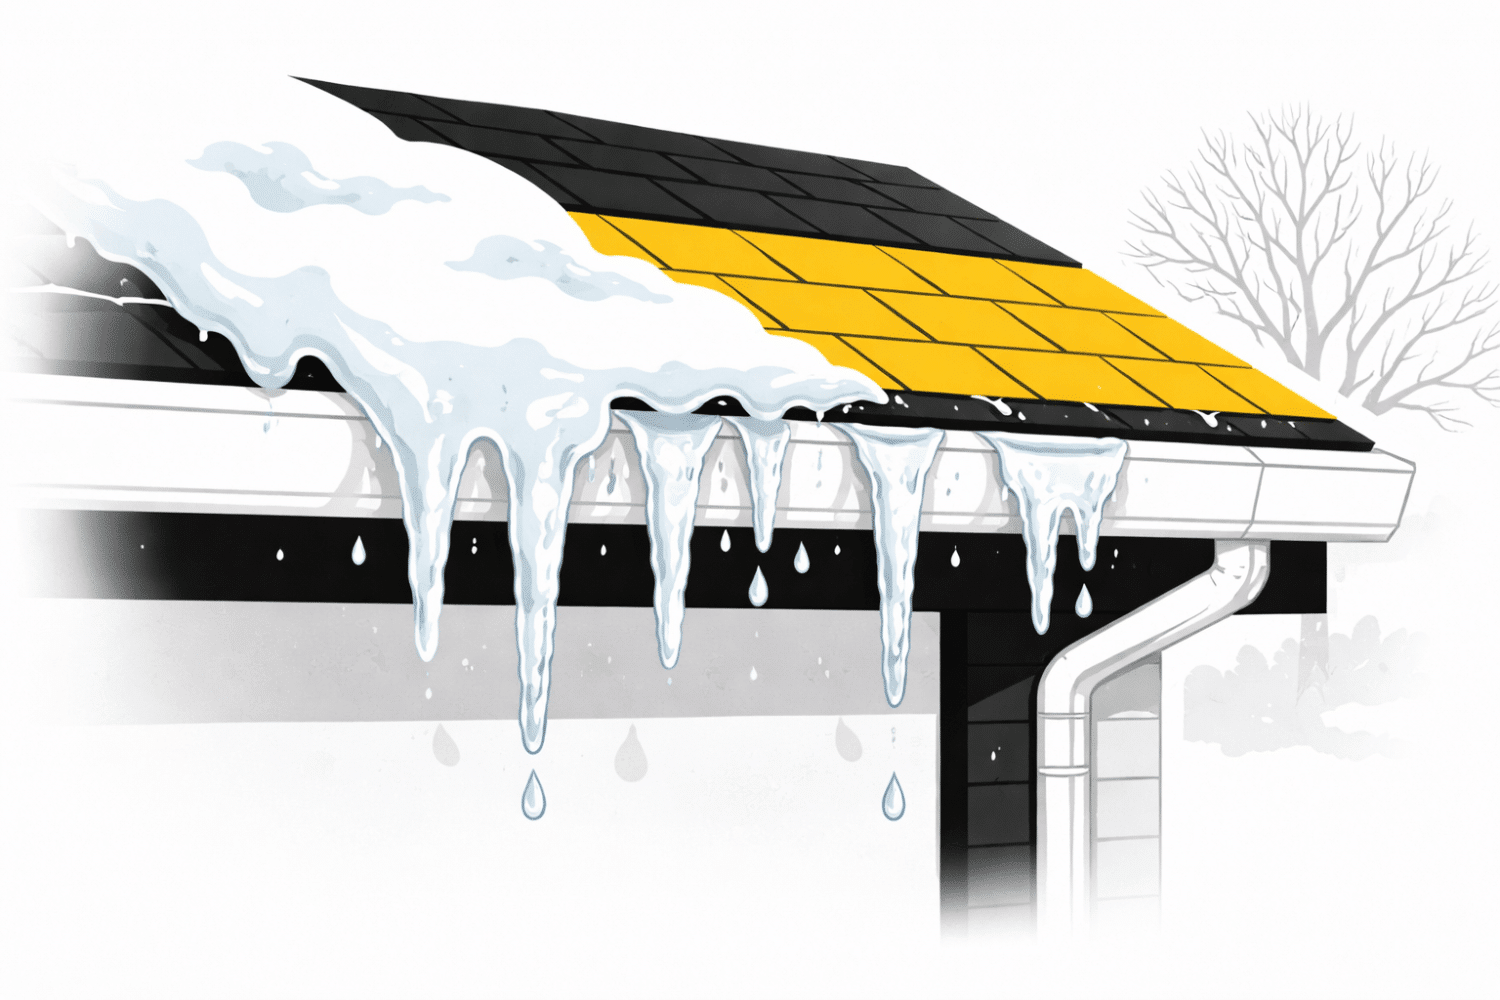
Hail Is a Fact of Life in Mid-Missouri
Missouri sits in the heart of Tornado Alley and sees an average of 20-30 significant hail events per year. For homeowners in Columbia, Jefferson City, Lake Ozark, and surrounding areas, that means replacing a standard roof every 10-15 years isn’t unusual—especially after a direct hit from golf-ball-sized hail.
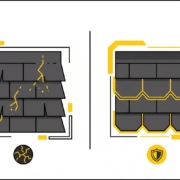
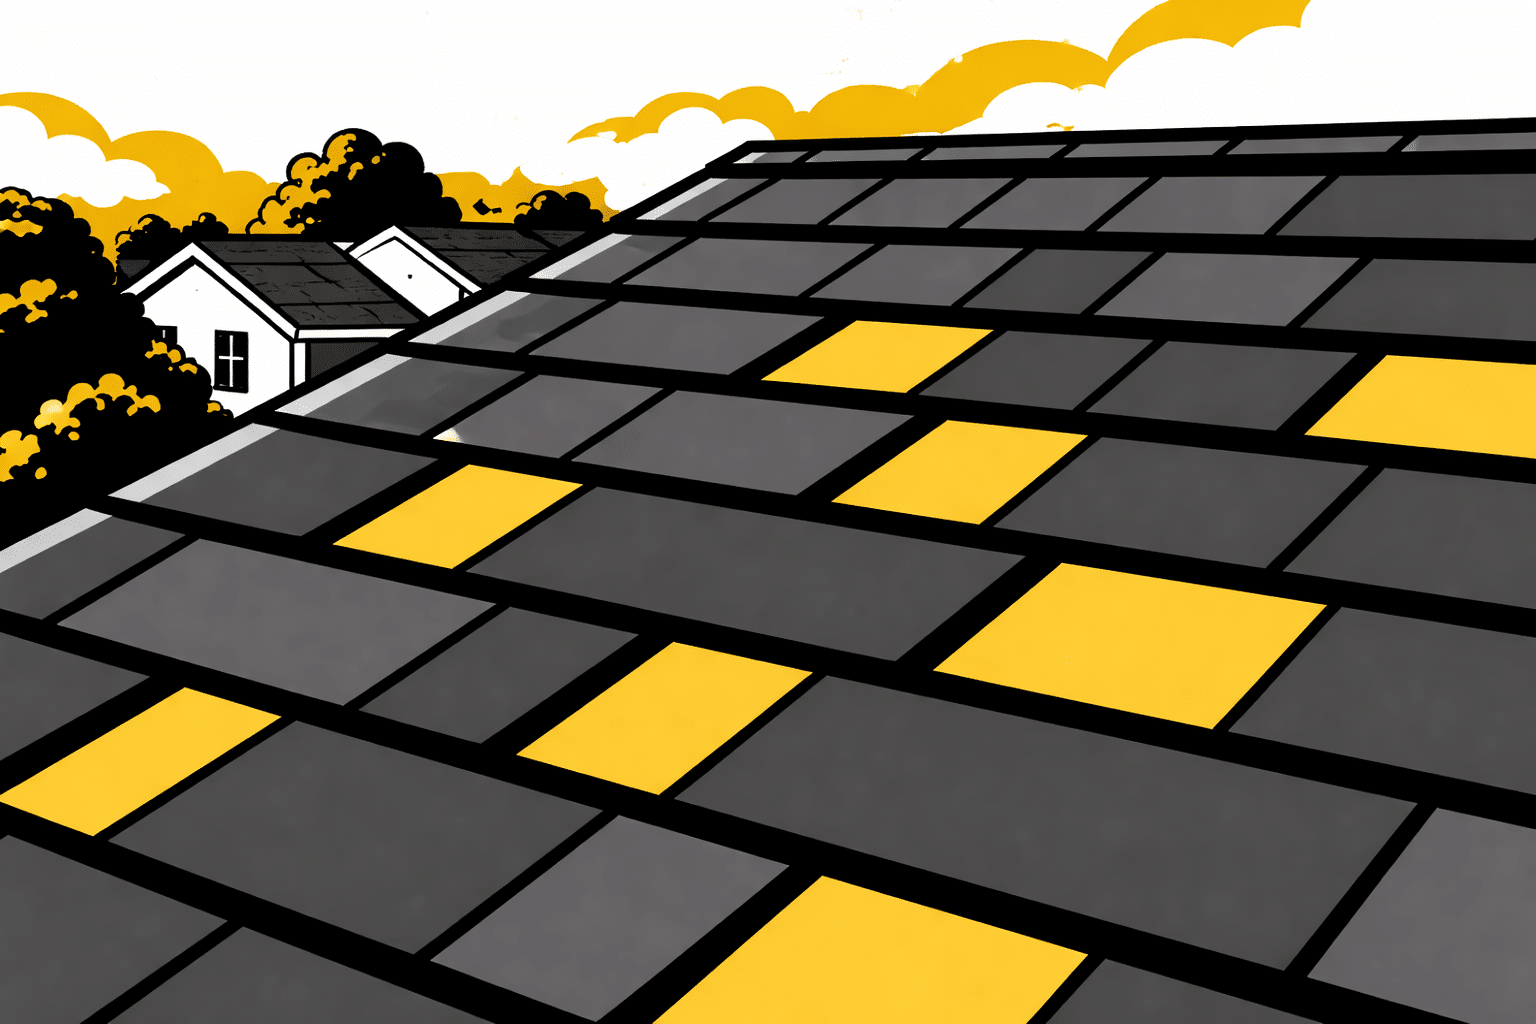
Impact-resistant shingles promise to change that equation. These specialized asphalt shingles are engineered to absorb hail impact without cracking, splitting, or losing granules. The highest-rated products carry a Class 4 impact rating, which is the toughest standard in the industry.
But are they worth the extra cost? Over the past decade, we’ve installed hundreds of impact-resistant roofs across Mid-Missouri. Some homeowners swear by them. Others question whether the upfront premium pays off. This guide breaks down the real costs, real benefits, and real trade-offs so you can make an informed decision.
What Makes a Shingle “Impact-Resistant”?
Standard architectural shingles are made of fiberglass mat coated with asphalt and mineral granules. When hail strikes, the asphalt layer cracks and granules dislodge, exposing the fiberglass to UV damage and shortening the roof’s life.
Impact-resistant shingles use one of two approaches to solve this problem:
Polymer-Modified Asphalt
Manufacturers like GAF and Owens Corning add synthetic polymers to the asphalt blend, making it more flexible and rubber-like. When hail hits, the shingle flexes instead of cracking. These shingles look and install like standard architectural shingles but perform like a tougher material.
Rubber or Plastic Reinforcement
Some brands incorporate a thin layer of rubber or recycled plastic into the shingle core. This creates a “bounce back” effect that dissipates impact energy. These shingles are less common in residential applications but appear in some specialty product lines.
The National Roofing Contractors Association provides technical standards for impact-resistant roofing materials and recommends Class 4 products for hail-prone regions.
How Class 4 Ratings Work
The Underwriters Laboratories tests shingles using the UL 2218 standard. Technicians drop steel balls of increasing size from 20 feet onto shingle samples:
Class Rating
Steel Ball Size
Drop Height
What It Means
Class 1
1.25 inches
12 feet
Basic impact resistance
Class 2
1.50 inches
15 feet
Moderate impact resistance
Class 3
1.75 inches
17 feet
Good impact resistance
Class 4
2.00 inches
20 feet
Highest impact resistance
Class 4 shingles must show no cracking, splitting, or tearing after impact. This doesn’t mean they’re indestructible—direct hits from softball-sized hail can still damage any asphalt product—but they withstand the hail size that damages most standard roofs in Mid-Missouri.
The Real Cost Difference in Missouri
For a typical 2,500-square-foot home in Columbia or Jefferson City, here’s how pricing breaks down:
Standard architectural shingles: $8,000-$12,000 total replacement cost.
Class 4 impact-resistant shingles: $10,500-$16,000 total replacement cost.
Premium synthetic or composite shingles: $14,000-$20,000+ total replacement cost.
The 20-40% premium for Class 4 shingles translates to roughly $2,000-$5,000 more upfront. For some homeowners, that’s a dealbreaker. For others, the long-term math looks different.
Insurance Premium Discounts
This is where impact-resistant shingles can pay for themselves. Many Missouri insurers offer discounts for Class 4 roofs:
State Farm: Up to 30% discount on wind/hail coverage in some Missouri markets.
Allstate: 10-20% discount depending on policy and location.
American Family: 15-25% discount for verified Class 4 installations.
Local and regional carriers: Varies widely; some offer no discount at all.
On a $1,500 annual premium, a 20% discount saves $300 per year. Over a 20-year roof lifespan, that’s $6,000 in savings—more than offsetting the upfront cost increase.
However, not all insurers offer these discounts, and some require re-inspection every five years. Call your agent before upgrading and ask specifically about Class 4 discounts, inspection requirements, and whether the discount applies to your entire premium or just the wind/hail portion.
CoMo roof projects often involve both retail replacement decisions and insurance conversations, so we treat the product paperwork as part of the roof plan. If you are considering a Class 4 shingle, ask for the exact manufacturer line, impact rating, warranty level, and installation requirements before you compare bids. That gives your insurance agent and your roofing contractor the same facts instead of relying on a vague “hail-resistant” label.
When Impact-Resistant Shingles Make Sense
You Live in a High-Hail Zone
Mid-Missouri counties including Boone, Cole, Callaway, and Miller experience frequent severe hail. If you’ve replaced your roof due to hail damage in the past 10 years, Class 4 shingles reduce the odds of doing it again.
You Plan to Stay in Your Home Long-Term
The financial benefit of impact-resistant shingles grows over time. If you’re selling in three years, you may not recoup the premium. If you’re staying for 15-20 years, the insurance savings and avoided replacement costs add up.
Your Insurance Offers Substantial Discounts
If your carrier provides a 25%+ discount for Class 4 roofs, the payback period is often under 7 years. Request a written quote showing your premium with and without the discount.
You Want Manufacturer Warranty Protection
GAF and Owens Corning both offer enhanced warranties for impact-resistant shingles installed by certified contractors. These warranties can include 50-year coverage and non-prorated protection for the first 10-20 years—significantly better than standard shingle warranties.
If you need a new roof now and can’t afford the Class 4 premium, standard architectural shingles are still a solid choice. Modern architectural shingles last 20-25 years with proper installation and ventilation.
You’re Selling Soon
Buyers appreciate a new roof, but most don’t pay extra for impact-resistant shingles. If you’re listing your home within 3-5 years, install standard shingles and market the “new roof” feature.
Your Insurance Doesn’t Offer Discounts
Some carriers, particularly smaller regional companies, don’t discount for Class 4 shingles. Without insurance savings, the payback depends entirely on avoiding hail damage—which is valuable but harder to quantify.
Installation Considerations for Impact-Resistant Shingles
Impact-resistant shingles are heavier and thicker than standard shingles. This creates installation requirements that affect your project:
Structural load: Most homes handle the extra weight fine, but very old structures may need reinforcement.
Nail penetration: Class 4 shingles require precise nail placement to maintain warranty coverage. Improper nailing voids both manufacturer and workmanship warranties.
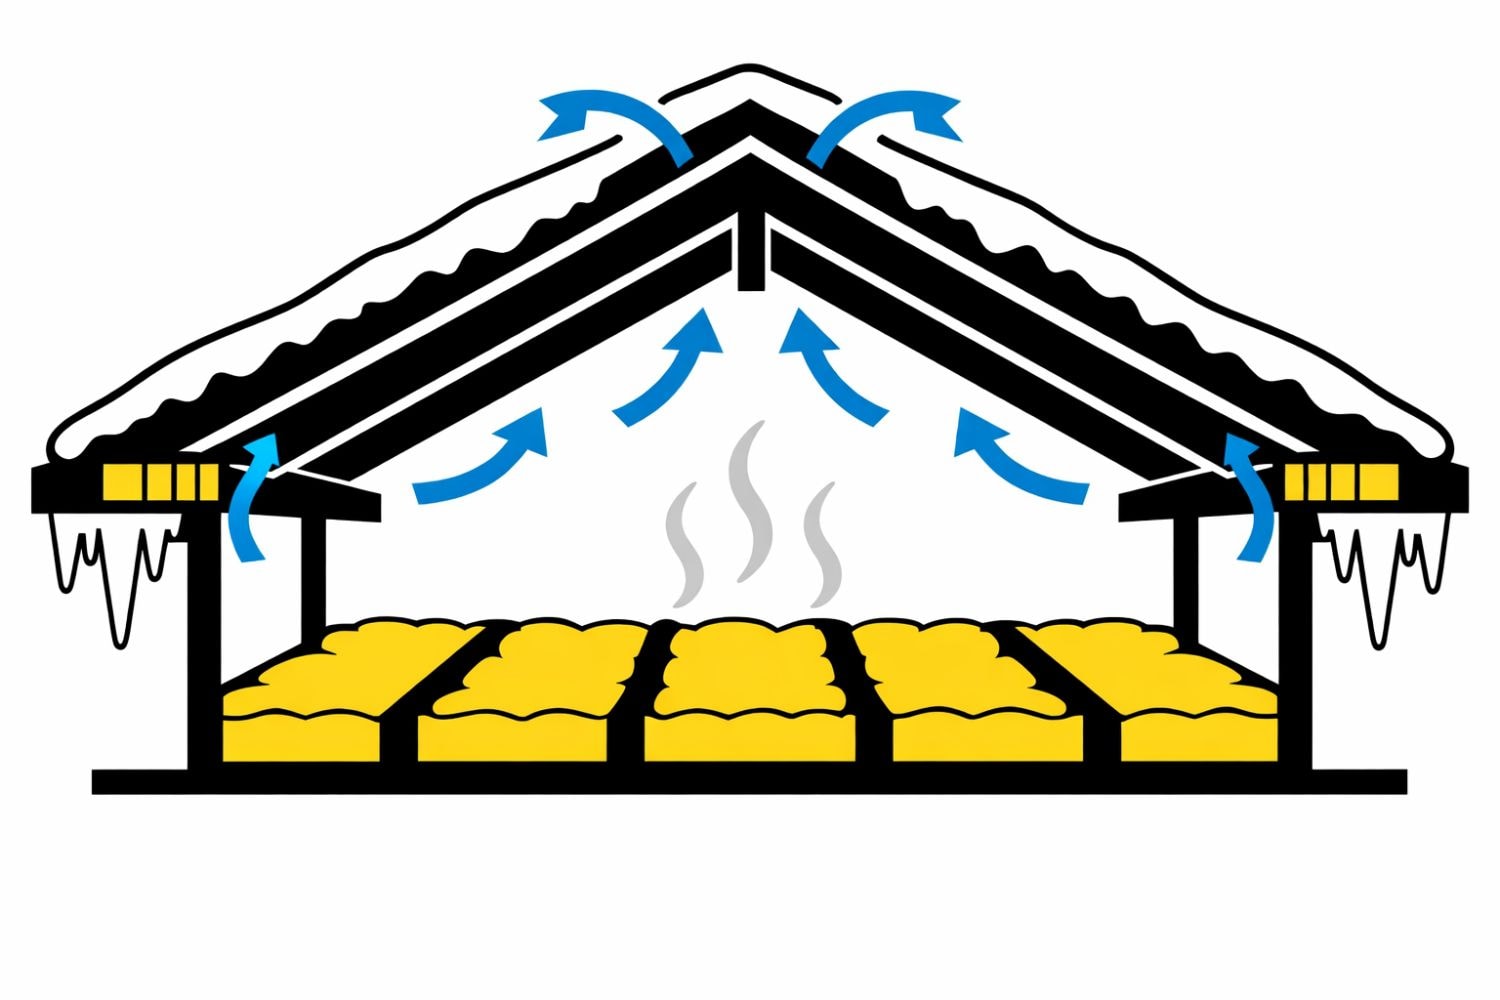
Ventilation: Thicker shingles trap more heat, making proper attic ventilation even more critical. Inadequate ventilation can shorten shingle life regardless of impact rating.
Flashing compatibility: Some impact-resistant profiles require specialized flashing or starter strips.
These details matter because manufacturer warranties for Class 4 shingles often require installation by certified contractors. As GAF Master Elite and Owens Corning Platinum Preferred contractors, we’re authorized to install and warranty these premium products. Non-certified roofers may install them correctly but cannot offer the same warranty protection.
The inspection and installation record matters after the roof is on, too. Homeowners should keep photos, the final shingle invoice, product warranty paperwork, and any ventilation notes with their home records. If a future hailstorm hits, that documentation helps show what product was installed, what condition the roof was in, and whether damage is storm-related or an installation/maintenance issue.
GAF’s homeowner education center explains the differences between standard and impact-resistant shingle warranties and why certified installation matters.
Questions to Ask Before Choosing a Class 4 Shingle
Before you approve the upgrade, ask a few practical questions that connect the product to your actual home:
Which exact shingle line and color are being quoted, and does it carry a UL 2218 Class 4 rating?
Will my insurance company recognize this product for a wind/hail discount, and what proof do they need?
Are the ridge caps, starter strips, flashing, and ventilation being matched to the manufacturer warranty requirements?
If hail hits later, what photos and paperwork should I keep so the inspection is straightforward?
Does the higher upfront cost make sense for my roof age, storm exposure, deductible, and how long I plan to stay in the home?
Those answers keep the upgrade from becoming a generic “premium shingle” upsell. The right choice should fit the roof system, the warranty, the insurance conversation, and the homeowner’s long-term plan.
Frequently Asked Questions
Do impact-resistant shingles really stop hail damage?
They significantly reduce damage from hail up to 2 inches in diameter, which covers roughly 80% of hail events in Mid-Missouri. Very large hail (softball-sized or bigger) can still damage Class 4 shingles, but the damage is typically less severe than on standard shingles.
How long do impact-resistant shingles last?
With proper installation and ventilation, Class 4 asphalt shingles last 25-30 years in Missouri’s climate. Some manufacturers rate them for 50 years, though real-world performance depends on installation quality, attic ventilation, and maintenance.
Will insurance pay for impact-resistant shingles?
If you’re filing a claim for storm damage and your policy includes “like kind and quality” replacement, insurance typically pays for standard shingles. The upgrade to Class 4 is your out-of-pocket cost unless you have specific upgrade coverage. Some homeowners pay the difference willingly because the long-term savings outweigh the upfront cost.
Are there alternatives to impact-resistant shingles?
Yes. Metal roofing, synthetic slate, and concrete tiles all offer excellent hail resistance—often better than Class 4 asphalt. These materials cost more upfront but last 40-70 years. For homeowners planning to stay in their homes indefinitely, they may be a better investment than premium asphalt.
Do impact-resistant shingles look different?
Modern Class 4 shingles are virtually indistinguishable from standard architectural shingles. They come in the same colors, textures, and dimensional profiles. Your neighbors won’t know you upgraded unless you tell them.
Can I install impact-resistant shingles myself?
We don’t recommend it. Class 4 shingles require precise nailing patterns and specialized accessories to maintain warranty coverage. Improper installation voids the manufacturer’s warranty and may not provide the impact protection you paid for.
Ready to Get Started?
We’ve been serving Mid-Missouri homeowners for over 25 years with premium roofing, siding, and exterior solutions. As GAF Master Elite, Owens Corning Platinum Preferred, and James Hardie Elite Preferred contractors, we bring certified expertise to every shingle upgrade decision.
If you’re weighing the pros and cons of impact-resistant shingles for your Missouri home, give us a call. We’ll inspect your current roof, explain your options, and help you choose the material that fits your budget, your timeline, and your long-term goals.
Does Homeowners Insurance Cover Roof Damage from Fallen Trees in Missouri?
Key Takeaways:
Usually yes, but with conditions: Most Missouri homeowners policies cover tree-related roof damage if the tree was healthy and fell due to a covered peril like wind or ice.
Neglect can void coverage: If the tree was dead, diseased, or leaning before it fell, your insurer may deny the claim for lack of maintenance.
Your policy covers your roof, not your neighbor’s tree: If your neighbor’s tree damages your roof, you file with your own insurance company, not theirs.
Removal costs are limited: Most policies cap tree removal at $500-$1,000 per tree, regardless of how large it is.
Document the tree’s condition immediately: Photos of the trunk, roots, and surrounding ground help prove the fall was storm-related, not negligence.
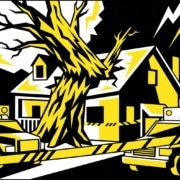
When a Tree Meets Your Roof
Missouri’s combination of mature oak forests, frequent thunderstorms, and ice storms makes fallen trees one of the most common causes of roof damage in Mid-Missouri. We’ve responded to tree strikes in Columbia, Jefferson City, Fulton, and Lake Ozark after nearly every major wind event. The damage is dramatic: crushed rafters, torn shingles, and holes big enough to see through.
But the insurance side of tree damage is less straightforward than hail or wind claims. Was the tree healthy? Who owned it? How much will removal cost? These questions determine whether your policy pays the full bill or leaves you with thousands in out-of-pocket expenses.
This guide explains exactly what Missouri homeowners insurance covers when a tree falls on your roof, what it doesn’t cover, and how to protect your claim from day one.
What Standard Missouri Policies Cover
Most Missouri homeowners policies are “all-risk” or “open perils” for the dwelling structure. This means your policy covers any cause of loss unless it’s specifically excluded. Tree damage is typically covered when caused by:
Wind or thunderstorms: The most common cause in Mid-Missouri, especially during spring storm season.
Ice or snow accumulation: Heavy ice loads can snap branches or uproot shallow-rooted trees.
Lightning strikes: A lightning-hit tree may split and fall hours or days later.
Fires: Though less common, wildfires or structure fires can weaken trees enough to collapse.
The key phrase is “sudden and accidental.” Insurance covers damage from events you couldn’t predict or prevent. If a healthy oak tree snaps in a 70-mph wind gust and crashes through your roof, that’s a covered loss.
The most common reason for denial isn’t the tree—it’s the tree’s condition before it fell. Insurance companies call this a “maintenance issue,” and it’s excluded under most policies.
Dead or Diseased Trees
If a tree was dead, rotting, or visibly diseased before a storm, the insurer may argue that you should have removed it. Common signs of a hazardous tree include:
Hollow or rotting trunk visible from the ground
Large fungal growths (conks or brackets) on the bark
Significant lean with cracked or uplifted soil on one side
Dead branches concentrated on one side
Roots damaged by recent construction or trenching
Adjusters photograph the stump and trunk after removal. If they find rot or disease, they may deny the claim or reduce the payout.
Neglected Maintenance
Even healthy trees need maintenance. If a homeowner ignores overhanging branches, fails to remove deadwood, or plants trees too close to the house, insurers may cite negligence. This is especially common with pine trees planted within 10 feet of a foundation—something we see frequently in older Columbia neighborhoods.
Flood-Related Tree Falls
Standard homeowners insurance does not cover flood damage. If saturated ground causes a tree to uproot during a flood event, the tree removal and roof repair may not be covered unless you have a separate flood policy through the National Flood Insurance Program.
Your Tree, Your Neighbor’s Tree: Who Pays?
This question creates confusion after nearly every storm. Here’s how it actually works:
Scenario
Who Files the Claim
Who Pays the Deductible
Your tree falls on your roof
You file with your insurer
You pay your deductible
Your tree falls on neighbor’s roof
Neighbor files with their insurer
Neighbor pays their deductible
Neighbor’s tree falls on your roof
You file with your insurer
You pay your deductible
Neighbor’s tree falls on their own roof
Neighbor files with their insurer
Neighbor pays their deductible
The general rule: you insure your house, not the tree. It doesn’t matter who owned the tree; what matters is whose property was damaged. Your insurance covers your roof. Your neighbor’s insurance covers their roof.
The only exception is if you can prove your neighbor was negligent—meaning they knew the tree was hazardous and refused to address it. In that case, you or your insurance company could pursue your neighbor’s liability coverage. But negligence is hard to prove and usually requires prior written communication about the tree’s condition.
Understanding Tree Removal Coverage Limits
Even when the roof damage is fully covered, tree removal is often capped. Most Missouri policies include these limits:
$500-$1,000 per tree: Regardless of the tree’s size, age, or removal difficulty.
$1,000-$2,000 total per event: Even if three trees fall, your removal coverage may max out at $2,000.
Only removal from the structure: Some policies only pay to remove the portion of the tree that’s on your house. The rest stays in your yard at your expense.
Large oak trees can cost $3,000-$8,000 to remove professionally. If your policy caps removal at $1,000, you’re responsible for the difference. We always recommend reviewing your policy’s tree removal limits before storm season and increasing coverage if needed.
What to Do Immediately After a Tree Strikes Your Roof
Step 1: Evacuate if Necessary
If the tree has compromised structural elements or created a large hole, leave the home. Don’t sleep in rooms beneath the damaged area.
Step 2: Document Everything Before Touching Anything
Photograph the tree, the roof, the trunk, and the surrounding ground. Capture:
The entire tree from multiple angles
Close-ups of the trunk and any breakage points
The root ball or stump if uprooted
Your roof damage from inside the attic and outside
Debris in your yard
These photos prove the tree was healthy (or document that it wasn’t your fault if it was diseased).
Because roof insurance files often turn on documentation, take photos in a sequence instead of only close-ups. Start with the full tree on the roof, then the broken trunk or root ball, then the roof opening, attic leaks, damaged decking, broken rafters, gutters, fascia, and any interior ceiling stains. That gives your adjuster and contractor a clearer path from the fallen tree to the actual roof repair scope.
Step 3: Call a Certified Contractor for Emergency Stabilization
Don’t attempt to remove the tree yourself. Tree removal requires specialized equipment and training, especially when the tree is resting on a structure. We coordinate with licensed arborists and tree services across Mid-Missouri to remove trees safely before beginning roof repairs.
Step 4: File Your Insurance Claim
Call your insurer’s claims line and provide your policy number, the date and time of the incident, and a description of the damage. Mention that a tree fell on your roof due to a specific event (windstorm, ice storm, etc.).
Step 5: Schedule Adjuster and Contractor Inspections
Request an adjuster visit within 48 hours. Then schedule a contractor inspection. At CoMo Premium Exteriors, we meet adjusters on-site to ensure all damage is documented, including structural issues that may not be visible from the exterior.
A tree-strike inspection should separate emergency stabilization from the permanent roof scope. Ask whether the repair is limited to shingles and flashing, or whether the impact also affected decking, rafters, sheathing, gutters, fascia, ventilation, or interior water damage. CoMo’s roofing, repair, inspection, and insurance work patterns show why this matters: the estimate, photos, and any supplement request need to describe the full damage path, not just the visible hole.
Tree strike repairs vary dramatically based on the tree’s size, the point of impact, and your roof’s structure. Here’s what we typically see in Mid-Missouri:
Small branch damage: $500-$2,000 for localized shingle and flashing repair.
Medium tree (6-12 inches diameter): $5,000-$12,000 for rafter repair, decking replacement, and partial re-roofing.
Large tree (18+ inches diameter): $15,000-$40,000+ for structural rebuild, full roof replacement, and potential interior repairs.
These costs assume standard asphalt shingles. Tile, metal, or slate roofs cost more to repair. Structural damage to trusses or ridge beams adds significant expense.
If the opening is small, a repair may be enough after the tree is removed and the roof is dried in. If the impact cracked rafters, crushed decking across several spans, disturbed flashing, or left matching issues on an older roof, the conversation can shift toward a larger replacement area. Before authorizing work, ask for a written scope that identifies the temporary dry-in, structural repair, roofing materials, gutter or fascia work, and what still needs insurance approval.
Frequently Asked Questions
Does insurance cover tree removal if the tree didn’t hit anything?
Generally no. Standard policies only cover tree removal if the tree damages a covered structure. If a tree falls in your yard and misses your house, removal is your responsibility unless you have specific debris removal coverage.
What if the tree was on city property?
If a city-owned tree falls on your home, file a claim with your own insurance first. Your insurer may then subrogate against the municipality. Claims against cities are difficult and time-consuming, so relying on your own policy is usually faster.
Will insurance pay for a new tree?
Most policies do not cover landscaping replacement, including trees. Some high-end policies include limited coverage for landscaping, typically $500-$2,500 total. Check your policy’s “other structures” and “landscaping” sections.
Should I remove trees near my house before they fall?
If a tree is healthy and properly maintained, removal isn’t necessary. But if a tree is dead, leaning toward your home, or has significant root damage, proactive removal is wise. Preventive tree work is cheaper than emergency roof repairs, and it eliminates the risk of a negligence-based claim denial.
How do I prove a tree was healthy before it fell?
Photos are your best evidence. Take annual photos of trees near your home, especially after trimming or maintenance. If you hire an arborist for inspections, keep their reports. Documentation of proactive care strengthens your claim if an insurer alleges negligence.
Can I choose any contractor for tree removal?
Yes, but choose carefully. Tree removal requires specialized insurance and equipment. Unlicensed tree services can damage your property further or leave you liable if a worker is injured. Verify workers’ compensation and general liability coverage before hiring.
Ready to Get Started?
We’ve been serving Mid-Missouri homeowners for over 25 years with premium roofing, siding, and exterior solutions. As GAF Master Elite, Owens Corning Platinum Preferred, and James Hardie Elite Preferred contractors, we bring certified expertise to every emergency repair.
If a tree has damaged your roof, call us immediately. We’ll coordinate safe tree removal, document everything for your insurance claim, and get your home watertight fast.
Can Hail Damage Your Roof Vents and Skylights? What Homeowners Miss
Key Takeaways:
Vents are vulnerable: Roof vents sit above the shingle line and have thin metal or plastic surfaces that dent or crack under hail impact.
Skylights crack from the side: Hail doesn’t need to hit the glass directly; impacts on the flashing or frame can transfer force and cause stress fractures.
Insurance often covers them: Most homeowners policies include vents and skylights under “roofing accessories,” but adjusters may miss them if they only inspect from the ground.
Small damage leads to big leaks: A cracked vent cap or dented flashing may seem minor, but it can funnel water into your attic for months before showing stains on your ceiling.
Get a full-roof inspection: A professional contractor checks every vent, skylight, and piece of flashing—not just the shingles you can see from your driveway.
Hail Doesn’t Stop at Your Shingles
When hail pounds Mid-Missouri, most homeowners immediately look at their shingles for dents or missing granules. That’s smart—shingles take the brunt of the impact. But hail doesn’t discriminate. Anything sitting above your roofline is exposed, and two of the most commonly overlooked casualties are roof vents and skylights.
In CoMo’s storm-damage work, skylights and roof accessories show up as their own repair and inspection issues, not just as small add-ons to the shingle claim. The important point for a homeowner is scope: a roof can have damaged vents, flashing, or skylight curbs even when the most obvious shingle damage is on a different roof plane. Those components are expensive to revisit later, and when they fail, they leak just as badly as a torn shingle.
If you’re filing an insurance claim, it’s critical that every damaged component gets documented. Adjusters who inspect from the ground or through satellite imagery often miss vent and skylight damage entirely. This guide explains what to look for, why these components matter, and how to make sure nothing gets left off your claim.
How Hail Damages Roof Vents
Roof vents come in several styles—static box vents, turbine vents, ridge vents, and power vents—and each one has vulnerabilities that hail exposes.
Static Box Vents
These are the most common style in Mid-Missouri. They look like small boxes or domes sitting on your roof, usually made of galvanized steel, aluminum, or plastic. Hail larger than 1 inch in diameter can dent metal caps hard enough to crack the seams. Plastic caps are even more susceptible; we’ve seen quarter-sized hail shatter aging PVC vent covers.
The real danger isn’t cosmetic. A dented vent cap may no longer shed water properly. Rain runs into the dent, pools, and eventually seeps through the vent collar into your attic. By the time you notice a water stain on your ceiling, the insulation and decking around the vent may already be saturated.
Turbine Vents
Turbine vents spin with wind to draw hot air out of your attic. The spinning head is thin aluminum, and hail can dent or bend the fins. A bent turbine spins unevenly, creates noise, and eventually seizes. Worse, the impact can loosen the base flashing, breaking the seal between the vent and the roof deck.
Ridge Vents
Ridge vents run along the peak of your roof and are partially protected by their low profile. But wind-driven hail hits at an angle, and the plastic baffles inside ridge vents can crack from impact force. We’ve removed ridge vents after hailstorms and found shattered internal baffles that homeowners never knew were damaged.
The Storm Prediction Center tracks hail frequency across the Central United States, and Missouri sees an average of 20-30 significant hail days per year. That’s a lot of opportunities for vent damage to accumulate.
How Hail Damages Skylights
Skylights seem protected because they’re made of tempered or laminated glass. But hail damage to skylights rarely comes from a direct hit to the glass itself. Here’s what actually happens:
Flashing Damage
Skylights sit in a framed curb surrounded by metal flashing. Hail hitting the flashing can dent it, create gaps, or loosen the sealant. Once the flashing is compromised, water runs behind the skylight frame and into your roof structure. This type of leak is especially insidious because the skylight glass looks fine from inside your home.
Frame and Curb Impact
The wooden or composite curb that holds the skylight in place can split or crack from hail impact transferred through the frame. A cracked curb destabilizes the entire skylight unit, causing the glass to sit unevenly and eventually break its weather seal.
Direct Glass Strikes
While less common, hail larger than 2 inches in diameter can crack or shatter skylight glass on impact. We’ve seen this in Columbia after severe supercell storms. The debris from a shattered skylight then falls into your home, causing interior damage on top of the roofing issue.
Component
Visible Sign
Hidden Risk
Box vent cap
Dents, cracks, missing pieces
Water pooling in dents, attic leaks
Turbine vent
Bent fins, wobbling spin
Broken base seal, attic moisture
Ridge vent baffle
Not visible from outside
Cracked internal plastic, reduced ventilation
Skylight flashing
Dented metal, gaps in sealant
Water behind frame, structural rot
Skylight curb
Split wood, loose frame
Glass seal failure, interior leaks
Skylight glass
Cracks, shattered panes
Immediate water intrusion, debris
Why Insurance Adjusters Miss Vent and Skylight Damage
Insurance adjusters are trained to identify obvious damage: torn shingles, missing granules, dented metal. But vent and skylight damage often requires hands-on inspection. Here’s why it gets overlooked:
Ground inspections: Many adjusters inspect from the driveway with binoculars or satellite imagery. Vents and skylights are too small to evaluate from 30 feet away.
Flashing is hidden: Skylight flashing sits under shingles and counterflashing. An adjuster needs to lift shingle edges to see dents or gaps.
Vents look functional: A dented vent cap still spins or sits in place, so it appears fine until it leaks.
Code requirements are nuanced: Adjusters may not know that Missouri building codes require certain vent configurations, and replacing a damaged vent with a non-compliant model creates liability.
At CoMo Premium Exteriors, we climb every roof we inspect. We check every vent, every skylight, and every linear foot of flashing. We also note whether the issue looks like a simple accessory repair, a roof-plane repair, or a replacement detail that needs matching materials, measurements, and warranty information before the claim scope is finalized.
For guidance on skylight installation standards and weather resistance, ENERGY STAR provides specifications on certified skylight products designed to withstand severe weather.
What Happens If You Ignore Vent or Skylight Damage
Small damage becomes expensive damage. Here’s the typical timeline we see in Mid-Missouri:
Weeks 1-4: A dented vent cap or cracked skylight seal allows intermittent water intrusion during heavy rain. You don’t notice anything because the water evaporates in your attic before reaching your ceiling.
Months 2-6: Repeated moisture weakens roof decking around the vent or skylight. Insulation becomes compressed and loses R-value. Mold spores begin colonizing the damp wood.
Months 6-12: Water finds a path to your ceiling drywall. You notice a brown stain. By now, the repair involves not just the vent or skylight, but also decking replacement, insulation removal, and drywall repair.
The lesson is not to guess from the driveway. Inspect everything after a hailstorm, even the parts that look fine. A small accessory problem can become a roof-decking, insulation, or interior repair issue if water keeps finding the same path after each storm.
How to Document Vent and Skylight Damage for Your Claim
If you suspect hail damage, here’s what to document before your adjuster arrives:
Photograph every vent from multiple angles. Look for dents, cracks, loose seams, and discoloration.
Check skylights from inside your attic. Look for daylight around the frame, water stains on decking, or damp insulation.
Note the manufacturer and model. Insurance may only pay for “like kind and quality” replacements, so knowing your existing product helps.
Ask whether the surrounding flashing, curb, shingles, and interior staining were checked together. Skylight and vent work often depends on more than the visible cap or glass.
Mark damaged areas with tape. This makes it easier for adjusters to find problem spots during their inspection.
Get a contractor inspection. A certified roofer can spot damage you can’t see and provide a written report for your adjuster.
Before your inspection, take one close photo of the damaged part and one wide photo that shows where it sits on the roof. That context helps the contractor connect the accessory damage to the roof slope, flashing path, attic location, and any ceiling stain below.
Yes. Hail as small as 1 inch in diameter can dent metal vent caps and crack aging plastic covers. Wind-driven hail is especially damaging because it strikes at an angle with more force than falling straight down.
Will insurance pay to replace a damaged roof vent?
Most homeowners policies cover roof vents as part of the roofing system if the damage is storm-related. The key is proving the damage occurred during a covered event and documenting it properly. A contractor inspection report helps.
How can I tell if my skylight was damaged by hail?
Check the metal flashing around the skylight for dents or gaps. From inside your attic, look for daylight around the frame, water stains, or damp insulation. If the skylight glass itself is cracked, the damage is obvious.
Do I need to replace all my vents if only one is damaged?
Not necessarily. If the damaged vent is the same model and age as the others, insurance may only pay for the affected unit. However, if your vents are discontinued, mismatched, brittle from age, or tied into damaged flashing, your contractor may recommend a broader repair for consistency, water-shedding performance, and warranty purposes.
Can a dented vent cause a leak even if it looks fine?
Yes. Dents create low spots where water pools instead of running off. Over time, this standing water seeps through seams and into your attic. We’ve seen dented vents leak months after a hailstorm when the homeowner assumed everything was fine.
Should I have my roof inspected after every hailstorm?
If hail in your area was larger than 1 inch in diameter—or if your neighbors are reporting damage—schedule an inspection. Hail damage is often hidden, and early documentation protects your insurance claim options.
Ready to Get Started?
We’ve been serving Mid-Missouri homeowners for over 25 years with premium roofing, siding, and exterior solutions. As GAF Master Elite, Owens Corning Platinum Preferred, and James Hardie Elite Preferred contractors, we bring certified expertise to every hail damage inspection.
If a recent storm rolled through your area and you’re wondering whether your vents or skylights made it through unscathed, give us a call. We’ll check every component of your roof system and give you honest answers.
How to Read Your Roofing Insurance Estimate: What Missouri Homeowners Should Know
Key Takeaways:
Line-item breakdowns matter: Every material, labor hour, and accessory should be listed separately so you know exactly what you’re paying for.
ACV vs. RCV determines your payout: Actual Cash Value accounts for depreciation, while Replacement Cost Value covers full replacement—know which one your policy uses.
Supplements are common: Hidden damage often isn’t visible until tear-off, so expect additional charges and know how to request approval.
Code upgrades may be extra: Missouri building code requirements for underlayment, ice barrier, or ventilation may not be included in the initial estimate.
Get a contractor review: A certified roofing professional can spot missing line items and negotiate with your adjuster on your behalf.
Why Reading Your Roofing Insurance Estimate Matters
When a hailstorm rolls through Columbia or high winds rip across Jefferson City, the last thing you want to do is decipher a 10-page insurance estimate full of numbers, codes, and abbreviations. But here’s the truth: that document determines how much money you’ll receive to fix your roof, and insurance companies don’t always get it right on the first try.
We’ve reviewed thousands of roofing insurance estimates for Mid-Missouri homeowners over the past 25 years. In our experience, roughly 60% of initial estimates are missing at least one critical line item—whether it’s insufficient squares of shingles, omitted ventilation upgrades, or overlooked code requirements. Understanding your estimate isn’t just about being informed; it’s about protecting your out-of-pocket costs.
As GAF Master Elite, Owens Corning Platinum Preferred, and James Hardie Elite Preferred contractors, we’ve learned how adjusters think and what they commonly miss. This guide walks you through every major section of a typical roofing insurance estimate so you can spot red flags before work begins.
The Anatomy of a Roofing Insurance Estimate
Most insurance estimates follow a standardized format, typically using Xactimate pricing software. While the layout varies by carrier, these sections appear on nearly every document:
Scope of Work
This section describes what the insurance company agrees needs to be repaired or replaced. It should list every damaged component—roofing shingles, underlayment, flashing, drip edge, vents, and gutters. If you see vague language like “repair roof as needed” without specific materials listed, that’s a red flag. A proper scope should name the exact products, quantities, and areas of your home.
Line-Item Pricing
This is where the real details live. Each material and labor task gets its own line with a unit price. Common line items include:
Line Item
What It Covers
Common Omissions
Roofing shingles (per square)
Primary roof covering material
Wrong shingle grade, insufficient square footage
Underlayment
Waterproof barrier beneath shingles
Upgraded synthetic underlayment not included
Ice and water shield
Self-adhesive membrane in valleys and eaves
Missouri code requires this; often underestimated
Drip edge
Metal flashing at roof edges
Omitted on rakes or eaves
Flashing
Metal pieces around chimneys, walls, valleys
Step flashing or counterflashing missing
Ridge vent
Exhaust ventilation at roof peak
Insufficient linear footage
Pipe boots
Rubber seals around plumbing vents
Not replaced even when cracked
Gutter apron
Metal transition from roof to gutter
Omitted entirely
Dumpster and permits
Waste removal and municipal fees
Not included in base labor
Overhead and profit
Contractor business expenses
Sometimes disputed by carriers
If your estimate is missing any of these items—or if quantities seem low compared to your roof’s actual size—ask your contractor to verify. A professional roofer can measure your roof independently and cross-check every number.
Compare the estimate to the actual roof, not just the total
Before you sign off on a roof insurance estimate, match the line items to what is actually on your home. CoMo’s roof insurance and inspection work often comes down to details that are easy to miss on paper: pipe boots, ridge vent length, step flashing, gutter apron, roof-to-wall transitions, and the exact shingle system being installed. A low estimate is not always “wrong,” but it should explain the same roof your contractor is seeing.
Take photos before cleanup or temporary repairs if it is safe to do so. Wide photos show which slope, elevation, or accessory was damaged. Close-up photos show dents, cracked sealant, lifted shingles, torn flashing, or damaged vents. Those two views make the estimate easier to review because everyone can tie the line item back to a real part of the roof.
ACV vs. RCV: The Difference That Costs Thousands
One of the most important numbers on your estimate is whether your policy pays Actual Cash Value (ACV) or Replacement Cost Value (RCV). This single distinction can change your out-of-pocket cost by several thousand dollars.
ACV pays what your roof is worth today, accounting for age and wear. If your 15-year-old roof has a 25-year lifespan, the insurer may only cover 40% of replacement costs, leaving you to pay the rest.
RCV pays the full cost of replacing your roof with materials of like kind and quality, minus your deductible. This is the better coverage for Missouri homeowners, where storms can destroy a roof regardless of age.
Your estimate should clearly state whether each line item is priced at ACV or RCV. If you see ACV pricing and believe you have RCV coverage, call your agent immediately. For a deeper look at how insurance payouts work, the National Roofing Contractors Association offers educational resources on working with carriers.
Missouri-Specific Code Upgrades to Watch For
Missouri building codes have evolved over the past decade, and many older homes don’t meet current standards. When your roof is replaced, code requires that certain upgrades be brought up to date. The problem? Insurance policies don’t always include “code upgrade” coverage automatically.
Common code-related line items that appear on Missouri roofing estimates include:
Ice and water shield: Required by code in certain climate zones, including much of Mid-Missouri. This self-adhesive membrane prevents leaks from ice dams and wind-driven rain.
Drip edge: Must be installed on all roof edges, not just eaves.
Proper ventilation: Attic ventilation must meet minimum square footage requirements based on your attic size.
Decking replacement: Damaged or rotted roof decking must be replaced, not covered with new shingles.
If your estimate lacks these items, your contractor should flag them during inspection. At CoMo Premium Exteriors, we document every code requirement before work starts and communicate directly with adjusters when supplements are needed. You can verify local code standards through FEMA’s building code resources or your municipal building department.
When to Request a Supplement
A supplement is an adjustment to your insurance estimate after additional damage is discovered. In our experience, supplements are needed on about half of all storm-damage roof replacements in Mid-Missouri. Here’s why: adjusters inspect from the ground or with limited ladder access. They can’t see rotted decking, compromised underlayment, or inadequate ventilation until the old roofing comes off.
Signs you may need a supplement include:
The estimate doesn’t account for all slopes of your roof
Your roof has multiple layers of old shingles that need removal
Chimney flashing, skylights, or satellite mounts require resealing
Decking is soft or water-damaged underneath old shingles
Your municipality requires permits or inspections not listed
We handle supplement requests as part of our standard process. Our project managers photograph hidden damage, write detailed explanations, and submit documentation directly to your adjuster. When a supplement is needed, the best support is specific: what was found, where it is on the roof, why it was not visible during the first inspection, and which line item needs to change. That keeps the conversation focused on the scope instead of guesswork.
For homeowners who want to understand how manufacturers recommend handling insurance claims, GAF’s homeowner resource center provides guidance on working with adjusters and choosing certified contractors.
How Contractor Estimates Differ From Insurance Estimates
Your contractor’s estimate and your insurance estimate will rarely match exactly. That’s normal—and expected. Insurance estimates use standardized pricing databases that don’t always reflect real-world material costs in Columbia, Jefferson City, or Lake Ozark. Contractor estimates account for:
Local labor rates: Mid-Missouri roofing crews earn different wages than coastal markets where Xactimate pricing is often calibrated.
Material availability: Premium shingles like GAF Timberline HDZ or Owens Corning Duration may cost more than generic equivalents in insurance software.
Job complexity: Steep pitches, multiple valleys, or hard-to-access lots require more labor hours.
If your contractor’s estimate is higher than your insurance check, don’t panic. The difference is often resolved through supplements, code upgrades, or matching your policy’s RCV coverage. The key is working with a contractor who understands insurance language and advocates for you.
What does “per square” mean on a roofing estimate?
A “square” equals 100 square feet of roof area. If your home needs 25 squares of shingles, that means you have approximately 2,500 square feet of roof surface to cover. Adjusters sometimes miscalculate roof squares by measuring from the ground or using outdated satellite imagery.
Why is my insurance estimate lower than my contractor’s quote?
Insurance estimates use averaged pricing databases that don’t always reflect local material costs, premium product selections, or job complexity. A qualified contractor can identify missing line items and request a supplement from your adjuster with proper documentation.
Can I keep the leftover money if my contractor charges less than the insurance estimate?
With RCV coverage, insurance typically pays the full replacement cost once work is complete. If your contractor’s bill is lower, you may be entitled to the difference, depending on your policy language. With ACV coverage, the payout is fixed based on depreciation, so savings go to you—but you may also face uncovered costs.
How long do I have to file a roof damage claim in Missouri?
Most Missouri homeowners insurance policies require claims to be filed within one year of the damage date, but some policies have shorter windows. We recommend filing within 30 days of the storm to preserve documentation and avoid disputes about whether damage was storm-related.
What if my insurance denies part of my roof claim?
Request a written explanation for the denial, then have your contractor provide additional documentation such as photos, measurements, roof-slope notes, and the specific missing line items. If the dispute is about materials, accessories, or a hidden condition found during tear-off, ask your contractor to connect the documentation to that exact part of the estimate. Most carriers allow appeals, and a certified contractor can advocate on your behalf during re-inspection.
Should I get multiple estimates before filing a claim?
Not necessarily. Insurance companies set their own pricing based on standardized software, so multiple bids won’t change their payout. What matters is choosing a certified contractor who understands insurance language and can identify missing line items on your estimate.
Ready to Get Started?
We’ve been serving Mid-Missouri homeowners for over 25 years with premium roofing, siding, and exterior solutions. As GAF Master Elite, Owens Corning Platinum Preferred, and James Hardie Elite Preferred contractors, we bring certified expertise to every insurance claim we handle.
If you’re staring at an insurance estimate and wondering whether the numbers add up, give us a call. We’ll review your documents at no charge and tell you exactly what we see—no obligation, no pressure.
Is Roof Replacement Covered by Insurance in Missouri?
Key Takeaways
In Missouri, homeowners insurance typically covers full roof replacement when damage results from sudden, storm-related events like hail, wind, or tornadoes, not from gradual wear and tear.
Whether your insurance company pays for complete replacement or only partial repairs depends heavily on your policy type (Replacement Cost Value vs. Actual Cash Value), your roof’s age (many carriers impose 10-20 year cutoffs), and your maintenance history.
Many Mid-Missouri policies require storm claims to be reported within 30-60 days, even though state law may allow longer filing windows.
Understanding the difference between RCV coverage and ACV coverage can mean the difference between receiving $18,000 for a new roof or just $7,000-$10,000 after depreciation.
CoMo Premium Exteriors helps Mid-Missouri homeowners document roof damage, meet with adjusters, and pursue full, code-compliant roof replacements across Columbia, Jefferson City, and surrounding areas.
Does Home Insurance Cover Roof Replacement in Missouri?
The short answer is yes, most standard HO-3 homeowners policies in Missouri cover roof replacement when damage is “sudden and accidental.” This means if a hailstorm, high winds, tornado, or falling tree damages your roof, your insurance coverage will typically respond by funding repairs or full replacement, minus your deductible.
However, “covered” doesn’t always mean “fully paid.” The amount you actually receive depends on several factors we’ll explore throughout this guide, including your policy type, your roof’s condition, and how well you document the damage.
Common scenarios that typically trigger full roof replacement coverage in Missouri:
Hailstorm in Boone County causing widespread granule loss and cracked shingles across multiple roof slopes
Straight-line winds in Cole County lifting shingles and damaging ridge caps
Tornado-related debris impact in Central Missouri
Large tree limbs falling during severe weather and puncturing roofing materials
What’s NOT covered:
Gradual deterioration, improper installation, and neglect fall outside coverage boundaries. For example, a 25-year-old roof with asphalt shingles that’s simply reached its expected lifespan and started leaking won’t qualify for an insurance claim. Similarly, damage from clogged gutters causing water backup or moss growth from years of neglected maintenance typically won’t be covered.
Insurance adjusters decide between “repair” and “replace” by examining the percentage of damaged shingles, roof slope conditions, and local building code requirements. In cities like Columbia and Jefferson City, code often requires bringing the entire roof surface up to current standards if repairs exceed a certain threshold, which can tip the scales toward full replacement.
As a local Mid-Missouri contractor with 25+ years of experience, we can inspect your roof first and give you an honest assessment of whether damage likely meets insurance thresholds for full roof replacement before you file a claim.
How Missouri Weather Affects Roof Damage and Insurance Decisions
Missouri’s four-season severe weather creates one of the most challenging environments for residential roofs in the country. This directly translates to higher rates of roof damage claims and more frequent full replacements.
Seasonal storm patterns and their impact on Mid-Missouri roofs:
Spring (March-May): Peak hail season, with storms frequently producing 1-1.5 inch hailstones that cause functional damage to shingles. Tornado activity also peaks, bringing extreme wind uplift and debris damage.
Summer (June-August): Straight-line winds from severe thunderstorms commonly exceed 55 mph, the threshold where significant shingle uplift occurs. These storms often move through quickly but leave widespread missing shingles and damaged flashing.
Fall (September-November): Wind events continue, and temperature swings begin stressing roofing materials. Early freeze-thaw cycles can exploit existing damage.
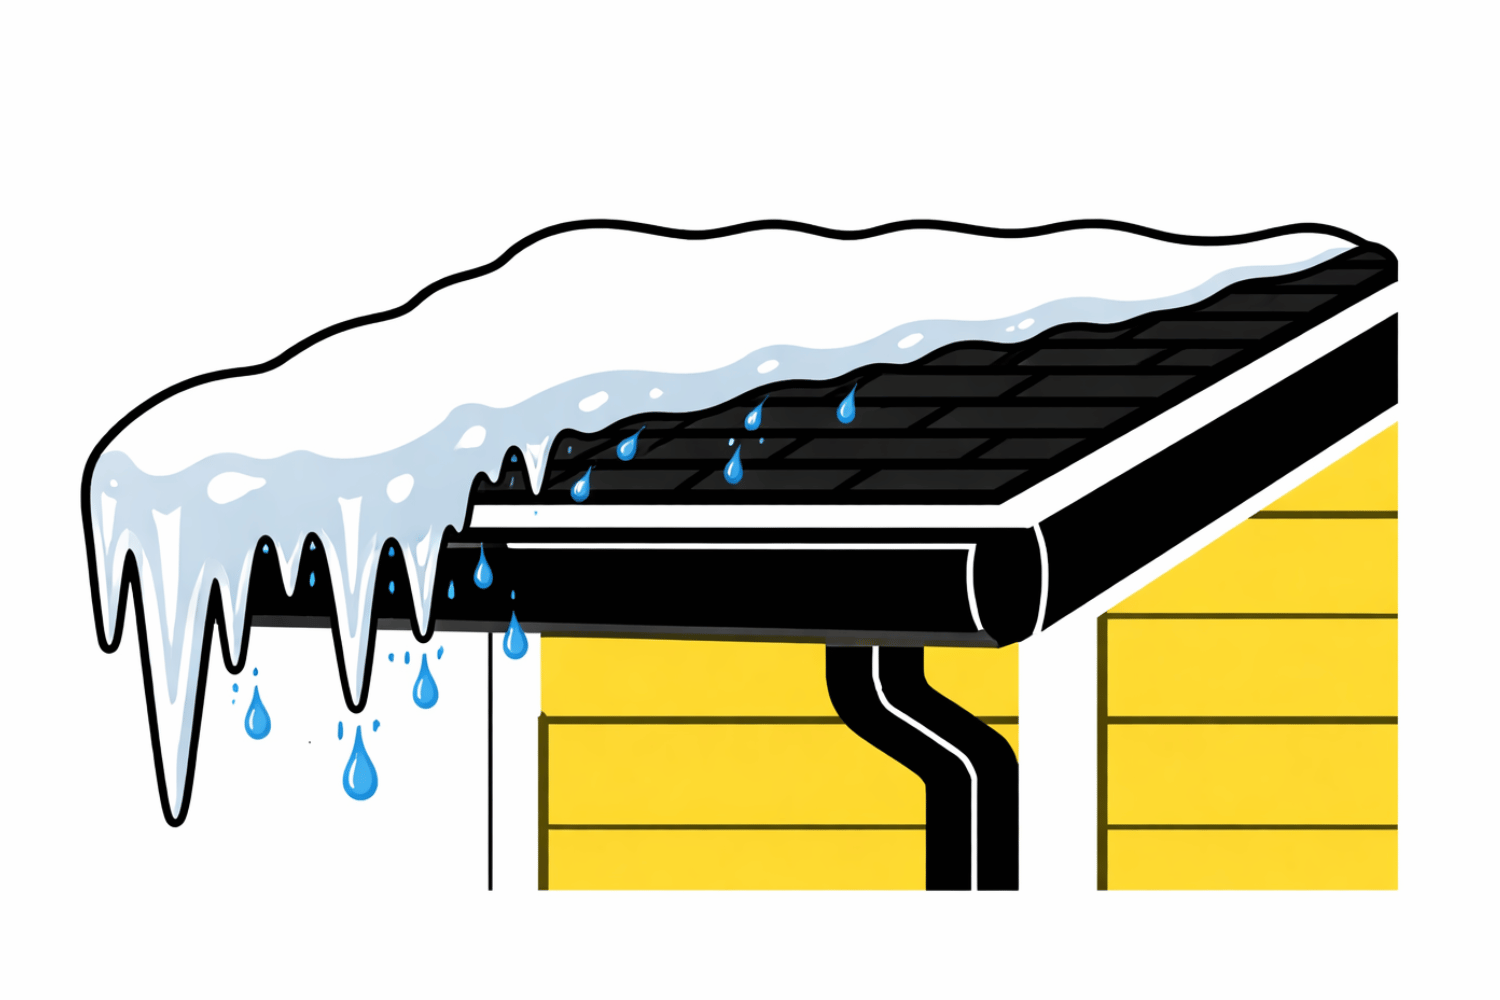
Winter (December-February): Ice dams form, heavy snow loads stress structures, and 40°F temperature swings within single days cause expansion and contraction that accelerates wear on already-compromised roofs.
Real recent examples show how insurers respond to widespread Missouri weather events. The Spring 2023 hail events in Boone and Callaway counties prompted many carriers to approve full replacements rather than spot repairs, particularly when multiple slopes showed damage. Similarly, June 2024 wind storms near Lake of the Ozarks resulted in numerous replacement approvals when inspections revealed creased shingles and compromised underlayment across roof surfaces.
The “wear and tear” argument:
Because roofs age faster in Missouri weather, insurers sometimes try to attribute storm damage to gradual deterioration. This is why clear documentation tying damage to a specific recent storm date matters enormously. Without proper documentation showing the roof’s condition before and after a dated weather event, your roof damage claim becomes much harder to defend.
We recommend inspections every 1–2 years, plus after any major storm. Catching insurable damage early and documenting it properly helps prevent underpaid claims or outright denials.
RCV vs. ACV: How Your Policy Type Changes Roof Replacement Coverage
The single biggest factor determining whether insurance pays for your entire new roof or only a fraction is whether you have a Replacement Cost Value (RCV) or Actual Cash Value (ACV) policy. This distinction can mean tens of thousands of dollars difference in your claim payout.
Replacement Cost Value (RCV) Explained:
RCV coverage pays to replace your damaged roof with a new one of similar quality at today’s prices, minus your deductible. Depreciation is calculated, but you can recover it after completing the replacement.
Columbia Example: Your roof needs full replacement. The insurance estimate shows:
Full replacement cost: $18,000
Depreciation withheld: $4,000
Deductible: $2,000
Initial payment: $12,000
After your roofer completes the job and submits the final invoice, you receive the $4,000 recoverable depreciation. Your total out-of-pocket is the $2,000 deductible.
Actual Cash Value (ACV) Explained:
ACV coverage pays only what your roof is worth today, accounting for age, wear, and remaining useful life. The depreciation is permanent and you do not get it back.
Jefferson City Example: Same $18,000 replacement cost, but your roof is 17 years old on a 25-year expected lifespan:
Insurance calculates the roof is roughly 68% depreciated
ACV payout: approximately $5,760
After deductible: $3,760-$4,760 actual payment
You’re left covering $13,000+ out of pocket for the same new roof.
Missouri-specific trends to watch:
Many insurers now switch policies to ACV-only coverage after roofs reach 15-20 years
Some carriers apply “roof surface payment schedules” that gradually reduce replacement coverage based on age
Older roofs increasingly face coverage limitations regardless of storm damage severity
Before storm season, check your declarations page for terms like “ACV,” “RCV,” “roof surface schedule,” or “roof coverage limitation.” Talk with your insurance agent about exactly what’s covered. We’re happy to review your policy language and explain how it affects your roof replacement options.
Roof Age, Maintenance, and When Insurers Refuse Full Replacement
Your roof’s age and condition heavily influence whether insurers will approve full replacement—even when storm damage is clearly documented.
Typical insurance age thresholds in Mid-Missouri:
Roof Age 0-10 years: Full RCV coverage typically available
Roof Age 10-15 years: Some carriers begin reducing coverage or adding limitations
Roof Age 15-20 years: Many policies shift to ACV-only for roof claims
Roof Age 20+ years: Most carriers pay ACV only; some won’t cover roof replacement at all
Common “wear and tear” arguments insurers use to reduce or deny claims:
Brittle, curling, or cracked shingles indicating age-related deterioration
Prior unreported damage from earlier storms
Multiple shingle layers (which violate most codes and void coverage)
Dented gutters or damaged siding from previous events not properly claimed
Wet insulation or water stains in the attic suggesting chronic leaks
Clogged gutters leading to ice dam damage
Maintenance habits that preserve your eligibility for full replacement:
Clean gutters annually (spring and fall)
Replace missing shingles promptly rather than waiting
Never install new shingles over old layers
Address small roof repairs before they become costly repairs
Document your roof’s condition with dated photos annually
Keep records of any maintenance or inspections performed
At CoMo Premium Exteriors, we can document your roof’s pre-storm condition with photos and a detailed report. This documentation often proves invaluable later if an insurance adjuster tries to blame new storm damage on age or neglect.
When Will Insurance Pay for Full Roof Replacement vs. Just Repairs?
Even with confirmed storm damage, your insurance company decides whether to fund spot repairs or approve a full roof replacement based on damage extent and pattern.
Hail damage scenarios:
Insurance adjusters assess hail damage by counting impacts per “square” (100 square feet of roof surface). When bruises, cracks, or granule loss appear scattered across multiple slopes rather than concentrated on one section, carriers more readily approve system-wide replacement. If your roof shows 8+ legitimate hail hits per square across several slopes, most adjusters will recommend replacement rather than trying to patch dozens of damaged areas.
Wind damage patterns:
Wind affects roofs differently than hail. Adjusters look for:
Missing shingles (especially along edges and ridges)
Creased or lifted shingles indicating wind uplift
Damaged ridge caps and hip caps
Compromised flashing around vents, pipes, and valleys
Hidden damage in valleys where debris collects
When high winds cause widespread uplift that compromises the shingle seal strips across the roof system, spot repairs often can’t restore watertight integrity. This justifies full replacement.
Building code requirements:
Here’s where local knowledge matters. If a Missouri city or county building code, including Columbia, Jefferson City, Osage Beach, or Sedalia, requires bringing the entire roof up to current standards when repairs exceed a certain percentage, your insurance must usually pay for those code upgrades if your policy includes Ordinance or Law coverage. This might include:
Proper drip edge installation
Ice and water shield in valleys and eaves
Adequate ventilation per current code
Specific underlayment requirements
Having your roofer present during the adjuster’s inspection makes all the difference. We can point out non-obvious damage, such as hidden issues in valleys, compromised flashing, or granule loss visible only at certain angles, and explain why repairs alone may not restore a watertight, code-compliant roof.
Step-by-Step: How to Pursue Roof Replacement Through Insurance in Missouri
Navigating the roof insurance claim process doesn’t have to be overwhelming. Here’s a practical, chronological roadmap from storm event to completed replacement, designed specifically for Mid-Missouri homeowners.
Step 1: Stay safe and document visible damage
After severe weather passes, photograph any visible damage from the ground. Look for missing shingles, debris in the yard, dented gutters, and damaged siding. Don’t climb on your roof—this is dangerous and unnecessary for initial documentation. Capture photos from multiple angles with timestamps.
Step 2: Schedule a free inspection with a local roofer
Contact a reputable roofing company like CoMo Premium Exteriors for a professional inspection. We’ll safely assess your roof and provide a thorough roof inspection with documentation of all damage found. This gives you honest information before you involve your insurance carrier.
Based on the inspection findings, determine if filing a claim makes sense. Minor damage that costs less than your deductible probably isn’t worth claiming. Significant storm damage affecting multiple areas likely warrants filing.
Step 4: File the claim promptly
Contact your insurance company to report the damage. Have your policy number ready, know the approximate storm date, and briefly describe the damage. Request a claim number and the adjuster’s contact information.
Step 5: Schedule the adjuster meeting with your roofer present
When the insurance adjuster comes to inspect, have your contractor there. At CoMo Premium Exteriors, we routinely meet adjusters from State Farm, Shelter, American Family, and other major insurance carriers throughout Mid-Missouri. We speak their language and ensure they don’t miss damage that affects your claim payout.
Step 6: Review the insurance estimate carefully
Once you receive the estimate, compare it to your contractor’s assessment. Look for missed damage, missing line items (starter shingles, ridge caps, flashing), and ensure code-required items are included.
Step 7: Complete the roof replacement
After agreeing on scope and payment, your roofing project proceeds. Quality workmanship matters because proper installation protects your investment and ensures manufacturer warranties remain valid.
Step 8: Collect final RCV payment
If you have RCV coverage, submit your final invoice to recover the depreciation withheld from your initial payment.
Missouri-specific timing:
Many carriers want roof claims reported within 30-60 days of storms, even though state law may technically allow longer. Waiting months gives insurers grounds to question whether damage came from that specific storm, making full replacement harder to secure.
Keep a simple claim log:
Track dates of calls, names of representatives, claim numbers, and any commitments made. Save all photos, inspection reports, and invoices in a folder labeled by storm date and city (e.g., “May-15-2024 Hail – Columbia”). This proper documentation protects you if disputes arise.
If your initial insurance estimate seems inadequate, we prepare supplemental documentation and can request additional review. Many homeowners receive significantly improved repair estimates after supplements are submitted with proper supporting evidence.
Out-of-Pocket Costs, Upgrades, and Financing Your New Roof
Even when insurance covers a roof replacement, Missouri homeowners will still have out-of-pocket costs and may choose to invest in optional upgrades that insurance won’t fully fund.
Understanding your deductible:
Missouri law (enacted in 2012) strictly prohibits roofing contractors from paying, waiving, or absorbing your insurance deductible. This is insurance fraud, and reputable companies won’t do it.
Typical Mid-Missouri deductibles:
Home Value $200,000: 1% Wind/Hail Deductible $2,000; 2% Wind/Hail Deductible $4,000
Home Value $300,000: 1% Wind/Hail Deductible $3,000; 2% Wind/Hail Deductible $6,000
Home Value $400,000: 1% Wind/Hail Deductible $4,000; 2% Wind/Hail Deductible $8,000
Many homeowners are surprised to learn they have percentage-based wind/hail deductibles rather than flat $500 or $1,000 amounts. Check your policy before storm season to avoid surprises.
Common upgrade opportunities:
Insurance typically pays to restore your home to “pre-loss condition.” If you want better materials or added features, you’ll contribute the difference:
Impact resistant shingles: Can reduce future premiums 10-20% and offer superior hail protection for Missouri weather
Upgraded synthetic underlayment: Better moisture protection and longer lifespan than felt paper
Improved ventilation: Ridge vents, soffit vents, or powered ventilation for better attic performance
Premium color or style changes: If you want architectural shingles upgraded from standard 3-tab
Considering metal roofing?
Many homeowners use insurance-funded replacement as an opportunity to upgrade to metal roofing. While insurance typically pays based on equivalent asphalt shingle replacement, you can apply that amount toward metal and pay the difference. Metal roofing offers superior longevity and weather resistance, particularly attractive given Missouri weather patterns.
We offer financing options and can show you good-better-best roof system packages so you can decide how far beyond the insurance scope you want to invest. Sometimes a modest upgrade delivers decades of additional protection and eliminates future roofing projects.
Why Work with a Local Mid-Missouri Roofer on Your Insurance Roof Replacement?
The contractor you choose strongly influences whether your successful roof insurance claim results in a high-quality, long-lasting roof or ongoing problems.
Advantages of choosing an established local company:
CoMo Premium Exteriors has served Mid-Missouri since 2010 with offices in Columbia, Jefferson City, Boonville, Moberly, Sedalia, and Lake of the Ozarks. We’re not storm chasers who appear after severe weather and disappear once checks clear. We’re your neighbors, invested in this community long-term.
Our extensive storm restoration experience means we’ve handled hundreds of hail claims and wind damage situations. We understand what adjusters look for, what documentation prevents underpaid claims, and how to navigate the claim process efficiently.
Triple manufacturer certifications matter:
As the only contractor in the region holding GAF Master Elite, Owens Corning Platinum Preferred, and James Hardie Elite Preferred certifications, we maintain the highest installation standards. These certifications require annual factory training, maintaining 4.0+ customer ratings, and meeting strict quality benchmarks.
For your roof replacement, this means:
Access to enhanced manufacturer warranties (including workmanship coverage)
Installation by crews trained in proper techniques
Quality craftsmanship that protects your investment for decades
Local code knowledge:
We know Boone, Cole, Callaway, and Camden County building codes and inspection requirements intimately. This ensures your replacement meets all local standards and passes inspection—something out-of-state crews often struggle with.
Contrast with storm chasers:
After major storms, out-of-state crews flood Mid-Missouri looking for quick work. Many are gone within weeks, leaving homeowners with no recourse if problems emerge. They may not carry proper insurance, understand local codes, or stand behind their work with meaningful warranties.
Missouri families deserve honest service from contractors who’ll be here in 10 years when questions arise.
Ready to understand your options?
Whether you’ve noticed missed damage after a recent storm or simply want to know where you stand before storm season, we offer free inspections throughout Mid-Missouri. We’ll give you honest answers about whether your situation likely qualifies for insurance-funded replacement. No pressure, just information you need to make smart decisions.
FAQs
Will insurance still replace my roof if it’s more than 15–20 years old?
Many Missouri carriers reduce coverage on older roofs. Some switch to ACV only after 10-15 years; others apply roof-surface payment schedules after 20 years that progressively reduce payouts.
If storm damage is clearly documented with photos, inspection reports, and ties to specific dated weather events, insurers often still pay something. However, the payout may be significantly reduced compared to a newer roof. A roof worth $18,000 new might only generate $5,000 to $8,000 in actual cash value payment after depreciation.
Homeowners with older roofs should review their policy now and consider:
Adding RCV endorsements if available
Planning proactive replacement before the next hail season
Understanding exactly what their coverage limits are
We inspect older roofs throughout Mid-Missouri and can advise whether yours is a strong candidate for insurance-backed replacement or better handled as a planned out-of-pocket upgrade before major damage occurs.
Does my Missouri policy have to pay for code upgrades during roof replacement?
If your policy includes Ordinance or Law coverage, insurers typically must pay to bring the roof up to current local building codes when replacing storm-damaged sections.
Common code-required items in Columbia, Jefferson City, and surrounding areas include:
Proper drip edge installation along all eaves and rakes
Ice and water shield in valleys, around penetrations, and along eaves
Adequate ventilation meeting current code requirements
Specific underlayment types and installation methods
Look for “Ordinance or Law” or “Code Upgrade” language on your declarations page. If you’re unsure, ask your agent directly.
We design replacement estimates to be fully code compliant from the start. When initial insurance estimates miss mandated upgrades, we prepare supplemental documentation explaining why these items are legally required and work to get them covered.
Can I choose my own roofing contractor for an insurance-paid replacement in Missouri?
Yes. Missouri homeowners generally have the right to choose any properly licensed and insured roofer. You are not required to use your insurer’s “preferred contractor” or recommended vendor.
Insurer-recommended contractors can be convenient, but they may prioritize keeping costs low over comprehensive repairs. It’s wise to compare their proposal with an independent estimate from a local company familiar with your specific situation.
When selecting a roofer for full replacement, verify:
Workmanship warranties backed by an established company
Experience with insurance claims in your area
We work with all major carriers in Mid-Missouri while advocating for thorough, long-lasting roof systems rather than bare-minimum repairs that might leave you vulnerable during the next storm.
How long do I have to file a roof replacement claim after a storm in Missouri?
While Missouri law may allow up to a year or more for property claims, many policies require roof-related wind and hail claims to be reported within 30-60 days or “promptly.”
Waiting months creates problems:
Insurers question whether damage came from that specific storm
Additional weathering obscures original damage patterns
Roof’s condition may deteriorate further, complicating assessments
Carriers may argue you failed to mitigate damage
After major events commonly reported in Mid-Missouri news (spring hail outbreaks, severe wind events), contact a roofer and your insurer as soon as you suspect damage.
We use storm data and inspection findings to help homeowners in Boone, Cole, and surrounding counties tie damage to specific, timely storm dates, which provides important documentation to support your roof claim.
What if the insurance estimate isn’t enough to cover a quality roof replacement?
Initial insurance estimates are often conservative. Adjusters may miss items like:
Starter shingles along eaves
Ridge caps and hip caps
Flashing work around vents, pipes, and chimneys
Code-required underlayment or ventilation
Emergency repairs or temporary repairs already made
The supplement process exists specifically for this situation. Your contractor submits additional documentation, including photos, manufacturer specifications, code references, and measurements, requesting higher payment based on what is actually required to complete the job properly.
Don’t accept a clearly inadequate estimate without consulting a roofing professional experienced in insurance work. Many homeowners who initially receive lowball estimates end up with proper funding after thorough supplement documentation is submitted.
We frequently prepare supplemental documentation and meet adjusters on-site to secure adequate funding for full, code-compliant roof replacements across Mid-Missouri. If the initial numbers don’t add up, we know how to make the case for what your roof actually requires.
Roofing Material Comparison: Asphalt vs. Metal vs. Designer Shingles
Key Takeaways
Asphalt shingles offer the lowest upfront cost and fastest installation, making them ideal for budget-conscious Missouri homeowners or those planning to sell within 5-10 years.
Metal roofing delivers the longest roof lifespan (40-70+ years) and best energy efficiency, though the higher upfront cost means it works best for forever homes.
Designer shingles bridge the gap with upgraded curb appeal, stronger wind resistance, and 25-35 year lifespans at a mid-range price point.
Mid Missouri weather, including hail, high winds, humid summers, and freeze-thaw winters, should drive your material choice more than appearance alone.
CoMo Exteriors installs all three options across Columbia, Jefferson City, Boonville, Moberly, and Lake of the Ozarks and offers free roof inspections with side-by-side estimates.
Introduction: How Missouri’s Climate Shapes Your Roofing Choice
Central Missouri doesn’t give roofs an easy life. Spring brings golf ball-sized hail that can shred roofing shingles in minutes. Summer pushes temperatures past 95°F, baking roofs under relentless UV exposure. Winter swings from freezing rain to sunny 50-degree days within 48 hours, creating the freeze-thaw cycles that crack materials and invite leaks. If you own a home in Columbia, Jefferson City, Lake Ozark, or anywhere in between, your roof faces roughly 40 freeze-thaw cycles every year, more than most homeowners realize.
When Missouri homeowners reach out to us for a roof replacement, three options come up in nearly every conversation: standard architectural asphalt shingles, metal roofing, and premium designer shingles. Each handles Missouri’s wild weather differently. Each fits different budgets and timelines. And each has trade-offs that matter more here than in milder climates.
This guide focuses on practical comparisons you can actually use: real 2025 cost ranges for Mid Missouri, typical lifespans under our weather conditions, maintenance needs, and how each roofing material performs when severe weather rolls through. We’ve installed hundreds of each type across the region as the only triple-certified contractor (GAF Master Elite, Owens Corning Platinum Preferred, James Hardie Elite Preferred) in Mid Missouri. There’s no single “best” roof. The goal is matching the right roofing material to how long you’ll stay, your budget, and what matters most to you, whether that’s curb appeal, energy savings, or storm resilience.
Architectural asphalt shingles dominate Mid Missouri rooftops, and for good reason. They’re the most popular roofing material nationwide, covering over 80% of U.S. homes, because they balance performance and price better than any alternative for most homeowners.
Lifespan in Missouri Conditions
Quality architectural shingles typically last 20-30 years in our climate. That’s assuming proper installation, adequate attic ventilation, and regular inspections. Older three-tab shingles (the flat, uniform-looking kind) tend to give out sooner, often 12-20 years, because they’re thinner and more vulnerable to wind uplift and hail damage.
What shortens asphalt shingle life in Missouri? Heavy hail strips away protective granules. Poor attic ventilation traps summer heat, accelerating material breakdown. Hot summers cause thermal expansion that eventually leads to cracking. After about 10 years, expect 5-10% granule loss annually as shingles age.
2025 Pricing for Mid Missouri
For a typical 1,800-2,200 square foot Columbia-area home (roughly 20-25 roofing squares), expect:
Standard architectural shingles: $350-$550 per square installed
Total project cost: $7,000-$13,750
Steeper pitches, complex roof lines, tear-off of multiple layers, and accessibility all move prices. A simple ranch costs less than a two-story with dormers and valleys.
Practical Pros
Fastest installation time (most crews finish in 1-2 days)
Widest color and style selection to match Missouri homes
Familiar look that buyers recognize and expect
Easier insurance claims approvals after hail. Adjusters know exactly how to assess damage
Replacement shingles widely available for repairs years later
Realistic Cons
More prone to granule loss and impact damage from hail
Absorbs solar heat, pushing cooling costs higher in July and August
May need one or more full replacements if you own the home 40+ years
Standard shingles struggle in winds above 90 mph without proper nailing
We typically recommend architectural shingles as the minimum standard for Missouri homes, not basic three-tab. For homeowners in hail prone regions around Columbia and Moberly, upgrading to Class 3 or Class 4 impact resistant shingles adds meaningful protection and often qualifies for insurance discounts.
Metal Roofing: Long-Term Durability and Energy Efficiency
Metal roofing has grown from 3% to roughly 10-15% of the residential market over the past two decades, and we’re seeing that trend accelerate across Mid Missouri. Homeowners increasingly value long term durability and energy efficiency, two areas where metal excels.
Common Metal Systems
The two metal options we install most frequently:
Standing seam metal roofing: Raised vertical seams with concealed fasteners create clean lines and superior water shedding. Best for modern aesthetics and maximum durability.
Metal shingles/stone-coated steel: Profiles that mimic traditional shingles, wood shake, or even slate tiles. Blends the longevity of metal with familiar neighborhood aesthetics.
Lifespan That Often Outlasts the Homeowner
Properly installed metal roofing lasts 40-70+ years in Missouri’s climate. Steel panels typically go 50-70 years. Aluminum (popular in lake properties) lasts 50+ years without rust concerns. Many homeowners realistically never need another roof replacement after going metal, making it a “one and done” decision for forever homes.
2025 Cost Reality
Metal costs roughly 2-3 times more upfront than architectural asphalt:
Metal roofing: $800-$1,800 per square installed
For a 2,000 sq ft Columbia or Jefferson City ranch: $16,000-$36,000
The wide range reflects material type (steel vs. aluminum vs. stone-coated), panel style, and roof complexity. Standing seam on a simple gable costs less than intricate cuts around multiple dormers and valleys.
Performance Advantages for Missouri Weather
Wind resistance: Standing seam panels resist uplift at 140-180+ mph when properly fastened, far exceeding typical Missouri storm winds
Hail resistance: Class 4 rated metal shows no penetration from 2-inch hail at testing speeds; however, cosmetic dents can occur with very large hail
Snow and ice: Metal’s slick surface sheds snow 70-90% faster than asphalt, reducing structural load and ice dams
Fire resistance: Class A non-combustible rating
Energy Efficiency in Hot Summers
This is where metal shines for Mid Missouri homes. Cool-roof coatings reflect 50-70% of solar heat (versus 5-30% for asphalt), reducing attic temperatures by 20-50°F. That translates to 10-25% lower cooling costs, potentially $100-300 per year in savings during months when temperatures climb into the 90s.
Modern reflective coatings like Kynar 500 also resist fading and chalking for 30+ years, maintaining that heat-reflecting performance and appearance.
Addressing Common Concerns
“Won’t it be noisy in rain?” Over solid decking with quality underlayment, a metal roof dampens sound to levels comparable with asphalt. This isn’t a barn roof over open rafters.
“What about rust?” Modern galvanized steel and galvalume coatings provide decades of corrosion resistance. Aluminum panels (lighter and ideal for lake homes) don’t rust at all.
“Can I walk on it safely?” Yes, though proper technique matters. We train crews on safe walking patterns and recommend calling us rather than DIY roof walks.
Insurance Considerations
Here’s something many homeowners don’t learn until after installation: some Missouri insurance policies exclude cosmetic hail dents on metal roofs. Your roof might function perfectly, but if it looks dimpled after a storm, your carrier may not cover replacement.
Before choosing metal, call your insurance agent. Ask specifically about cosmetic damage exclusions. We help clients review coverage and can provide product documentation to share with adjusters.
Designer & Premium Shingles: High-End Look Without Going Full Metal
Walk through newer Columbia subdivisions or lakefront homes around Lake of the Ozarks, and you’ll spot roofs with deeper dimension, richer shadows, and textures that mimic natural slate or wood shake. These are designer shingles—also called premium or luxury asphalt shingles—and they’ve become increasingly popular for homeowners wanting standout curb appeal without metal’s price tag.
What Makes Designer Shingles Different
Designer shingles aren’t just thicker traditional shingles. They feature:
Deeper dimensional profiles with layered patterns
Heavier weight (often 300-450 lbs per square vs. 200-250 for standard)
Stronger wind ratings—some products like Duration shingles with LayerLock technology warrant up to 130 mph
Enhanced granule technology like Scotchgard Protector to resist algae (those black streaks common in humid Missouri summers)
Warranties extending to 50 years through certified installers
2025 Pricing: The Middle Ground
Designer shingles sit clearly between standard architectural and metal:
Designer/premium shingles: $500-$875 per square installed
For a typical 2,000 sq ft Mid Missouri home: $10,000-$17,500
That’s roughly 40-60% more than basic architectural but still well under metal territory.
Pros of Going Premium
Dramatically upgraded curb appeal that stands out on the street
Stronger hail and wind resistance than entry-level asphalt
Better manufacturer warranties (often 30-50 years with proper installation)
Compatible with most existing roof framing—no structural upgrades needed
Algae resistance keeps roofs cleaner longer in Missouri’s humidity
Cons to Consider
Higher material cost than standard shingles
Still not as long-lived as quality metal (25-35 years vs. 50+)
Repair work gets complicated if colors or product lines discontinue years later
Heavier weight, worth checking truss capacity on older homes
We often recommend designer shingles for homeowners planning to stay 15-25 years who want a showpiece look but don’t need metal’s extreme longevity. They’re particularly popular around Lake of the Ozarks and in Columbia neighborhoods where appearance strongly influences resale value.
Side-by-Side Comparison: Asphalt vs. Metal vs. Designer Shingles
Sometimes you need the numbers next to each other. Here’s how these three options stack up across the factors Missouri homeowners care about most:
2025 Cost per Square:
Architectural Asphalt: $350-$550
Designer Shingles: $500-$875
Metal Roofing: $800-$1,800
Typical 30-35 Square Roof Cost:
Architectural Asphalt: $10,500-$19,250
Designer Shingles: $15,000-$30,625
Metal Roofing: $24,000-$63,000
Lifespan in Missouri:
Architectural Asphalt: 20-30 years
Designer Shingles: 25-35+ years
Metal Roofing: 40-70+ years
Wind Resistance:
Architectural Asphalt: Up to 110-130 mph
Designer Shingles: Up to 130-160 mph
Metal Roofing: 140-180+ mph
Hail Performance:
Architectural Asphalt: Vulnerable; Class 4 upgrades help
Designer Shingles: Better than standard; some Class 4
Metal Roofing: Excellent; cosmetic dents possible
Energy Efficiency:
Architectural Asphalt: Baseline; absorbs heat
Designer Shingles: Some cool-roof options
Metal Roofing: Best; reflects 50-70% solar heat
Maintenance Needs:
Architectural Asphalt: Annual inspection; repairs common
Designer Shingles: Similar to standard asphalt
Metal Roofing: Quarterly fastener check; minimal upkeep
Curb Appeal:
Architectural Asphalt: Familiar, widely accepted
Designer Shingles: Premium appearance
Metal Roofing: Modern or traditional options
Insurance Discounts:
Architectural Asphalt: 10-25% for Class 4 impact
Designer Shingles: 10-25% for Class 4 impact
Metal Roofing: 20-45% possible; check exclusions
A note on long term value: Over 50 years, a homeowner with asphalt might replace their roof twice ($21,000-$38,500 total). Metal’s single installation ($24,000-$63,000) achieves payback in 15-20 years through durability and energy savings. Designer shingles land in between, meaning one replacement is likely instead of two.
How These Materials Perform in Mid-Missouri Weather
Missouri weather doesn’t follow polite patterns. Spring hail storms dump ice from marble-size to golf ball-size across Columbia, Moberly, and Jefferson City. Summer thunderstorms bring straight-line winds exceeding 70 mph. Heavy rain tests every flashing and valley. And winter’s freeze-thaw cycles work their way into any weakness.
Asphalt in Action
Modern asphalt shingles handle Missouri summers adequately but struggle with repeated hail impacts. After 10-15 years of UV exposure and storm cycles, expect visible granule loss. Bruising from hail may not leak immediately but weakens shingles for future storms.
Impact-rated (Class 3 or Class 4) asphalt holds up significantly better. We’ve seen impact resistant shingles survive 1.75-inch hail with less than 5% granule loss, compared to 20%+ on standard products. For hail prone regions, the upgrade pays for itself in avoided claims and longer life.
Metal’s Storm Performance
Metal excels where asphalt struggles:
High winds: Properly fastened standing seam resists uplift well beyond Missouri’s typical storm winds
Hail: No penetration from 2-inch hail in testing; real-world performance shows 95% less structural damage than asphalt after major storms
Ice and snow: Fast shedding prevents ice dams and reduces weight stress on trusses
Heavy rain: Raised seams channel water efficiently with minimal retention
The caveat? Very large hail (2.5+ inches) can leave cosmetic dents, especially on thinner panels. The roof still functions perfectly, but appearance suffers.
Designer Shingles in Extreme Weather
Designer shingles’ added thickness and weight provide measurably better wind uplift resistance than standard asphalt. The layered construction also handles freeze-thaw cycles better on complex rooflines where ice tends to accumulate.
After major Mid Missouri storm events over the past decade, we’ve seen designer shingles outlast standard products on neighboring homes. They’re not metal-tough, but they’re noticeably more resilient than entry-level options.
Cost, Warranty, and Insurance: Looking Beyond the Bid Price
The lowest bid isn’t always the best value. When choosing between asphalt, metal, and designer shingles, smart homeowners look at 15-30 year cost, not just initial cost.
Warranty Differences Matter
Manufacturer warranties vary dramatically:
Standard architectural: 25-30 year limited coverage, often materials only
Designer shingles: 30-50 year coverage, sometimes including labor when installed by certified contractors
Metal systems: 30-50 year paint/finish warranties, 40+ year structural warranties
The key phrase is “certified contractor.” Manufacturers like GAF and Owens Corning offer their best warranties only when their trained installers do the work. That’s one reason our triple certified status matters for customers, as it unlocks coverage that generic contractors cannot provide.
Workmanship Warranties
Materials only fail when installation fails first. That’s why CoMo Exteriors offers a limited lifetime workmanship warranty. If our installation causes a problem, we fix it, period. Ask any contractor what happens if their work fails after two years. The answer tells you a lot.
Insurance Considerations in Missouri
Insurance intersects with roofing material choices in ways most homeowners don’t expect:
Impact-resistant discounts: Class 4 rated shingles (asphalt or designer) often qualify for 10-25% premium reductions
Metal discounts: Some carriers offer 20-45% savings for metal, especially in hail-heavy areas
Cosmetic exclusions: Watch for policies excluding cosmetic hail damage on metal, which is common in Missouri
Claim patterns: Insurance claims for hail damage on asphalt get approved routinely because adjusters know exactly how to assess them. Metal claims can get complicated.
Before choosing materials, call your insurance agent. Ask about discounts, exclusions, and what happens if your new roof gets hail damage next year. We regularly help homeowners review policies and document pre-storm roof conditions to protect your home and investment.
Which Roofing Material Fits Your Situation?
Rather than declaring a winner, let’s match materials to real homeowner situations we see across Mid Missouri.
Choose Asphalt Shingles If…
You’re planning to sell within 5-10 years and want maximum ROI without overspending
Budget matters most and you need a reliable roof at the lowest initial cost
You manage rental properties in Columbia or Jefferson City where tenants don’t care about premium aesthetics
Your roof has a simple design without complex angles that would inflate labor costs for premium materials
You want easy repairs, and replacement shingles will be available at any supplier for decades
Choose Metal Roofing If…
This is your forever home and you never want to think about roof replacement again
You own rural property around Lake of the Ozarks or Boone County where energy savings and minimal maintenance matter
Hot summers are uncomfortable and you want to reduce cooling costs by 10-25%
You value peace of mind during severe weather season knowing your roof handles 140+ mph winds
Long term durability justifies higher upfront cost in your financial planning
Choose Designer Shingles If…
Curb appeal matters in your neighborhood and you want your home to stand out
You’re planning to stay 15-25 years, which is long enough to justify the upgrade, not long enough to need metal’s extreme longevity
You want the high-end look of slate roofing or wood shake without their maintenance demands or price
Your home’s architecture shows off the roof prominently and benefits from dimensional texture
You want improved wind and hail resistance without jumping to metal pricing
Hybrid Options
Not every roof needs one material. We frequently design combinations:
Metal on low-slope porch roofs (where it performs best) with architectural or designer shingles on the main structure
Metal accents on dormers or entryways paired with composite shingles elsewhere
Standing seam on modern additions joined to designer shingles on traditional sections
These combinations balance cost, performance, and appearance. Proper flashing where materials meet is critical—but that’s exactly what quality installation ensures.
Why Installation Quality Matters as Much as Material
Here’s a truth that doesn’t appear on any manufacturer brochure: even the best asphalt, metal, or designer shingle system will fail early if installed poorly. Missouri’s storm cycles punish shortcuts within a few seasons.
Critical Installation Details
What separates a roof built to last from one that leaks in three years?
Proper underlayment: Ice and water shield placement in valleys, around penetrations, and along eaves prevents leaks during ice dams and wind-driven rain
Quality underlayment throughout: Synthetic underlayment outperforms felt paper in our humidity
Correct flashing: Chimneys, valleys, skylights, and wall transitions need properly lapped, sealed metal flashing—not caulk alone
Ventilation balance: Intake at soffits and exhaust at ridges prevents moisture buildup and premature shingle failure
Our GAF Master Elite, Owens Corning Platinum Preferred, and James Hardie Elite Preferred certifications require annual factory training and maintaining high customer ratings. This isn’t a sticker on a truck. It’s ongoing verification that our crews install products correctly.
For customers, certification unlocks enhanced manufacturer warranties that generic contractors can’t offer. A 50-year material warranty means nothing if improper installation voids coverage in year three.
Before You Sign Any Contract
Ask potential contractors:
Proof of specific manufacturer certifications (not just “we’ve done lots of roofs”)
Local references in Columbia, Jefferson City, or your specific area
Proof of insurance (liability and workers’ comp)
Written warranty details, including both manufacturer and workmanship
We offer free roof inspections, detailed written proposals explaining every cost, and clear communication from first visit through final walkthrough. No surprises, no pressure.
Working With a Local Mid-Missouri Roofing Expert
There’s value in working with a roofing partner who understands Central Missouri specifically, not a national franchise following generic playbooks. We know Columbia building codes. We know which HOAs around Jefferson City have roofing restrictions. We know how Lake of the Ozarks properties differ from Moberly homes. And we’ve watched how Missouri weather actually treats different materials over 25+ years.
What to Expect From CoMo Exteriors
Our process is designed to educate, not pressure:
Free inspection: We document your current roof condition with photos and explain what we find in plain English
Side-by-side recommendations: You’ll see asphalt, designer, and metal options priced for your specific roof, not generic estimates
Transparent pricing: Line-item proposals show exactly what you’re paying for
Insurance support: If storm damage is involved, we help with documentation, meet with adjusters, and explain scope differences between bids
We want you to understand your options well enough to make a confident decision, whether that’s with us or someone else.
Ready to Compare Your Options?
Schedule a no-obligation roof evaluation by calling or completing our online form. We’ll walk your roof, document its condition, and provide side-by-side estimates for the materials that make sense for your home and timeline. Get your free estimate and see exactly what each option costs for your specific situation.
FAQs
How do I know if my existing roof is a candidate for a metal overlay?
In some cases, metal can be installed over a single layer of asphalt, which saves tear-off costs. However, Mid Missouri building codes, roof weight limits, and manufacturer guidelines all need verification first.
We typically recommend a full tear-off for most homes. Why? Removing old materials lets us inspect decking for hidden hail damage or moisture problems that would compromise a new roof. It also ensures proper ventilation and underlayment placement for maximum durability.
A free on-site inspection is the only reliable way to determine if an overlay makes sense for your specific home.
Are designer shingles worth the extra cost compared to architectural asphalt?
For homeowners planning to stay 15+ years, designer shingles often justify their premium through improved appearance, better wind resistance, and longer warranties. In neighborhoods where curb appeal strongly affects resale value, the visual upgrade translates to real equity.
For rental properties or homes likely to be sold within 5-7 years, standard architectural shingles typically provide better return on investment. The buyer may not pay extra for your premium roof.
We can price both options on your specific roof so you see the actual dollar difference before deciding.
Will a new metal or designer shingle roof lower my home insurance premium?
Some insurers offer 10-25% discounts for Class 4 impact-resistant shingles. Metal roofing may qualify for larger discounts (20-45% in some cases), particularly with carriers that recognize its storm resilience.
However, policies vary widely across Missouri carriers. Before choosing materials, get written confirmation from your agent about potential discounts and any cosmetic damage exclusions that might affect future claims.
We can provide product documentation and impact-rating specifications to share with your insurance agent during this process.
How far in advance should I plan my roof replacement in Mid-Missouri?
Start gathering estimates 1-3 months before you want work completed, especially if you’re targeting spring or summer. Storm season keeps roofing crews busy, and popular materials occasionally face supply delays.
Weather, material availability, and insurance approvals (if applicable) all affect scheduling. Earlier planning typically means better timing and less stress.
If you’re dealing with active leaks or multiple leaks, we can often handle emergency tarping quickly while planning the full replacement.
Can I mix materials, like using metal on porches and asphalt on the main roof?
Mixed-material roofs are common across Mid Missouri and can provide both style variety and cost savings. Metal works exceptionally well on low-slope porch roofs where water shedding matters most, while architectural or designer shingles cover the main structure at lower cost.
The critical factor is proper flashing and transition details where different materials meet. Poorly executed transitions leak, while properly done, they last decades.
We regularly design and install these hybrid solutions and can show photos of past projects around Columbia and nearby communities during your consultation.
Labor Cost for Roof Installation: What Are You Actually Paying For?
Key Takeaways
In Mid-Missouri (Columbia, Jefferson City, Lake of the Ozarks), labor typically makes up about 50%–70% of your total roof installation cost.
You’re paying for skilled crews, safety measures, project management, and warranty support, not just “hours on a roof.”
Roof size, pitch, height, and material selection (asphalt shingle vs. metal, etc.) are the biggest drivers of roofing labor costs.
Hidden work like deck inspection, flashing installation, and proper ventilation require specialized skills that prevent leaks and protect your investment.
CoMo Exteriors offers free, detailed, line-item estimates so homeowners can see exactly how labor is calculated on their own roof.
When you look at roof replacement estimates, the labor line can seem surprisingly large. For many homeowners in Columbia, Jefferson City, and surrounding Mid-Missouri communities, that number raises an obvious question: what exactly am I paying for?
The short answer is that roofing labor covers far more than someone nailing shingles to your roof. It includes tear-off of your old roof, safety equipment, skilled craftsmanship at critical areas, project supervision, and the warranty support that stands behind the work for years to come. Let’s walk through what goes into that labor cost so you can evaluate your quotes with confidence.
What Does Roofing Labor Actually Include?
The word “labor” on an estimate covers far more than nail guns and shingles. It represents every hour of skilled and general work required to safely remove your existing roof and install a new one that will protect your home through Mid-Missouri’s hail, wind, and freeze-thaw cycles.
Visible labor on your roof includes:
Tear off and removal of old shingles, underlayment, and damaged flashing
Deck inspection to identify soft or rotted sheathing that needs structural repairs
Installation of new underlayment and ice & water barrier in valleys and around penetrations
Flashing work at walls, chimneys, skylights, and step areas
Shingle or panel installation, including starter strips, field courses, and ridge caps
Ventilation components like ridge vents or box vents
Final clean-up with magnetic sweepers to catch every stray nail
Behind-the-scenes labor you don’t always see:
Loading and unloading materials from delivery trucks
Staging the job site and positioning materials on the roof
Daily setup and teardown of ladders, scaffolding, and safety equipment
Supervising quality control and crew safety throughout the project
Skilled tasks like flashing installation, valley work, and chimney detailing cost more per hour than basic shingle laying because they’re where roofs fail when done poorly. These areas require precision to prevent leaks and future damage, exactly the kind of extra labor that separates quality craftsmanship from a rushed job.
When you hire CoMo Exteriors, part of your labor cost funds trained, certified installers and foremen who follow manufacturer specifications. That attention to installation methods keeps your warranties valid and your roof performing as designed.
How Much of Your Roof Cost Is Labor vs. Materials?
For a typical asphalt shingle roof replacement in Mid-Missouri during 2025–2026, you can expect roughly 50%–70% of your total cost to go toward labor, with 30%–50% covering materials. That ratio varies based on roof complexity, pitch, and the roofing material you choose.
Here’s a concrete example:
A 1,700 square foot Columbia, MO home with an asphalt shingle roof might total around $8,000–$12,000
Of that amount, roughly $4,000–$8,000 represents labor costs
The remaining $3,000–$5,000 covers shingles, underlayment, flashing, vents, and other materials
Why does labor take such a large portion?
Higher-skill systems like standing seam metal roofing or a tile roof push the labor percentage up because installation takes longer and requires specialized crews
Complex roofs with multiple valleys, dormers, or skylights demand more cutting, fitting, and detailed work
Old roof removal adds significant labor time, especially when multiple layers of existing roofing material need to come off
CoMo Exteriors provides line-item estimates that separate labor, materials, and other project costs. You’ll see exactly how much of your quote covers roofing labor versus the shingles and components going onto your roof.
Roofing Labor Cost Ranges by Material Type
Different materials require different skill levels and installation time. Here’s how labor costs typically break down by material type, measured in cost per square (one roofing square equals 100 square feet):
Asphalt shingle roof:
Labor cost per square foot installed runs lower than other materials
Mid-Missouri rates typically fall in the $250–$350 per square range for straightforward installations
Simple gable roofs on single-story homes sit at the lower end; steeper pitches and multi-story homes push costs higher
Metal roofing:
Labor rates run higher because panels must be measured, cut, and fastened precisely
Standing seam systems are slower and more technical than corrugated metal
Expect to pay a premium for the craftsmanship required to handle expansion, contraction, and proper sealing
Tile and specialty products:
These premium materials require careful handling due to weight and fragility
May need extra structural considerations, adding labor time
Crews are often larger or timelines longer, increasing overall cost per square foot
Labor varies widely based on roof size, number of penetrations, and condition of existing layers
New construction labor is typically lower since there’s no tear-off involved
Replacement projects with old materials to remove add significant crew hours
Factors That Drive Roofing Labor Costs Up or Down
Mid-Missouri features everything from simple single-story ranches to two-story homes with dormers and multiple roof sections. These key factors determine where your project lands on the labor cost spectrum:
Roof size: Larger roofs mean more squares to tear off and install. An extra 500–1,000 square footage can add a full day or more of crew time, directly increasing your labor line item.
Roof pitch and height: Steeper or multi-story roofs require extra safety equipment, harnesses, and slower movement. The same number of squares on a steep roof takes longer than on a low-slope patio roof.
Complexity and features: Valleys, hips, dormers, chimneys, and skylights require more cutting, flashing, and detailed work. A straightforward gable roof costs less in labor than one with several elements demanding precision.
Existing condition: Multiple layers of old shingles, rotten decking, or damaged flashing increase tear-off and repair labor. CoMo Exteriors checks for these during our initial inspection so they aren’t surprise costs on install day.
Accessibility: Tight driveways, limited parking, or long carries for materials (common in older Columbia neighborhoods) can slow the crew and add to labor time.
Seasonal demand: Busy storm seasons in Mid-Missouri, spring hail and summer wind events, may affect crew availability. Higher demand can extend project timelines, and some roofing contractors adjust rates during peak periods.
What You’re Paying For Beyond Hourly Wages
Your labor line item covers more than the wages paid to workers on your roof. It also includes the overhead that allows a reputable local roofing company to do the job safely and stand behind it for years.
Direct wages: Installers, foremen, and general laborers including their training, certifications, and local experience navigating Missouri’s challenging weather patterns.
Burden and benefits: Payroll taxes, workers’ compensation insurance, liability coverage, and ongoing safety training. These protect you if an accident occurs on your property.
Equipment and safety: Ladders, scaffolding, fall protection systems, compressors, dump trailers, and tool maintenance. These costs are built into labor rates rather than billed as separate hidden fees.
Project management: Scheduling crews, coordinating material deliveries, communicating with homeowners, handling permit fees and inspections, and managing punch lists. Someone has to keep your project running smoothly.
Warranty support: CoMo Exteriors includes a limited lifetime workmanship warranty. The long-term ability to service that warranty, coming back years later if an issue arises, is built into what you pay for labor today.
Labor for Tear-Off, Repairs, and Installation: Where the Time Goes
Here’s how labor hours are actually spent on a typical roof replacement in Mid-Missouri:
Day 1 – Setup and tear-off: Crew arrives, protects landscaping and driveways with tarps, sets up safety gear, then begins removing old shingles, felt, nails, and flashings. Old roof removal on a 2,000 square foot home typically takes most of a full day.
Deck inspection and repairs: Once old materials are off, the crew checks for soft or rotted sheathing. Replacing bad sheets of OSB or plywood adds carpentry labor, usually priced at $75–$125 per sheet depending on accessibility.
Underlayment and flashings: Installing synthetic underlayment across the deck, applying ice & water barrier in valleys and around penetrations, and fitting new metal flashing at walls, chimneys, and step areas. This work prevents leaks at vulnerable points.
Shingle or panel installation: Laying out starter strips, installing field shingles or metal panels course by course, adding ridge caps, and integrating ventilation components. This is the bulk of hands-on install time.
Clean-up and walkthrough: Magnet sweeping for nails, loading debris into dump trailers, and conducting a final inspection with the homeowner or foreman to verify every workmanship detail meets standards.
How Local Labor Rates in Mid-Missouri Affect Your Roof Cost
National roofing labor averages provide a starting point, but what homeowners actually pay in Columbia, Jefferson City, Boonville, Moberly, and Lake of the Ozarks reflects local factors.
Mid-Missouri labor rates are influenced by local cost of living, availability of skilled roofers, and seasonal storm demand rather than big-city pricing. You’ll generally find rates slightly below what homeowners pay in major metro areas, but geographic location still matters.
After major hail or wind events, labor demand spikes as roofs across Columbia and surrounding towns need replacement at the same time. This can tighten schedules and extend project timelines as every local roofing contractors in the area works through a surge of claims.
Established companies like CoMo Exteriors maintain consistent crews year-round instead of relying on short-term storm chasers who may disappear after collecting payment. That stability affects how we price labor. We’re investing in people who’ll be here to service your roof for decades.
While rates shift over time (material and labor costs both rose across the industry between 2024 and 2026), transparent pricing through written estimates keeps you in control of your budget effectively.
How CoMo Exteriors Estimates and Explains Labor on Your Roof Quote
We believe you should understand every dollar on your estimate. Here’s how we build labor costs into your proposal:
Free on-site inspection: We start by taking detailed roof measurements, photographing any damage, and noting pitch, stories, and number of penetrations so labor is estimated accurately based on your home’s location and specific conditions.
Square-by-square calculation: We determine the number of “squares” (100 square foot sections) and apply different labor assumptions for steep vs. low-slope areas, valleys, and specialty details like skylights or chimneys.
Itemized breakdown: Our estimates separate labor, materials, and any expected deck repairs or code upgrades. You see what each piece costs instead of a single lump-sum number that hides the actual cost breakdown.
Insurance claim support: When the roof is a homeowners insurance claim (common after Mid-Missouri hailstorms), we explain how the insurance scope breaks out labor vs. materials and advocate for fair allowances that cover real-world crew time, not theoretical minimums.
Contact us for a no-obligation written estimate and see a real example of how labor is itemized for your specific home. We’re happy to walk through the detailed breakdown line by line.
Tips to Make Sure You’re Getting Fair Roofing Labor Pricing
Getting multiple quotes is smart. Here’s how to evaluate them:
Get at least three estimates that show labor separately from materials. Be cautious of quotes far below the local average. They may indicate corners being cut or hidden fees appearing later.
Ask who will be on your roof. In-house crews vs. subcontractors? How many workers? How long will the project take? These simple questions help you verify whether the labor line item makes sense.
Confirm insurance coverage. Proper liability and workers’ compensation insurance protects you. Underinsured crews may offer lower labor pricing at higher risk to you as the homeowner.
Clarify how surprises are handled. Ask how the company addresses unexpected deck repairs or extra labor discovered after tear-off. The estimate should explain these potential surprise costs clearly.
Verify warranty terms in writing. A strong workmanship warranty has real value built into the labor cost. Know what you’re getting and how long it lasts.
Don’t assume lowest price means best value. The cheapest bid may reflect rushed work, inexperienced crews, or skipped steps that cost you more in roof repairs down the road.
When Higher Labor Cost Can Actually Save You Money
The cheapest labor isn’t always the best value, particularly with Mid-Missouri’s wind, hail, and freeze-thaw cycles testing every roof.
Proper installation prevents bigger problems: Roofs installed correctly are less likely to leak or fail in storms. Avoiding interior damage to drywall, insulation, and flooring can save thousands compared to the cost difference between a budget crew and a quality one.
Manufacturer warranties require proper installation: Roofs installed to manufacturer specifications may qualify for enhanced warranties. If a covered issue occurs years later, that warranty can save you the full cost of repairs that would otherwise come out of pocket.
Experienced crews work efficiently: What looks like higher labor rates may still be competitive once you factor in fewer days on-site, less risk of callbacks, and no corner-cutting that leads to early failure of your new roof.
Long-term value over lowest bid: At CoMo Exteriors, we focus on 30-year solutions, not 15-year patches. Many of our roof replacement projects in Columbia and surrounding towns involve fixing problems caused by rushed, low-cost labor from prior installations. Paying for quality craftsmanship the first time often costs less overall.
FAQs
Is it normal for labor to cost more than the roofing materials?
For many asphalt shingle roofs in 2025–2026, labor is often equal to or greater than the shingle cost, especially on steep or complex roofs. This reflects the skilled work involved: tear-off, proper installation, flashing, safety measures, and supervision. Materials alone don’t keep your roof watertight; the labor that installs them correctly does.
Can I save money by doing some of the roofing work myself?
While some homeowners consider DIY tear-off or cleanup, most manufacturers require licensed installation to keep warranties valid. Roofing involves significant fall risk and specialized equipment. CoMo Exteriors recommends leaving both old shingles removal and new shingles installation to trained crews for safety and insurance reasons.
Why do labor estimates sometimes change after you start the job?
Once old roofing is removed, hidden issues occasionally appear, such as rotten decking, improper prior repairs, or structural damage that wasn’t visible during inspection. CoMo Exteriors documents these findings with photos, explains extra labor and material needs clearly, and gets homeowner approval before proceeding with additional work.
Does the time of year affect how much I’ll pay for roofing labor?
Peak roofing seasons in Mid-Missouri are typically spring and summer, especially after major storms when demand surges. Labor rates may be more flexible during slower periods, but weather windows and manufacturer temperature requirements still guide when certain products like drip edges and underlayment can be properly installed.
How can I see exactly how much of my quote is labor?
Request a written, itemized estimate that clearly separates labor, materials, and any expected repairs. Avoid accepting a single lump-sum number without knowing what’s included. CoMo Exteriors provides this level of detail on every proposal and is happy to walk line-by-line through the labor assumptions for any roof in Columbia, Jefferson City, Boonville, Moberly, Lake of the Ozarks, or Sedalia. Contact us for a free estimate to see exactly how roofing costs break down for your home.
Roof Replacement Cost Breakdown in Mid Missouri – 2026 Guide
Key Takeaways
A typical 1,700–2,000 sq. ft. asphalt shingle roof replacement in Mid-Missouri runs approximately $8,000–$15,000 in 2026, or roughly $4.25–$7.50 per square foot installed.
Labor accounts for over half of your total cost in Mid-Missouri, especially on steep, two-story roofs common around Columbia and Jefferson City.
Material choice (basic architectural asphalt vs. impact-resistant shingles vs. metal), roof complexity, and hidden wood or decking repairs are the biggest cost drivers affecting your final bill.
Full tear-off of your existing roof typically adds $1,500–$2,500 to the project but is required by code in most situations and recommended for long-term performance.
CoMo Premium Exteriors offers free, no-pressure inspections, detailed written estimates, and financing options for Mid-Missouri homeowners ready to understand their roof replacement project costs.
Understanding Roof Replacement Costs in Mid-Missouri (2026 Overview)
If you’re researching roof replacement in 2026, you’ve probably noticed that pricing looks different than it did even a few years ago. Material costs have climbed steadily since 2020, driven by supply chain adjustments and increased demand for roofing materials following active storm seasons across Mid-Missouri. Updated building codes in cities like Columbia and Jefferson City also require specific underlayment, ventilation, and installation practices that weren’t universal a decade ago. These changes protect your home but add to the overall cost.
Most Mid-Missouri asphalt shingle roof replacements in 2026 fall between approximately $8,000 and $18,000, depending on your home’s size, roof pitch, and any material upgrades you choose. That’s a wide range, but the variation makes sense when you consider that a simple 1,500 square foot ranch home in Moberly has very different requirements than a sprawling lake house near Camdenton with steep pitches and multiple dormers.
This guide focuses specifically on residential roofs in towns we serve every week: Columbia, Jefferson City, Boonville, Moberly, Lake of the Ozarks, and surrounding communities. We’ll break down costs by square footage, roofing material, labor, tear-off requirements, and extras, using real-world numbers we see in the field as a triple-certified contractor. Our goal is to educate first so you can confidently compare any contractor’s estimate, not to pressure you into choosing CoMo Premium Exteriors. When you understand how roof replacement costs work, you’re in control of the process.
Average Roof Replacement Cost in Mid-Missouri for 2026
The term “average cost” can be misleading because every roof is different. However, understanding the typical range gives you a solid starting point for budgeting and helps you recognize when an estimate seems unusually high or suspiciously low.
For a typical 1,700–2,000 square foot asphalt shingle roof in Mid-Missouri, expect to pay around $9,000–$14,000 in 2026. This range includes tear-off of your old roof, new synthetic underlayment, standard flashing, drip edges, and basic ventilation, essentially everything needed for a code-compliant, warranty-backed installation.
Here’s how costs typically break down by home size at current 2026 rates:
1,500 sq. ft. roof area (common ranch homes): $6,400–$11,250 total
2,000 sq. ft. roof area (typical split-level or two-story): $8,500–$15,000 total
2,500 sq. ft. roof area (larger two-story homes): $10,625–$18,750 total
These figures assume installed costs of $4.25–$7.50 per square foot, which covers materials, labor, and standard accessories. Roofs with complex hips, valleys, and dormers, common in newer Columbia subdivisions, land at the higher end of these ranges. Simple ranch roofs in towns like Moberly or Boonville often land at the lower end.
Premium options like Class 4 impact-resistant shingles or standing seam metal will push these ranges higher. However, these materials may qualify for insurance discounts and deliver longer lifespans that offset the initial investment over time.
Cost Per Square Foot and Per “Square” Explained
When roofing contractors talk pricing, you’ll hear two measurements: cost per square foot and cost per “roofing square.” Understanding both helps you make sense of estimates.
A roofing square equals 100 square feet of roof coverage. So if your home has 2,000 square feet of roof area, that’s 20 squares. This measurement allows contractors to provide standardized pricing that accounts for roof size in a meaningful way.
In Mid-Missouri for 2026, installed price ranges typically look like this:
Architectural Asphalt: $425–$750 per square (100 sq. ft.) — $4.25–$7.50 per square foot
Entry-Level Metal: $900–$1,400+ per square — $9.00–$14.00+ per square foot
Per-square pricing usually includes materials, basic accessories, and labor. However, it may or may not include tear-off, rotten decking replacement, and permits, so always ask what’s included before comparing estimates.
Here’s a quick example: a 20-square roof (2,000 sq. ft. of roof area) with standard architectural asphalt shingles at $550 per square would cost approximately $11,000 before any unusual repairs or upgrades.
Only a detailed roof inspection and written estimate will reveal your exact square count and final price. Tax records show your home’s interior square footage, but actual roof area is typically 10–30% larger due to slope and overhangs.
Roof Replacement Cost by Roof Size, Height, and Pitch
Your roof’s “size” is larger than your home’s interior square footage because of slope, overhangs, and architectural details. A 2,000 square foot home might have 2,200 to 2,600 square feet of actual roof coverage depending on pitch and design.
Low-slope ranch homes around Columbia or Boonville usually cost less per square than steep, two-story roofs near Lake of the Ozarks. The difference comes down to safety and time: steeper roofs require additional fall protection, specialized equipment, and slower, more careful work.
Roof pitch is measured as rise over run (for example, 6/12 means the roof rises 6 inches for every 12 inches of horizontal distance). Here’s how pitch affects pricing:
Low pitch (3/12 to 5/12): Standard pricing, walkable for experienced crews
Moderate pitch (6/12 to 8/12): Slightly higher labor costs, requires more careful movement
Taller homes also cost more because they require additional safety equipment, staging, and ladder work. If your home has multiple roof planes with valleys, skylights, or chimneys, expect higher pricing because each detail adds cutting time, flashing complexity, and material waste.
Realistic 2026 Size-Based Cost Ranges for Mid-Missouri Homes
Based on what we see regularly across our service area, here are typical 2026 asphalt shingle replacement costs for different home types:
Standard two-story (~2,500 sq. ft.): $12,500–$16,500
Large custom/estate (~3,500+ sq. ft.): $22,000–$35,000+
Many homes in Columbia and Jefferson City fall in the 18–26 square range, with total costs typically between $9,000 and $16,000 including tear-off and standard accessories. Very large custom homes around Lake of the Ozarks can easily exceed $20,000–$30,000, especially with metal roofing or designer shingles.
Don’t rely solely on the square footage from your tax records. At CoMo Premium Exteriors, we always measure the roof directly, using satellite tools plus on-site verification, to prevent surprises and ensure accurate pricing on your new roof.
Roof Replacement Cost by Material (Asphalt, Impact-Resistant, Metal & More)
Material selection is the single biggest controllable factor in both your new roof cost and its expected lifespan. Mid-Missouri’s combination of hail, wind, and freeze-thaw cycles makes material choice especially important, because what works in Arizona won’t necessarily hold up here.
Here’s an overview of the primary roofing material options available for Mid-Missouri homes in 2026:
Standard Architectural Asphalt: $4.25–$7.50 per sq. ft., 20–30 years lifespan, best value for most homeowners
Class 4 Impact-Resistant Asphalt: $5.00–$8.50 per sq. ft., 25–35 years lifespan, great for hail-prone areas with insurance savings
Standing Seam Metal: $8.00–$14.00 per sq. ft., 40–70 years lifespan, ideal for long-term owners and lake homes
Designer/Premium Shingles: $7.00–$12.00 per sq. ft., 30–50 years lifespan, for curb appeal and premium aesthetics
Synthetic Slate/Shake: $9.00–$16.00 per sq. ft., 40–60 years lifespan, high-end look with lower weight than real stone
Architectural asphalt shingles dominate in Mid-Missouri for good reason: they offer the best balance of cost, durability, and storm performance for our climate. Metal roofing is increasingly popular in rural areas and at the Lake of the Ozarks for longevity and hail resistance, though with higher initial investment.
Asphalt Shingles (Most Common in Mid-Missouri)
The vast majority of Mid-Missouri homes in 2026 use architectural (laminated) asphalt shingles, with installed costs typically around $4.25–$7.50 per square foot. These multi-layer shingles provide better wind resistance, dimensional appearance, and longevity compared to older three-tab styles.
Under typical Mid-Missouri weather conditions, expect a standard asphalt shingle roof to last 20–30 years, with premium lines from manufacturers like GAF and Owens Corning sometimes extending that range further when properly installed and ventilated.
You can upgrade to Class 4 impact-resistant asphalt shingles, which typically add $30–$60 per square to your project cost. Many homeowners find this upgrade worthwhile because it often qualifies for insurance premium discounts, sometimes paying for itself over the roof’s life while providing better hail protection.
As the only triple-certified contractor in Mid-Missouri (GAF Master Elite, Owens Corning Platinum, James Hardie Elite), CoMo Premium Exteriors can offer extended manufacturer warranties on many asphalt systems, warranties that require certified installation to remain valid.
For most local homeowners, architectural asphalt shingles remain the most affordable roofing material that still delivers solid performance against our storms, making them the smart choice when balancing upfront cost against long-term value.
Metal Roofing (Standing Seam & Metal Panels)
Metal roofing has gained significant popularity across Mid-Missouri, particularly for rural properties and lake homes where durability matters most. The most common roofing material options in metal include standing seam steel panels and high-quality exposed-fastener systems.
In 2026, expect installed costs in the $8.00–$14.00 per square foot range for quality metal roofing, depending on profile style, steel gauge, and roof complexity. Standing seam systems (with concealed fasteners) cost more than exposed-fastener panels but offer superior weather performance and longer warranties.
The advantages of metal are compelling for many homeowners:
Lifespan: 40–70 years with proper installation
Hail resistance: Far superior to standard asphalt
Fire resistance: Non-combustible rating
Maintenance: Minimal ongoing needs
Energy efficiency: Reflects heat, potentially lowering cooling costs
Metal often makes sense when you plan to stay in your home long-term or want maximum durability against the hail, wind, and heavy snow loads common in central Missouri. The higher cost compared to asphalt should be weighed against potential energy savings, fewer replacement cycles over your lifetime, and the peace of mind that comes with knowing your roof can handle whatever storms come.
High-end options like designer asphalt shingles, synthetic shake or slate, and real slate tiles represent niche choices in Mid-Missouri, selected primarily for aesthetics and prestige rather than necessity.
Broad 2026 cost ranges for premium materials run $9.00–$20.00+ per square foot installed. Real slate tiles and clay tiles can exceed even these figures, particularly when structural modifications are required.
Some important considerations for premium materials:
Heavy materials (real slate, clay tiles, copper roofing) may require structural evaluation and possible reinforcement of rafters or trusses, adding significantly to total cost
Installation techniques for premium systems are more complex, requiring specialized training
Warranties and maintenance requirements differ substantially from standard asphalt
If you’re considering premium materials, work with a roofing contractor experienced in these systems. At CoMo Premium Exteriors, we can install premium systems but focus on aligning your options with your actual budget and goals, sometimes the best answer is a high-quality architectural shingle rather than an expensive specialty product that doesn’t fit your situation.
Labor & Installation Costs for Mid-Missouri Roof Replacements
In 2026, labor typically makes up 50–65% of a full roof replacement cost in Mid-Missouri. Understanding what drives labor costs helps you evaluate estimates and appreciate why quality installation matters.
Local labor realities include skilled roofing crews, significant safety requirements, and travel time between service areas like Columbia, Jefferson City, and the Lake region. Most homeowners effectively pay somewhere around $2.50–$4.50 per square foot in labor when averaged into total project cost.
Several factors increase labor time and therefore cost:
Difficult access (tight city lots, landscaping obstacles)
Weather delays requiring crew remobilization
The value of paying for trained, certified installers cannot be overstated. Proper installation techniques reduce the risk of roof leaks, premature failure, and warranty problems. An improperly installed roof can fail in half the expected time, making the cheapest bid potentially the most expensive mistake.
What Drives Labor Costs Up or Down?
Understanding specific labor cost factors helps you anticipate where your project might fall within typical ranges:
Scheduling during peak seasons (spring storm rush)
Factors that keep labor costs moderate:
Single-story, walkable roof
Simple rectangular roof shape
Easy equipment access
Off-peak scheduling when possible
Mid-Missouri’s storm season (spring through early summer) creates higher demand, sometimes affecting both schedules and pricing. Full tear-off and deck inspection are more labor-intensive than overlay work but provide better long-term results.
Reputable roofing contractors include safety setup, thorough cleanup, and haul-off in their labor estimates rather than charging surprise fees later. When comparing estimates, look beyond the bottom-line labor number to understand what’s actually included: crew size, supervision quality, warranty coverage, and cleanup standards all vary between contractors.
Roof Tear-Off, Removal, and Disposal Costs
Removing old shingles, underlayment, and fasteners represents a separate line item that often surprises many homeowners when they receive their first estimate. This isn’t padding. It’s real work that takes time, labor, and disposal resources.
Typical 2026 Mid-Missouri tear-off costs run approximately $0.75–$2.50 per square foot, depending on the number of layers being removed and the existing roofing material type. A standard single-layer asphalt tear-off costs less than removing multiple layers or dealing with old wood shingles.
Most Mid-Missouri municipalities and shingle manufacturers prefer or require full tear-off for warranty and code reasons, especially after storm damage. The reasoning is sound: you can’t properly inspect decking or install new underlayment over old shingles hiding unknown problems.
Disposal costs include dumpster rental, landfill or recycling fees, and crew time to load debris. These removal costs typically add several hundred to over a thousand dollars for an average roof. Some roofing companies quote artificially low by omitting tear-off details, then present change orders once work begins. Always confirm what’s included before signing.
Overlay vs. Full Tear-Off in Mid-Missouri
A roof overlay means installing new shingles directly over your existing roof without removing the old materials. While this approach was more common decades ago, it’s increasingly rare today due to code restrictions, weight concerns, and inspection limitations.
Here’s why overlays are problematic in Mid-Missouri:
Hidden damage: Overlays can mask rotten decking, active leaks, and ventilation issues that worsen over time
Reduced lifespan: New shingles installed over old ones typically don’t last as long
Warranty limitations: Many manufacturer warranties require tear-off for full coverage
Code compliance: Missouri building codes prohibit more than two total roof layers
Future costs: Your next roof replacement will require removing both layers
While an overlay might save $1,000–$2,000 in the short term, it usually reduces roof lifespan and increases future replacement cost. In Mid-Missouri’s humid, stormy climate, where moisture intrusion is a constant concern, the risks outweigh the savings.
We typically recommend full tear-off for most Mid-Missouri homes, especially where hail damage, wind damage, or age-related deterioration is suspected. Removing old shingles allows us to inspect your entire roof structure, fix problems properly, and stand behind our workmanship warranty with confidence.
Additional Materials, Code Upgrades, and Hidden Costs
A roof system is more than just shingles or metal panels, it’s a complete assembly including underlayment, flashing, ventilation, and wood decking. These components significantly affect both your total cost and your roof’s long-term performance.
Common “extras” that affect pricing include:
Synthetic underlayment upgrade: $0.50–$2.00 per sq. ft., better water protection than felt
Ice & water shield: $1.00–$2.50 per sq. ft. (at eaves, valleys), prevents ice dam damage
New roof flashing (drip edges, valleys): $200–$800 total, prevents leaks at roof transitions
Ventilation upgrades: $300–$1,200+, extends shingle life and regulates temperature
Building code changes in cities like Columbia and Jefferson City may require specific underlayment types, ventilation ratios, and nailing patterns. These requirements add cost but provide meaningful protection, they’re not arbitrary expenses.
Always ask for a line-item breakdown in estimates so you can see exactly what’s being included. This transparency helps you avoid surprise costs and hidden fees once work starts. If a contractor can’t explain what they’re installing and why, that’s a red flag.
Rotten Decking, Structural Repairs, and Storm-Related Damage
In Mid-Missouri’s humid and storm-prone climate, it’s common to find some rotten or soft decking once old shingles are removed. This discovery is one of the most frequent hidden costs homeowners face.
Realistic 2026 ranges for decking replacement run approximately $3.00–$6.00 per square foot for sheet decking (typically 4×8 plywood or OSB panels). A typical project might need a few sheets replaced, though severe cases occasionally require full deck replacement.
Less common but potentially significant repairs include:
Truss or rafter repairs
Sagging ridge line correction
Chimney flashing rebuilds or chimney cap replacement
Fascia board replacement
Insurance often covers storm-related structural repairs if properly documented during a claim. This is where working with a contractor experienced in insurance claims becomes valuable. Proper documentation can mean the difference between an approved repair and out-of-pocket expenses.
At CoMo Premium Exteriors, we document any unexpected issues with photos and clear pricing before proceeding. You’ll see exactly what we found, understand why it needs repair, and approve the cost before work continues. No surprises, no pressure, just honest communication about what your roof structure actually needs.
Local Factors: Mid-Missouri Climate, Codes, and Insurance Considerations
Mid-Missouri presents specific roofing challenges that affect both material selection and installation costs. Our region experiences:
Hailstorms: Frequent spring and summer storms capable of damaging shingles
High winds: Severe thunderstorms and occasional tornado activity
Heavy spring rains: Extended moisture exposure testing drainage and flashing
Freeze-thaw cycles: Ice formation at eaves and in valleys
Temperature extremes: Summer heat and winter cold stressing materials
These conditions drive demand for better underlayment, ice & water shield in vulnerable areas (valleys, eaves, around penetrations), and impact-resistant shingle options. What works in mild climates won’t necessarily protect Mid-Missouri homes.
City and county building departments influence cost through permit fees and inspection requirements. Typical 2026 permit fees in Mid-Missouri range from roughly $150–$400 for single-family roof permits, varying by municipality. Columbia, Jefferson City, and Camden County each have specific requirements that reputable contractors navigate routinely.
Many Mid-Missouri homeowners involve insurance when hail damage or wind damage is present. This changes how “cost” is calculated. Your actual cost may be primarily your deductible rather than the full replacement cost.
Insurance Claims and Roof Replacement Cost
Understanding how insurance works can dramatically affect your out-of-pocket expense for roof replacement. Here’s what Mid-Missouri homeowners need to know:
ACV vs. RCV Policies Explained:
Actual Cash Value (ACV): Insurance pays what your roof is worth today, accounting for age and depreciation. A 15-year-old roof might receive only 50% of replacement cost.
Replacement Cost Value (RCV): Insurance pays to fully replace your roof with comparable materials, regardless of age.
Example: On a $15,000 roof replacement, an ACV policy on an aging roof might pay $8,000, leaving you responsible for $7,000 plus your deductible. An RCV policy would cover the full $15,000 minus your deductible.
In Mid-Missouri, deductibles typically range from $500 to several thousand dollars. When storm damage is covered under an RCV policy, you typically pay only your deductible plus any elective upgrades you choose.
Insurance adjusters can miss secondary damage around valleys, roof flashing, and vents. This damage that affects both claim scope and your final cost. Having a qualified professional roofing contractor inspect your roof before or alongside the adjuster helps ensure nothing is overlooked.
CoMo Premium Exteriors serves as an insurance claim advocate, documenting damage, meeting with adjusters, and helping ensure homeowners receive fair pricing and compensation. We speak adjusters’ language so you don’t have to.
How to Save Money on a Roof Replacement in Mid-Missouri (Without Cutting Corners)
A roof represents a major investment, and most families are budget-conscious, especially with 2026 material costs higher than a few years ago. The good news: you can save money without compromising quality.
Smart cost-saving strategies that keep quality intact:
Choose durable mid-range shingles: Premium architectural shingles offer excellent performance without the cost of ultra-high-end designer lines
Simplify accessory choices: Standard ridge caps and ventilation often perform as well as premium alternatives
Skip unnecessary cosmetic extras: Copper accents and decorative elements add cost without functional benefit
Check for insurance coverage: After wind or hail events, insurance may cover most of your replacement cost
Schedule strategically: When possible, schedule outside peak seasons (late summer through fall)
Consider financing: Spreading costs over time lets you choose quality over the cheapest bid
The most powerful savings tool for many homeowners is insurance coverage after storm events. A roof that would cost $14,000 out of pocket might cost only your $1,000 deductible when insurance covers storm damage.
CoMo Premium Exteriors offers financing options so homeowners can budget effectively and spread costs over time rather than compromising on quality to meet an immediate cash constraint.
Smart Choices vs. False Economy
Understanding the difference between wise savings and risky cuts protects your investment and prevents leaks:
Smart savings:
Choosing architectural over designer shingles (similar performance, lower cost)
Selecting standard colors over premium colors
Bundling multiple exterior projects for efficiency
Timing work during contractor availability
Risky cuts that often backfire:
Skipping ice & water shield in valleys and at eaves
Ignoring ventilation problems
Choosing thin, inadequate underlayment
Hiring unlicensed contractors without insurance
Accepting estimates without detailed scope
Beware of out-of-state storm chasers who quote suspiciously low prices by skimping on underlayment, flashing, or cleanup. These contractors often disappear after collecting payment, leaving you with no recourse when problems emerge.
A strong workmanship warranty, like CoMo Premium Exteriors’ limited lifetime workmanship warranty, provides long-term value that cheap bids rarely match. We’ll still be here in 10 years if you need us. Will the storm chaser?
Ask every roofing company about crew training, certifications, insurance coverage, and what happens if problems appear later. The cheapest estimate often becomes the most expensive option when roof leaks, repairs, and voided warranties are factored into the overall cost.
Working with CoMo Premium Exteriors: What to Expect and Why It Matters
Since 2010, CoMo Premium Exteriors has served Mid-Missouri homeowners as a locally owned, triple-certified exterior contractor. We work throughout Columbia, Jefferson City, Boonville, Moberly, Lake of the Ozarks, and surrounding communities, and we’re still here, project after project, year after year.
Here’s what working with us looks like:
Free inspection: We examine your roof thoroughly, documenting conditions with photos
Detailed written estimate: You receive line-item pricing showing exactly what’s included
Options review: We walk through material choices, warranty options, and potential upgrades
Insurance assistance: If storm damage is involved, we help document and navigate your claim
Clear scheduling: We provide realistic timelines and keep you informed throughout
Professional installation: Our trained crews follow manufacturer specifications exactly
Final walkthrough: We review completed work with you and answer any questions
Our certifications, GAF Master Elite, Owens Corning Platinum Preferred, and James Hardie Elite Preferred, represent the top tier of manufacturer recognition. These aren’t just badges; they require ongoing training, quality standards, and customer satisfaction ratings that fewer than 3% of roofing contractors nationwide achieve.
We back our work with a limited lifetime workmanship warranty because we’re confident in our installation quality. We’ll be here for years to come if you ever need roofing services or have questions.
Ready to understand what your roof replacement will actually cost? Call us at (573) 424-9008, text us, or request a free estimate online. We’ll provide honest answers and a detailed breakdown tailored to your home, no pressure, just the information you need to make a confident decision.
FAQs
How often do roofs typically need to be replaced in Mid-Missouri?
Standard architectural asphalt shingles in Mid-Missouri generally last 20–30 years under normal conditions, while quality metal roofs often last 40–70 years depending on maintenance and storm exposure. However, severe hail events, poor ventilation, or improper installation can significantly shorten these lifespans.
We recommend roof inspections every 1–2 years and after any significant storm with hail or high winds. These inspections help identify minor issues before they become expensive problems. CoMo Premium Exteriors offers free inspections to help homeowners determine whether their roof can safely last another few years or whether replacement planning should begin.
Is it cheaper to repair my roof or replace it entirely?
Small, isolated issues, such as a few missing shingles, one localized leak, damaged flashing around a single penetration, often cost a few hundred dollars to repair. That’s obviously much less than a full replacement.
However, when an older roof shows widespread granule loss, curling or buckling shingles, multiple leak points, or visible wear across most of the surface, replacement typically makes more financial sense. Repeated repairs on an old roof often total more than replacement cost would have been, while still leaving you with an old house roof that needs replacing soon anyway.
A general rule of thumb: if more than 20–25% of your roof is failing or approaching end-of-life, replacement is usually the better long-term investment. We’re happy to assess your specific situation and give you an honest recommendation, even if that recommendation is to wait.
When is the best time of year to replace a roof in Mid-Missouri?
Most roofing work in Mid-Missouri happens from late March through November, with peak demand following spring and early summer storms. Late summer through early fall often offers the most stable weather conditions and somewhat more flexible scheduling.
That said, CoMo Premium Exteriors works year-round when conditions are safe. If you have active leaks causing interior damage, don’t wait for an “ideal” season. Water damage inside your home can quickly create costs that far exceed any small scheduling savings. An emergency repair or tarp can protect your home while you schedule a full replacement.
Can I finance my roof replacement, and what does that look like?
Many Mid-Missouri homeowners choose to finance roof replacements, spreading costs over time instead of paying $10,000–$15,000 upfront. This approach lets you select quality materials and professional installation without straining your immediate budget.
CoMo Premium Exteriors partners with financing providers to offer various monthly payment options, subject to credit approval. Terms, interest rates, and payment amounts vary based on the financing program and your creditworthiness. We encourage you to ask about current financing options when requesting your free estimate. We can explain what’s available and help you understand how monthly payments would fit your household budget.
How can I compare roof estimates from different Mid-Missouri contractors fairly?
Comparing multiple quotes is smart, but the lowest number isn’t always the best value. Here’s what to examine when comparing estimates:
Look beyond price to scope:
What specific shingle brand and product line is quoted?
What underlayment type is included?
Are ice & water shield, drip edges, and all flashing included?
Is full tear-off and disposal included, or quoted separately?
What ventilation is included?
What warranty coverage is provided (both manufacturer and workmanship)?
Verify contractor credentials:
Is the contractor licensed and insured in Missouri?
Are they manufacturer-certified (GAF, Owens Corning, etc.)?
How long have they operated in Mid-Missouri?
Can they provide local references in towns like Columbia or Jefferson City?
Request itemized estimates and ask clarifying questions about anything vague or missing. A reputable roofing contractor welcomes these questions because transparency builds trust. If a contractor won’t explain their estimate or gets defensive about questions, that tells you something important.
Have questions we didn’t cover? Give CoMo Premium Exteriors a call at (573) 424-9008. We’re always happy to answer roofing questions, whether you work with us or not.
Snow Melt, Refreezing, and Hidden Leaks: How Winter Moisture Gets Into Roof Systems
Key Takeaways
Mid-Missouri’s freeze-thaw cycles cause snow to melt during warm days, then refreeze at the colder eaves overnight. This creates ice dams that push water back up under shingles, leading to “mystery” winter leaks that appear without any rain.
Many winter leaks aren’t caused by faulty roof installations—they stem from ice dam formation, attic condensation, and poor insulation or ventilation that allow hidden moisture into the roof system from below.
Watch for warning signs between January and March: water stains on ceilings or exterior walls, wet insulation in the attic, large icicles at the eaves, and musty odors in the attic space. Early action prevents expensive structural repairs.
CoMo Premium Exteriors is Mid-Missouri’s only triple-certified roofing and exterior contractor (GAF Master Elite, Owens Corning Platinum, James Hardie Elite), equipped to inspect, diagnose, and permanently fix winter moisture problems—not just patch interior damage.
Schedule a free winter roof and attic inspection anywhere in Columbia, Jefferson City, Boonville, Moberly, or Lake of the Ozarks by calling (573) 424-9008.
How Snow Melt and Refreezing Create Hidden Winter Leaks
It’s mid-February in Columbia, and a winter storm just dropped six inches of snow on your roof. Two days later, the sun comes out and temperatures climb into the low 40s. You’re feeling good—the snow is melting, the worst is over. Then that night, the mercury plunges back below freezing.
The next morning, you notice a small brown ring on your living room ceiling. There’s no rain in the forecast. No pipes above that spot. So where’s the water coming from?
This scenario plays out in homes across Mid-Missouri every winter. The culprit isn’t a sudden roof failure or a burst pipe—it’s the melt-refreeze cycle that our region’s variable weather creates.
Here’s how it works: During the day, the sun and heat escaping from your attic warm the upper sections of your roof. Snow in these warmer zones begins to melt, and that water flows downhill toward the eaves and gutters. But those lower sections of the roof—especially the overhangs that extend beyond your heated living space—stay colder. When temperatures drop at night, that flowing water refreezes, building a ridge of ice along the roof edge.
This ice ridge, commonly called an ice dam, acts like a small dam on a river. As more snow melts and flows down, it has nowhere to go. Water pools behind the ice barrier and eventually finds its way under shingles, over underlayment, and into nail holes. From there, it can drip into your attic, run along wall cavities, or seep into light fixtures—sometimes showing up as a ceiling stain days after the snow event.
In central and northern Missouri—from Columbia to Moberly to the Lake of the Ozarks—this cycle can repeat dozens of times between December and early March. According to research from the Minnesota Department of Transportation (which shares similar winter patterns with our region), an average of 86 freeze-thaw cycles occur at shallow depths from October to April over a 10-year period. That’s 86 opportunities for water to infiltrate small cracks, expand by approximately 9% when it freezes, and gradually widen those entry points.
Many homeowners first notice issues as small ceiling stains or damp window trim, often assuming a plumbing leak. But when there’s no plumbing above that spot and the weather has been alternating between thaws and freezes, the real culprit is usually snow melt refreezing at the roof edge.
Ice Dams: The Visible Sign of an Invisible Moisture Problem
An ice dam is a solid ridge of ice that forms along the eaves and gutters, blocking normal snowmelt from draining off the roof. While the ice itself is visible from the ground, the moisture damage it causes is often hidden inside your roof system for weeks or months.
How Ice Dams Form
Ice dams form when temperatures across your roof surface are uneven. Here’s the typical sequence:
Heat escaping from your attic warms the upper portion of the roof above 32°F
Snow on this warmer section begins to melt, even when outdoor temperatures are below freezing
The meltwater flows down toward the eaves, which are colder because they extend beyond the heated living space
At the cold eaves, the water refreezes, building up a layer of ice
As more melt flows down and refreezes, the ice dam grows thicker
Eventually, liquid water pools behind the dam with nowhere to drain
The University of Minnesota Extension explains that for ice dams to develop, sustained average temperatures must keep lower roof areas below freezing while upper areas thaw snow. The dam essentially self-limits to these cold zones—but it traps water that exploits every crack in your roof’s exterior covering.
Visible Signs of Ice Dam Problems
What to Look For
Where to Check
What It Indicates
Thick icicles hanging from gutters
Roof edges, especially north-facing
Active ice dam with melt-refreeze occurring
Solid band of ice at roof edge
Along eaves above exterior walls
Significant blockage of normal drainage
Ice-filled or sagging gutters
All gutter runs
Debris may be trapping water; drainage compromised
Ice in roof valleys
Where two roof slopes meet
Vulnerable area for water backup
These signs are especially common on north-facing roof slopes in Columbia and Jefferson City, where the sun provides less warming and ice persists longer.
Hidden Effects You Can’t See from the Ground
The real damage from ice dams happens out of sight:
Water backing up beneath shingles saturates the roof deck
Wet insulation loses its effectiveness and can take weeks to dry
Moisture seeps into exterior wall cavities
Weeks later, you may notice bubbling paint, cracked drywall, or mold growth
Here’s an important point many homeowners miss: a good-quality, correctly installed roof can still experience ice dams if the attic isn’t properly insulated and ventilated. The “roof system” includes the attic, ventilation, and insulation—not just shingles. Addressing only the visible roof surface while ignoring what’s underneath often leads to recurring problems.
Attic Heat, Condensation, and Uneven Roof Temperatures
Ice dams and winter moisture issues almost always tie back to what’s happening under the roof deck—especially in the attic space above living areas and garages. Understanding this connection is key to solving the problem permanently.
How Warm Air Escapes Into Your Attic
Warm interior air from your furnace, showers, and cooking constantly tries to rise and escape through the building envelope. Common escape routes include:
Gaps around recessed lights (can lights)
Unsealed attic hatches and pull-down stairs
Plumbing stacks and electrical penetrations
Gaps at the top plates where interior walls meet the attic floor
HVAC ductwork running through unconditioned attic space
When this warm air reaches the attic, it does two things that cause winter moisture problems:
It melts snow on the upper roof – This creates the temperature differential that leads to ice dam formation
It carries moist air that condenses on cold surfaces – During January cold snaps, moisture-laden air hitting the cold underside of roof sheathing forms frost or dripping water
This condensation can mimic a roof leak in surprising ways: wet sheathing, dripping nails, damp insulation, and frost buildup that melts on the first warm day. Homeowners often assume their roof is leaking when the moisture is actually coming from inside the house.
Specific Contributors in Mid-Missouri Homes
In our 25+ years serving Central Missouri, we’ve identified common issues in local homes:
Bathroom fans vented into the attic – Instead of exhausting moist air outdoors, these fans dump humidity directly into the attic space where it freezes and later melts
Older masonry chimneys – The mass of brick retains heat and warms nearby framing, creating localized hot spots that melt snow unevenly
Uninsulated knee walls – Common in 1½-story homes, these walls allow significant heat loss into attic areas behind them
Cathedral ceilings with inadequate air channels – Without proper venting between insulation and roof sheathing, these areas trap heat
Common Indoor Heat Sources That Trigger Winter Moisture Problems
A thorough winter moisture inspection needs to look beyond shingles and flashing. Here are the interior sources we check:
Heat/Moisture Source
How It Affects the Roof System
Recessed (can) lights
Create hot spots that melt snow directly above; gaps allow warm air into attic
Unsealed attic hatches
Major air leakage pathway; warm air flows directly into attic space
Leaky HVAC ductwork
Heats the attic, melts snow above; can also add humidity if connected to humidifier
Whole-house fans
If not sealed in winter, allow significant heat loss to attic
Bath/kitchen exhaust vents terminating in attic
Add large amounts of humidity; condensation forms on cold sheathing
When we perform a winter moisture assessment, checking these penetration points is just as important as examining the roof surface from your driveways or walking the roof itself.
Where Winter Moisture Sneaks In: Typical Leak Paths in Roof Systems
Winter moisture doesn’t always come straight through obvious holes. Water often travels along framing members, nails, and joints, so the leak may show up far from the actual entry point. This is why dripping water in your living room doesn’t necessarily mean the problem is directly above.
Common Vulnerable Areas
Certain locations on any roof are more susceptible to winter moisture infiltration:
Roof valleys – Where two roof slopes meet, snow accumulates deeper and ice dams form easily
Chimney surroundings – Counter-flashing and step flashing joints are common failure points
Skylights – The intersection of glass, frame, and roofing creates multiple potential leak paths
Plumbing vent boots – Rubber and plastic boots crack in freeze-thaw cycles
Sidewalls – Where a lower roof meets second-story siding, step flashing must be correctly integrated
Low-slope sections – Porches, additions, and dormers with shallow pitches hold snow longer
During mid-winter thaws, backed-up snowmelt can push water up under shingles in valleys, around step flashing near second-story walls, and beneath metal counter-flashing at chimneys. The water doesn’t need a large opening—capillary action can draw moisture into surprisingly small gaps.
In homes built before about 2005 in Mid-Missouri, we commonly find limited or no ice-and-water shield membrane at the eaves and valleys. This self-adhering underlayment wasn’t required by code in many areas until more recently, leaving older roofs more vulnerable to wind-driven snow and ice dam backup.
A proper inspection by our team includes not only the top side of the roof, but also attic-side evidence: darkened sheathing, rusty nail heads, wet insulation, and staining around penetration points. Sometimes the attic tells us more about moisture problems than the shingles do.
How Hidden Leaks Show Up Inside the Home
Interior warning signs often appear in January and February, though they may not be recognized as roof-related problems at first:
Common indicators:
Faint yellow-brown rings on ceilings
Sagging or cracked drywall at exterior corners
Swollen or warped window trim
Peeling paint near outside walls
Bubbling wallpaper
Less obvious signs:
Musty smell in the attic
Higher-than-normal winter humidity on main floors
Frost on exposed nail tips in the attic
Ice forming on the underside of roof sheathing during extreme cold
Moisture can flow along the back of drywall or run down top plates, so the visible stain may be several feet away from where water entered the roof system. This makes diagnosis tricky without an attic inspection.
We recommend that homeowners in Columbia, Jefferson City, and surrounding areas do a quick attic check with a flashlight after major snowstorms followed by a warm-up. Look for dark spots on sheathing, damp insulation, or frost patterns—these are early warnings that moisture is getting where it shouldn’t be.
Long-Term Damage from Winter Roof Moisture (and Why Speed Matters)
One ice dam event or condensation episode may seem minor—a small stain, a little dampness. But repeated winter moisture can create serious long-term issues inside the roof system that become expensive to repair.
Structural Risks
When roof decking and framing stay wet through multiple freeze-thaw cycles, deterioration begins:
Rotting roof decking – Plywood and OSB sheathing absorb moisture and eventually delaminate or rot
Soft or spongy spots – Walking on the roof reveals areas where decking has weakened
Weakened rafters or trusses – Chronic dampness leads to wood decay in structural members
Corroded fasteners – Nails and screws rust, losing their holding power
Interior Risks
The damage doesn’t stop at the roof structure:
Mold growth – In attic insulation and wall cavities, mold can develop within 24-48 hours of sustained moisture. Studies suggest 60-70% of untreated attic leaks develop mold within months.
Deteriorating drywall – Repeated wetting weakens drywall, leading to sagging ceilings and crumbling walls
Ruined insulation – Wet insulation compresses and loses R-value, reducing energy efficiency
Increased heating costs – Damaged insulation means your furnace works harder, and you’ll see this reflected in higher energy costs throughout winter
Health Implications
Chronic attic moisture creates health risks for your household:
Mold and mildew can aggravate allergies and respiratory conditions
Spores spread through HVAC systems into living spaces
Winter homes with limited fresh air exchange concentrate these contaminants
Children, elderly residents, and those with asthma face heightened risk
Cost Implications
Here’s the financial reality: repairing minor insulation and flashing issues after the first signs of trouble is far less expensive than replacing sheathing, insulation, and interior finishes after several untreated seasons. What might be a $500-1,500 repair in year one can become a $10,000+ restoration project if moisture damage compounds over three or four winters.
How Winter Moisture Shortens Roof Lifespan
Repeated wetting and refreezing of the roof deck accelerates aging in several ways:
Sheathing warps, causing shingles to lose proper contact and adhesion
Freeze-thaw cycles loosen shingle fasteners
Ice pressing against materials creates new gaps and entry points
Granule loss accelerates on repeatedly frozen shingles
A well-installed roof with good attic ventilation and insulation can last 25-30 years in Mid-Missouri’s climate. A similar roof plagued by chronic moisture issues may show major problems in just 10-15 years.
An important note on warranties: Manufacturer warranties from GAF, Owens Corning, and other major brands assume proper ventilation and underlayment installation. Chronic ice damming and poor attic conditions can compromise warranty coverage, leaving homeowners responsible for repairs that might otherwise be covered.
Preventing Ice Dams, Condensation, and Winter Leaks in Mid-Missouri
Effective winter moisture control isn’t about any single fix—it’s about the whole system working together: roof covering, underlayment, ventilation, insulation, and air sealing.
Short-Term Emergency Measures
When you’re dealing with an active ice dam or leak, here are immediate steps:
Remove snow from the roof edge – A roof rake (used from the ground) can clear the lower 3-4 feet of roof, reducing melt feeding the ice dam
Create drainage channels – In severe cases, professionals can carefully melt channels through ice dams to allow trapped water to escape
Control interior moisture sources – Run bathroom fans longer, reduce humidifier settings, and ensure dryer vents are clear
However, these are emergency measures, not long-term fixes. Roof raking every storm isn’t sustainable, and aggressive ice removal risks damaging shingles and gutters.
Long-Term Solutions
Based on hundreds of winter moisture cases across Mid-Missouri, here’s what we commonly recommend:
Upgrade attic insulation – Bringing insulation to R-49 (the current Mid-Missouri code minimum for attics) significantly reduces heat loss through the ceiling
Improve attic ventilation – Balanced intake and exhaust ventilation keeps attic temperatures closer to outdoor conditions
Air-seal ceiling penetrations – Sealing gaps around lights, plumbing, and wiring stops warm air leakage at the source
Install ice-and-water shield during reroofing – This self-adhering membrane at eaves, valleys, and penetrations provides a waterproof backup
Solutions should be tailored to each home’s design. Ranch homes in Columbia behave differently than two-story homes in Jefferson City, and lake homes with complex roofs at Lake of the Ozarks present their own challenges. There’s no one-size-fits-all approach.
The good news: properly addressing winter moisture issues often improves comfort and reduces energy costs year-round, not just during snow season.
Ventilation and Insulation Best Practices for Our Climate
A balanced attic ventilation system works by creating airflow from intake to exhaust:
Intake vents at the soffits or eaves allow cool outside air to enter
Exhaust vents at the ridge or high on the roof let warm air escape
This circulation keeps attic temperatures more uniform, reducing the temperature differential that causes ice dams
For central Missouri homes, we typically follow current building code ratios for net free ventilation area—though many older homes fall short of these standards. The concept is straightforward: prevent your attic from becoming significantly warmer than the outdoors during winter.
Good attic insulation should:
Provide even coverage across the entire attic floor
Maintain proper depth (not compressed or settled)
Include baffles at the eaves to protect soffit vents from being blocked
Remain dry and fluffy, not wet or compacted
If insulation is damaged, wet, or missing in areas, it needs to be corrected before other improvements will be fully effective.
A word of caution: We don’t recommend DIY-ing major ventilation changes in winter. Cutting new vents in freezing weather creates its own risks, and improper vent placement can actually worsen moisture problems. Schedule an assessment with a certified roofing contractor who understands both manufacturer specifications and local conditions.
Roofing Upgrades That Protect Against Winter Moisture
When we install or replace a roof, specific components help limit winter leaks:
Ice-and-water shield membranes – Self-adhering waterproof layer at eaves, valleys, and around penetrations
High-quality synthetic underlayment – Better water resistance and durability than traditional felt
Properly flashed chimneys and sidewalls – Correct integration of step flashing, counter-flashing, and kickout diverters
Correctly sized gutters and downspouts – Adequate capacity to handle snowmelt without backing up
We typically extend ice-and-water protection beyond the minimum code requirements in known trouble spots like low-slope eaves and long valleys. Mid-Missouri’s weather demands this extra margin.
Our triple-certified installation approach (GAF Master Elite, Owens Corning Platinum, James Hardie Elite for siding tie-ins) ensures these details are done to factory standards. This matters for winter performance because manufacturers have engineered their systems to work together—when installation shortcuts happen, winter is often when problems appear.
If your roof was installed before modern underlayment and flashing practices became standard in the 2000s-2010s, a proactive evaluation may prevent potential water damage before it starts.
How CoMo Premium Exteriors Diagnoses and Fixes Winter Roof Moisture Issues
As a local Mid-Missouri contractor, we’ve seen hundreds of winter leak scenarios across Columbia, Jefferson City, Boonville, Moberly, and the Lake of the Ozarks. After 25+ years, patterns repeat—and that experience helps us quickly identify what’s actually going on with your roof system.
Our Inspection Process
When you contact us about a winter moisture concern, here’s what to expect:
Exterior roof assessment – When conditions allow safe access, we inspect the roof surface for missing shingles, damaged flashing, ice dam evidence, and vulnerable areas
Attic inspection – We check for moisture evidence, frost patterns, ventilation adequacy, insulation levels, and air leakage points
Documentation – We photograph conditions and explain what we’re seeing in plain English
Diagnosis – We differentiate between true roof failures (missing shingles, failed flashing) and building-science issues (heat loss, condensation)
This last point is critical. Sometimes the solution is a flashing repair. Sometimes it’s adding insulation and sealing air leaks. And sometimes it’s both. We want you to invest money where it actually solves the problem, not just where it’s most visible.
Creating a Prioritized Plan
Based on our findings, we develop a plan that addresses:
Immediate leak control – If water is actively entering your home, we prioritize stopping it
Short-term stabilization – Temporary measures to maintain safe conditions through the rest of winter
Long-term fixes – Air sealing, ventilation upgrades, insulation improvements, and targeted roof repairs or full replacement if necessary
We also offer free estimates and can coordinate with insurance when winter moisture stems from storm-related damage. We help homeowners understand what is and isn’t typically covered, and we’re experienced in documenting damage for adjusters.
When to Call Us (and What to Expect)
Contact CoMo Premium Exteriors if you notice:
A new ceiling stain appearing after snow, especially without rain
Recurring winter leaks in the same area year after year
Heavy icicles and thick ice bands at the roof edge
Visible frost, dripping, or moisture in the attic
What happens after you call:
We schedule an on-site assessment at a time that works for you
We perform a thorough inspection of roof, attic, and relevant interior areas
We explain our findings in clear, straightforward language
We provide a written estimate with options (repair vs. long-term solution)
There’s no high-pressure sales pitch. Our goal is to educate you and let you decide when and how to move forward. Many of our customers appreciate having the information even if they’re not ready to act immediately.
Ready to get answers? Call us at (573) 424-9008 or request an inspection through our website. With more freeze-thaw cycles ahead this winter, acting before the next major snow or temperature swing helps prevent the situation from getting worse.
FAQs
Can an ice dam damage my roof even if I don’t see water inside the house?
Yes. Ice dams can soak roof decking and insulation without immediately causing interior stains. The moisture may saturate sheathing and insulation for weeks before it eventually shows up as sagging drywall, a musty attic odor, or mold on stored items.
If you see heavy icicles or thick ice at the eaves during January or February, we recommend scheduling a roof and attic inspection even if there’s no active leak yet. Early inspections often let us identify and fix minor issues—like localized underlayment or flashing problems—before they lead to major repairs.
Is it safe to remove ice dams myself with a shovel, hammer, or roof rake?
Using a roof rake from the ground to remove fresh snow is generally safe when done carefully. However, aggressive chipping at ice with hammers, shovels, or picks can easily break shingles, dent gutters, and damage fasteners—creating new leak points that show up during spring rains.
For severe ice dams, professional steam-based removal is safer than mechanical methods. But the real answer is prevention: proper insulation, ventilation, and air sealing address the root cause so you’re not managing an emergency situation every winter.
Will my homeowners insurance cover damage from ice dams or winter roof leaks?
Many policies in Missouri cover resulting interior water damage from sudden ice dam events—things like stained ceilings, damaged drywall, and ruined flooring. However, policies typically don’t cover the underlying cause, such as inadequate attic insulation, poor ventilation, or pre-existing roof wear.
Coverage varies significantly by policy and carrier. We recommend reviewing your policy or talking with your agent to confirm specifics. When appropriate, CoMo Premium Exteriors assists homeowners in documenting winter damage and communicating with adjusters so they understand what repairs are needed. We can help you file a claim correctly when winter damage qualifies.
When is the best time of year to fix winter moisture problems with my roof and attic?
We can perform emergency leak-control work any time, including during winter weather. However, major fixes—like full roof replacements, extensive ventilation modifications, or large insulation projects—are typically best scheduled for spring through fall when weather conditions allow for proper installation.
The key is to call as soon as you notice an issue. We can stabilize the situation, prevent further damage, and plan permanent solutions for the next available weather window. Waiting multiple seasons often compounds the damage, increasing both repair cost and disruption to your household.
How do I know if I need a full roof replacement or just targeted repairs and attic improvements?
The answer depends on several factors: the age of your roof, visible wear patterns (curling shingles, significant missing granules, exposed fasteners), and how widespread the moisture damage is to decking and underlayment.
We evaluate both the roof surface and the attic to determine whether strategic repairs plus insulation and ventilation improvements will solve the problem, or whether a full replacement is the more cost-effective long-term option. Sometimes a 15-year-old roof with localized ice dam damage needs only flashing work and attic upgrades. Other times, widespread sheathing damage makes replacement the smarter investment.
We share photos and clear explanations so you can see exactly what we see before making any decision. Our role is to give you the information—not to pressure you into a particular choice.
Winter Roof Replacement: Can You Really Replace Your Roof in a Mid‑Missouri Winter?
Replacing your roof during the winter months might seem daunting, especially in Mid-Missouri’s cold weather. However, with the right conditions, materials, and experienced roofing contractors, a winter roof replacement can be both safe and effective. While colder temperatures do affect roofing materials like asphalt shingles, proper techniques and careful planning ensure your roof is installed correctly and protected against winter storms. In this guide, we’ll explore everything you need to know about winter roofing projects, including temperature considerations, safety precautions, and how to prepare your home for a successful winter roof replacement.
Key Takeaways
Yes, you can replace a roof in a Mid-Missouri winter, but it requires the right temperatures, materials, and an experienced crew. Most shingle manufacturers prefer 40°F and rising, though with hand-sealing and proper jobsite prep, we can work effectively down into the mid-30s on sunny, dry days.
Winter roof replacement stops active leaks, prevents ice dam damage, and often offers better scheduling flexibility and pricing than the spring rush. If your home’s roof is already compromised, waiting until April can turn small problems into major structural issues.
Cold temperatures change how roofing materials behave—asphalt shingles become brittle below 40°F, and factory sealant strips need heat to activate. Experienced roofing professionals compensate with warmed materials, manual sealing, and adjusted tool settings.
Is Winter Roof Replacement in Mid‑Missouri Really a Good Idea?
We get this question every December, usually from a homeowner staring at a ceiling stain or watching shingles blow off during a cold front. The honest answer? Winter roofing is absolutely possible—but it’s not ideal for every situation, and it takes a roofing team that knows what they’re doing.
In Central Missouri—whether you’re in Columbia, Jefferson City, or out by Lake Ozark—we typically see usable winter roofing windows on dry days in the 35–50°F range. When the sun’s out and the wind stays calm, that’s often enough to get quality work done. We’ve installed over 500 roofs across the region, and a good portion of those happened between November and March.
Here’s the thing: emergency situations shouldn’t wait. If you’ve got active leaks, damage from winter storms, or a roof deck that’s starting to fail, delaying until spring can mean thousands more in repairs. Water doesn’t care what month it is—it just keeps finding its way in.
That said, winter projects do come with tradeoffs:
Pros
Cons
Stops leaks before freeze-thaw damage worsens
Slower progress due to shorter days
Often faster scheduling (less backlog)
More weather delays possible
Prevents ice dam damage
Extra care needed with cold materials
Ready before late-winter storms
Shingle sealing takes longer
A trusted contractor should walk you through whether a temporary repair, partial replacement, or full winter reroof makes the most sense for your specific roof and budget. That’s exactly what we do at CoMo Premium Exteriors—no pressure, just straight answers based on what your roof actually needs.
What Temperatures Are Too Cold for a Winter Roof Replacement?
Temperature matters for two reasons in cold weather roofing: keeping workers safe on potentially icy roof surfaces, and making sure roofing materials perform the way they should. In Mid-Missouri winters, understanding these thresholds helps you know when winter work makes sense.
Manufacturer guidance is straightforward: Most standard asphalt shingles are designed for installation at 40°F (4°C) and above. The ideal range sits between 50–80°F, where shingles stay flexible and the thermally-activated sealant strips bond quickly.
Here’s how we break down the temperature ranges:
Temperature Range
Workability
What We Do
50°F+
Ideal conditions
Standard installation techniques
40–50°F
Good with care
Monitor sealant activation, work during warmest hours
32–40°F
Workable
Hand-sealing, warmed materials, midday scheduling
Below 30°F
Not recommended
Emergency tarping and temporary measures only
Between roughly 32–40°F, careful crews can still replace roofs using specific cold weather techniques. We store materials in warm spaces, apply roofing cement manually under shingle tabs, and schedule work during the warmest hours of the day—typically 10 AM to 3 PM.
A sunny 38°F January day in Columbia? That’s workable with the right approach. A 28°F cloudy, windy morning with frost on the roof surface? We’re rescheduling. CoMo Premium Exteriors will always reschedule rather than risk a poor install or unsafe winter conditions.
How Cold Weather Affects Asphalt Shingles and Other Roofing Materials
Cold doesn’t just make the job uncomfortable—it fundamentally changes how roofing materials behave and how long they’ll last. Understanding this helps explain why winter projects require different techniques.
Shingle flexibility is the biggest concern. Under about 40°F, asphalt shingles become stiffer and more brittle. The asphalt matrix that gives shingles their pliability stiffens up, and studies show cracking rates can increase by up to 30% if materials aren’t properly warmed before installing asphalt shingles. That means more care when handling, nailing, and walking on them.
Sealant behavior changes dramatically too. Every asphalt shingle has a factory adhesive strip designed to bond under the sun’s heat. In a July installation, this happens naturally within days. In January in Columbia, that bond might take weeks—or it might not happen at all until spring without intervention. That’s why manual sealing becomes essential in cold conditions, using quarter-sized dabs of approved roofing cement under each tab.
Other roofing materials have their own cold weather quirks:
Metal roofs can be installed in colder conditions since they don’t rely on adhesive bonding, but crews need to watch for condensation, thermal expansion, and proper fastener torque
EPDM and low-slope membranes often need 45°F+ to bond correctly
Slate tiles become more susceptible to cracking in freezing temperatures
An experienced crew adjusts everything—tool settings on nail guns, air pressure, storage locations, work timing—to match the actual temperatures on installation day.
Installer Safety and Project Timing in Winter
Ice, frost, and shorter December–February days change everything about how we plan roofing projects across Mid-Missouri.
Safety comes first. Snow and ice, frost, and wet leaves make roofs dangerously slick. Our crews use harnesses, anchors, roof jacks, and winter-rated boots. They often work more slowly than in warm weather—and that’s intentional. The extra safety precautions aren’t optional when temperatures fall and surfaces get treacherous.
Winter days are simply shorter. A roof that might take two long summer days could require three or four shorter winter days, especially when start times get pushed back by morning frost. We typically wait until the roof’s edge and surface have thawed and dried before sending anyone up.
At CoMo Premium Exteriors, we build weather buffers into every winter schedule. If a cold snap or heavy snow hits, we pause the project, secure the site, and resume when conditions allow proper installation. The home stays “dried-in” each day before we leave—underlayment and flashings installed so you’re protected overnight, even if shingles extend into additional days.
Projects take a bit longer in January, but the focus is on correct installation and safety precautions, not rushing to finish by dark.
Pros and Cons of Replacing Your Roof During the Winter
Winter isn’t automatically bad or good for a new roof—it depends entirely on your roof’s condition and your timing. Let’s lay out the honest tradeoffs.
Advantages of winter roof replacement:
Potentially faster scheduling since there’s less backlog than April–June
Sometimes better pricing or off season promotions
Stops active leaks before freeze–thaw cycles cause additional roof damage
Gets your roofing system ready before severe late-winter storms
Insurance claims from winter storms can often be processed more smoothly in the off season
Drawbacks to consider:
More weather-related delays are likely
Longer total project timeline
Shingles need more careful handling to avoid cracking
Slower shingle sealing compared to a July installation
Crews work shorter days
Think about your specific scenario: A roof leaking in January after a windstorm near Jefferson City probably shouldn’t wait. But a cosmetically aged roof that’s still watertight? That might be a good candidate for a scheduled spring replacement.
CoMo Premium Exteriors will walk you through both options—winter versus spring replacement—so you can choose what fits your risk tolerance, schedule, and budget.
Potential Cost and Scheduling Benefits
Winter is typically a lighter season for roofing volume in Mid-Missouri, which can actually work in your favor.
Because many homeowners delay until warmer months, winter calendars often have more flexibility. That means faster start dates and more accommodating time slots. While you might wait 4–6 weeks for a spring appointment during peak season, winter projects often start within 1–2 weeks.
Some roofing contractors, including us, occasionally offer off-season bundled deals—like combining a roof with gutter upgrades—when schedules are less compressed. That said, quality and materials should never be discounted. Be wary of any reputable roofing company offering dramatically lower prices; it usually means corners are being cut.
The less obvious cost savings? Replacing a failing roof in winter avoids emergency call-outs, interior water damage, and the higher repair bills that come from waiting while problems compound. Melting snow finding its way through damaged shingles can ruin insulation, drywall, and even flooring—costs that dwarf the premium of a winter install.
Ask any contractor, including CoMo Premium Exteriors, about timing, availability, and whether winter scheduling might reduce wait time compared to peak season.
Risks of Waiting Until Spring
Sometimes waiting for warmer temperatures makes sense. But if your roof is already compromised, that delay carries real risks.
Freeze-thaw cycles are the enemy. From December through March in Central Missouri, water gets into small openings—missing shingles, cracked flashing, worn pipe boots—then freezes and expands overnight. This repeated cycle turns minor issues into rotten decking, soaked insulation, and interior ceiling damage. We’ve seen homeowners turn a $12,000 roof into a $20,000 project by waiting.
Ice dams form when poor attic insulation and ventilation combine with an aging roof. Heat escapes through the attic, melts snow on the upper roof, and that water refreezes at the roof’s edge where it’s colder. The ice dam formation backs water under shingles and into walls or soffits. Proper ventilation helps, but a compromised roof makes ice dams far more damaging.
Spring backlogs catch homeowners off guard. Many roofing contractors see their schedules explode in March and April. If you postpone a January decision, you might find yourself behind dozens of hail claims after an early-spring storm hits Columbia or Lake Ozark. Nationally, 15–20% of roofs are replaced during winter months, but that rises to 25% in Midwest storm zones like ours—because smart homeowners know waiting creates problems.
Have a professional roof inspections done before deciding to wait. CoMo Premium Exteriors can document your roof’s condition with photos and explain which issues can safely hold and which really shouldn’t.
How CoMo Premium Exteriors Handles Winter Roof Replacements
Winter roofing projects simply require more planning. After 25+ years in Mid-Missouri, we’ve learned how to work with our weather—not against it.
Our triple certifications—GAF Master Elite, Owens Corning Platinum, and James Hardie Elite —require ongoing factory training and strict quality standards that we maintain year-round. GAF’s cool-weather testing shows that properly sealed roofs withstand 110 mph wind speeds even when installed in cold climates. That’s the standard we hold ourselves to.
Here’s how we evaluate each winter job:
Forecast review – Looking at temperature ranges for the entire project window
Sun exposure assessment – Different roof slopes get different amounts of warming
Roof complexity analysis – Valleys, chimneys, skylights, and wall intersections need extra attention
Material planning – Ensuring everything stays warm and flexible until installation
We prioritize “dry-in” each day. That means underlayment and flashings are installed so your home is protected overnight, even if shingles or finishing details extend into additional days. If a cold snap hits, we pause, secure the site, and resume when the roof can be installed correctly to manufacturer standards.
We never force a job into unsafe or below-spec weather conditions.
Cold-Weather Installation Techniques We Use
Winter roof replacement isn’t about magic products—it’s about disciplined techniques, proper storage, and quality control on site.
Material storage matters. We store shingles, sealants, and coil nails in heated or insulated spaces—trailers, garages, or hot boxes—so they stay at 50–55°F and remain flexible. Power blanket-style material warmers can maintain 70°F in bundles, reducing brittle failures by up to 75% according to industry studies.
Manual sealing is essential. On colder days, especially along rakes, eaves, and ridges, our crews apply approved roofing cement manually under each shingle tab. This mimics the waterproof seal that would normally form from solar heat. Using a caulk gun or trowel, we apply quarter-sized dabs of adhesive to ensure proper bonding even before warm weather arrives.
Tool adjustments prevent damage. We dial in air pressure on nail guns so nails set correctly without over-driving through cold, brittle shingles. We monitor for jams caused by condensation or freezing moisture. GAF Master Elite guidelines require checking compressor pressure hourly in cold conditions.
Our crews pay extra attention to key details in winter:
Valleys – Where two roof planes meet and water concentrates
Pipe boots – Rubber seals that crack in extreme weather
Step flashing – Where roof meets walls, common leak points
For information on flat roof materials, including their longevity and best practices, see our comprehensive guide.
These are the first places winter leaks show up if not installed correctly. We install ice-and-water shield underlayment in all valleys and along eaves for enhanced protection.
Safety, Site Protection, and Clean-Up in Winter
Winter isn’t just harder on workers—it affects your landscaping, driveway, and how debris gets handled.
Pre-work preparation:
We clear snow, frost, and loose ice from work areas before starting
Morning start times may be delayed until roof surfaces are safe
Heavy snow gets removed using safe methods that avoid structural damage
Safety systems we use:
Guardrails or roof jacks on steeper shingle roofs
Harnesses and anchors on every project
Warning lines to protect both crew and anyone on the ground
Winter-rated footwear with aggressive tread
Property protection:
Layered tarps catch shingles and nails on snow or frozen ground
Dumpsters placed where driveway ice won’t create hazards
Magnet sweeps performed even when winter snow is present
Landscape protection in frozen conditions
We leave the site safe at the end of each day—no exposed roof deck, no loose materials at risk of blowing off in high winds, and clear communication on what’s completed and what’s scheduled next.
Preparing Your Home and Roof for Winter (Whether or Not You Replace It)
Even if a full winter replacement isn’t needed, every Mid-Missouri homeowner can take steps to protect their roof before and during the winter season.
Schedule an inspection. Either inspect your roof yourself from the ground using binoculars or have a professional evaluation done by a reputable company. Look for missing shingles, cracked pipe boots, or failing flashing. Catching problems early is always cheaper than emergency roof repairs.
Clean gutters and downspouts. Do this in late October or early November before temperatures drop below freezing. Clogged gutters contribute to ice dam formation along eaves. Roof rakes can help manage winter snow buildup, but clean gutters are the first line of defense.
Check attic insulation and ventilation. Proper ventilation keeps roof temperatures more even, lowering ice dam risk and improving your home’s energy efficiency. Most Mid-Missouri homes should have insulation meeting R-49 standards—we always inspect this during evaluations.
Trim overhanging branches. Heavy, wet Mid-Missouri snows can break limbs onto shingles and gutters. Removing overhanging branches before winter storms prevents damage and costly repairs.
Know your roof’s age. Most asphalt shingles last 20–30 years depending on quality and maintenance. If yours are approaching that range, a winter inspection helps you plan rather than react.
Addressing Small Problems Before They Become Winter Emergencies
Winter is not the time you want to discover a “small” issue has turned into a ceiling stain or sagging drywall.
Watch for these early warning signs:
Lifted or missing shingles after a November windstorm
Granules building up in gutters (a sign shingles are deteriorating)
Flashing pulling away from chimney or sidewall
Daylight visible in attic spaces
Moisture or frost in the attic
Minor roof repairs—securing loose shingles, resealing flashing, replacing a cracked pipe boot—can often be done quickly in winter-friendly weather windows. These small fixes can add years of life to an otherwise sound roofing system.
CoMo Premium Exteriors documents all findings with photos and walks homeowners through whether they’re looking at a simple repair, a “watch and wait” situation, or a roof nearing the end of its service life.
Don’t ignore ceiling stains, attic moisture, or moldy insulation during winter. These signs mean water is already getting in and should be evaluated promptly. Waiting typically means the problem spreads—and the bill grows.
How to Decide: Repair, Temporary Fix, or Full Winter Replacement?
Deciding what to do in January when you spot damage can feel overwhelming and urgent. Let’s simplify the decision.
The choice usually comes down to three paths: for example, deciding how often you need a roof inspection is an important consideration.
Option
Best For
Considerations
Targeted repair
Isolated damage on newer roofs
Quick, affordable, preserves existing roof
Temporary protection
Emergency situations, severe weather coming
Buys time until full replacement in warmer months
Full replacement
Older roofs, widespread damage
Best long-term solution, requires careful winter planning
General guidelines:
Roofs under 10–12 years old with isolated damage from a recent storm are often good candidates for repair, especially if the rest is in solid shape
Very old roofs (20+ years for standard asphalt shingles) with widespread cracking, curling, or missing granules often make more sense to replace than keep patching
Active leaks almost always require immediate action—at minimum, temporary protection
Shingle manufacturers like GAF and Owens Corning design their products to last, but every roof has a lifespan. When repairs start costing more than they’re worth, it’s time for a conversation about replacement.
Get a written inspection and photo documentation so you can make the decision with clear information—not just urgency or guesswork. That’s exactly what we provide.
Insurance, Storm Damage, and Winter Claims
Winter storms in Mid-Missouri—especially strong winds and sub zero temperatures followed by rapid warming—can create damage that may be covered by homeowners insurance.
Timely documentation is critical. Photos of missing shingles after a December windstorm, interior water damage, or damaged flashing can support a claim even if full replacement happens weeks later. Don’t assume damage isn’t covered just because it happened in winter.
As experienced insurance claims advocates, CoMo Premium Exteriors helps homeowners understand the difference between ACV and RCV:
ACV (Actual Cash Value) – Insurance pays what your roof is worth today, accounting for age and wear
RCV (Replacement Cost Value) – Covers the full cost of a new roof
We’ve recovered full costs on 95% of claims by speaking adjusters’ language so homeowners don’t have to.
Insurers typically require the roof to be protected from further damage—temporary tarping or emergency repairs—which is another reason not to wait until spring if you already see active leaks. Failing to mitigate damage can actually hurt your claim.
Call us if you’re unsure whether winter damage might be an insurance claim. We can inspect, take photos, and help you have a more informed conversation with your adjuster.
Conclusion
Your roof shouldn’t have to wait until April to get the protection it needs. Whether you’re dealing with winter storm damage, an active leak, or just want professional eyes on that aging roof, CoMo Premium Exteriors is here with honest answers and proven cold weather expertise.
Give us a call at (573) 424-9008 for a no-pressure winter roof evaluation. We’ll document everything with photos, explain your options, and help you make the right decision—whether that’s a quick repair, an immediate replacement, or a plan for spring. That’s what neighbors are for.
FAQ: Winter Roof Replacement in Mid‑Missouri
Can you replace only part of my roof in winter and finish the rest in spring?
Partial replacements are sometimes possible—for example, repairing a heavily damaged slope while leaving intact sections alone. However, transitions between old and new roofing must be carefully detailed so warranties and waterproofing aren’t compromised. We’ll advise on a case-by-case basis whether this makes sense for your specific situation, and help you understand how long your roofing lasts in Missouri.
Will my shingle warranty still be valid if the roof is installed in January?
Warranties depend on following roofing manufacturers’ instructions, not the month on the calendar. If temperature protocols, installation techniques, and materials meet guidelines—including proper hand-sealing in cold conditions—a winter installation can qualify for full manufacturer coverage, including GAF’s 50-year warranties.
How long will it take a winter-installed roof to fully seal?
The adhesive strip continues to bond as warmer temperatures return and the sun hits the roof. In Mid-Missouri, that typically means full sealing happens over the first few warm spells of late winter and early spring. Hand-sealing done during installation speeds this process significantly at critical areas like rakes, eaves, and ridges.
Will a winter roof replacement make my house very cold while you work?
Our crews tear off and replace in sections, keeping the home dried-in as they go. Attic insulation remains in place throughout the project. Most homeowners notice indoor temperatures drop only a few degrees while work is underway—far less than you might expect.
How do I know if I should call now or wait until warmer weather?
Simple guidance: If you see active leaks, missing shingles, sagging areas, or storm damage, call for an inspection right away. If the roof simply looks older but isn’t leaking, a scheduled evaluation can help plan for spring or summer replacement without pressure. Either way, knowing what you’re dealing with is better than guessing.