Summer Siding Replacement Timeline: From Inspection to Final Walkthrough
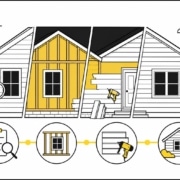
Summer can be a practical time to replace siding in Mid-Missouri, but the project does not begin when the first panel comes off the wall. Inspection, material selection, measurements, delivery, weather, and repair discoveries all affect the schedule.
A useful timeline explains the sequence without promising an exact installation date before the home and material choice are known.
Step 1: Inspect the Existing Exterior
The first visit should document the siding material, damaged elevations, trim, windows, soffit, fascia, penetrations, and visible water concerns. The contractor should separate cosmetic wear from functional problems and explain whether targeted repair is still reasonable.
Photos and measurements from this visit become the starting scope. If storm damage is involved, keep those records separate from ordinary age or maintenance observations.
Before that first visit ends, ask that the inspection cover each siding-relevant surface, not just the damaged wall. A complete siding inspection should document: the siding material and its current fastening, every elevation rather than only the worst one, trim and J-channel condition at corners and openings, soffit and fascia where they meet the siding at the wall top, visible water staining or swelling near windows and doors, soft or spongy spots that can indicate sheathing damage behind the siding, and any prior patch or repair lines that may hide older problems. Photos taken wall-by-wall at this stage become the reference point if hidden damage is found later during tear-off.
Step 2: Choose Material, Profile, and Color
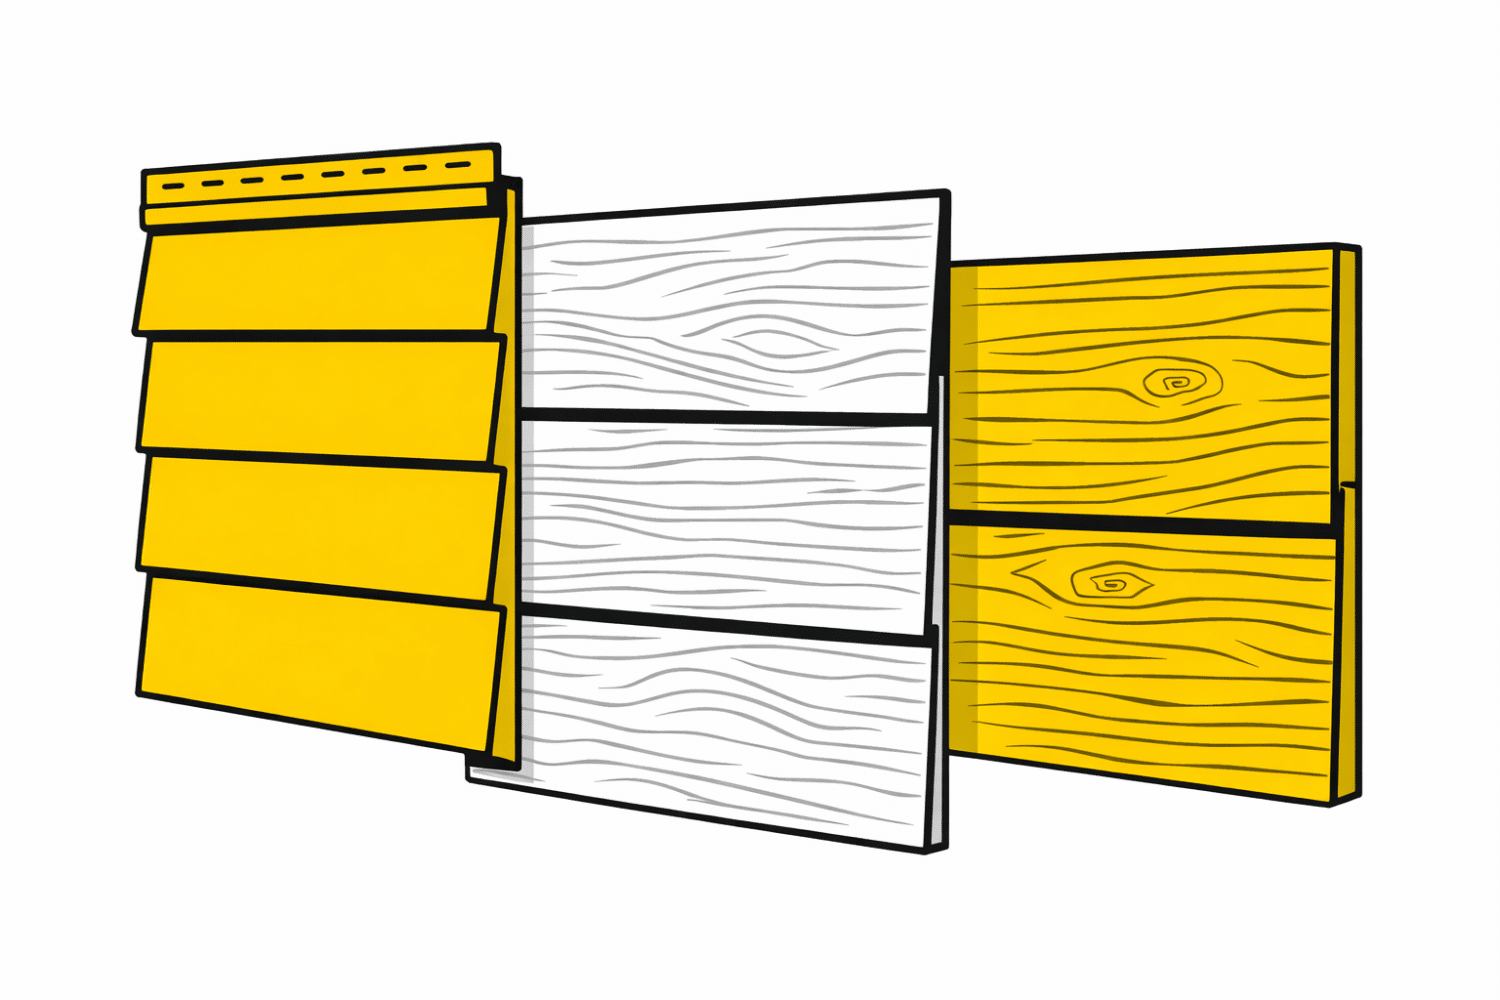
Vinyl, fiber cement, and engineered wood have different installation details, lead times, maintenance needs, and trim systems. Color and profile choices can also affect availability. A final order should be based on measured quantities and a written scope, not a rough guess from the street.
Ask which trim, starter strips, flashing, house-wrap repairs, and accessories are included. Those details affect both the appearance and the water-shedding system.
The written siding estimate is what turns the inspection into an actionable project. A clear proposal should list the siding product and manufacturer, the profile and color, the measured linear feet and square footage per elevation, the trim and accessory items included (starter strip, J-channel, corner posts, window and door wrap, vent blocks), the house-wrap and flashing work, the scope for any soffit, fascia, or sheathing repair that is anticipated, the disposal of the old siding, and the warranty terms for both material and workmanship. If any of those lines are missing or labeled “allowance,” ask what happens to the price if the actual quantity is higher once the wall is open.
Step 3: Confirm Delivery and Site Preparation
Installation should be scheduled after the required materials are confirmed. Before work starts, homeowners can move patio furniture, grills, planters, and fragile decorations away from the walls. Inside, remove items that could be affected by vibration near exterior walls.
The crew also needs clear access for materials and debris. Discuss pets, gates, vehicles, landscaping protection, and any area where a downspout or utility line may limit access.
Why the Material Order Is a Separate Step
It is common to assume installation can start a few days after the estimate is signed. In practice, the material order is its own gate. After the written scope is approved, the siding, trim, and accessories are ordered from the manufacturer or distributor, and the order has to be confirmed before a delivery date is set. Custom colors, longer lengths, and certain profiles can add lead time, especially during the busy summer season.
This means a realistic siding schedule usually looks like: inspection and written estimate, then order approval, then material manufacturing or fulfillment, then confirmed delivery to the site, then installation. A contractor that gives you an install date before the order is confirmed is guessing. Ask for the delivery confirmation in writing so the install date is based on material actually in hand, not an estimate.
Step 4: Remove Siding and Check What Is Behind It
Tear-off can reveal soft sheathing, missing flashing, deteriorated trim, or old water paths that were not visible during the estimate. A compliant process pauses to document the condition and explain the change before covering it.
House wrap and flashing should be repaired or integrated so water sheds outward. New siding should not be used to hide a wet or damaged substrate.
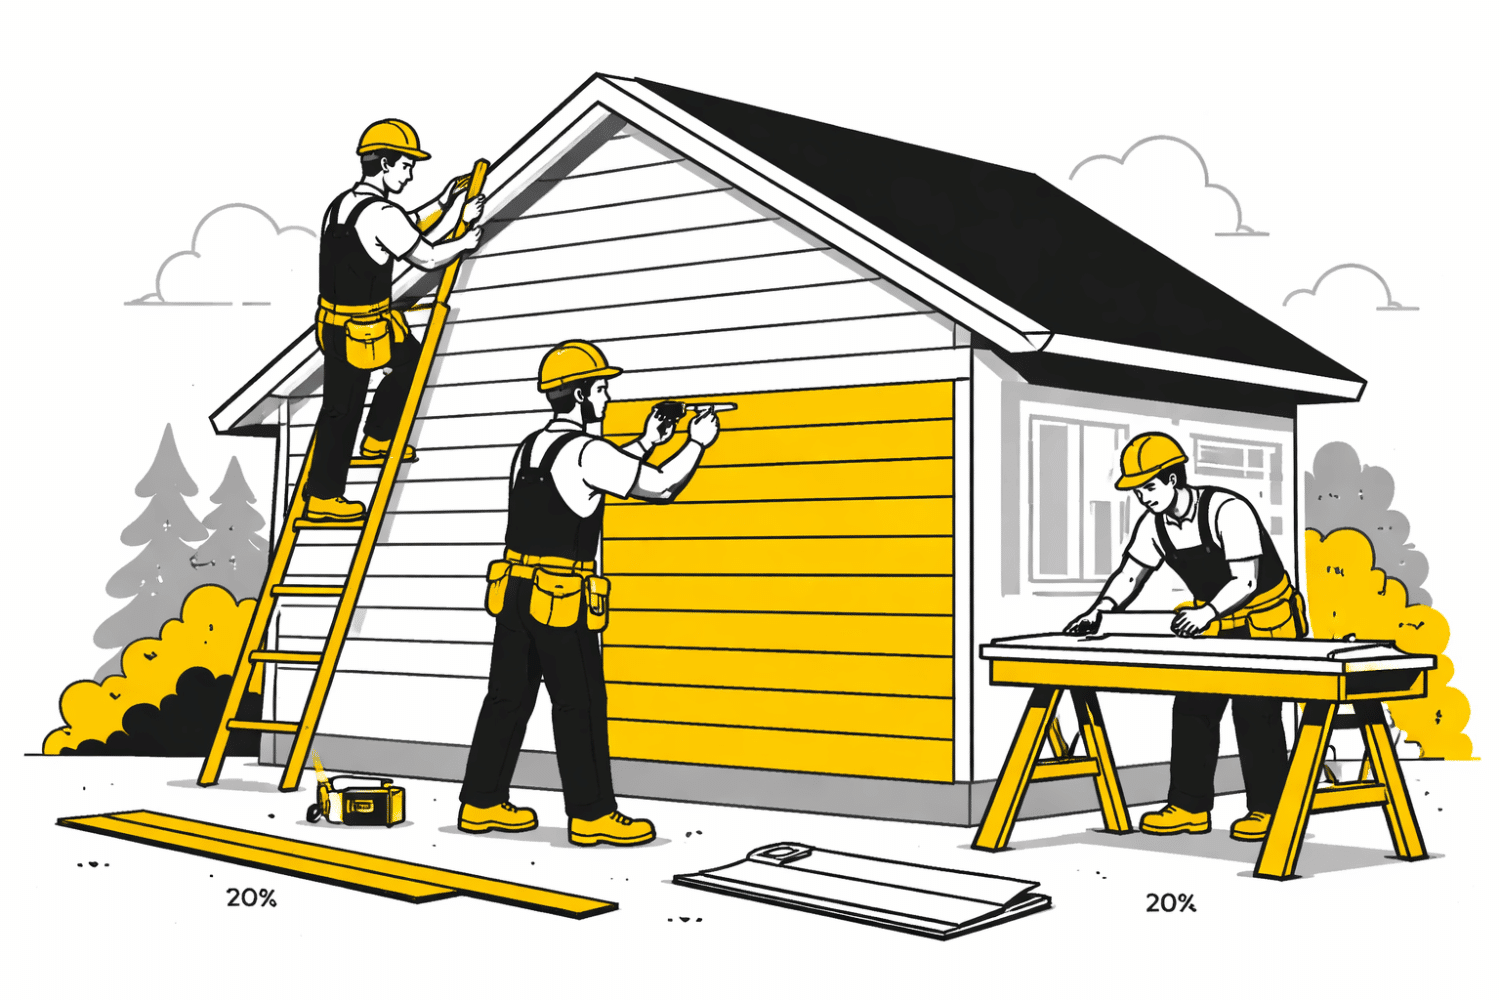
Step 5: Install the Siding System
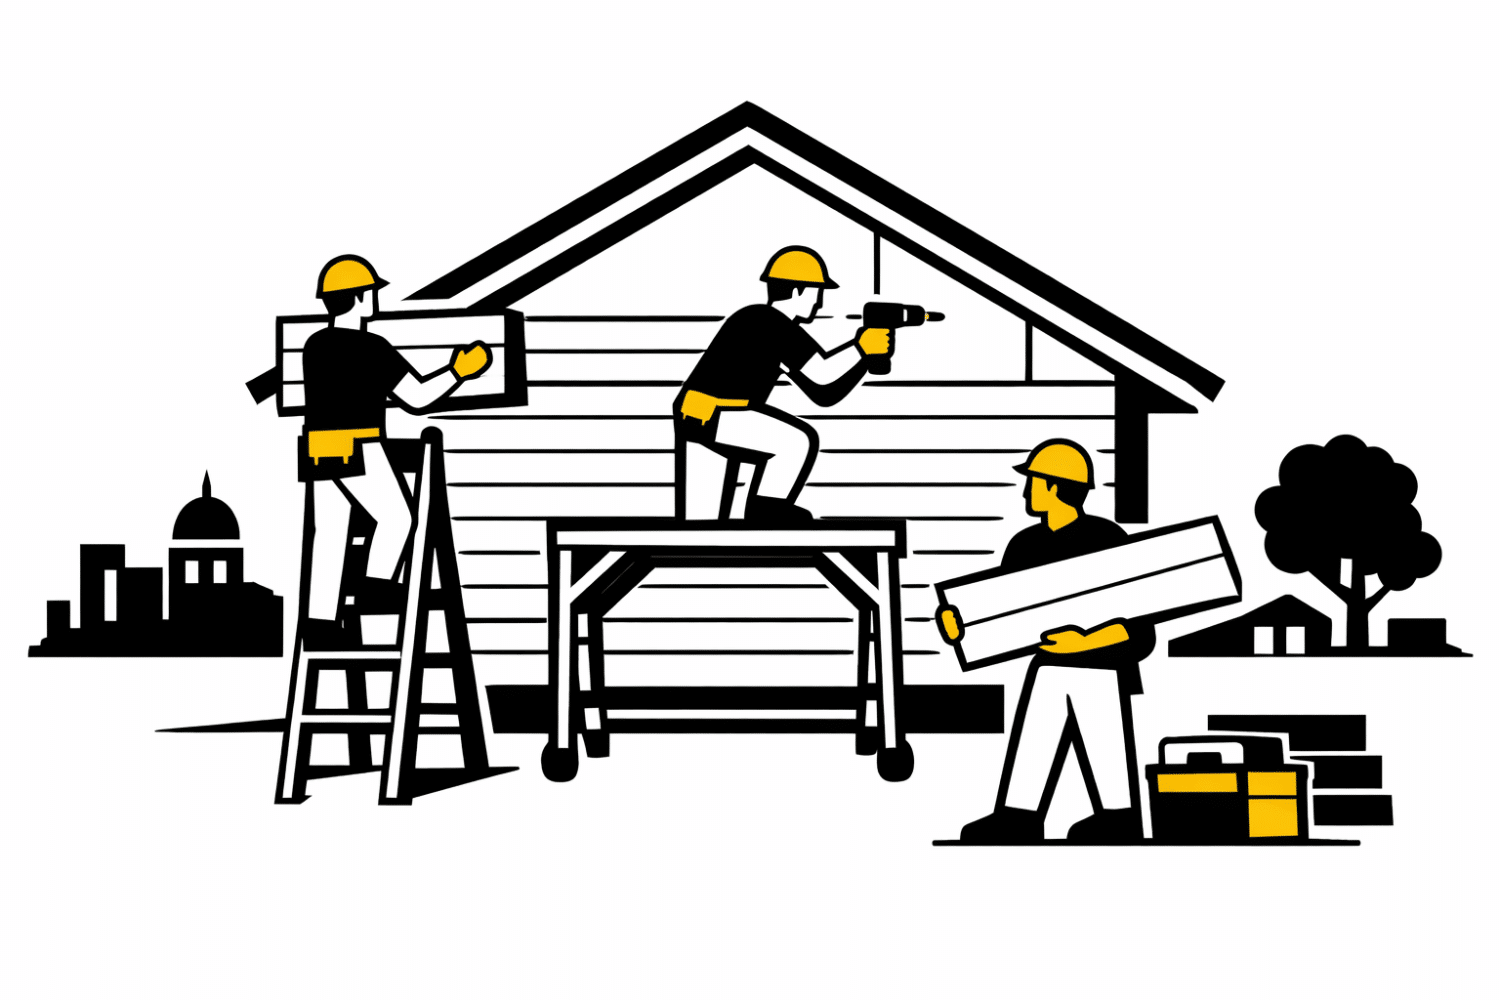
The crew installs starter components, corners, trim, flashing details, and siding according to the selected product. Vinyl siding must be fastened so it can move with temperature changes rather than being pinned tight. The VSI Preparation and Flashing Guidance calls for a smooth substrate, a continuous water-resistive barrier, and code-compliant flashing integrated around openings before siding is installed. Fiber cement and engineered wood have their own fastening, clearance, and finishing requirements.
Summer heat can change material handling and crew timing. It does not replace the manufacturer’s installation instructions or good judgment about storms and unsafe working conditions.
Step 6: Complete the Final Walkthrough
The walkthrough should cover trim alignment, penetrations, caulked joints, siding movement, cleanup, gutters and downspouts that were removed and reset, and any scope changes discovered during tear-off. Homeowners should receive a plain explanation of care and warranty steps.
What a Siding Final Walkthrough Should Cover
The final walkthrough is where incomplete or damaged work gets caught before final payment. Walk the exterior with the contractor, elevation by elevation, and confirm each item before signing off. A useful siding punch list checks: siding panels seated fully into J-channel and corner posts with even reveal, trim and J-channel cleanly cut and fastened at openings, caulked joints continuous around windows, doors, and penetrations, color and panel run direction consistent across each wall, no fasteners over-driven or visible on the siding face, soffit and fascia that were part of the scope reinstalled tight and aligned, flashing and house wrap repairs that were added during tear-off pointed out and explained, cleanup complete with no loose nails, offcuts, or debris, and a written care and warranty summary including who to call if a panel is damaged later.
If an item is not finished, it should be written on the punch list with a date, not left to memory. A short, dated punch list protects both the homeowner and the contractor.
What Can Change the Timeline?
Material or color availability.
Storms, high winds, or unsafe heat.
Hidden sheathing, flashing, or trim repairs.
Changes to windows, soffit, fascia, or gutters in the same scope.
Access limitations around landscaping, utilities, or neighboring property.
A contractor should communicate those variables rather than offer a precise duration before the scope is settled.
CoMo Premium Exteriors can inspect the current exterior, document the scope, and explain the sequence before materials are ordered. Call (573) 284-3227 or Request an Inspection.
Can Cracked Vinyl Siding Be Repaired One Panel at a Time?
A crack in one vinyl siding panel does not automatically mean the whole wall needs replacement. A one-panel repair can be reasonable when the damage is isolated, the surrounding siding is flexible and secure, and a compatible replacement panel is available.
The harder question is whether the new panel can be installed without damaging the courses around it and whether the repair will blend well enough to make sense. That decision requires more than counting cracks.
When a One-Panel Repair Is a Good Candidate
A targeted repair is most practical when the crack is limited to one or two panels, the wall is otherwise flat, and there are no signs of water entry or widespread impact. The panel above must be unlocked carefully, the damaged piece removed, and the replacement fastened so it can still move with temperature changes. A one-panel repair is technically possible because VSI’s Damaged-Panel Replacement Procedure describes unlocking the course above, removing the damaged piece, installing the replacement, and re-locking the panel above it.
The inspection should also check the lock, nail hem, trim channels, house wrap, and sheathing behind the damaged area. A cracked face can be the only issue, but it can also be the visible part of a loose or poorly moving siding course.
Matching Is Often the Limiting Factor
Vinyl siding profiles, textures, and colors change over time. Even when the original product is still made, years of sun exposure can make a new panel look different. A contractor should identify the manufacturer and profile when possible, compare samples in daylight, and explain whether the repaired area will remain noticeable.
Using a panel with the wrong profile or lock can create alignment and movement problems. A close color match is not enough if the pieces do not connect correctly.
Older or Brittle Siding Can Complicate the Repair
Vinyl becomes less forgiving as it ages. Unlocking the panel above a crack can break an adjacent course if the material is brittle. Cold weather can make that risk worse. Before promising a spot repair, the contractor should test the surrounding material gently and discuss what happens if another panel cracks during removal.
This is one reason a repair that looks simple from the yard can expand after the wall is opened. The estimate should describe the intended repair and the backup plan rather than pretending the risk does not exist.
After Hail, Check the Pattern Across the Elevation
If the crack appeared after hail, photograph the close-up, the full wall, and nearby screens, downspouts, window wraps, and trim. One isolated crack may support a repair. Repeated fractures, holes, broken locks, or damage across several elevations point to a larger siding-system question.
CoMo can document visible conditions and explain repair options. Insurance coverage decisions remain with the carrier and the policy; a contractor should not guarantee a claim outcome.
When More Than One Panel or Wall May Make Sense
The original profile is discontinued or will not lock to a current product.
The surrounding siding cracks during careful handling because it is brittle.
Damage is repeated across the same elevation rather than isolated.
Water, loose fastening, or sheathing damage is found behind the panel.
The color difference would leave a repair the homeowner does not want to accept.
What a Siding Panel Repair Inspection Should Cover
An inspection for a single cracked panel is not just about the crack itself. A useful estimate comes from checking the full wall around the damage so the repair plan holds up after the crew leaves.
The cracked panel and the course above and below it, to confirm the lock is still intact and the panel can still move with temperature changes.
The nail hem and fastening pattern. A panel that cracked from movement, wind, or impact often points back to how that course is fastened, not only to the crack.
The house wrap and sheathing behind the damaged area, which can only be checked once the panel is removed. Water staining or soft wood there turns a cosmetic repair into a larger scope.
The fascia and soffit at the top of the wall and the trim around nearby windows and doors. A crack near the top of an elevation is often tied to how that wall meets the roofline.
The same elevation photographed from a distance and up close, plus the opposite side of the house for comparison. Wide shots matter for insurance and for spotting whether the damage is isolated or part of a larger pattern across the wall.
If an estimate only addresses the visible crack and nothing behind or around it, it is worth asking what happens when the panel comes off and a different condition is found underneath.
Questions to Ask Before Approving a Repair
Did you identify the profile and locking system, not just the color?
Will the replacement panel have room to expand and contract?
What will be checked behind the damaged section?
What is the plan if an adjacent brittle panel breaks during removal?
Will the estimate explain the likely color difference?
CoMo Premium Exteriors can inspect the damaged course and surrounding wall, then explain whether a one-panel repair is practical or a larger scope is more honest. Call (573) 284-3227 or Request an Inspection.
Why Exterior Trim Gaps Keep Coming Back After Recaulking
An exterior trim gap that reopens after it has been caulked is giving you useful information. The sealant may not be the root problem. Movement, loose materials, missing flashing, trapped moisture, or repeated runoff can pull the same joint apart again.
This is different from simply learning where to spot an old caulk line. The goal is to understand why one joint keeps failing before another bead of sealant covers the evidence.
Start With the Pattern, Not the Tube of Caulk
Take one close photo of the gap, one photo of the entire window or wall section, and one photo that shows the roofline and gutter above it. Note whether the joint opens only on a sunny elevation, after heavy rain, or during freeze-thaw weather. A repeating pattern helps separate ordinary sealant aging from a defect in the surrounding exterior system.
On exterior reviews in Mid-Missouri, trim concerns often overlap with siding, window wraps, soffit, fascia, and gutter runoff. Treating the seam in isolation can miss the force that is pulling it apart.
Reason 1: Normal Movement Exceeds the Joint
Siding, trim, windows, and sealant expand and contract at different rates. A joint that is too narrow, too deep, or filled with the wrong material may not have enough flexibility. South- and west-facing walls often show more movement because they receive more sun. That movement is not a minor detail: VSI’s Vinyl Siding Installation Guidance says vinyl panels can expand or contract by 1/2 inch or more over a 12-foot-6-inch run and need clearance at openings rather than caulk locking the panels in place.
The repair may require cleaning the joint, sizing it correctly, using backer material where appropriate, and choosing a compatible exterior sealant. It should not mean packing every designed drainage opening with caulk.
Reason 2: Trim or Siding Is Moving
Loose corner boards, lifted siding courses, failed fasteners, and warped trim can move enough to break a good seal. Pressing on the surrounding trim and checking whether the nearby siding stays locked can reveal whether the joint itself is stable.
If the material moves, fastening or replacing the affected section usually comes before resealing. Caulk is not a structural fastener.
Reason 3: Flashing or Water-Shedding Details Are Wrong
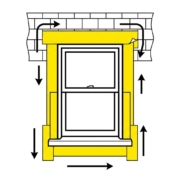
Flashing, house wrap, and window or door wraps should direct water out over the layers below. Missing, reversed, or poorly lapped flashing can send water behind trim. Wet materials swell, dry, and move, causing the visible joint to reopen.
A useful inspection checks the top of the opening, the trim corners, the siding transition, and the water path above the gap. The existing Storm Damage Inspection Process can also help when the opening appeared after wind-driven rain or impact.
Reason 4: Runoff Keeps the Joint Wet
Overflowing gutters, short downspouts, and roof valleys can concentrate water on one section of wall. The same caulk line may fail repeatedly because it remains wetter than the rest of the exterior. Correcting the runoff path may be part of the trim repair.
Reason 5: The Substrate Is Already Soft
Sealant will not restore rotted wood, swollen sheathing, or deteriorated trim. Softness, staining, peeling paint, a musty smell, or a joint that widens under light pressure can point to moisture damage behind the surface. Covering that condition delays the real repair.
What a Root-Cause Inspection Should Cover
Trim firmness and fastening around the entire opening.
Siding lock, spacing, and movement beside the joint.
Flashing and weather-resistive-barrier laps above and behind the trim.
Gutter, fascia, and downspout runoff above the wall.
Interior staining or moisture near the same opening.
Whether the old sealant bonded to both sides of a clean, sound joint.
Repair, Replace, or Monitor?
A clean maintenance joint on solid materials may only need correct preparation and resealing. Loose siding or trim may need fastening first. Soft or split trim generally needs removal and replacement, and hidden wet materials need to be evaluated before the wall is closed again.
The important result is a repair plan tied to the cause. Repeating the same caulk-only fix without checking movement and water control is how a small gap becomes a recurring project.
CoMo Premium Exteriors can inspect the trim, siding, flashing, and visible water path to explain why a joint keeps reopening. Call (573) 284-3227 or Request an Inspection.
Can Hail Damage Vinyl Siding? What Homeowners Miss Before Filing a Claim
Key Takeaways:
Vinyl siding cracks and dents from hail: Hail larger than 1 inch can crack vinyl panels, especially if they’re older or exposed to temperature extremes.
Damage is often hidden: Hail hits the bottom edge of siding panels where homeowners rarely look, and cracks may not be visible until panels warp months later.
Color matching is difficult: Even if only a few panels are damaged, finding an exact color match for older siding can require replacing entire walls.
Insurance covers siding if damage is documented: Most policies cover hail-damaged siding, but adjusters need to see the damage before you clean or repair it.
Inspect from multiple angles: Hail damage to siding is best spotted in early morning or late afternoon light when shadows reveal dents and cracks.
Trim and accessories matter: Photograph corner posts, J-channel, soffit/fascia edges, and nearby gutters because those details help show whether the siding system took a storm impact.
Siding Takes a Beating Too
When hailstorms sweep through Columbia or Jefferson City, homeowners naturally look up at their roofs. But your siding is just as exposed. Vinyl siding faces horizontally, giving hail a broad target. And unlike shingles, which flex and absorb some impact, vinyl becomes brittle with age and temperature swings—making it more likely to crack than dent.
We’ve replaced hail-damaged siding on homes across Mid-Missouri where the roof survived unscathed but the siding looked like it had been hit with a ball-peen hammer. The damage isn’t always obvious from your front porch, though. Hail strikes the bottom edges of panels, the corners near downspouts, and the walls that face the storm’s path. Miss these spots, and you file an incomplete claim that leaves you paying for repairs out of pocket.
This guide explains how to identify hail damage on vinyl siding, what insurance typically covers, and why a thorough inspection matters before you call your adjuster.
CoMo’s storm inspections often include more than the flat siding panels. We also look at the trim pieces, J-channel, outside corners, soffit and fascia transitions, and gutters near the same wall. Those connected pieces help tell the story of the storm path and can reveal damage that is not obvious from a straight-on photo.
How Hail Damages Vinyl Siding
Vinyl siding is made from PVC resin, which becomes more rigid and brittle as it ages or when temperatures drop. Mid-Missouri’s freeze-thaw cycles already stress siding; hail impact is the breaking point.
Cracking Along the Bottom Edge
The most common hail damage pattern we see is cracking along the bottom edge of siding panels. Hail strikes the exposed lip at the bottom of each panel, and the impact propagates upward into a vertical crack. These cracks are often 2-6 inches long and follow the panel’s contour.
Homeowners miss this damage because they look at siding straight on. Bottom-edge cracks are only visible when you crouch down and look upward along the wall—or when the damaged panel warps months later and pulls away from the course below it.
Round Dents or Impact Marks
On newer vinyl siding (less than 10 years old), hail may leave round dents instead of cracks. These look like small dimples, often with a whitish stress mark in the center. The vinyl hasn’t broken through, but the impact has stretched the material thin. Over time, UV exposure causes these thin spots to become brittle and crack.
Corner and Trim Damage
Outside corners, window trim, and door frames are made of rigid vinyl or aluminum. Hail can crack corner posts, split J-channel, and dent aluminum trim coil. This damage is expensive to repair because trim pieces are often custom-bent and color-matched to your siding.
Chalking and Accelerated Aging
Hail impact scrapes away the thin layer of UV protectant on vinyl siding. The damaged areas chalk faster, fade differently, and attract dirt. Within a year, hail-damaged siding may look discolored even if no cracks are visible yet.
Damage Type
What It Looks Like
Where to Find It
Bottom-edge cracks
Vertical cracks starting at panel lip
Storm-facing walls, 1-3 feet from ground
Round dents
Circular dimples with white stress marks
Flat wall sections, especially south and west faces
Corner post cracks
Split or shattered outside corners
All corners, especially those facing storm path
J-channel splits
Cracked trim around windows and doors
Window perimeters, door frames
Chalking spots
White residue or uneven fading
Previously dented areas, 6-12 months after storm
Why Insurance Adjusters Miss Siding Damage
Roof adjusters are trained to look at shingles, gutters, and vents. Siding inspection requires different techniques, and not all adjusters perform them:
Ground-level bias: Adjusters walking your property may not crouch down to inspect siding edges.
Lighting conditions: Siding dents and cracks are hardest to see in midday sun. Early morning or late afternoon light creates shadows that reveal damage.
Color matching confusion: Some adjusters assume partial siding replacement is possible and underestimate the scope if color-matched panels aren’t available.
Focus on structural damage: If your roof has obvious damage, adjusters may assume the siding is fine and spend less time on it.
At CoMo Premium Exteriors, we inspect siding on every hail damage call. We photograph damage from multiple angles, in different lighting, and at close range. If your adjuster misses siding damage, our documentation supports a supplement request.
For technical specifications on vinyl siding performance and hail resistance, the Vinyl Siding Institute publishes impact testing standards and product certifications.
The Color Matching Problem
Here’s a reality that surprises many homeowners: vinyl siding color varies between production runs. Even if you know the manufacturer and color name, a panel made in 2024 may not match panels installed in 2014. Sun fading, dirt accumulation, and manufacturing pigment shifts all contribute.
What this means for insurance claims:
If your siding is more than 5-7 years old, partial replacement may look patchy.
Insurance companies sometimes argue for “repair” instead of “replace” to save money.
A contractor who understands siding can document why full-wall or full-home replacement is necessary for aesthetic consistency.
We’ve had cases where an adjuster approved replacement of 12 damaged panels, but the color mismatch was so obvious that the homeowner ended up paying for 40 panels out of pocket. Proper documentation from the start prevents this scenario.
When you have an older vinyl siding color, ask the contractor to document whether the damaged panel can realistically be matched before you accept a small panel-only repair. Good documentation should include the wall location, panel profile, color condition, nearby trim condition, and whether replacement panels would leave one section of the home visibly different from the rest.
How to Document Siding Damage for Your Claim
Before your adjuster arrives, walk your home’s exterior with your phone and document everything:
Photograph each wall from multiple distances. Wide shots establish location; close-ups show damage detail.
Use a reference object. Place a coin or ruler next to cracks or dents to show scale.
Shoot in different light. Morning and evening light reveals damage that midday sun washes out.
Look at the bottom 3 feet of every wall. This is where most hail damage occurs.
Check corners and trim carefully. Cracked corner posts are easy to miss but expensive to replace.
Photograph connected exterior pieces. Include J-channel, soffit/fascia edges, downspouts, gutter corners, window trim, and door trim on the same wall so the inspection has context.
Note your siding brand and color. Check for manufacturer labels on the back of spare panels or in your home’s build documentation.
If you find damage, don’t power-wash your siding before the adjuster visits. Power washing can widen cracks and erase evidence of impact marks.
When Siding Damage Means More Than Cosmetic Repairs
Hail damage to siding isn’t just an aesthetic issue. Cracked panels compromise your home’s weather barrier, allowing water to reach the sheathing behind the vinyl. Over time, this causes:
Sheathing rot and structural weakening
Mold growth in wall cavities
Insulation degradation and energy loss
Pest entry points for insects and rodents
We’ve removed hail-damaged siding in Columbia and found rotted OSB sheathing that the homeowner never knew existed. The vinyl had been hiding water intrusion for two years. This is why we recommend siding inspection after any hail event, even if the damage looks minor.
Before you agree to a small hail repair, ask whether the damage is isolated to one panel or part of a larger wall system issue. A useful siding inspection should answer these questions:
Are the cracked or dented panels on one storm-facing wall, or are multiple elevations affected?
Do the corner posts, J-channel, soffit/fascia, gutters, or window trim show related impact marks?
Can the existing vinyl profile and color still be matched closely enough for a visible wall?
Are there loose panels, gaps, or water-entry points that make replacement safer than a cosmetic patch?
Do the photos clearly show close-up damage, wall location, and the surrounding exterior pieces?
These are the details that help separate a quick patch from a repair plan that actually protects the home. If the siding damage is limited, a focused repair may be enough. If the damage affects several panels, trim transitions, or a faded older wall, replacement may be the cleaner long-term answer.
Frequently Asked Questions
What size hail damages vinyl siding?
Hail 1 inch in diameter or larger can crack or dent vinyl siding, especially if the siding is more than 10 years old or has been exposed to temperature extremes. Wind-driven hail smaller than 1 inch may also cause damage if it strikes at high velocity.
Does insurance cover hail-damaged siding?
Most standard homeowners policies cover hail damage to siding as a covered peril. The key is documenting the damage before cleaning or repairing it. Adjusters need to see evidence that the damage was caused by a specific storm event.
Can I replace just the damaged panels?
Sometimes, but color matching is the challenge. If your siding is relatively new (under 5 years) and you know the exact product, partial replacement may work. For older siding, insurance often approves full-wall replacement to ensure aesthetic consistency.
How long do I have to file a siding damage claim?
Missouri policies typically require claims within one year of the damage, but we recommend filing within 30 days. Delays make it harder to prove the damage was storm-related, and cracks can worsen with freeze-thaw cycles.
Should I have my siding inspected even if my roof looks fine?
Yes. We’ve inspected many homes where the roof had no damage but the siding was significantly compromised. Roofs and walls face different angles and receive hail at different velocities. One can be damaged while the other survives.
Can hail damage James Hardie or fiber cement siding?
James Hardie fiber cement siding is more impact-resistant than vinyl, but very large hail can chip or crack it. The damage pattern is different—chipping and spalling rather than cracking—but it’s still claimable if documented properly.
What photos should I take before my siding inspection?
Take wide photos of each side of the home, then close-ups of cracks, dents, corner posts, J-channel, window trim, downspouts, and any soffit or fascia damage near the affected wall. Avoid only taking extreme close-ups; your contractor and adjuster also need photos that show where the damage is on the house.
Ready to Get Started?
We’ve been serving Mid-Missouri homeowners for over 25 years with premium roofing, siding, and exterior solutions. As GAF Master Elite, Owens Corning Platinum Preferred, and James Hardie Elite Preferred contractors, we bring certified expertise to every hail damage inspection.
If you suspect hail damaged your siding—or if you want a professional opinion before filing a claim—give us a call. We’ll inspect every panel, document everything for your adjuster, and give you honest guidance on your next steps.
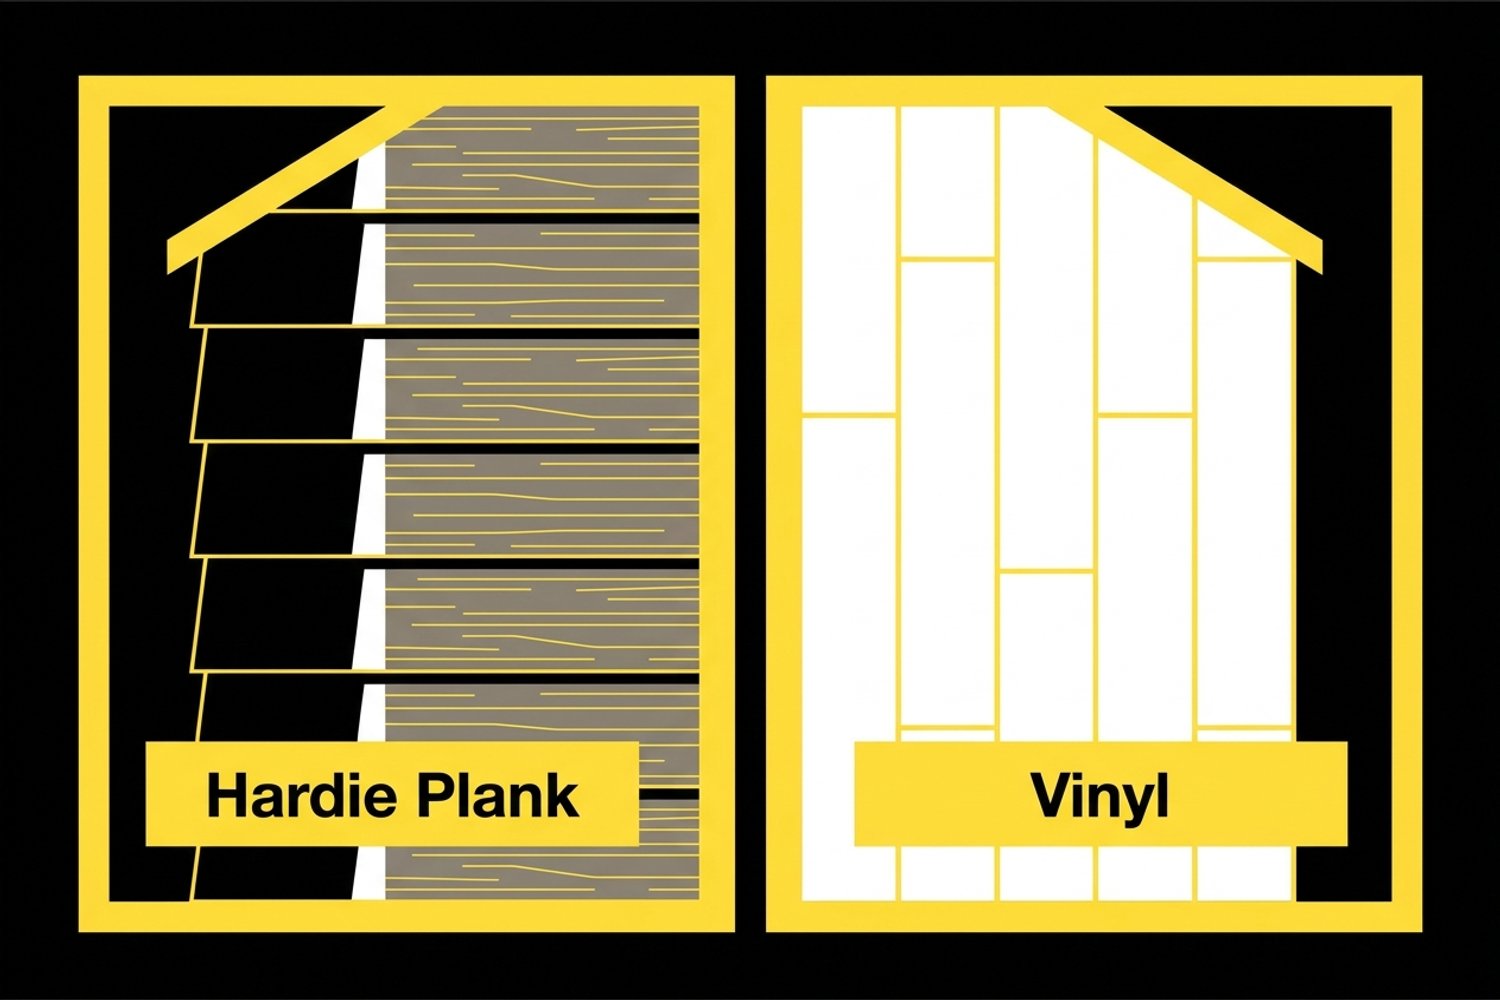
Hardie Plank Siding vs Vinyl: Which Is Best for Your Columbia Home? 1
Hardie Plank vs Vinyl: Which Is Best for Your Columbia, Missouri Home?
If you are shopping for new siding in Columbia, Jefferson City, or anywhere in Mid-Missouri, the decision usually comes down to two materials: vinyl siding and James Hardie fiber cement (HardiePlank) siding. Both are solid choices, but they perform very differently in our climate — and the right one for your home depends on your budget, your priorities, and how long you plan to stay.
One thing homeowners miss when comparing Hardie and vinyl is that the siding panel is only part of the decision. A good estimate should also account for the condition of the trim, corners, house wrap, window and door transitions, soffit, fascia, gutters, and downspouts. Those details affect how clean the finished exterior looks and whether the wall system sheds water correctly after the new siding is installed.
Hardie Plank vs Vinyl at a Glance
Feature
James Hardie (HardiePlank)
Vinyl Siding
Material
Fiber cement (cement, sand, cellulose)
Polyvinyl chloride (PVC)
Installed cost/sq ft
$8 – $14
$4 – $8
Lifespan
30 – 50 years
15 – 25 years
Fire rating
Class A (non-combustible)
Melts/distorts (no fire rating)
Hail resistance
Good — Class 4 impact rated
Poor — cracks and shatters in cold
Wind resistance
Up to 150 mph
Up to 110 mph (premium panels)
Maintenance
Annual rinse, repaint at 15+ years
Annual rinse only
Warranty
30 yr substrate + 15 yr color
Lifetime limited (prorated)
ROI at resale
~80% cost recovery
~70% cost recovery
Pest resistance
Impervious to termites/carpenter ants
Not a food source, but insects nest behind
Why This Comparison Matters in Mid-Missouri
The siding choice that makes sense in San Diego or Atlanta may not make sense in Columbia. Our climate throws specific challenges at exterior materials:
Hail: Columbia and Boone County average 3–5 significant hail events per year. Vinyl siding becomes brittle in cold temperatures and shatters on impact — meaning a late-March hailstorm can cause far more damage to vinyl than the same storm in July. Hardie plank handles hail significantly better. If your home has been hit by hail before, check out our guide to storm damage assessment and repair.
Temperature extremes: We swing from −5°F to 105°F annually. Vinyl expands and contracts visibly in these extremes, which can cause buckling, waviness, and gaps at seams. Fiber cement is dimensionally stable across this entire range.
Humidity and moisture: Our humid summers promote mold and mildew growth. Both materials resist this, but vinyl panels that are not properly installed can trap moisture behind them, leading to hidden rot on the sheathing beneath.
UV exposure: Mid-Missouri gets substantial summer sun. Vinyl fades over time, especially darker colors. James Hardie’s ColorPlus factory finish carries a 15-year fade warranty because the color is baked through multiple coats rather than applied to the surface.
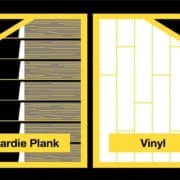
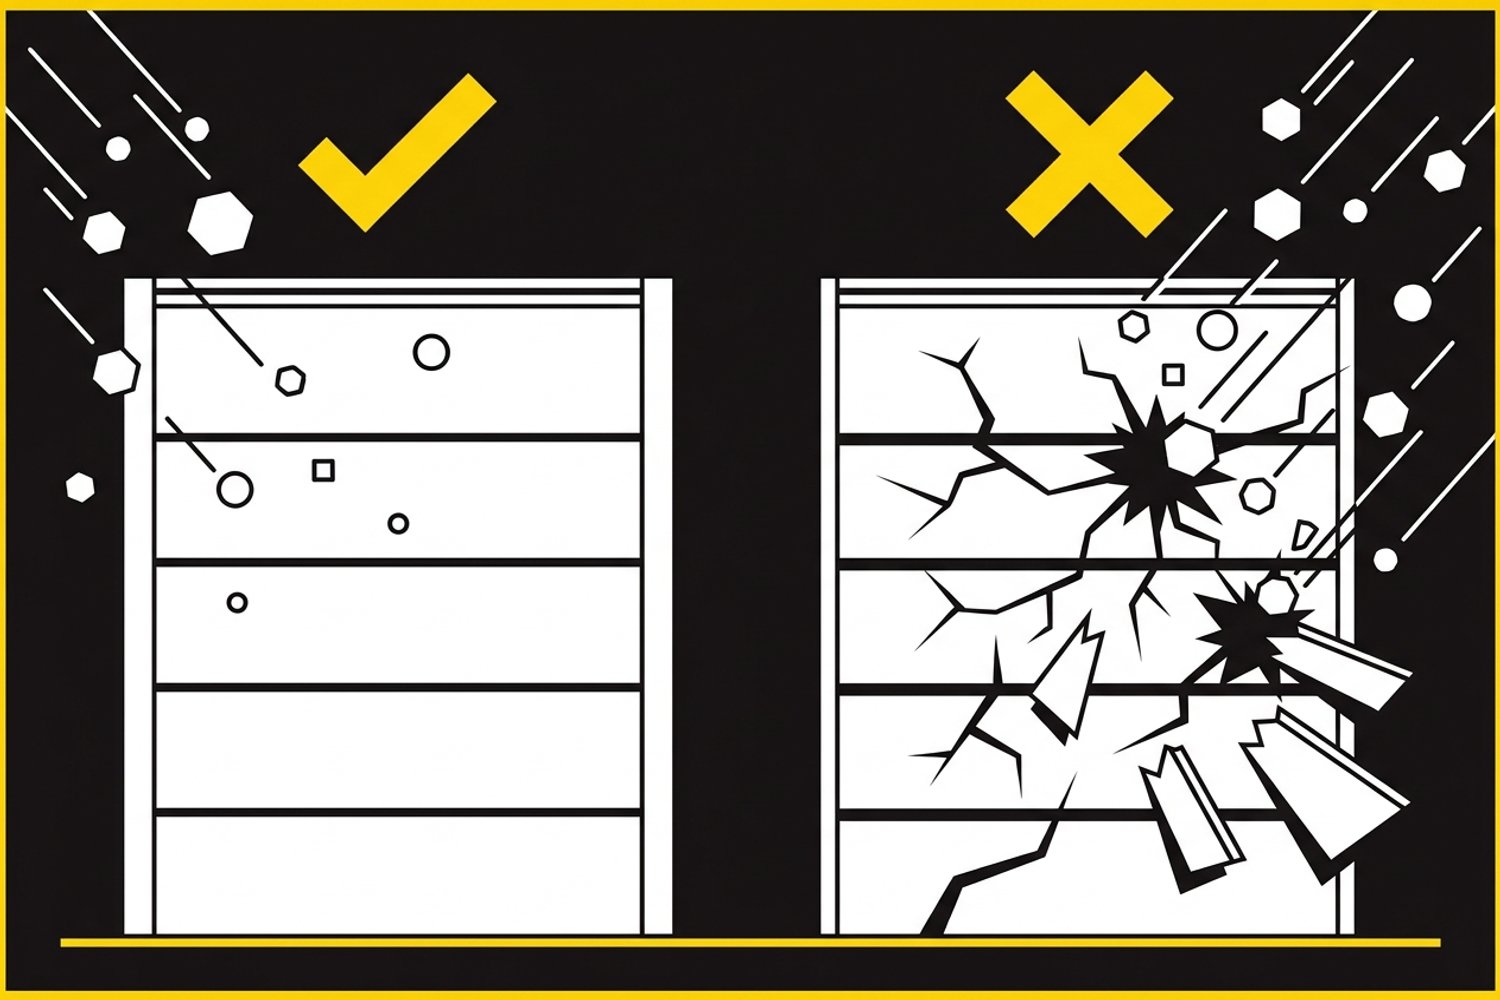
How fiber cement and vinyl siding respond differently to Mid-Missouri hailstorms.
Understanding Vinyl Siding
What It Is
Vinyl siding is made from polyvinyl chloride (PVC) extruded into panels typically 0.040 to 0.048 inches thick. The color runs through the entire panel thickness, which helps hide scratches. Standard vinyl comes in horizontal lap, vertical board-and-batten, and shake/shingle profiles.
Advantages of Vinyl for Columbia Homeowners
Lowest upfront cost: At $4 to $8 per square foot installed, vinyl is the most budget-friendly siding option. For a typical 1,800 sq ft Columbia home exterior, that means $7,200 to $14,400 total.
Zero painting required: Vinyl never needs paint. A garden hose rinse once a year keeps it looking clean.
Fast installation: Most vinyl siding jobs complete in 3–5 days, minimizing disruption.
Wide availability: Every siding contractor in Mid-Missouri works with vinyl. Replacement pieces are easy to source if individual panels are damaged.
Disadvantages of Vinyl in Our Climate
Hail vulnerability: This is the biggest drawback for Columbia homeowners. Vinyl becomes increasingly brittle below 40°F. A hailstorm during a late-season cold snap can destroy entire walls of vinyl siding. We see this every spring.
Heat distortion: Dark-colored vinyl can warp or buckle on south-facing and west-facing walls during our hottest summer days, especially if installed too tightly.
Shorter lifespan: Plan on 15–25 years before vinyl starts looking faded, chalky, or damaged enough to warrant replacement.
Lower resale value: Home buyers and appraisers in the Columbia market view vinyl as a standard, not premium, exterior finish.
Understanding HardiePlank (Fiber Cement) Siding
What It Is
James Hardie HardiePlank siding is made from a mixture of Portland cement, ground sand, and cellulose fibers pressed into planks. The result is a dense, dimensionally stable board that looks and feels like real wood but resists fire, rot, insects, and impact far better than wood or vinyl. The HZ5 product line is specifically engineered for climates like ours that experience both freezing and hot/humid conditions.
Advantages of HardiePlank for Columbia Homeowners
Superior durability: Fiber cement lasts 30 to 50 years — roughly double the lifespan of vinyl. For homeowners planning to stay in their Columbia home long-term, this dramatically reduces lifetime cost.
Hail and impact resistance: HardiePlank carries a Class 4 impact rating and does not become brittle in cold weather. It handles Mid-Missouri hailstorms far better than vinyl.
Fire resistance: Class A non-combustible rating. Fiber cement will not ignite, melt, or contribute to flame spread. This matters for homes near wooded lots or during drought conditions.
Dimensional stability: Unlike vinyl, fiber cement does not expand, contract, warp, or buckle with temperature changes. Seams stay tight year-round.
ColorPlus factory finish: Multiple coats of color baked on in a controlled factory environment. Resists fading for 15+ years in our UV conditions.
Higher resale value: According to Remodeling Magazine’s Cost vs. Value Report, fiber cement siding replacement recoups approximately 80% of cost at resale in the Central U.S.
Pest proof: Termites, carpenter ants, and woodpeckers — all active in Boone and Cole counties — cannot damage fiber cement.
Disadvantages of HardiePlank
Higher upfront cost: At $8 to $14 per square foot installed, Hardie costs roughly double what vinyl does upfront. For a typical Columbia home, that means $14,400 to $25,200.
Heavier material: Fiber cement boards are heavy and require more labor to install. Not every siding crew is qualified to work with it.
Will eventually need repainting: While the ColorPlus finish lasts 15+ years, fiber cement will eventually need repainting — unlike vinyl which never gets painted (though vinyl also cannot be refreshed).
Requires skilled installation: Improper cutting, nailing, or caulking can lead to moisture intrusion and premature failure. Always choose a James Hardie preferred contractor.
Cost Comparison for a Typical Columbia Home
For a standard 1,800 sq ft exterior (common for many homes in Columbia’s established neighborhoods like Vanderveen, Shepard Hills, and Old Southwest):
Cost Factor
HardiePlank
Vinyl
Materials + Labor
$14,400 – $25,200
$7,200 – $14,400
Expected lifespan
30 – 50 years
15 – 25 years
Cost per year of life
$360 – $630
$480 – $576
Repainting (over 30 yr)
$3,000 – $5,000 (once)
$0
Hail repair probability
Low
High (1–2 claims typical)
30-year total cost
$17,400 – $30,200
$14,400 – $28,800 (2 installs)
When you factor in the likelihood of needing a second vinyl installation within 30 years — plus potential hail damage repairs — the cost gap narrows significantly. For many Columbia homeowners, Hardie is the more economical choice over time. For a detailed breakdown, see our guide on James Hardie siding costs in Columbia.
Before you compare quotes, take a few wide photos of each wall and close-ups of any cracked panels, loose trim, soft fascia, open caulk joints, warped corners, or areas where water appears to run behind the siding. Those photos help you ask better questions: does the estimate include trim and accessory pieces, does it address hidden water damage if found, and are you comparing the same siding profile, thickness, finish, and warranty level from one quote to the next?
Which Should You Choose?
Choose Vinyl If:
Your budget is tight and you need the lowest upfront cost
You are planning to sell within 5–7 years and want a fresh exterior at minimal investment
You are siding a rental property or secondary structure where appearance is less critical
Choose HardiePlank If:
You plan to stay in your home for 10+ years and want to avoid a second siding project
Hail damage history or concern is a factor (very common in Boone and Cole counties)
You want the highest curb appeal and resale value
Your home is in a fire-prone area or near wooded lots
You want the look of real wood without the maintenance of real wood
Get a Free Siding Estimate
Whether you are leaning toward vinyl or HardiePlank, our team at CoMo Premium Exteriors will give you an honest assessment of what makes sense for your specific home. We will measure the walls, review the trouble spots around openings and trim, discuss your goals, and present options at multiple price points — no pressure.
Is Hardie plank siding better than vinyl in Columbia, MO?
For most Columbia homeowners who plan to stay long-term, yes. HardiePlank outperforms vinyl in durability (30–50 years vs. 15–25), hail resistance, fire safety, and resale value. The higher upfront cost is offset by its longer lifespan and lower risk of hail damage claims.
How much more does Hardie plank cost than vinyl siding?
In the Columbia area, HardiePlank typically costs $8 to $14 per square foot installed versus $4 to $8 for vinyl. For a typical 1,800 sq ft home exterior, that is roughly $7,000 to $11,000 more upfront. However, over 30 years, the total cost of ownership is often comparable because vinyl may need replacement within that period.
Does vinyl siding hold up to Missouri hailstorms?
Vinyl siding is vulnerable to hail damage, particularly during cold-weather storms when the PVC becomes brittle. Columbia and Boone County average 3–5 significant hail events per year. We frequently replace hail-damaged vinyl siding across Mid-Missouri. HardiePlank handles hail significantly better due to its Class 4 impact rating.
Can you paint vinyl siding?
Technically yes, but it is not recommended. Paint on vinyl can cause the panels to absorb more heat and warp. Darker paint colors are especially problematic. If your vinyl siding looks faded or outdated, replacement is generally the better option. HardiePlank can be repainted any color without risk of warping.
Which siding has better resale value in Columbia’s housing market?
James Hardie fiber cement siding adds more resale value than vinyl. Industry data shows fiber cement recoups about 80% of installation cost at resale versus roughly 70% for vinyl. Real estate agents in the Columbia market consistently report that Hardie siding is a selling point with buyers.
How long does each type of siding last in Mid-Missouri?
James Hardie HardiePlank typically lasts 30 to 50 years in our climate. The HZ5 formulation is specifically engineered for our freeze-thaw and humidity conditions. Vinyl siding lasts 15 to 25 years before fading, brittleness, or storm damage warrants replacement.
Does CoMo Premium Exteriors install both vinyl and Hardie siding?
Yes. We are a James Hardie preferred contractor and also install premium vinyl siding. We will recommend the material that makes the most sense for your home, budget, and goals. Call (573) 424-9008 for a free consultation.
Lap Siding vs Vertical Siding: Which Orientation Works Best?
Key Takeaways:
Lap (horizontal) siding is the most popular choice for Mid-Missouri homes — more contractors are experienced with it, and it’s the safer bet for resale value.
Vertical siding sheds water efficiently along its length but requires careful seam sealing at panel joints to prevent moisture infiltration.
Horizontal lap costs slightly less to install because the framing is simpler — vertical siding often requires horizontal furring strips over the sheathing.
Mixing both orientations on different sections of your home creates architectural interest without committing fully to either style.
Vertical siding suits farmhouse, modern, and coastal aesthetics, while horizontal lap works for virtually every architectural style.
Horizontal vs Vertical: More Than Just a Visual Choice
When most people think of siding, they picture horizontal lap boards — and for good reason. It’s what covers the majority of homes in Columbia, Jefferson City, and throughout Mid-Missouri. But vertical siding has been gaining ground, especially on newer construction and renovated homes going for a farmhouse or modern look.
The orientation you choose affects more than aesthetics. It changes how water moves across your exterior, how the siding is fastened to your home’s structure, what maintenance looks like, and what the project costs. Neither orientation is objectively better — each has strengths that match different situations.
How Water Behaves on Each Orientation
This is where the practical differences start, and it’s not as straightforward as you might expect.
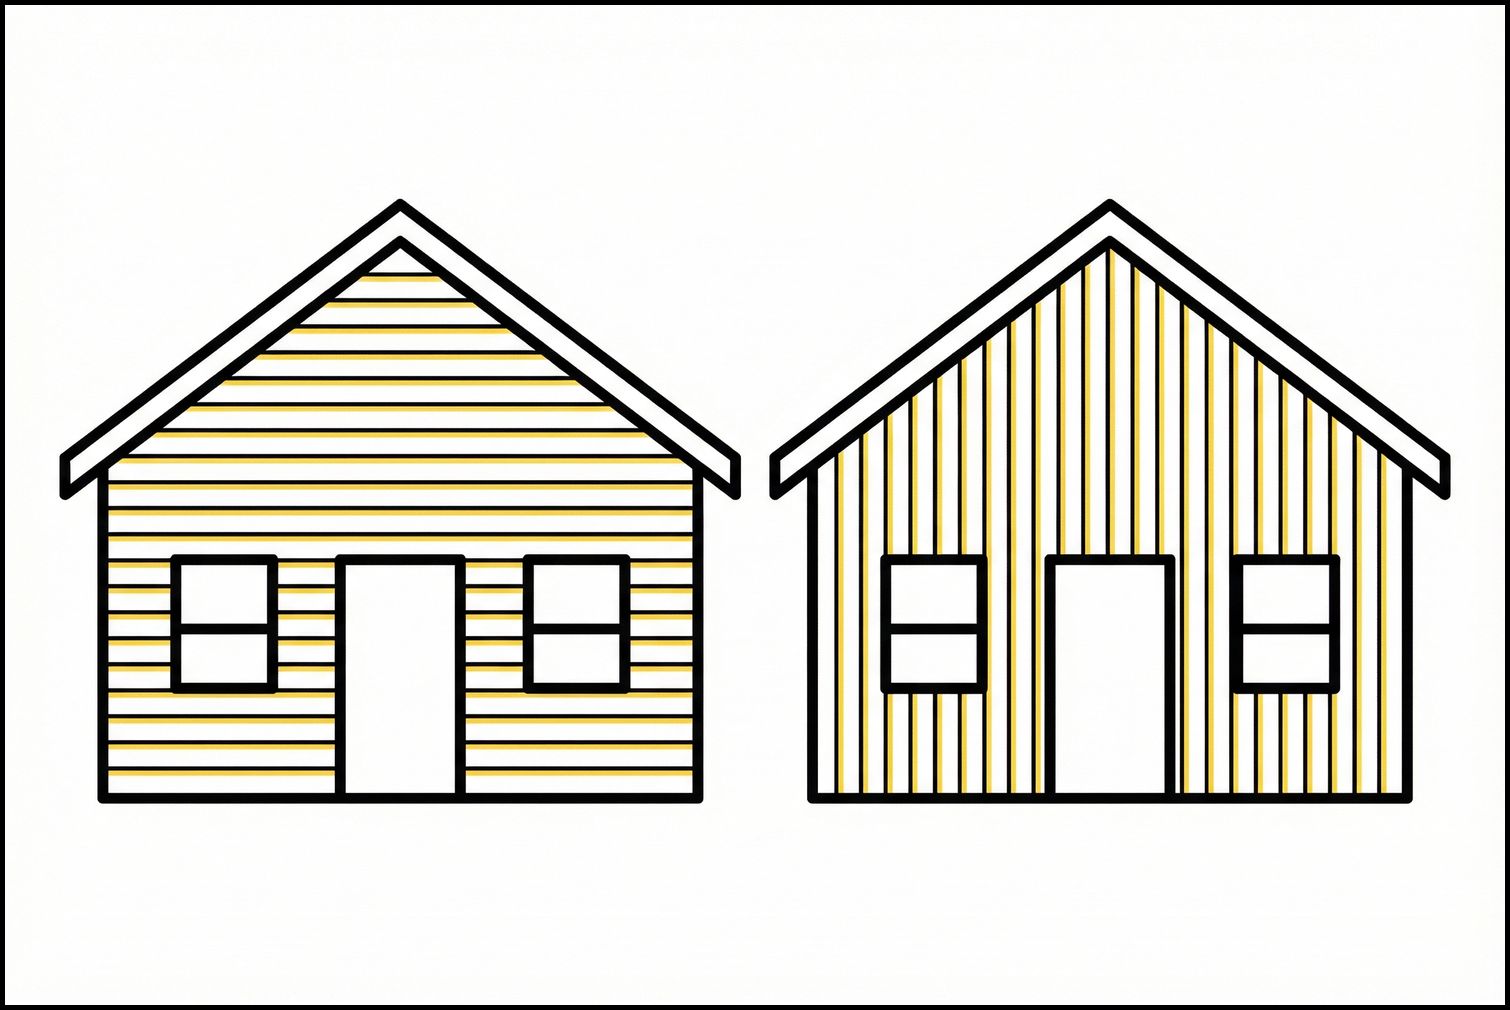
Horizontal lap siding uses gravity and overlap to manage water. Each board overlaps the one below it, so rain naturally runs down the face of one board and drops onto the next. The overlap joint is the system’s strength and its vulnerability — it sheds direct rain effectively, but wind-driven rain can push moisture up and under the overlap. Fiber cement manufacturer Nichiha notes that horizontal gaps between panels can hold water for extended periods, contributing to mold and mildew in humid climates.
Vertical siding lets water run straight down with minimal interruption. There are no horizontal overlaps to catch water, so rain moves off the surface quickly. The vulnerability with vertical siding is at the seams between panels — those vertical joints need caulking and battens to prevent water from working behind the siding. In Mid-Missouri’s climate, where summer humidity sits above 80% for weeks at a time, both orientations need proper housewrap and flashing behind the siding regardless of which direction the boards run.
The honest answer: both manage water adequately when installed correctly. Horizontal lap has a slight edge in wind-driven rain scenarios because the overlaps create physical barriers. Vertical has a slight edge in sustained downpours because water sheds faster. Neither is waterproof without the backup systems behind it.
Installation and Cost Differences
Horizontal lap siding installs directly onto standard wall sheathing with nails driven into studs. The framing is straightforward because studs run vertically — horizontal boards cross them naturally, creating plenty of fastening points. Most siding crews can install horizontal lap efficiently because it’s the most common configuration they encounter.
Vertical siding requires an extra step. Since the boards run the same direction as the studs, you can’t always nail directly into framing at consistent intervals. The standard solution is adding horizontal furring strips — 1×3 or 1×4 boards nailed across the studs — to create a nailing surface for vertical panels. That furring adds material cost and labor time.
Factor
Horizontal Lap
Vertical Siding
James Hardie installed cost
$12-$25/sq ft
$11-$18/sq ft (panel)
Additional framing
None needed
Furring strips (~$1-2/sq ft added)
Net installed cost
$12-$25/sq ft
$12-$20/sq ft
Installation speed
Faster
Slower (furring + sealing)
Contractor availability
Most crews experienced
Fewer crews specialize
The material cost for vertical panels is sometimes lower per square foot than lap boards — James Hardie’s HardiePanel vertical siding runs $11-$18 installed versus $12-$25 for HardiePlank lap. But the furring strip requirement and slower installation typically even out the total project cost. For most Mid-Missouri homes, the final price is comparable between orientations in the same material.
Architectural Styles and Curb Appeal
Horizontal lap works on almost everything. Colonial, ranch, Cape Cod, craftsman, traditional — horizontal siding is the default for a reason. It creates a grounded, proportional look that’s hard to get wrong. For resale, horizontal lap is the conservative choice that appeals to the broadest range of buyers.
Vertical siding makes a statement. It draws the eye upward, making walls appear taller and emphasizing vertical architectural elements. Vertical works particularly well on:
Modern farmhouse — board-and-batten (a type of vertical siding) is the signature exterior treatment
Contemporary homes — clean vertical lines complement flat or low-slope rooflines
Gable accents — vertical siding on gable ends with horizontal on the main walls adds visual variety
Garages and outbuildings — vertical panels suit utilitarian structures
The trend toward mixed orientations is worth considering. Using horizontal lap on the main body of your home with vertical siding on gable ends, dormers, or accent sections creates architectural interest without the resale risk of an all-vertical exterior. This is one of the most common approaches we see in siding projects across Columbia.
Maintenance Considerations
Horizontal lap: Maintenance concentrates at the overlap points. Check annually for lifted boards, cracked caulk at butt joints, and paint peeling at overlaps where moisture contact is highest. Cleaning is straightforward — a garden hose or light pressure wash from top to bottom follows the board direction naturally.
Vertical siding: Maintenance focuses on the vertical seams between panels. Caulk and batten strips at these joints need inspection for gaps, especially after temperature swings that cause expansion and contraction. Vertical panels can accumulate more visible dirt streaking because rain runs straight down and carries debris with it. Cleaning requires attention to those vertical streaks.
In Mid-Missouri’s climate with its freeze-thaw cycles, both orientations need caulk inspection at least once a year. The temperature swings between a 95-degree August afternoon and a -5-degree January night put significant stress on sealant joints regardless of siding direction.
Board-and-Batten: The Most Popular Vertical Style
If you’re drawn to vertical siding, board-and-batten is likely what caught your eye. Wide boards are installed vertically with narrow batten strips covering the seams between them. The result is a rhythmic pattern of wide-narrow-wide that reads as distinctly vertical without the institutional look of flat panel siding.
We’ve covered board-and-batten in detail in our board-and-batten vs lap siding comparison, including cost breakdowns and when it makes sense for Mid-Missouri homes. If board-and-batten specifically is what you’re considering, that comparison has the deep-dive.
What a Siding Orientation Inspection Actually Covers
Before anyone commits to lap or vertical, a real siding estimate walks the exterior wall by wall. The point isn’t just quoting a price — it’s matching the orientation to how your home is built, how water currently moves across it, and what’s behind the existing material. Here’s what that visit should cover.
Wall geometry and height. Tall, narrow walls read differently in vertical siding than short, wide ones. An estimator who pays attention to this will point out which walls benefit from each orientation before you pick one for the whole house. A two-story wall with board-and-batten draws the eye up; that same profile on a low ranch can look heavy.
Existing overlap, housewrap, and flashing condition. If you’re re-siding rather than building new, the inspection checks whether the current overlap, housewrap, and flashing are doing their job. Water staining or soft spots behind old siding tell a different story than the orientation debate alone — and they can change whether a full tear-off is in scope before any new material goes up.
Trim, corners, and transition points. Vertical and horizontal siding meet windows, doors, and corners differently. Inside corners, outside corners, and window casing all need compatible trim. The estimate should call out trim upgrades or transition pieces that change the labor and material count, not just the board price.
Gable ends and accent walls. These are where mixing orientations is most common and most cost-effective. A good estimator will show you where vertical siding on a gable end or dormer adds visual interest without the cost of re-doing an entire wall system.
Fastening surface check. If vertical siding is on the table, the inspection confirms whether horizontal furring strips are needed over your sheathing. That single detail changes the labor estimate and the timeline — and it’s why a phone quote for “vertical siding” is rarely reliable.
Photos and measurements, wall by wall. Every elevation should be photographed and measured during the visit. Those photos become the scope document your written estimate is built from. If an estimate arrives without that level of detail, the orientation recommendation is a guess, not a measurement.
Frequently Asked Questions
Is horizontal or vertical siding better for resale value?
Horizontal lap siding is the safer choice for resale. It appeals to the widest range of buyers and matches the most architectural styles. Vertical siding can add value on homes where it suits the architecture (farmhouse, modern), but it limits your buyer pool more than horizontal does.
Can you mix horizontal and vertical siding on the same house?
Yes, and it’s one of the most effective ways to add architectural interest. Common combinations include horizontal on the main walls with vertical on gable ends, dormers, or accent sections. The key is using the same material and color family so the mix looks intentional.
Does vertical siding cost more than horizontal?
Material costs are similar or sometimes lower for vertical panels. But vertical installation often requires horizontal furring strips over the sheathing, which adds $1-2 per square foot in material and labor. Total installed cost is usually comparable between the two orientations.
Which siding orientation handles wind better?
Vertical siding generally provides better resistance to wind uplift because there are no horizontal overlaps for wind to catch. Horizontal lap siding can be vulnerable to wind-driven rain pushing moisture under the overlaps, especially during the severe thunderstorms common in Mid-Missouri from April through June.
What’s the best siding orientation for a farmhouse look?
Board-and-batten (vertical) on the main body with horizontal accents on covered porches or lower sections. This combination has become the signature farmhouse exterior treatment. James Hardie’s HardiePanel with batten strips or LP SmartSide vertical panels both achieve this look in durable fiber cement. Call us at (573) 424-9008 to explore options for your home.
Ready to Get Started?
We’ve been serving Mid-Missouri homeowners for over 25 years with premium siding installation in both horizontal and vertical orientations. As James Hardie Elite Preferred contractors, we have specialized training on every HardiePlank and HardiePanel profile — and the experience to help you choose the right combination for your home’s architecture and your curb appeal goals.
Dutch Lap vs Traditional Siding: Which Profile Is Right for Your Home?
Key Takeaways:
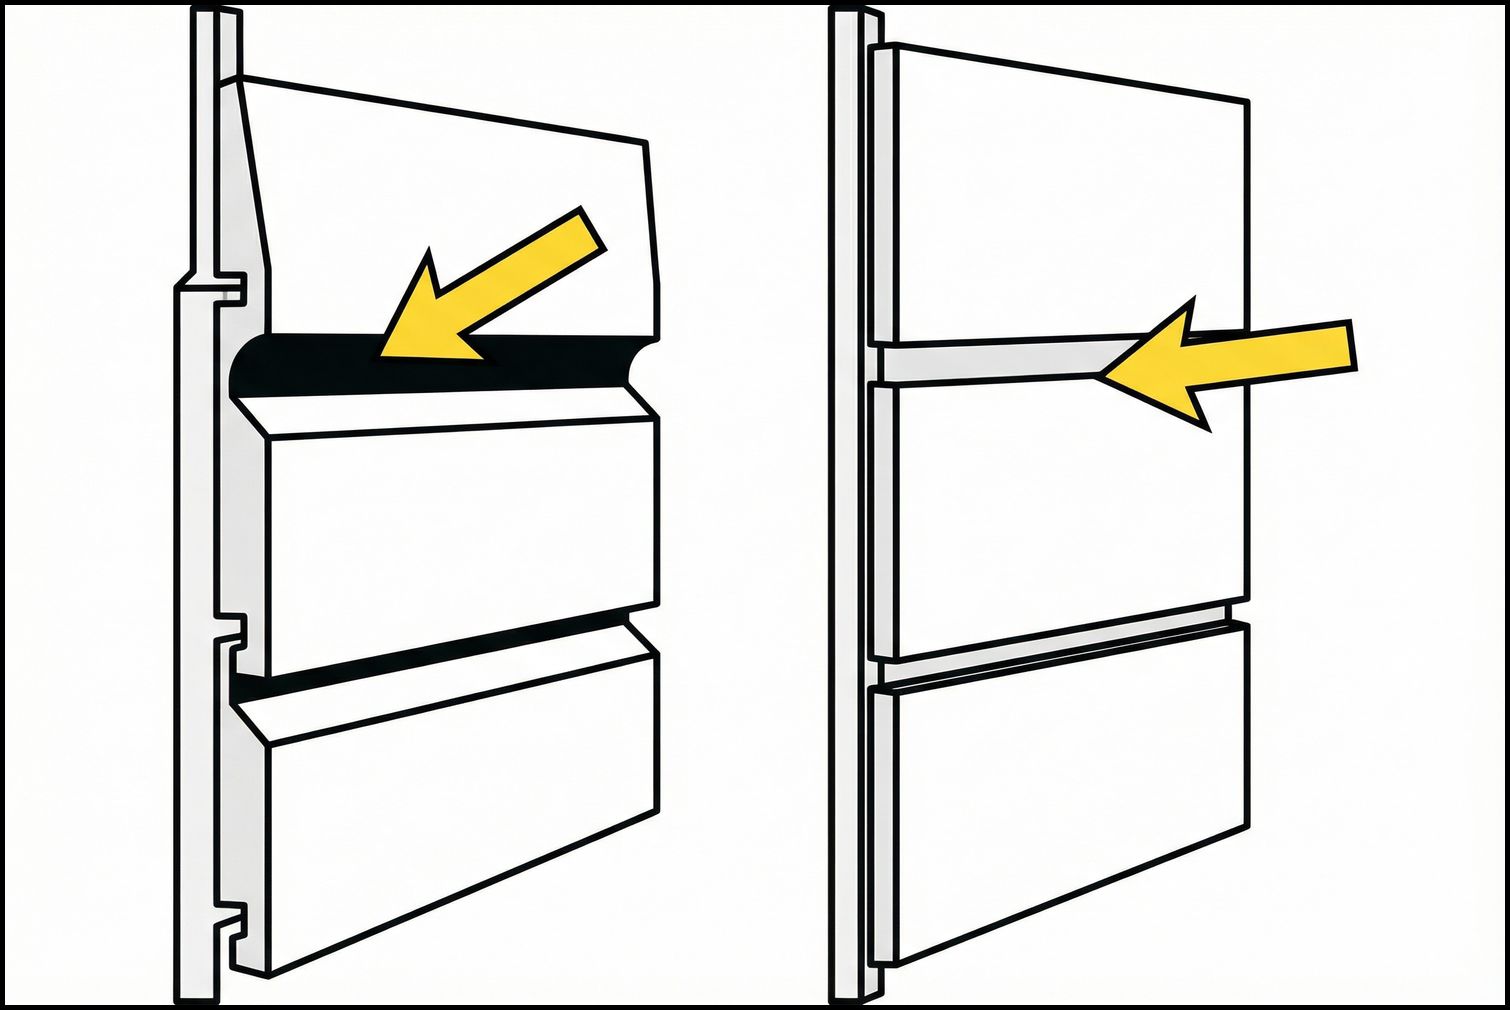
Dutch lap siding has a beveled notch at the top of each board that creates a deeper shadow line and more dimensional look than traditional flat clapboard.
Cost difference is small — Dutch lap runs about $0.50-$1.50 more per square foot than traditional lap in the same material.
Dutch lap sheds water better than flat clapboard because the angled profile prevents moisture from pooling at the overlap point.
Traditional clapboard is easier to install and more DIY-friendly, while Dutch lap’s notched profile requires more precision.
Both styles are available in vinyl, fiber cement, and wood — James Hardie calls their Dutch lap profile “Custom Colonial.”
What’s the Actual Difference Between Dutch Lap and Traditional Siding?
If you’re looking at siding samples for your Columbia or Jefferson City home, you’ve probably noticed that “lap siding” comes in more than one shape. The two most common profiles — traditional clapboard (also called straight lap) and Dutch lap — use the same overlapping installation method but create very different visual effects on your exterior.
The difference comes down to a single design detail at the top of each board. Traditional clapboard is flat. Dutch lap has a concave notch — a beveled channel that creates a pronounced shadow line where each course meets the one above it. That shadow gives Dutch lap its distinctive dimensional appearance, tracing back to siding styles brought to the American colonies by Dutch settlers in the 1600s.
The visual difference is easy to spot once you know what to look for. Whether that difference is worth the slightly higher cost depends on your home’s architecture, your curb appeal goals, and how the siding handles Mid-Missouri weather.
Visual Profile: Shadow Lines vs Clean Lines
Traditional clapboard creates a smooth, streamlined appearance. Each flat board overlaps the one below with minimal depth. The transitions between courses are subtle — you see horizontal lines but not much shadow play. This profile works well on colonial, Cape Cod, and ranch-style homes where a clean, understated exterior is the goal.
Dutch lap adds visible depth. The concave notch at the top of each board catches light differently throughout the day, creating shadow lines that shift as the sun moves. The effect makes your home’s exterior feel more textured and substantial. Dutch lap suits craftsman, farmhouse, and transitional-style homes where architectural detail adds character.
From the street, the difference is noticeable but not dramatic. Walk up to the siding and the profile difference is obvious. In real estate photography — which matters for resale — Dutch lap tends to photograph with more visual interest because the shadows add dimension to flat images.
How Each Profile Handles Mid-Missouri Weather
The profile difference isn’t just cosmetic. That beveled notch on Dutch lap siding changes how water interacts with your exterior.
Traditional clapboard’s flat overlap can pool small amounts of water at the seam where boards meet. In most conditions this drains quickly, but during sustained rain — common in Mid-Missouri spring storms — that pooling creates extended moisture contact at the overlap point. Over years, this can accelerate paint failure, mold growth, and material deterioration at the seams.
Dutch lap’s angled profile moves water off the overlap point faster. The concave channel acts as a small ramp that directs rain downward rather than letting it sit at the seam. This means less moisture contact time, which translates to less mold growth and less paint peeling — meaningful advantages in Central Missouri’s humid summers.
Neither profile is waterproof on its own — both depend on proper housewrap, flashing, and installation behind the siding. But Dutch lap’s geometry gives it a practical edge in wet climates.
Cost Comparison by Material
Material
Traditional Lap (installed)
Dutch Lap (installed)
Premium
Vinyl
$2-$6/sq ft
$4-$7/sq ft
~$1-2/sq ft
Fiber cement (James Hardie)
$12-$20/sq ft
$12-$22/sq ft
~$0-2/sq ft
Wood (cedar/pine)
$6-$12/sq ft
$7-$14/sq ft
~$1-2/sq ft
The material cost difference between profiles is minimal — especially in fiber cement, where James Hardie offers both traditional HardiePlank lap and Custom Colonial (their Dutch lap equivalent) at similar price points. The labor premium for Dutch lap is where the difference shows up. The notched profile requires more precision during installation — each board must align accurately for the shadow lines to look consistent. That adds 10-15% to labor costs compared to flat clapboard.
On a typical Mid-Missouri home with 1,500-2,000 square feet of siding, the total project cost difference between Dutch lap and traditional might run $750-$3,000 depending on material and contractor.
Installation Differences
Traditional clapboard is the more forgiving installation. Flat boards align easily, minor spacing variations are hard to spot, and the profile is standard enough that most siding crews install it quickly. If you’re considering DIY vinyl siding, clapboard is the safer choice — alignment mistakes are less visible.
Dutch lap demands more precision. The beveled notch creates a visual reference point that makes misalignment obvious. If one board sits slightly higher or lower than its neighbors, the shadow line breaks and the eye catches it immediately. Professional installation is strongly recommended for Dutch lap — the precision requirement adds time but produces a much better result than DIY attempts typically achieve.
For fiber cement Dutch lap (James Hardie Custom Colonial), professional installation isn’t just recommended — it’s required for warranty coverage. James Hardie Elite Preferred contractors like us have specific training on profile alignment and fastener placement for each siding installation in Columbia.
Which Style Fits Your Home?
Choose traditional clapboard if:
Your home is colonial, Cape Cod, or classic ranch style
You prefer a clean, understated exterior
Budget is the primary concern
You’re matching existing siding on an addition or partial replacement
You plan to DIY the installation (vinyl only)
Choose Dutch lap if:
Your home is craftsman, farmhouse, or transitional style
You want more visual depth and shadow play on your exterior
Curb appeal and resale presentation are priorities
You’re investing in fiber cement or wood siding (the premium is proportionally smaller on higher-end materials)
Water management matters — Dutch lap’s angled profile performs better in wet climates
What a Siding Profile Selection Estimate Should Actually Cover
Choosing between Dutch lap and traditional clapboard is a visual and budget decision, but it should sit on top of a real inspection of your walls — not a sample board and a price quote alone. When a siding contractor comes out, the estimate should cover more than square footage and material price.
Here is what a proper siding estimate and inspection should address before anyone talks profile or color:
Existing siding condition wall by wall. Are the current boards sound underneath, or is there soft spots, rot, or impact damage from hail or yard equipment? One damaged elevation changes the scope and cost even if the rest of the house looks fine.
Sheathing and housewrap behind the siding. Siding profile does not fix water damage that is already behind it. If the sheathing is soft or the weather barrier is missing or torn, that repair work has to happen before new siding goes on.
Trim, corner boards, and transitions. Window wraps, door surrounds, inside and outside corners, and where the siding meets soffit or fascia all need to be scoped. Dutch lap’s shadow line only looks right when the trim around it is also replaced or refreshed to match.
Flashing and water-management details. Kick-out flashing at roof-wall intersections, drip cap above windows and doors, and proper integration with the gutter system. These matter more for long-term performance than the profile choice itself.
Photos of every elevation. A written estimate should come with wall-by-wall photos showing current condition, problem areas, and any trim or accessory work included. This protects you and gives you something to compare against the finished job.
Profile samples in context. A good contractor brings actual Dutch lap and traditional clapboard samples — in the material you are considering — and holds them against your home. Shadow lines look different on a south-facing wall in afternoon sun than they do in a showroom.
If an estimate skips these steps and jumps straight to a price per square foot, that is a sign the installer is treating your siding as a commodity swap rather than a wall-system replacement. The profile you pick will look good for a few years either way, but the inspection and installation quality behind it determines whether it lasts 20 years or 40. Orientation choices like lap versus vertical follow the same rule — the estimate should prove the walls are ready for whatever goes on them.
What About Resale Value?
Both profiles add comparable value at resale. New siding of any style typically recoups 65-75% of project cost when selling. The choice between Dutch lap and traditional rarely makes or breaks a sale — buyers respond to the overall condition and quality of the siding, not the specific profile.
That said, Dutch lap’s dimensional appearance photographs better in real estate listings. In a market where buyers browse photos before scheduling showings, the visual interest from shadow lines can help your listing stand out. It’s not a dramatic advantage, but it’s a real one.
Frequently Asked Questions
Is Dutch lap siding more expensive than traditional clapboard?
Slightly. Material costs are similar, but Dutch lap’s precision requirements add 10-15% to labor costs. On a full-house siding project, the total difference is typically $750-$3,000 depending on material and home size.
What is the difference between Dutch lap and clapboard siding?
Traditional clapboard is flat — each board simply overlaps the one below it. Dutch lap has a concave notch (bevel) at the top of each board that creates a deeper shadow line. The structural installation method is the same; the visual profile is different.
Does Dutch lap siding last longer than traditional?
Both profiles have the same lifespan when made from the same material — 20-40 years for vinyl, 30-50 years for fiber cement, 15-30 years for wood. Dutch lap’s angled profile may reduce moisture damage at seams over time, but the material itself determines durability.
Can I mix Dutch lap and clapboard on the same house?
It’s uncommon and generally not recommended. Mixing profiles creates visual inconsistency that looks unintentional rather than designed. If you want variety, pair lap siding (either profile) with a different treatment like board-and-batten or shakes on gable ends.
What does James Hardie call their Dutch lap siding?
James Hardie’s Dutch lap profile is called “Custom Colonial.” It’s available in Colonial Roughsawn (textured) and Colonial Smooth finishes. Both offer the same dimensional shadow line characteristic of Dutch lap. Call us at (573) 424-9008 to see samples and discuss which profile suits your home.
Ready to Get Started?
We’ve been serving Mid-Missouri homeowners for over 25 years with premium siding installation. As James Hardie Elite Preferred contractors — the only ones in Mid-Missouri — we install both traditional HardiePlank and Custom Colonial (Dutch lap) profiles with the precision these materials deserve.
James Hardie vs Vinyl Siding: What’s Best for Your Mid-Missouri Home?
Key Takeaways
James Hardie fiber cement siding typically wins on durability and long-term value in Mid-Missouri, lasting 30-50 years compared to vinyl’s 20-30 year lifespan, while vinyl wins on upfront cost with savings of 25-40%.
CoMo Exteriors installs both James Hardie and vinyl siding across Columbia, Jefferson City, and surrounding Mid-Missouri communities. We can help you compare options on-site with actual samples.
James Hardie handles hail, high winds, and temperature swings significantly better than standard vinyl siding, which can crack in cold snaps or warp under prolonged summer sun.
Vinyl siding remains a solid choice for tight budgets, rental properties, or homeowners planning to move within 10 years.
The right siding depends on your budget, how long you plan to stay, your neighborhood’s architectural style, HOA requirements, and your maintenance expectations.
Introduction: Why This Choice Matters in Mid-Missouri
If you’re a homeowner in Columbia, Jefferson City, Lake of the Ozarks, Boonville, or Moberly, you already know our weather doesn’t take it easy on your home’s exterior. We see spring hailstorms that pummel roofs and siding, humid summers that push 90°F with moisture that lingers, cold winters with freeze-thaw cycles that test every joint and seam, and winds that sweep across open fields with nothing to slow them down. Remember the spring hail events in 2022? Many homeowners in Central Missouri are still dealing with the aftermath.
That’s why your siding choice matters more here than in milder climates. The two most popular exterior siding options we install are James Hardie siding (a fiber cement product made from cement, sand, and cellulose fibers) and vinyl siding (made from PVC plastic). Both have their place, but they perform very differently under Mid-Missouri conditions.
This guide breaks down durability, cost, appearance, maintenance, and resale value so you can decide which material fits your specific home, budget, and plans. We’re CoMo Exteriors, triple-certified including James Hardie Elite Preferred status, and we install both premium vinyl and James Hardie daily. This comparison comes from real-world installations across Columbia and Jefferson City, not manufacturer marketing materials.
What Is James Hardie Siding? (Fiber Cement Overview)
James Hardie is the leading brand of fiber cement siding, engineered from a composite of cement, sand, water, and cellulose fibers. The result is a dense material typically 5/16 inch thick, roughly five times thicker than standard vinyl. This composition was specifically designed for climate zones like Central Missouri, where homes face extreme temperature swings, humidity, and storm exposure.
Here’s what makes fiber cement stand out:
Non-combustible: Earns a Class A fire rating and withstands temperatures over 1,600°F without ignition
Rot and pest resistant: Unattractive to termites, carpenter ants, and woodpeckers
Dimensional stability: Less than 0.5% expansion under saturated conditions, meaning minimal warping in our hot/cold swings
Impact resistant: Testing shows it endures hailstones equivalent to 1.75 inches in diameter at 50 mph without cracking
James Hardie uses a HardieZone system to tune products for specific regional climates. Mid-Missouri homes typically use products engineered for our combination of hot summers and cold winters. Common styles we install around Columbia include HardiePlank lap siding (the most popular choice), HardiePanel vertical siding for board-and-batten looks, and HardieShingle for gables and accent areas. ColorPlus Technology provides factory-applied finishes with proprietary UV protection that resists the uneven fading common in other materials.
One critical point: James Hardie siding installation requires proper technique to reach the advertised 30+ year service life and maintain warranty coverage. As a James Hardie Elite Preferred contractor, we follow their published installation guidelines on every project.
What Is Vinyl Siding? (Material Basics)
Vinyl siding is manufactured from polyvinyl chloride (PVC), a plastic polymer extruded into thin panels measuring approximately 0.040-0.048 inches thick. It gained popularity starting in the 1950s as a low-cost alternative to wood siding, exploding in the U.S. housing market during the post-war building boom.
Around Columbia and Jefferson City, we commonly see these vinyl profiles:
Double 4” lap siding (traditional horizontal look)
Insulated vinyl siding (with foam backing for modest energy efficiency gains)
Modern vinyl has improved significantly from older generations. Today’s premium panels offer better impact resistance and UV protection than what went on homes 20 years ago. Color-through technology means the pigment is baked into the material, so no painting required, ever. However, color choices and texture depth are generally more limited compared to James Hardie options.
Quality varies widely between budget vinyl and premium, thicker panels. The difference matters for durable siding performance in our climate. During estimates, we help homeowners sort through these differences so you understand exactly what you’re getting.
Side-by-Side Comparison: James Hardie vs Vinyl Siding
Here’s a direct comparison of the two siding materials across the factors that matter most to Mid-Missouri homeowners:
Factor
James Hardie (Fiber Cement)
Vinyl Siding
Durability/Lifespan
30-50+ years with proper installation
20-30 years (often shorter in harsh conditions)
Weather Performance
Excellent in hail, high winds, temperature extremes
Can crack in extreme cold, warp in prolonged sun
Fire Resistance
Non-combustible, Class A rated
Softens at 160-250°F, can melt near heat sources
Pest Resistance
Unattractive to insects and woodpeckers
Does not prevent pests from reaching sheathing
Installed Cost
$12-20 per square foot
$5-13 per square foot
Maintenance
Annual washing; repaint around 15-20 years
Annual washing; cannot be repainted effectively
Resale Value Impact
Higher percentage of cost recouped
Lower ROI in resale markets
Warranty
30-year (with proper installation)
Typically 20-50 years (degrades in practice)
A note on cost: In Mid-Missouri, James Hardie installed typically runs 25-50% more than standard vinyl for the same home size. For a 2,000-2,500 square foot home in Columbia, that difference can be significant upfront but the gap narrows considerably when you factor in longevity and potential replacement costs over 30+ years.
Appearance & Curb Appeal
Curb appeal drives property value, especially in higher-end Columbia neighborhoods and on Lake of the Ozarks lake properties where homes are often viewed from the water. The right siding transforms how your home looks and feels.
James Hardie appearance advantages:
Deeper, more realistic woodgrain textures that mimic natural wood
Sharp shadow lines that create visual depth
Wide range of architecturally appropriate profiles
Pairs beautifully with stone veneer, brick, and standing seam metal roofs
ColorPlus factory finishes in numerous palettes, plus the ability to repaint later
Vinyl appearance characteristics:
Modern vinyl mimics wood reasonably well at a distance
Panel seams, shine, and shallower texture become more visible up close
Two-story homes seen from the street may show limitations more clearly
Limited to original color for the life of the siding (cannot be effectively repainted)
For historic homes in Columbia’s older neighborhoods, custom builds, and homes aiming for a timeless, high-end look, James Hardie typically delivers better results. Vinyl works well for simpler ranch-style homes, starter homes, and rental properties where budget takes priority over premium aesthetics.
When we complete vinyl-to-Hardie upgrades around Columbia and Jefferson City, the transformation is dramatic. The depth of color and texture makes homes look completely different.
Durability & Performance in Mid-Missouri Weather
Let’s talk specifically about how these siding materials hold up under our Central Missouri weather stresses: spring hailstorms, 90°F+ summer heat with high humidity, freezing winters with temperature swings of 50+ degrees in a single week, and strong winds off open fields.
James Hardie performance:
Moisture resistance through inorganic composition does not absorb water or promote mold growth
Impact resistance handles moderate hail without cracking or denting
Minimal expansion and contraction in freeze-thaw cycles (less than 0.5% under saturated conditions)
Excellent UV stability over decades under strong Missouri sun
Non-combustible construction provides superior protection
Vinyl performance considerations:
Can crack or shatter in sub-freezing temperatures if struck by hail or lawn equipment
Potential warping on south- and west-facing walls under prolonged direct sun, especially darker colors
Thermal expansion coefficients up to 0.005 inches per inch per degree Fahrenheit can create gaps
Porous seams may allow water infiltration in our rainy climate
Vulnerable to wind lifting if not installed with proper fastener spacing
Both materials rely on proper housewrap and flashing for complete weather resistant protection. We always include flashing and weather barrier details designed for storm-driven rain common in Central Missouri. This matters as much as the siding itself.
We also have extensive experience inspecting storm damage claims and can document how each siding type holds up after hail or wind events for insurance purposes.
Cost, Value, and Return on Investment
Pricing changes with material costs and labor rates, so treat these ranges as ballparks and request a current free estimate for your specific project.
Upfront cost reality: James Hardie represents a premium upgrade above mid-grade vinyl. For a typical 2,000-2,500 square foot home in Columbia, the price difference is noticeable at the point of installation. Reference data shows installed James Hardie ranging from $12-20 per square foot (including labor and premium features like ColorPlus), compared to vinyl’s $5-13 per square foot.
Long-term value calculation: Over 50 years, James Hardie’s minimal maintenance and 2-3x longevity often yield lower total cost of ownership. A vinyl siding installation may require full replacement after 20 years in harsh conditions, while properly installed James Hardie can last through multiple ownership cycles with periodic cleaning.
Resale value impact: National cost-vs-value reports consistently show fiber cement with a higher percentage of cost recouped at resale than vinyl. Homeowners often see 5-10% higher property values and potential insurance savings from fiber cement’s fire ratings.
Convenient financing options: We offer financing to help homeowners spread the cost of a James Hardie upgrade if you want long-term value but need manageable monthly payments. No need to compromise on your home improvement project because of cash flow timing.
Who should choose what: Vinyl may be more appealing for landlords, investment properties, or those planning to move within 10 years. James Hardie tends to suit “forever home” projects and Columbia homeowners planning to stay long-term.
Maintenance & Cleaning Requirements
Both siding materials are far easier to maintain than wood siding, which requires regular painting, staining, and vigilant moisture damage inspection. But they do have different care routines.
James Hardie maintenance:
Wash with a garden hose and soft brush every 6-12 months
Check caulking around windows, doors, and trim annually
Touch up paint as needed on any chips or scratches
Plan for a repainting cycle after 15-20 years if using painted (non-ColorPlus) products
ColorPlus factory finishes typically last longer before needing attention
Vinyl maintenance:
Clean with mild soap and low-pressure water
High-pressure washing is not recommended, it can force moisture behind panels and cause water damage
Cannot be effectively repainted when colors fade
Darker colors may show fading more noticeably over time, especially on sun-exposed walls
Individual panels can be replaced if damaged, though color matching older vinyl can be challenging
Both materials are considered low maintenance compared to natural wood alternatives. The key difference: James Hardie gives you the option to refresh your home’s color completely in 10-20 years, while vinyl limits you to the original color for the life of the siding.
We can inspect existing siding (both vinyl and James Hardie) and advise whether simple maintenance, localized repair, or full replacement makes the most sense for your situation.
Installation Differences and Why the Contractor Matters
Siding performance depends heavily on installation quality. This matters even more in a storm-prone region like Mid-Missouri where proper installation means the difference between siding that survives a hailstorm and siding that needs replacement.
James Hardie installation requirements:
Heavier material requiring specialized cutting tools with dust collection
Specific clearances from roofing and grade must be maintained
Correct nailing patterns per manufacturer specifications
Proper joint flashing and caulking details
Blind nailing techniques for lap siding
Following James Hardie’s published installation manual exactly
Vinyl installation requirements:
Lighter and somewhat more forgiving to handle
Still requires proper fastener spacing and technique
Must allow for expansion and contraction (nails not driven tight)
Careful detailing at windows, doors, and roof lines prevents blow-offs and leaks
Starter strips and j-channels must be positioned correctly
Warranty implications: James Hardie’s manufacturer warranty assumes professional installation following their published guidelines. Our status as a James Hardie Elite Preferred contractor helps protect those industry leading warranties. We’re one of only a few triple-certified contractors in Mid-Missouri with GAF Master Elite, OC Platinum, and James Hardie Elite credentials.
What we include with siding projects:
Housewrap and weather barrier
All necessary flashings
Starter strips and trim details
Soffit and fascia work as needed
Daily cleanup and debris removal
Coordination with any replacement windows or doors installation
Typical project timelines: Most full siding replacement projects on typical 2-story homes take about 5-9 working days depending on size, complexity, and weather. We discuss the schedule upfront during your estimate so you can plan around pets, vehicles, and outdoor living spaces.
Which Is Right for Your Home? Decision Guide
Here’s a straightforward guide to help you choose the right siding for your specific situation:
Choose James Hardie if:
You’re planning to stay in your home 10+ years
Maximum durability and weather resistance is your priority
You live in a neighborhood with higher-end finishes and want to match
Curb appeal and resale value matter significantly to you
You’ve experienced repeated hail damage or woodpecker problems with previous siding
Your home is historic or has architectural details worth highlighting
You want the option to change exterior colors in the future
Choose vinyl if:
Budget is your primary constraint
You’re updating a rental or investment property
You plan to sell within 5-10 years
The home is smaller or simpler in design
You want a quick, attractive, low-maintenance refresh
Insulated vinyl options align with your energy efficiency goals
Other factors to consider:
HOA requirements (some require specific siding materials or appearance standards)
What neighboring homes in your area are using
Plans for future additions or exterior remodeling
Matching existing engineered wood siding, LP SmartSide, or Diamond Kote materials already on your house
The best siding option varies by homeowner. We’re happy to schedule a free on-site consultation where we can bring siding samples of both James Hardie and vinyl, show real project photos from Columbia and Jefferson City dream homes, and provide a detailed written estimate. No pressure—just the information you need to make an informed decision.
What a Siding Material Comparison Inspection Should Actually Cover
Bringing samples to your door is helpful, but the real value of an on-site comparison visit is seeing how each material would perform on your specific walls. An honest James Hardie vs vinyl comparison needs wall-by-wall context, because the same home can have a sun-baked south elevation that favors fiber cement and a shaded north elevation where premium vinyl performs fine. Before you commit to a material or a price, here is what that walkthrough should include.
Wall-by-wall condition of the existing siding. Every elevation ages differently. A south or west wall takes more UV and heat; a wall under a valley or behind a downspout takes more water. The inspection should note where current siding is fading, cracking, warping, or coming loose, and how that maps to which material would hold up better on each wall.
Sheathing and housewrap behind the siding. Fiber cement and vinyl both depend on what is underneath them. If the inspection finds soft spots, water staining, or damaged OSB or plywood, that repair belongs in the written scope for either material. A bid that skips this step is pricing the visible layer, not the wall system.
Trim, corner posts, and J-channel details. Most siding callbacks involve the trim, not the field panels. The walkthrough should cover corner boards, window and door casing, J-channel clearances, and how each material transitions at corners and openings. James Hardie trim and vinyl trim behave differently, and the estimate should spell out which trim product is included.
Soffit and fascia at the wall top. Siding meets the roof edge somewhere, and that junction is where water and wind failures usually start. The inspection should check whether the soffit and fascia are solid, whether the drip edge is intact, and whether either material option will require soffit or fascia work to keep the warranty valid and the wall dry.
Flashing and weather-resistant barrier plan. Both materials rely on housewrap and flashing to stay dry in storm-driven rain. The estimate should state which weather barrier, which flashing details at windows and doors, and which sealants are included. If one bid includes a full weather barrier and another does not, the price gap is not apples-to-apples.
Wide and close-up photos of each wall. A reputable contractor should document the existing conditions before quoting, especially if the project may involve storm or hail damage documentation for an insurance claim. These photos also give you something to compare against after install.
If the project is part of a larger exterior scope or you are weighing timing, the same inspection steps apply to any siding replacement timeline discussion, because material choice, trim scope, and sheathing repairs all change the schedule. For homeowners comparing profiles as well as materials, a full estimate also helps you weigh how lap vs vertical siding orientation fits the home before you commit.
Why a written scope matters more than the line-item price. When two bids come back far apart, the difference is usually in what is included, not just the material. One bid may include new housewrap, window and door flashing, soffit and fascia repair, and a full cleanup clause, while another prices panels and labor only. A side-by-side material comparison only tells you half the story. Ask each contractor for a written scope that lists the weather barrier, flashing, trim product, any sheathing repair allowance, and the warranty terms for both material and labor. That is what lets you compare James Hardie vs vinyl honestly, and it is what we provide on every estimate.
How CoMo Exteriors Helps You Compare and Install Siding
CoMo Exteriors is a locally owned exterior remodeling contractor founded in 2010 in Columbia, Missouri. We serve homeowners across Mid-Missouri through locations in Columbia, Jefferson City, Boonville, Moberly, and Lake of the Ozarks. Beyond new siding, we handle roofing, windows, doors, decks, gutters, and storm restoration services.
Our triple certification, including James Hardie Elite Preferred, GAF Master Elite, and OC Platinum Preferred status, represents ongoing factory training and quality standards that matter for proper installation. We’re one of only a few siding contractor teams in Central Missouri holding all three credentials.
Our typical siding process:
Free inspection and measurements – We assess your current siding condition and measure your house
Discussion of goals and budget – Understanding what matters most to you
Side-by-side comparison – Showing James Hardie vs vinyl options with actual samples
Clear written estimate – Detailed pricing with no hidden costs
Project scheduling – Coordinating timing that works for your household
We also help with storm or hail damage claims by documenting siding damage, providing photo evidence, and coordinating with insurance adjusters when appropriate. Our personalized service includes advocating for fair compensation so you get the repairs your home needs.
If you’re in Columbia MO, Jefferson City, Boonville, Moberly, or the Lake area, reach out for a no-obligation siding consultation. We’ll bring the expert craftsmanship and transparent communication you deserve. Call us at (573) 424-9008 or request your free estimate online.
FAQs
Is James Hardie siding worth the extra cost compared to vinyl in Central Missouri?
For many owner-occupied homes where you’re planning to stay 10+ years, James Hardie often is worth the extra investment. The superior protection against storm damage, longer service life (30-50 years vs 20-30 for vinyl), and stronger resale appeal can close the cost gap over time. However, for short-term ownership or tight budgets, a quality vinyl install remains a smart choice. We help homeowners run the numbers for their specific situation during consultations.
Can I mix James Hardie and vinyl siding on the same house?
Mixing materials on primary wall surfaces isn’t typically recommended due to different profiles, thickness, and expansion characteristics that can look mismatched. A more attractive approach is combining James Hardie lap siding with accent materials like stone veneer, HardieShingle, or continental siding patterns. We design mixed-material exteriors that look cohesive while adding architectural interest.
How does each siding type handle hail and storm damage in Missouri?
James Hardie fiber cement typically shows fewer dents and cracks from moderate hail than vinyl, which can chip or fracture under direct hits. The durable materials in fiber cement withstand impacts that would damage thinner vinyl panels. That said, large or extreme hail can damage any siding. We offer storm inspections to document damage to your old siding and advise whether repair or full replacement makes more financial sense.
Will new siding improve my home’s energy efficiency?
Siding itself isn’t insulation, but properly installed siding with housewrap and foam sheathing improves energy efficiency by reducing drafts and thermal bridging through your home’s structure. Insulated vinyl panels provide a modest R-value boost (around 2.0-4.0). James Hardie is typically combined with separate foam or sheathing insulation for similar or better results. Either way, new siding with modern weather barriers improves on most homes with aging exteriors.
How long does a siding replacement project usually take in the Columbia, MO area?
Most full siding replacements on typical single-family homes take about 5-9 working days depending on home size, complexity, and weather conditions. Our crews perform daily cleanup so your property stays manageable throughout the project. We discuss the timeline upfront during your estimate so you can plan around pets, vehicles, and outdoor living spaces accordingly.
Replacing your home’s exterior is one of the biggest decisions you’ll make as a homeowner, and understanding what new siding actually costs in Columbia, MO helps you plan with confidence. Whether you’re recovering from hail damage, upgrading an aging exterior, or simply want to boost your home’s curb appeal, this guide breaks down real 2026 pricing for Mid-Missouri projects.
Key Takeaways
Most Columbia, MO siding projects in 2026 fall between approximately $12,000 and $30,000 for an average single-family home, depending primarily on material choice and house size.
Typical installed cost per square foot in Mid-Missouri: vinyl runs about $6-$11, engineered wood like LP SmartSide ranges $8-$15, and fiber cement (James Hardie) sits around $10-$18+.
2026 tariffs are pushing some material prices higher, especially cedar and steel siding. Vinyl and fiber cement remain the most price-stable options.
Fiber cement siding replacement returns 114% of its cost at resale, making it one of the highest-ROI home improvements you can make (Zonda 2025 Cost vs. Value Report).
CoMo Exteriors provides free, no-obligation siding estimates throughout Columbia, Jefferson City, Boonville, Moberly, Sedalia, and Lake of the Ozarks, including inspection for hidden damage behind existing siding.
Material choice should match how long you plan to stay in your home, your desired aesthetic appeal, and maintenance preferences, not just the lowest upfront price.
How Much Does New Siding Cost in Columbia, MO in 2026?
For a typical Columbia home between 1,800 and 2,400 square feet, expect to invest between $12,000 and $30,000+ for complete siding replacement with professional installation and full tear-off of old siding. That’s a wide range because material choice drives much of the final number, with vinyl sitting at the budget-friendly end while premium fiber cement commands the higher prices.
Here’s what we commonly see for installed pricing on Mid-Missouri projects in 2026:
Stone veneer accents: $25-$45+ per square foot (typically used on accent walls or chimneys)
These ranges already include labor, basic trim work, housewrap, and disposal of your existing siding. They don’t cover major structural repairs, deck work, or extensive rot remediation. Those get priced separately once we can inspect what’s behind your current siding.
How does Columbia compare to national averages? Central Missouri labor and materials typically run slightly below what you’d pay in major coastal metros, but our challenging weather means proper installation details matter more here. Cutting corners on flashing or weather barriers might save a few hundred dollars upfront, but it creates expensive problems when our freeze-thaw cycles and summer storms hit.
Exact pricing always requires an on-site visit. Factors like steep gables, complex rooflines, three-story walls, or difficult access significantly change labor time, and that’s why a free estimate from an experienced local contractor beats any online calculator.
Main Factors That Affect New Siding Cost in Columbia
Material type is the single biggest driver of your project cost, but it’s followed closely by house size, architectural complexity, and any hidden damage lurking behind your walls.
Here’s what influences your final investment:
Total exterior square footage: Larger homes require more materials and labor hours, directly scaling costs
Number of stories: Two and three-story homes need scaffolding, safety equipment, and more time per square foot
Amount of trim and architectural details: Gables, dormers, bay windows, and decorative elements add complexity
Removal of old siding: Tear-off labor and disposal fees vary based on what’s currently on your house
Local building code requirements: Columbia and Boone County have specific permit and inspection requirements
Mid-Missouri’s weather creates unique considerations that affect both cost and performance. Our heavy summer storms, frequent hail, and dramatic freeze-thaw cycles mean weather barrier details and proper flashing aren’t optional extras. They’re essential to protecting your investment. Contractors who skip these steps might quote lower prices, but you’ll pay more in repairs down the road.
Underlying issues often appear once old siding comes off. Water damage, rotten sheathing, or compromised framing can add a few hundred to several thousand dollars to your project. Homes built before about 1980 are especially prone to surprises, so we recommend leaving a 10-20% contingency in your budget for unexpected repairs.
Cost by Siding Material in Mid-Missouri
Homeowners around Columbia, Jefferson City, Fulton, and Sedalia typically choose between vinyl, engineered wood (like LP SmartSide or Diamond Kote), and fiber cement (like James Hardie), sometimes adding stone veneer accents for enhanced aesthetic appeal. You may also be comparing cedar, aluminum, or steel siding. We’ve included those below so you can see where every option falls.
Vinyl Siding
Installed cost: $6-$11 per square foot in Mid-Missouri
Pros: Lowest upfront cost, virtually no maintenance required beyond occasional washing, good color selection, won’t rot or attract insects
Cons: Can crack under severe hail impact, may fade over 15-20 years, less premium appearance than wood or fiber cement
Best for: Budget-conscious homeowners, rental properties, or those planning to sell within 10-15 years
2026 tariff impact: Minimal. Vinyl is mostly manufactured from domestic PVC resin, making it the most price-stable siding option right now
Vinyl siding remains a popular choice in Columbia because it delivers solid performance at an affordable price point. For many homeowners, it’s the most cost-effective way to refresh a home’s exterior quickly. And with 2026’s tariff pressures raising costs on other materials, vinyl’s price stability is an added advantage.
LP SmartSide and Engineered Wood Siding
Installed cost: $8-$15 per square foot
Pros: Excellent impact resistance (handles hail better than vinyl), authentic wood-like appearance, strong performance in storm-prone areas, low maintenance compared to real wood
Cons: Requires occasional repainting (every 15-20 years with quality finishes), costs more than vinyl
Best for: Homeowners wanting wood aesthetics without wood siding‘s maintenance demands, especially in hail-prone Mid-Missouri
2026 tariff impact: Moderate. LP SmartSide uses OSB and wood strand inputs, some sourced from Canada. Expect 6-10% price increases through mid-2026
James Hardie Fiber Cement Siding
Installed cost: $10-$18+ per square foot
Pros: Exceptional durability (50+ year lifespan), Class A fire resistance, won’t rot or attract pests, excellent for harsh elements, premium appearance that mimics wood or stone
Cons: Higher upfront investment, heavier material requiring reinforced installation, generates silica dust during cutting (professional installation recommended)
Best for: “Forever home” projects where you plan to stay 20+ years, historic home renovations, or homeowners prioritizing long-term value
2026 tariff impact: Low to moderate. Fiber cement is largely produced domestically, though rising cement input costs may push prices 3-5% higher
As James Hardie Elite Preferred contractors, we install fiber cement siding throughout Mid-Missouri and see firsthand how it performs through our challenging weather. The factory-applied ColorPlus finishes resist fading far better than field-painted alternatives.
Stone and Stone Veneer Accents
Installed cost: $25-$45+ per square foot
Best used for: Accent walls, chimney surrounds, entryway features, foundation wraps
Stone veneer lets you create high-end curb appeal without covering your entire house in premium materials. It’s a smart way to balance budget and visual impact.
Other Materials: Cedar, Aluminum, and Steel
While we primarily install vinyl, engineered wood, and fiber cement, you may be comparing other options as you research. Here’s where they fall:
Cedar wood siding: $6-$16 per square foot installed. Beautiful natural look, but requires repainting or restaining every 5-7 years. Cedar is also the most tariff-exposed material in 2026, with Canadian lumber tariffs at 34.5% pushing 15-25% price increases
Aluminum siding: $6-$10 per square foot installed. Lightweight, fire-resistant, and dent-prone. Less common on new projects today
Steel siding: $4-$16 per square foot installed. Extremely durable, but facing up to 50% tariffs on imported steel that are pushing prices up 3-5% annually
Real-World Example: Consider a typical 2,000 square foot Columbia ranch home. With vinyl siding, you might invest $12,000-$18,000 total. That same home in James Hardie fiber cement could run $20,000-$32,000+. The difference? Potentially 30+ more years of performance, better storm resistance, and significantly higher resale value.
For Mid-Missouri’s weather patterns, including frequent hail, high winds, and extreme temperature swings, we most often recommend engineered wood or fiber cement for homeowners planning to stay long term. These durable materials handle our climate without requiring constant attention.
How 2026 Tariffs Are Affecting Siding Prices
If you’ve been getting siding quotes this spring and noticed prices creeping up from last year, you’re not imagining things. Trade tariffs enacted in late 2025 and early 2026 are having a real effect on building material costs across the country, and siding is no exception.
Here’s a straightforward look at how each material is affected:
Vinyl siding: Least affected. The PVC resin used in vinyl is primarily manufactured domestically, so tariffs have minimal impact on pricing. If budget stability matters to you, vinyl is in the strongest position right now
Fiber cement (James Hardie): Low to moderate impact. Production is mostly U.S.-based, but rising cement and raw material input costs are pushing prices up 3-5%. Still one of the more stable premium options
LP SmartSide / engineered wood: Moderate impact. These products use OSB and wood strand inputs, with some sourced from Canada. The 34.5% Canadian lumber tariff means potential 6-10% price increases through 2026
Cedar / natural wood: Highest impact. Most cedar used for siding comes from Canada, where the 34.5% softwood lumber tariff hits directly. Expect 15-25% price spikes compared to 2024 levels
Steel and aluminum siding: Significant impact. Tariffs of up to 50% on imported steel and aluminum are driving 3-5% annual price increases on metal siding products
According to analysis from the Brookings Institution, aggregate construction costs are running roughly 8% higher under current tariff conditions compared to pre-tariff baselines. For a $20,000 siding project, that translates to roughly $1,600 more than you would have paid in 2024.
What does this mean practically? If you’ve been considering a siding project, material prices are unlikely to drop in the near term. Locking in pricing with your contractor sooner rather than later protects you from further increases. We honor quoted prices for a set period on all our estimates, so you have time to make a confident decision without worrying about the number changing.
Labor, Tear-Off, and Other “Hidden” Siding Costs
Materials are only part of your final number. Labor and prep work in Columbia typically make up 40-60% of total project cost, a fact many homeowners don’t realize when comparing quotes.
Missouri siding installer rates currently range from $40 to $75 per hour, and construction wages have been rising 4%+ annually. One advantage of being in Mid-Missouri: labor rates here are meaningfully lower than what you’d pay in St. Louis or Kansas City, which keeps your total project cost more manageable.
Here’s how labor costs break down in Mid-Missouri by home type:
Simple one-story ranch: $3-$5 per square foot
Standard two-story: $4-$7 per square foot
Complex multi-story with details: $6-$10+ per square foot
Straightforward one-story homes cost less per square foot than tall or architecturally complex designs because installers work faster with easier access.
Scheduling tip: If your project timeline is flexible, booking during off-peak months (March through April or October through November) can save you 5-10% on labor. Crews are less booked during these windows, and you may benefit from more competitive pricing and faster scheduling.
Tear-off and disposal fees add to your project, especially with heavy siding materials like fiber cement or wood siding. Expect dumpster rental and landfill charges in the Columbia area to run $300-$800 depending on volume. Aluminum siding and metal sidings are lighter but still require proper disposal.
Soffit, fascia, and gutter work frequently gets bundled with siding projects. This approach often reduces total labor cost compared to hiring separate crews. Your installer is already on scaffolding with the right tools, so adding these elements makes sense.
When you’re comparing estimates, pay attention to how that bundled work is priced. Some quotes fold soffit, fascia, and gutter work into a single siding number. Others price each piece as its own line item. Neither approach is wrong, but you can’t compare apples to apples until you know which one you’re looking at. It’s also worth asking what happens to your gutters during tear-off. Crews sometimes re-hang the existing gutters when they’re still in good shape, and sometimes replacement is the better call. Gutter and gutter guard work is one of the most common add-ons we see alongside siding projects in this area, so settle that question before you sign rather than after the crew arrives.
How New Siding Can Save (or Cost) Money Over Time
The least expensive siding up front isn’t always the lowest-cost choice over a 20-30 year period in Central Missouri’s climate. Here’s what to consider when evaluating your long-term investment.
Resale value is where premium siding really pays off. According to the Zonda 2025 Cost vs. Value Report, fiber cement siding replacement returns 114% of its cost at resale, ranking it the #4 highest-ROI remodeling project in the entire country. Vinyl siding replacement isn’t far behind at 97% ROI, making it #6 nationally. In fact, 8 of the top 10 highest-ROI home improvements are exterior projects. New siding isn’t just a cosmetic upgrade. It’s one of the best investments you can make in your home’s value.
Maintenance needs vary dramatically:
Vinyl: Simple washing every few years, no painting required
Fiber cement: Factory-finished products (like James Hardie ColorPlus) may go 15+ years before needing paint
Real wood siding: Requires repainting every 5 to 7 years to prevent rot. Those costs add up
Color stability affects resale value: Cheaper siding materials fade faster under Missouri’s intense summer sun. Premium finishes maintain their appearance longer, which directly impacts your home’s value when it’s time to sell.
Energy efficiency matters here: Proper insulation behind new siding, combined with improved housewrap and a tighter building envelope, can noticeably reduce energy costs. Columbia’s hot summers and cold winters mean your HVAC system works hard. Anything that improves insulation helps your monthly budget.
Insurance considerations: More durable materials can mean fewer repairs after severe storms, and they can also affect what you pay for homeowner’s insurance. Fiber cement siding (like James Hardie) carries Class A fire resistance and strong wind/hail ratings, which may qualify you for insurance premium discounts. On the other hand, cedar and natural wood siding carry higher fire risk, which some insurers penalize with higher premiums. After any siding replacement, it’s worth calling your insurance agent to request an updated quote. You may be pleasantly surprised.
Lifetime cost comparison: A Columbia homeowner who invests $14,000 in basic vinyl might spend an additional $3,000-$5,000 on repairs and touch-ups over 20 years. Meanwhile, a $26,000 James Hardie project could require almost nothing beyond occasional cleaning. The “expensive” option sometimes costs less over your ownership period.
We believe in 30-year solutions rather than 15-year patches. That doesn’t mean everyone needs the most expensive siding available, but it does mean understanding the true cost of ownership before you decide.
Financing, Insurance, and Paying for New Siding
Siding is a major investment, and many Mid-Missouri homeowners use financing or insurance proceeds to manage the cost without draining savings.
Financing options we can help arrange:
Low monthly payment plans that spread costs over time
Options for full exterior makeovers (siding, windows, roofing combined)
Quick pre-qualification so you know your budget before choosing materials
When homeowners insurance may help: Storm and hail damage is common around Columbia, Jefferson City, Lake of the Ozarks, and Sedalia. If your siding was damaged by a covered event, your policy may pay for replacement cost rather than leaving you to cover depreciation. Normal wear and aging typically aren’t covered, but storm damage often is.
We frequently work directly with insurance adjusters, helping homeowners document damage thoroughly and ensure necessary repairs are included in claims. Insurance companies sometimes overlook secondary issues like fascia or soffit damage. Having an experienced contractor involved helps you receive fair compensation.
Don’t forget to re-quote your policy after the project. As mentioned above, upgrading to fire-resistant and impact-rated siding materials can qualify you for lower insurance premiums. Your agent can re-evaluate your coverage once the new siding is installed.
If the first estimate you receive feels high, you have options besides walking away. Ask for it priced more than one way. Switching the primary material from fiber cement to vinyl, or scoping the front elevation first and completing the rest later, can move the number significantly. Both paths are common on Mid-Missouri homes. A phased scope also spreads out the budget impact, though you should ask how leaving part of the old siding in place affects matching colors and trim later. The cheapest quote on paper isn’t always the cheapest project over the years you’ll own the home.
Suspect storm damage? Schedule a free inspection. There’s no obligation, and early documentation prevents small problems from becoming expensive emergencies. We’ll assess your home’s exterior and provide honest guidance about whether a claim makes sense.
Why Columbia Homeowners Choose CoMo Exteriors for New Siding
We’re a locally owned, triple-certified exterior contractor with extensive siding experience throughout Mid-Missouri since 2010. When you hire us, you’re working with neighbors who understand Central Missouri weather and who will still be here in 10 years if you have questions.
What sets us apart:
James Hardie Elite Preferred status: Factory-trained installers who know how to maximize your warranty and performance
Deep experience with all major siding materials: Vinyl, engineered wood, fiber cement, we install them all correctly.
Thousands of projects completed: From Columbia and Ashland to Fulton and Jefferson City, we’ve seen every type of home and challenge
Our limited lifetime workmanship warranty protects your investment beyond just the manufacturer’s material warranty. If we make an error, we fix it. Period.
We take an educational, no-pressure approach to every estimate. You’ll receive detailed written proposals with clear explanations of materials, side-by-side comparisons, and honest answers to your questions. Our job is helping you choose confidently, not pushing you toward the most expensive option.
Ready to see exactly what new siding would cost for your home? Call us at (573) 424-9008 or request your free siding estimate and design consultation. We serve homeowners throughout Columbia, Jefferson City, Boonville, Moberly, and Lake of the Ozarks.
FAQs
How do I estimate the square footage of siding on my Columbia home?
Start with a simple method: measure the length and height of each exterior wall, multiply to get area, then subtract large openings like garage doors. Add 10-20% for gables, waste, and cutting allowance.
This gives you a rough ballpark, but professional measurements are essential before committing to a budget. Multi-story homes, walkout basements, and complex rooflines are notoriously easy to mis-measure. During our free on-site visits, we use professional tools to calculate precise square footage, so you know exactly what you’re paying for.
Is it cheaper to install siding over old siding in Mid-Missouri?
While overlay installation is sometimes possible, we generally recommend full tear-off in our climate. Removing your existing siding lets us inspect underlying sheathing and framing for rot, mold, or previous water damage that would otherwise stay hidden.
Building codes, manufacturer requirements, and warranty conditions often restrict overlay installations, especially for fiber cement and engineered wood products. Skipping tear-off might save money on day one, but it can hide serious issues that become far more expensive when they finally surface.
What time of year is best (and most cost effective) to replace siding in Columbia?
Spring and fall typically offer ideal conditions: comfortable temperatures for installers and optimal conditions for caulks and paints used with fiber cement or engineered wood. Many factors affect scheduling, but mild weather usually means faster, smoother installation.
If you want to save on labor costs, consider scheduling during the off-peak windows of March through April or October through November, when crews have more availability. This can save 5-10% compared to peak summer pricing. Scheduling early, in late winter or early spring, also helps you secure preferred dates before the busy summer storm season fills our calendar.
How long does a full siding replacement usually take in Columbia?
Most average single-family homes take about 5-10 working days, depending on size, material complexity, and weather. Very large or architecturally complex homes may require additional time.
This timeline typically includes tear-off, repairs to minor sheathing issues, installation of housewrap, new siding, trim, and complete jobsite cleanup. We keep homeowners updated daily on progress and any weather-related schedule changes, so you will always know where your project stands.
Can I mix materials (like vinyl and stone) to manage cost?
Absolutely, and many Columbia-area homeowners do exactly this. Combining an affordable primary siding (vinyl or engineered wood) with premium stone veneer accents on front elevations or entryways delivers high-end curb appeal without paying for stone on every wall.
This approach helps keep overall budget under control while creating visual interest that matches your style preferences. We can help design balanced combinations that work with your existing roofing, windows, and neighborhood character.
Will 2026 tariffs keep raising siding prices?
It depends on the material. Vinyl siding prices have stayed relatively flat because PVC resin is primarily produced domestically. Cedar and natural wood are seeing the sharpest increases due to the 34.5% Canadian softwood lumber tariff. Fiber cement and engineered wood fall somewhere in between, with moderate 3-10% increases.
Trade policy is unpredictable, but most industry analysts don’t expect significant relief in the near term. If you’re planning a siding project for 2026, getting a locked-in quote sooner gives you price protection regardless of what happens next. We honor our quoted prices for a set period on every estimate.
How Long Will My New Siding Actually Last? Expectations vs. Reality in Missouri
Key Takeaways
Realistic Mid-Missouri siding lifespans differ from brochure claims: Vinyl typically lasts 20–35 years (not the 40–60 advertised), James Hardie fiber cement delivers 40–50+ years with proper care, and engineered wood reaches 25–35+ years depending on maintenance.
Central Missouri weather is the great equalizer: Hail events averaging 4–6 times yearly, freeze-thaw cycles exceeding 50 per winter, intense summer UV, and high humidity all compress manufacturer “lab condition” lifespans by 10–20 years for many siding materials.
Installation quality matters as much as the material itself: We’ve seen two identical homes on the same street with completely different outcomes after 15 years—the difference almost always traces back to proper flashing, housewrap, and fastener placement during installation.
Simple maintenance habits add 5–10+ years: Annual cleaning with mild soap, post-storm inspections for loose panels or cracks, and keeping caulk and paint intact on fiber cement and engineered wood dramatically extend siding life.
CoMo Premium Exteriors is Mid-Missouri’s only triple-certified exterior contractor (GAF Master Elite, Owens Corning Platinum Preferred, James Hardie Elite Preferred), bringing 25+ years of local experience to help homeowners choose siding that fits real-world expectations—not just marketing promises.
What Missouri Homeowners Expect vs. What Really Happens
Picture this: A Jefferson City homeowner installs new siding in 2012, confident that their 40-year warranty means they won’t think about their house siding for decades. Fast forward to 2024, and they’re staring at faded panels, hail dings across the south wall, and buckling near the garage where a previous contractor nailed everything too tight. The brochure said one thing. Missouri weather said something else entirely.
This scenario plays out across Columbia, Boonville, Moberly, and Lake of the Ozarks more often than most homeowners realize.
National blogs and manufacturer brochures quote optimistic numbers like “vinyl 40–60 years” and “fiber cement 50+ years,” but these figures come from controlled lab conditions—not the real-world punishment of Central Missouri’s climate.
What we actually see on Mid-Missouri homes built or re-sided between 1995–2015 tells a different story. Vinyl siding often shows significant fading, chalking, and impact damage by years 15–20. Even premium materials develop moisture issues when installation was rushed or corners were cut.
The siding material itself rarely fails first. In our experience inspecting hundreds of exteriors across the region, problems typically trace back to installation quality, missing or improper flashing, and moisture management failures—not the product sitting in the box.
As a local exterior remodeler serving Columbia to Lake of the Ozarks since 2010, we routinely inspect 10–20-year-old siding that’s performing either far better—or far worse—than the warranty card promised. The difference? How it was installed and maintained.
The sections ahead break down each major siding type’s “marketing lifespan” versus “Missouri reality” so you can make decisions based on what actually happens here, not what happens in a Phoenix test lab.
How Long Does Siding Really Last in Mid-Missouri?
Before diving into specifics, here’s a high-level view of what we see across central Missouri communities—Columbia, Jefferson City, Boonville, Moberly, and Lake of the Ozarks—under typical care and weather exposure.
Siding Type
Marketing Claims
Missouri Reality
Key Variables
Vinyl Siding
40–60 years
20–35 years
Color, sun exposure, hail history
Fiber Cement (James Hardie)
50+ years
40–50+ years
Installation quality, paint upkeep
Engineered Wood (LP SmartSide)
30–50 years
25–35+ years
Caulking, paint maintenance
Traditional Wood Siding
40+ years
15–30 years
Repainting frequency, moisture control
Brick/Stone Accents
50–100+ years
50+ years
Mortar condition, weep details
Vinyl siding is often advertised at 40–60 years, but our Missouri reality puts it at 20–35 years on average. Dark colors on western and southern exposures fade faster, and repeated hail impacts shorten that window considerably.
James Hardie fiber cement claims 50+ years with a 30-year product warranty. In Mid-Missouri, we see 40–50+ years when installed correctly with proper flashing and periodic paint touch-ups—making it one of the most durable siding options for our climate.
LP SmartSide siding and other engineered wood products advertise 30–50 years. Here, expect 25–35+ years, heavily dependent on keeping paint and caulking maintained through our wet-dry-freeze cycles.
Traditional wood siding can reach 40+ years in moderate climates, but Missouri’s humidity and insect pressure typically compress that to 15–30 years without aggressive repainting and moisture control.
Brick and stone accents often do last generations here—50+ years is common—but mortar joints and weep details still require attention. Most homes use these as accents rather than full cladding.
These numbers assume professional siding installation and basic maintenance. Poor installation or neglect can cut these lifespans in half, while premium installation combined with proper care pushes them toward the high end.
How Missouri Weather Really Treats Your Siding
Mid-Missouri delivers a unique combination of weather conditions that few other regions match. We get severe hail and straight-line winds in spring, 90°+ sun through July and August, dozens of freeze-thaw cycles each winter, and persistent humidity—especially around the lake communities.
Hail and straight-line winds are annual realities here. Even siding marketed as “hail-resistant” can be cracked or chipped by 1–1.75” hailstones like those that hit Columbia and Jefferson City in 2018, 2020, and 2023. The 2023 derecho brought winds exceeding 100 mph across Mid-Missouri, tearing loose panels off homes that had stood for 20 years without issue.
UV exposure and extreme heat hit south- and west-facing walls hardest. Vinyl remains vulnerable to embrittlement under intense sun, especially darker colors that absorb more heat. Fiber cement holds color significantly better when painted with quality coatings, but no material is immune to prolonged exposure.
Freeze-thaw cycles and moisture infiltration cause some of the most insidious damage. Water that gets behind siding—often through poor flashing around windows and doors—expands and contracts through 50+ freeze-thaw cycles each winter. This stresses caulk joints, trim boards, and panel connections, eventually compromising structural integrity.
Humidity and biological growth affect shaded north walls and properties near trees. Mold, mildew, and algae growth are common near lake properties and wooded lots. Regular gentle cleaning prevents surface degradation, but neglect accelerates aging.
Micro-climate variations mean neighboring homes can have vastly different outcomes. We’ve seen hail tracks move from Boonville through Columbia where one side of a neighborhood sustained significant siding damage while homes a few blocks away escaped with minor scratches. Weather exposure varies block by block.
Choosing materials rated for hail, wind-driven rain, and moisture resistance—and installing them precisely to manufacturer specs—is what keeps “expected” average lifespan closer to reality in Missouri.
Vinyl Siding in Missouri: Affordable, But What’s the Real Lifespan?
Vinyl siding is the most common replacement siding we encounter on homes built from the late 1990s through the 2010s around Columbia, Fulton, and Jefferson City. It’s popular for good reason—but understanding its realistic vinyl siding lifespan in our climate helps set proper expectations.
Lifespan expectations vs. reality: While manufacturers often claim 40–60 years, our Missouri reality is 20–35 years on average. Cheaper builder-grade vinyl from early 2000s subdivisions sometimes shows major issues—cracking, severe fading, warping—by years 15–20.
Strengths worth noting: Vinyl offers low maintenance compared to wood, solid resistance to rot and insects, and lower upfront cost than premium alternatives. High quality vinyl siding with insulation backing slightly improves energy efficiency on older homes and provides modest weather resistance.
Common Missouri failure points: We see fading and chalking on sun-exposed walls, cracking from hail impacts (1-inch hail penetrates roughly 40% of standard gauge vinyl), warping and buckling from improper nailing or grill heat, and panels blown off in 60+ mph wind gusts common during spring storms.
Maintenance reality: Vinyl requires minimal upkeep—annual or bi-annual cleaning with mild detergent and a soft brush, plus post-storm inspections for loose panels or cracks. Avoid high-pressure washers, which can force water behind panels. This routine cleaning is typically all most homeowners need.
When vinyl makes sense in Mid-Missouri: Vinyl is a strong budget choice for rentals, starter homes, or when owners plan to move within 10–15 years. For a “forever home” where you want 30+ years of performance, you may want to consider stepping up to a more durable siding material.
During a free inspection, we can tell homeowners if their existing vinyl is worth keeping and repairing, or if they’re close to the point where replacing vinyl siding entirely is more cost effective than ongoing patch work.
Fiber Cement (James Hardie) and Engineered Wood: Premium Options That Last
When Mid-Missouri homeowners want long-term durability and enhanced curb appeal, James Hardie fiber cement siding and engineered wood options like LP SmartSide siding are the two most popular “step-up” choices we install across the region.
James Hardie fiber cement combines cement, sand, and cellulose fibers into a dense, stable product. Realistic Missouri lifespan runs 40–50+ years with repainting around every 10–15 years depending on color and weather exposure. James Hardie siding has become the benchmark for premium exteriors in our area.
Why fiber cement thrives here: It offers exceptional durability against rot, insects, fire resistance, and hail impacts. James Hardie fiber cement handles our temperature swings and humidity well when properly flashed and painted with quality coatings. Studies show fiber cement retains 90% integrity after 10,000 thermal cycles—compared to vinyl’s 70%.
Engineered wood (LP SmartSide) delivers a warm wood aesthetic without traditional wood siding’s vulnerabilities. Made from wood strands bonded with resins and treated for moisture protection, realistic lifespan here is 25–35+ years. The catch? Diligent paint and caulk upkeep is essential to protect edges from moisture infiltration in our wet-dry-freeze cycles.
Expectations vs. reality: Brochures may tout 50-year warranties, but these are product warranties against manufacturing defects—not guarantees that the installed system will be maintenance-free for 50 years in Missouri’s extreme weather conditions.
Maintenance snapshot: Check siding every spring and fall, touch up caulk as needed at windows and trim, and plan to repaint in an 8–15 year window depending on exposure and color depth. This minimal maintenance pays dividends in extended lifespan.
As a James Hardie Elite Preferred contractor—the only one in Mid-Missouri with all three major certifications—we’re trained and audited on installation details that directly impact how close homeowners get to that 40–50+ year mark.
Installation Quality: The “Hidden” Factor That Can Cut Lifespan in Half
Two homes on the same street, with the same siding brand, can have completely different outcomes after 10–15 years. The difference usually isn’t the product—it’s how the siding was installed properly or not.
Common installation shortcuts we see in Mid-Missouri: Missing housewrap or improper taping at seams, windows and doors flashed incorrectly (or not at all), nails driven too tight that prevent natural expansion and contraction, and lack of proper clearances above roofs, decks, and ground level.
How these shortcuts show up later: Warped vinyl panels that won’t lie flat, moisture trapped behind fiber cement causing paint failure, peeling and bubbling at trim boards, soft sheathing that crumbles when you push on it, and in severe cases, mold or structural rot inside the wall cavity.
Why proper technique matters: Correct flashing details, breathable housewrap with sealed seams, and fasteners placed to allow panel movement are just as important as the right siding brand. When installation ignores rainscreen gaps or proper drainage planes, even premium materials fail prematurely. Research suggests 70% of premature siding failures trace back to installation errors.
Our workmanship warranty in practice: Our limited lifetime workmanship warranty means if an issue is caused by our installation—not the manufacturer’s product—we come back and fix it. This gives homeowners confidence that their siding installation is backed for the long term.
Questions to ask any contractor: Request proof of training and certifications (like James Hardie Elite Preferred status), ask to see sample installation details for tricky areas like roof-to-wall transitions, and verify they use manufacturer-required materials like proper flashing tape and trim.
Paying more upfront for certified, trained installation is often what turns “brochure lifespan” into “reality” in Missouri weather conditions. Poor installation is the fastest path to costly repairs.
Maintenance: Small Habits That Add 5–10 Years to Your Siding
Here’s the good news: most Mid-Missouri homeowners don’t need complicated maintenance routines. A few simple yearly habits dramatically extend siding lifespan and keep your home’s curb appeal strong for several decades.
Annual cleaning: Spring cleaning with a garden hose, mild soap, and a soft brush removes accumulated dirt, pollen, and mildew. A simple annual routine cleaning makes a visible difference. Avoid using a pressure washer on vinyl and fiber cement—water pressure above 1500 PSI can force moisture behind panels and etch finishes.
Post-storm checks: After severe weather (hail, 50+ mph winds), do a quick walk-around looking for cracks, impact marks, or loose pieces. Focus on windward and upper-story walls where damage is most common. Document anything you find with photos—this helps with insurance claims and timely repairs.
Caulk and paint maintenance: For fiber cement and engineered wood, keeping joints sealed and paint intact is critical during our wet and humid seasons. Small gaps at trim and window transitions allow moisture entry, which leads to swelling, peeling, or soft spots over time. Touch-ups prevent small problems from becoming replacement siding projects.
Vegetation control: Trim trees and shrubs 1–2 feet away from siding to prevent constant moisture contact and scraping damage. We see this issue frequently on wooded properties and lake homes where landscaping grows against walls.
Gutters and downspouts: Keep gutters clear so water doesn’t overflow and run down the siding surface. This is especially important on older homes in Columbia and Jefferson City where marginal drainage compounds moisture problems at foundation level.
Schedule a professional inspection every few years—or after any major storm—to catch small issues before they reduce lifespan or turn into insurance claims. An experienced eye spots problems you might miss.
Missouri-Specific Red Flags: How to Tell Your Siding Is Near the End
Siding rarely fails overnight. Most Mid-Missouri homes show warning symptoms 3–5 years before full siding replacement becomes urgent. Knowing what to look for helps you plan ahead rather than react to emergencies.
Warning Sign
What It Looks Like
What It Means
Persistent hail damage
Cracked panels, pockmarks, chipped edges
Impact damage compromises weather protection
Widespread fading/chalking
Washed-out color, chalky residue on hands
UV degradation beyond cosmetic repair
Swelling or soft spots
Bubbling, peeling, spongy areas
Moisture has penetrated the wall system
Repeated repairs needed
Annual patch work, recurring loose panels
System is at end of useful life
Interior clues
Higher bills, musty smells, wall staining
Moisture getting past siding layer
Persistent hail damage: Cracked vinyl panels, pockmarks on aluminum siding, or chipped fiber cement edges across multiple walls after hailstorms indicate both aesthetic appeal and weather resistance have been compromised.
Widespread fading and chalking: When color is so washed out or chalky that routine cleaning and touch-ups no longer restore curb appeal, the material has reached its limits. This is common on 15–25-year-old vinyl siding in full sun exposure.
Swelling, peeling, or soft spots: These symptoms—especially on older wood siding or engineered wood around windows, doors, and bottom edges where splashback hits—signal that resist moisture capabilities have failed.
Repeated repairs becoming routine: If you’re calling for patch work every year or two, the old siding is typically at the end of its useful life. Full replacement often proves more economical than endless spot fixes.
Interior warning signs: Higher energy bills, musty smells in rooms against exterior walls, or interior wall staining near exterior trouble spots suggest moisture is getting past the siding layer and affecting energy efficiency and indoor air quality.
Take photos of concerning areas and request a free, no-pressure evaluation from a local professional. Clear documentation helps you decide between repair and siding replacement with confidence.
Choosing the Right Siding for Your Mid-Missouri “Time Horizon”
Instead of asking “what lasts longest on paper,” reframe the decision: How long do I plan to own this home, and how much maintenance am I willing to do? Your answer shapes siding choices more than any brochure ever could.
5–10 year horizon (planning to move): Vinyl siding may be most sensible. Lower upfront cost, quick aesthetic appeal upgrade, and strong return when selling in Columbia, Jefferson City, and surrounding towns. You likely won’t be around long enough to encounter its long-term limitations.
15–25 year horizon (growing family or investment property): Consider upgraded vinyl or engineered wood, balancing durability, cost, and the look you want. These options deliver solid performance across that window with reasonable maintenance.
25+ year “forever home” horizon: James Hardie fiber cement is a strong fit for Mid-Missouri homeowners wanting long-term stability, fire resistance, and consistent appearance that can withstand extreme weather conditions decade after decade. It’s a cost effective choice when amortized over 40+ years.
Neighborhood and HOA considerations: Some communities around Columbia and at Lake of the Ozarks strongly prefer higher-end profiles and colors that hold up visually over decades. Check restrictions before committing to a specific siding material.
Budget and financing: We help homeowners compare total cost of ownership—purchase price plus maintenance over likely lifespan—rather than just sticker price. We also offer financing options to spread the investment across manageable payments.
Our local experience across thousands of Mid-Missouri projects helps match siding choices to real-world plans, not just brochure numbers. What works for a rental in Moberly differs from what makes sense for a forever home on the lake.
Why Work With a Local, Triple-Certified Exterior Contractor
National averages and generic manufacturer claims don’t always match what happens in Boone, Cole, Cooper, and surrounding counties. Local experience—understanding how our specific weather patterns affect home exteriors—makes the difference between siding that lasts and siding that disappoints.
Our certifications matter for your siding lifespan: We’re the only contractor in Mid-Missouri holding GAF Master Elite, Owens Corning Platinum Preferred, and James Hardie Elite Preferred certifications simultaneously. Each requires annual factory training and maintaining high customer satisfaction ratings. This training and oversight directly protects your investment.
We know Mid-Missouri weather: Since 2010, we’ve served Columbia, Jefferson City, Boonville, Moberly, and Lake of the Ozarks through every storm season. We understand how our freeze-thaw cycles, hail frequency, and humidity affect siding differently than contractors who learned their trade elsewhere.
Complete warranty protection: Our limited lifetime workmanship warranty backs up manufacturer product warranties, giving you a complete protection picture. If installation issues arise, we return and make it right—no finger-pointing between contractor and manufacturer.
Educational approach, not high-pressure sales: We walk homeowners through pros and cons of each material, real-world expectations for their exact home, and detailed written estimates. We want you to understand your options, not just trust us blindly.
Free inspections and estimates: Schedule a free siding inspection—by phone at (573) 424-9008 or online—to get a specific, home-by-home assessment of expected lifespan and siding replacement options tailored to your situation.
With the right material, properly installed correctly by certified professionals, and maintained with simple annual habits, Missouri homeowners can realistically enjoy several decades of strong siding performance—meeting or exceeding even optimistic expectations.
FAQs
How do I find out what type of siding I already have and how old it is?
Start with simple checks: Look for manufacturer stamps on the back of spare pieces (often stored in garages or attics), examine the style—lap profile, texture, and material feel—and check your home’s closing documents or building permits for installation dates. Vinyl has a distinct hollow sound when tapped, while fiber cement feels dense and heavy. Engineered wood shows wood strand patterns on cut edges. If you’re uncertain, give us a call—we can confirm the siding type during a free inspection and estimate age based on visible wear patterns and style characteristics common to specific eras.
Can I replace just the damaged sections, or do I need to re-side the entire house?
Spot repairs make sense when damage is limited—a few cracked vinyl panels from hail, minor impact damage to one wall, or localized moisture issues. Full replacement becomes smarter when damage is widespread, when fading is so severe that new panels won’t match old ones, when the product has been discontinued (making matching impossible), or when moisture issues have spread behind multiple walls. We often find that homes needing repairs every year or two have reached the point where full replacement is more economical than continued patching. During an evaluation, we’ll give you honest guidance on which approach makes financial sense for your situation.
Will my homeowner’s insurance pay to replace old siding that’s near the end of its life?
Insurance generally covers sudden storm damage—hail impacts, wind-torn panels, debris strikes—but not normal aging, fading, or wear. That said, significant hail and wind events common in Mid-Missouri can trigger covered claims even on older siding. The key is proper documentation. We help homeowners photograph damage with specific details adjusters need, understand what their policy covers, and communicate effectively with insurance companies. Adjusters often miss secondary damage in valleys and around windows—sometimes undervaluing claims by 40%—so having an experienced advocate matters.
Does new siding really improve my home’s energy efficiency in our climate?
While siding isn’t the only factor in energy performance, properly installed, well-flashed siding systems can reduce drafts and heat loss—especially on older homes common throughout Columbia and Jefferson City. Insulated vinyl options add modest R-value (around R-2.5 versus standard vinyl’s R-1), and any new siding installation includes updating housewrap and sealing gaps that may have developed over decades. Set realistic expectations: you’ll likely notice improved comfort and some reduction in heating and cooling bills, but siding alone won’t transform energy performance like new windows or attic insulation would.
What’s the best season in Missouri to install new siding for long-term performance?
Spring and fall are ideal—milder temperatures mean materials behave predictably, and we experience fewer weather delays. However, we install year-round when conditions are safe. Proper installation practices adjust to the season: accounting for thermal expansion differences in summer heat versus winter cold, ensuring caulk and sealants cure properly, and protecting materials from precipitation during installation. The season matters less than choosing a contractor who understands how to adapt techniques to current conditions. A February installation done correctly will perform just as well as one completed in October.