What Happens During a Storm Damage Window Inspection?
A storm damage window inspection is not just a quick look for broken glass. Glass matters, but windows have several parts that can be affected by hail, wind, debris, and driving rain. A useful inspection checks the full window area and explains what is damaged, what is aging, and what needs attention now. NOAA’s Hail Overview confirms that hail can damage homes, while NFRC’s Guide to Window Types and Parts explains why the frame, glazing, spacers, and other components all belong in the review.
For Mid-Missouri homeowners, the best inspection is specific by elevation. The side of the home that took the storm often tells a different story than the protected side. CoMo Premium Exteriors reviews those patterns so homeowners are not left guessing, especially when window concerns appear alongside siding, gutters, fascia, or other storm-facing materials.
What the exterior inspection includes
The inspection usually starts outside. CoMo looks at exposed elevations, window frames, screens, wraps, trim, caulking, nearby siding, gutters, downspouts, fascia, and other soft metal. Hail may dent metal wraps, tear screens, chip trim, crack brittle siding near the window, or leave marks that line up with damage on gutters and siding. Wind can loosen components or force water into weak areas. Window concerns should be reviewed alongside gutters, siding, screens, and trim on the same elevation so the documentation shows the complete visible pattern rather than one isolated close-up.
The goal is not to find one mark and call it done. The goal is to understand whether the damage forms a storm-related pattern and whether the window area is still keeping water and air where they belong.
What the interior inspection may include
Inside the home, the inspector may check for water staining, soft drywall, drafts, fogging between panes, moisture near trim, and windows that no longer open, close, or lock correctly. A window can look fine from the yard but still have seal or operation problems that show up indoors.
Homeowners should point out rooms where something changed after the storm: a new draft, a damp sill, fogging, rattling, or a window that suddenly feels harder to operate.
How documentation works
Good documentation is part of the process. Expect photos, notes by elevation, and a plain-English explanation of the findings. If the inspection is connected to an insurance claim, those details help show whether the window damage appears storm-related or whether it is likely age, wear, or prior installation trouble.
You can prepare by writing down the storm date, saving any hail photos if you have them, and noting rooms where you noticed leaks, drafts, or fogging. Move furniture away from affected windows if possible. You do not need to diagnose the problem before the inspection. Just point out what changed.
What happens after the inspection if storm damage is confirmed
If the inspection finds storm-related window damage, the next steps usually follow a predictable path, and knowing what to expect makes the process less stressful.
First, the inspector documents the damage with photos and notes organized by elevation. Those photos become the reference point for the estimate and for any insurance conversation. If you are filing a claim, your adjuster will rely on clear documentation that ties the window damage to the storm rather than to age or wear.
Next comes the estimate. For windows, an estimate is rarely a single number on the spot. If replacement is recommended, a separate precise measurement visit is usually needed before anything is ordered. Replacement windows are built to exact opening sizes, so the measure step exists to make sure the new window fits correctly the first time. That is also why a contractor may need to come inside your home during the measure, even if the damaged window faces the exterior.
Once measurements are complete and the scope is agreed on, the window order goes in. Replacement windows are custom-manufactured to your home’s openings, which means there is a production lead time between approval and installation day. That gap is normal and is not a sign that something stalled. Your contractor should give you a realistic timeline for production and delivery so you are not left wondering.
If only a screen, wrap, or trim piece is damaged, the timeline is usually shorter because those parts do not require a custom window order. Knowing whether your situation needs a full replacement or a component repair is one of the most useful things the inspection can clarify early.
What a contractor should and should not promise
The contractor should not promise what insurance will cover. That decision belongs to the carrier and your policy. What the contractor can do is inspect carefully, document visible damage, explain repair and replacement options, and help you understand whether the issue appears isolated or part of a larger exterior problem.
A clear inspection may show that you only need a screen repair. It may show hail damage to exterior wraps. It may show older windows that are ready for replacement regardless of the claim. The value is knowing which situation you are actually dealing with before the next storm rolls through.
If you are trying to sort out storm damage, repair options, or an insurance conversation, CoMo Premium Exteriors can inspect the exterior and explain what we see in plain English. Call (573) 284-3227 or Request an Inspection.
Should You Replace Windows After a Hail Claim or Repair Them?
After a hail claim, windows can be easy to overlook. Homeowners usually notice broken glass right away, but hail can also damage screens, frames, exterior wraps, seals, trim, and caulking. Some items are simple repairs. Others point toward replacement. NOAA’s Hail Basics notes that hail can damage homes, which is why a complete window review should not stop at the most obvious break.
The right answer depends on what was damaged, how the window is performing, and whether the issue is isolated or part of a larger exterior pattern. CoMo Premium Exteriors starts by separating storm damage from age, wear, and ordinary maintenance needs, then looks at whether the same elevation has siding, gutter, trim, or wrap damage that changes the recommendation.
When window repair may be enough
Repair may make sense when the damage is limited. A torn screen, small trim issue, damaged exterior accessory, loose caulk joint, or minor wrap damage can sometimes be addressed without replacing the whole window. If the glass, frame, operation, and seal are still sound, a targeted repair may be the practical choice. NFRC’s Window Replacement Options distinguish repair, retrofit, sash replacement, insert replacement, and full replacement as separate scopes.
That is especially true when the surrounding siding and trim are in good shape. A window should be evaluated with the wall system around it, not just by looking at the glass.
When replacement becomes more likely
Replacement becomes more likely when the window no longer performs the way it should. Fogging between panes, broken seals, cracked frames, water intrusion, warped operation, failed locks, soft trim, and widespread exterior damage all raise the stakes. If the window was already aging, the storm may reveal a problem that was close to failure anyway.
In Mid-Missouri, summer heat can make weak windows more obvious. Rooms feel warmer, the AC runs harder, and worn seals become harder to ignore. If a storm claim already has you reviewing the exterior, it is a good time to decide whether the windows are still doing their job.
What CoMo checks before recommending a direction
A useful window review checks more than one pane of glass. CoMo looks at the exterior elevation, screens, frames, wraps, trim, caulking, operation, visible seal failure, nearby siding damage, and any water signs inside the home. The goal is to explain whether repair, partial replacement, or a larger window project makes sense.
For insurance-related questions, documentation matters. Photos of broken screens, dented wraps, cracked trim, affected elevations, and matching storm evidence on siding or gutters help clarify what happened. Coverage decisions still belong to the carrier and policy, but clear documentation makes the conversation more grounded. Because hail follows an exposure path, an inspection should also compare siding, gutters, screens, and trim on the same elevation before deciding whether the window issue appears isolated.
Should you replace one window or several?
If one window needs replacement but the rest are older, you may have a decision to make. Do you repair the affected item only, replace a few windows on the damaged elevation, or plan a larger upgrade for comfort and energy performance? There is no one right answer.
Homeowners should weigh performance, budget, curb appeal, matching, and how soon they expect to replace the remaining windows. CoMo can explain those options without pushing every hail inspection into a full-window replacement project.
If you are trying to sort out storm damage, repair options, or an insurance conversation, CoMo Premium Exteriors can inspect the exterior and explain what we see in plain English. Call (573) 284-3227 or Request an Inspection.
Window screens are highly vulnerable: Hail easily tears fiberglass and aluminum screen mesh, and bent screen frames may not fit back into the window track.
Window frames dent and crack: Vinyl frames split under impact. Aluminum frames dent. Wood frames splinter. Each material shows different damage.
Damage affects function, not just looks: Bent frames prevent windows from closing properly. Torn screens let insects inside. Cracked frames allow water intrusion.
Insurance may cover replacement: If hail damage is documented during a covered storm event, screens and frames are often included in the claim.
Inspect after every hailstorm: Screen and frame damage is easy to miss from inside your home. Walk the exterior after storms to catch problems early.
The Forgotten Casualty of Hailstorms
When hail pounds Mid-Missouri, homeowners look at their roofs, their cars, and maybe their siding. But window screens and frames often take a beating that goes completely unnoticed—until a mosquito flies through a torn screen in July or rainwater seeps through a cracked frame during the next thunderstorm.
Window screens sit outside your glass, fully exposed to hail. They’re made of thin mesh stretched over lightweight frames. Window frames—whether vinyl, aluminum, or wood—project slightly from the wall and catch hail at an angle. Neither component is designed to absorb impact from ice falling at terminal velocity.
We’ve replaced hundreds of window screens and frames after hailstorms across Columbia, Jefferson City, and Lake Ozark. The damage is almost always worse than homeowners expect because they don’t think to look. This guide shows you exactly what to inspect, what damage means, and how to handle insurance claims for window components other than glass.
How Hail Damages Window Screens
Window screens are defenseless against hail. The mesh is thin, the frame is light, and the whole assembly is designed for airflow—not impact resistance.
Torn or Punctured Mesh
Hailstones larger than ¾ inch can puncture standard fiberglass screen mesh. The impact creates a star-shaped tear that spreads under tension. Once the mesh is torn, it continues to unravel with wind and use.
Aluminum mesh is stronger than fiberglass but dents instead of tearing. A dented aluminum screen may still keep insects out, but the dent weakens the metal and creates a point where future impacts will cause failure.
Bent or Twisted Frames
Screen frames are made of rolled aluminum or vinyl. Hail hitting the frame directly can bend the channels, pop corners apart, or twist the frame out of square. A bent frame won’t slide back into the window track properly, leaving gaps where bugs enter.
Spline Separation
The spline is the rubber or vinyl cord that holds screen mesh in the frame channel. Hail impact can pop the spline out of the groove, loosening the mesh. This damage is subtle—you might not notice it until the mesh sags or blows out in a strong wind.
Screen Type
Hail Damage Pattern
Repairability
Fiberglass mesh
Star-shaped tears, unraveling
Usually requires full rescreening
Aluminum mesh
Dents, punctures at weak points
Small dents may be acceptable; large damage needs replacement
Pet-resistant mesh
Tears less easily but frame may bend
Mesh often survives; check frame integrity
Solar screens
Same as standard mesh plus coating damage
Coating scratches reduce effectiveness; usually replace
Retractable screens
Housing dents, mesh tears, track damage
Often requires manufacturer-specific parts
How Hail Damages Window Frames
Window frames take hail differently depending on their material:
Vinyl Frames
Vinyl is the most common window frame material in Mid-Missouri. It’s energy efficient and low maintenance, but it becomes brittle in cold weather. Hail hitting vinyl frames in spring—when temperatures fluctuate—often causes cracking or chipping at the corners and edges.
Vinyl frame damage is tricky because it may not be immediately visible. A hairline crack in the exterior vinyl shell can let water into the hollow frame cavity. Over months, this water accumulates, freezes in winter, and expands the crack. By the time you notice a problem, the internal structure may be compromised.
Aluminum Frames
Aluminum frames dent rather than crack. Small dents are cosmetic, but large dents can bend the frame enough to prevent the sash from operating smoothly. Dented frames also create low spots where water pools, accelerating corrosion at joints and weep holes.
Wood Frames
Wood frames are less common in newer Mid-Missouri homes but still appear in historic properties around Jefferson City and Fulton. Hail can splinter wood, especially if the paint or stain is already weathered. Splintered wood requires prompt sealing or replacement to prevent rot.
Fiberglass and Composite Frames
Fiberglass frames are strong and resist impact well, but hail can chip the gel coat surface. Composite frames (wood fibers encased in vinyl) may show damage at the vinyl layer while the internal wood remains intact.
For technical specifications on window frame materials and impact resistance, the National Fenestration Rating Council publishes performance data for common frame types.
Why Screen and Frame Damage Matters
It’s tempting to dismiss screen tears and frame dents as minor issues. But these components play important roles in your home’s protection:
Insect barrier: A torn screen is an open door for mosquitoes, flies, and wasps during Missouri summers.
Debris filter: Screens catch leaves, pollen, and small debris before it reaches your glass. Without intact screens, your windows get dirtier faster.
Water management: Window frames include weep holes and drainage channels that direct water away from your walls. Cracked or dented frames disrupt this drainage, causing water to run into the wall cavity.
Structural integrity: The frame holds the window sash in place. A damaged frame may allow the sash to shift, breaking the weather seal and creating drafts.
Aesthetic value: Dented frames and torn screens reduce curb appeal and can affect resale value.
How to Inspect Screens and Frames After a Hailstorm
Use this systematic approach to check every window:
Walk the exterior of your home. Look at each window from 10-15 feet away, then move closer for detail.
Check screens from the outside. Look for tears, holes, sagging mesh, and bent frames. Run your hand lightly across the mesh to feel for small punctures you can’t see.
Examine frame corners and edges. Hail typically strikes the top and sides of frames. Look for cracks in vinyl, dents in aluminum, and splinters in wood.
Operate every window. Open and close each sash. If it sticks, binds, or won’t lock, the frame may be bent or swollen from moisture intrusion.
Check weep holes. These small slots at the bottom of the frame allow drainage. If they’re clogged with debris or frame damage, water backs up into the wall.
Look for water stains inside. Check the drywall beneath windows for discoloration, bubbling, or softness.
For each damaged window, take one wide photo that shows where the window sits on the home, then take close-up photos of the torn mesh, bent screen rail, cracked vinyl, dented aluminum, or damaged weep area. If the sash sticks or the lock will not line up, make a short note before forcing it closed. That kind of detail helps separate a simple screen repair from a frame or sash problem that may need a replacement measurement.
A good inspection also looks at the trim around the opening. Hail can leave the glass intact while still damaging the screen frame, exterior frame face, or water-management path. If you see fresh water staining, swelling, or a window that suddenly binds after the storm, mention that when you call so the inspection covers function and drainage, not just visible dents.
Insurance Coverage for Screens and Frames
Most Missouri homeowners policies cover hail damage to window screens and frames as part of the dwelling or other structures coverage. However, adjusters may not inspect these components closely unless you point them out.
Common insurance scenarios:
Full replacement approved: If multiple windows have damaged screens and frames, insurance may approve replacement of all affected components.
Partial approval: Some adjusters approve screen replacement but argue that frame dents are “cosmetic” and don’t affect function. A contractor can demonstrate how dented frames disrupt drainage or sash operation.
Denial for pre-existing wear: If screens were already torn or frames were already weathered before the storm, the insurer may attribute all damage to maintenance issues rather than hail.
Documentation is your best defense. Photograph every damaged screen and frame before cleaning or repairing anything. Include close-ups and wide shots showing the window’s location on your home. Also keep notes about which windows no longer open, close, latch, or drain normally. Those function notes are often more useful than a photo of a small dent because they explain why the damage matters.
When you ask for an inspection, be specific: mention damaged screens, bent screen frames, cracked or dented window frames, drainage concerns, and any window that changed how it operates after the hailstorm. That gives the contractor a clear checklist and helps determine whether the right next step is rescreening, a frame repair, a replacement part, or full window replacement.
Hail as small as ½ inch can tear fiberglass mesh and dent aluminum frames, especially if driven by wind. The angle of impact matters as much as the size—wind-driven hail strikes with more force than hail falling straight down.
Should I replace a screen with a small tear?
Small tears usually spread over time. If the tear is smaller than a quarter and not in a high-tension area, a patch kit may work temporarily. For larger tears or tears near the frame edge, full rescreening is the better solution.
Will insurance pay to replace all my screens if only some are damaged?
Insurance typically covers only the screens directly damaged by hail. However, if your screens are part of a uniform set and matching replacements aren’t available, you may be able to argue for full replacement for aesthetic consistency.
Can dented aluminum window frames be repaired?
Small dents can sometimes be smoothed, but the process risks cracking the frame’s finish. For most homeowners, replacement is more reliable than repair, especially if insurance covers the cost.
How do I protect my windows from future hail damage?
Storm shutters, exterior rolling shutters, and impact-resistant window films provide protection. For existing windows, removable storm panels are the most cost-effective option. Some homeowners install hail guards or awnings over vulnerable windows.
Should I have my windows inspected even if the glass isn’t broken?
Yes. Glass is actually the strongest part of most modern windows. Screens, frames, and weatherstripping are far more vulnerable. We’ve inspected many homes where the glass survived but frames and screens needed extensive replacement.
Ready to Get Started?
We’ve been serving Mid-Missouri homeowners for over 25 years with premium roofing, siding, and exterior solutions. As GAF Master Elite, Owens Corning Platinum Preferred, and James Hardie Elite Preferred contractors, we bring certified expertise to every window inspection and repair.
If a recent hailstorm rolled through your area and you’re wondering whether your window screens and frames made it through unscathed, give us a call. We’ll inspect every window, document the damage, and help you decide whether filing a claim makes sense.
Yes, severe storms can break window seals: High winds, rapid pressure changes, and flying debris can compromise the seal between double-pane glass layers.
Broken seals cause fogging: When the seal fails, moisture enters the space between panes, creating condensation that you can’t wipe away from either side.
Storm-related seal failure is often covered: If the damage occurs during a documented severe weather event, insurance may cover replacement.
Not all foggy windows are storm damage: Seals naturally fail over time due to UV exposure and thermal expansion. Insurance typically excludes normal wear and tear.
Documentation is critical: Photos of the fogging, the storm-facing side of the home, window screens, frames, trim, and nearby impact marks give the inspector and adjuster more useful context.
The Window Seal You Can’t See
Double-pane and triple-pane windows dominate Mid-Missouri homes for good reason: they’re energy efficient, reduce noise, and stand up to temperature swings better than single-pane glass. But these windows depend on an invisible component most homeowners never think about until it fails—the seal.
A window seal is the adhesive barrier that keeps the space between glass panes airtight and dry. When it’s intact, the insulating gas (usually argon) stays trapped, and moisture stays out. When it breaks, the gas escapes, outside air enters, and condensation forms between the panes where you can’t reach it.
Most people assume seal failure is just age-related wear. But severe storms—especially the high-wind thunderstorms and tornadoes common in Columbia, Jefferson City, and Lake Ozark—can break seals through pressure changes, structural flexing, and debris impact. If your windows fogged up after a recent storm, the timing might not be a coincidence.
How Storms Break Window Seals
Window seal failure from storms happens through three main mechanisms:
Rapid Pressure Changes
Severe thunderstorms and tornadoes create dramatic atmospheric pressure drops. When the external pressure drops suddenly, the gas trapped between window panes expands, stressing the seal. If the pressure change is severe enough—common in supercell storms across Central Missouri—the seal can rupture.
This is the same principle that causes ear discomfort during airplane descents, but applied to your window glass. Modern windows are designed to handle normal pressure variations, but extreme storm events exceed those design limits.
Structural Flexing
High winds push against your home’s walls, causing microscopic flexing in the window frame. Over hours of sustained wind, this repeated movement fatigues the sealant. We’ve seen this pattern after prolonged wind events in Mid-Missouri where gusts stayed above 50 mph for several hours.
Older homes with wood frames are especially susceptible because wood expands and contracts with moisture, amplifying the frame movement. Vinyl and fiberglass frames handle flexing better but aren’t immune.
Debris Impact and Vibration
Even if debris doesn’t crack the glass, nearby impacts create shockwaves that travel through the frame. A large branch hitting your siding 3 feet from a window can vibrate the frame enough to weaken the seal. Hail impacts on window frames, trim, or adjacent walls have the same effect.
The National Fenestration Rating Council provides technical standards for window performance under pressure and impact loads, including testing protocols that simulate severe weather conditions.
Tell the Difference: Storm Damage vs. Normal Seal Failure
This is where insurance claims get complicated. Not every foggy window is storm-related. Here’s how to tell the difference:
Characteristic
Storm-Related Seal Failure
Age-Related Seal Failure
Timing
Fogging appears within days or weeks of a documented storm
Develops gradually over years with no specific trigger
Pattern
Multiple windows on the storm-facing side of the home
Random distribution, often starting with south-facing windows (most UV exposure)
Other damage
Accompanied by cracked screens, dented trim, or roof damage
No other exterior damage present
Window age
Can occur in windows less than 10 years old
Most common in windows 15+ years old
Weather severity
Follows documented severe weather with high winds or hail
Occurs during normal seasonal changes
If your windows fogged after a storm but you have no other exterior damage, that doesn’t automatically rule out storm causation. Pressure changes alone can cause seal failure without leaving visible marks on your siding or roof.
For the first inspection, treat the window like part of the whole opening, not just a foggy pane of glass. Take photos from inside and outside. Include the fogging pattern, the full window frame, screens, exterior trim, sill area, and the side of the house that faced the wind or hail. CoMo’s window-related inspections commonly come down to the same practical questions: what changed after the weather event, what else around the opening was affected, and whether the best fix is sash/glass replacement or a larger window replacement.
Why Foggy Windows Matter Beyond Aesthetics
A broken window seal isn’t just an eyesore. It creates real problems for your home:
Lost insulation value: The R-value of a double-pane window drops by 30-50% when the seal fails and argon gas escapes. Your HVAC system works harder, and your energy bills rise.
Moisture damage: Condensation between panes eventually seeps into the window frame, causing wood rot in sashes and sill damage.
Mold risk: Persistent moisture in the window channel creates ideal conditions for mold growth, especially in humid Missouri summers.
Structural weakening: In extreme cases, moisture intrusion degrades the wall framing around the window opening.
We’ve inspected homes in Columbia where homeowners lived with foggy windows for two years, assuming it was cosmetic. By the time they called us, the sills were rotted and the drywall beneath the windows was moldy. What started as a $400 window replacement became a $3,000 repair involving framing, insulation, and drywall.
Documenting Storm-Related Seal Failure for Insurance
If you believe a storm broke your window seals, documentation determines whether insurance pays. Here’s what to gather:
Storm Documentation
National Weather Service reports showing wind speeds, hail size, or tornado activity in your area on the storm date.
Photos of your home’s exterior showing storm severity (debris, downed limbs, neighbor damage).
Your own photos from during or immediately after the storm.
Window Condition Records
Photos of your windows before the storm, if available. Real estate listings, home inspection reports, or renovation photos work.
Photos of the fogging pattern showing which windows are affected and when it appeared.
Window manufacturer, model, and installation date. Newer windows are more likely to have storm-related failure than age-related failure.
Professional Inspection
A certified window contractor can evaluate whether the seal failure pattern is consistent with storm damage. At CoMo Premium Exteriors, we inspect windows as part of our storm damage assessments and provide written reports for insurance adjusters.
A useful window inspection should not stop at “the glass is foggy.” Ask whether the sash is still square, whether the frame shows movement, whether the screen or wrap has impact marks, and whether the installer can order just the affected sash/glass unit or should price a full replacement. Those details help you avoid paying for more window work than you need while still documenting the problem clearly.
Technically, yes—there are companies that drill holes in the glass, remove moisture, and reseal the spacer. But we don’t recommend this approach for several reasons:
Warranty voiding: Drilling holes voids any remaining manufacturer warranty.
Temporary fix: Moisture usually returns within 1-3 years because the original argon gas isn’t replaced.
Structural compromise: Drilling weakens the glass and can create stress fractures.
Energy loss persists: Even defogged windows lack the insulating gas that makes double-pane windows efficient.
For most homeowners, full sash or window replacement is the better long-term solution. If insurance covers the replacement due to storm damage, there’s no financial reason to choose a temporary repair.
The right replacement path depends on what the inspection finds. If the frame is sound and the window line still has compatible parts available, a sash or insulated glass unit may solve the fogging without disturbing trim and siding. If the frame is racked, rotted, leaking, or no longer accepts replacement parts cleanly, a full window replacement is usually the safer long-term choice.
Frequently Asked Questions
How do I know if my window seal is broken?
The telltale sign is condensation or fogging between the glass panes that you can’t wipe away from either the inside or outside. You may also notice a white mineral residue (calcium deposits) on the glass when the moisture evaporates.
Will insurance replace all my windows if one seal fails after a storm?
Insurance typically covers only the windows directly affected by the storm. If three windows on your south wall fogged after a windstorm, those three are claimable. Windows on the opposite side of the house with no storm exposure are not.
How long do window seals normally last?
Quality double-pane windows should maintain their seals for 15-20 years. Budget windows may fail in 10-12 years. Windows exposed to direct sunlight, extreme temperature swings, or poor installation fail sooner.
Can I prevent storm-related seal failure?
You can’t prevent pressure changes, but you can reduce risk by ensuring windows are properly installed with adequate shim space and flexible sealant. Storm shutters or impact-resistant film provide additional protection during severe weather.
Does a broken seal mean I need a full window replacement?
Not always. Some manufacturers sell replacement sashes (the movable part of the window containing the glass) that fit existing frames. This is cheaper than full-frame replacement and preserves your interior trim. We evaluate sash replacement vs. full replacement on every job.
How much does it cost to replace foggy windows?
Replacement costs vary by window size, type, and brand. In Mid-Missouri, expect $300-$800 per window for standard double-hung replacements. Larger picture windows, bay windows, or premium brands run $1,000-$2,500+. Sash-only replacements cost 40-60% less than full-frame replacements.
Ready to Get Started?
We’ve been serving Mid-Missouri homeowners for over 25 years with premium roofing, siding, and exterior solutions. As GAF Master Elite, Owens Corning Platinum Preferred, and James Hardie Elite Preferred contractors, we bring certified expertise to every window inspection and replacement.
If your windows fogged after a recent storm—or if you’re unsure whether seal failure is storm-related or age-related—give us a call. We’ll inspect your windows, review your situation, and help you understand your options.
Do Window Installers Need to Come Inside Your Home?
Key Takeaways:
Yes, window installers need interior access — most of the removal, sealing, and trim work happens from inside your home.
The exterior is where the old window comes out; the interior is where the new window gets secured, sealed, insulated, and trimmed.
Clear 5 feet of space around each window and remove all blinds, curtains, and wall decor before the crew arrives.
Each window takes 4-6 hours for a full-frame replacement. Pocket (insert) replacements are faster with less interior disruption.
No window opening will be left exposed overnight — installers complete or weatherproof every window they start each day.
The Short Answer: Yes, They Need to Come Inside
This is one of the most common questions we hear from homeowners in Columbia and Jefferson City before scheduling a window replacement. The concern makes sense — you’re inviting a work crew into your living space, and you want to know what that actually looks like.
The reality is that window replacement is both an exterior and interior job. The old window is typically removed from the outside, but the new window gets secured, insulated, sealed, and trimmed from inside your home. Your installer will spend roughly equal time on each side of the wall, and some steps — like verifying the sash operates smoothly and checking for air gaps — can only be done from inside.
The good news: professional crews know they’re working in someone’s home, not a construction site. The disruption is manageable if you prepare each room ahead of time.
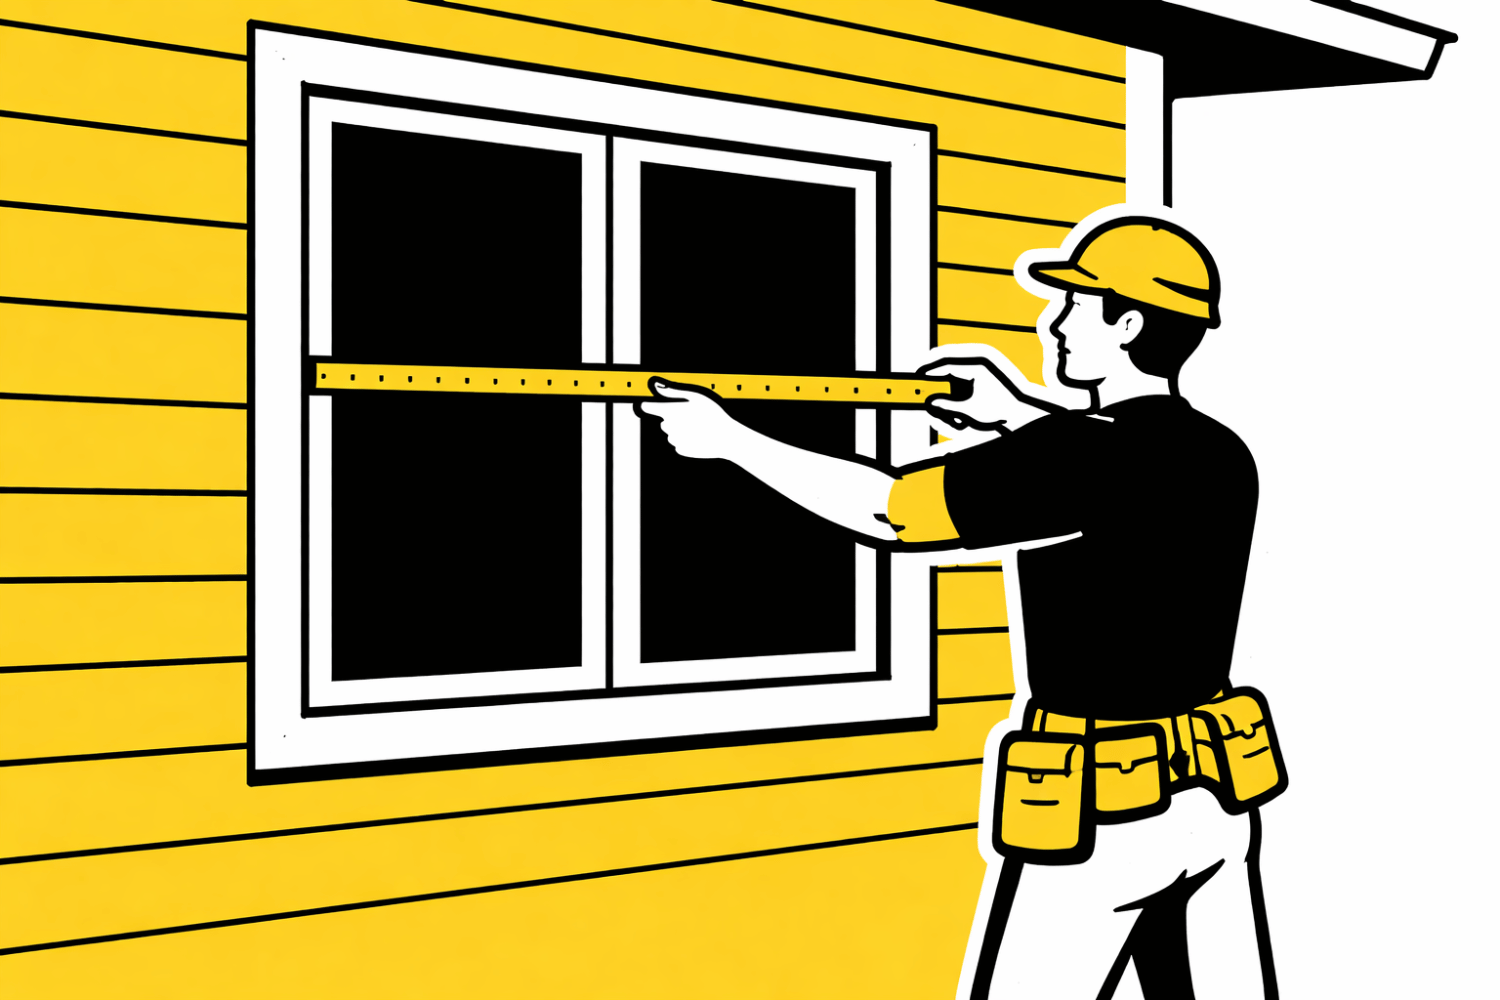
Before Install Day: Expect a Separate Measure Visit
Replacement windows are built to fit your exact openings, so the project usually starts with a separate measurement appointment — not the installation itself. A CoMo specialist comes inside to record precise dimensions for every window being replaced, note how each sash operates, and check the condition of the existing frame and rough opening. Plan for interior access on this visit too: the measurer needs to reach each window, look behind trim where possible, and confirm whether the frame is square and dry.
What you can do to make the measure visit productive:
Have blinds, curtains, and furniture pulled back so each window is reachable, even ones you’re unsure about.
Be ready with a list of problems you’ve noticed — drafts, hard-to-open sashes, foggy glass, moisture on the sill, or trim that’s pulling away.
Point out any window that sticks, has rot visible at the sill, or has a broken lock; these often shift the recommendation from a pocket insert to a full-frame replacement.
Once measurements are complete, your windows are custom-ordered to those exact sizes. That ordering step is why there’s typically a gap between the measure visit and install day — the windows are being manufactured for your home, not pulled off a shelf. We’ll confirm your install date once the windows are delivered and inspected.
What Happens Outside vs Inside
Exterior work includes:
Removing exterior trim and stops to access the old window
Lifting out the old sash and frame (full-frame replacement) or just the sash (pocket replacement)
Inspecting the rough opening for rot, water damage, or insect damage
Applying flashing tape to the sill for waterproofing
Installing exterior trim and caulking after the new window is set
Interior work includes:
Removing interior window trim, stops, and any hardware
Leveling and shimming the new window in the opening
Driving mounting screws through the window frame into the rough framing
Applying spray foam insulation around the gap between window and framing
Installing interior trim and caulking
Testing sash operation — making sure the window opens, closes, locks, and tilts correctly
Cleaning up dust, debris, and protective film
On brick homes, the installation often happens primarily from the exterior because the outer wall opening is wider than the interior one. But even on brick homes, the installer needs inside access for shimming, sealing, and trim work.
How to Prepare Each Room
Andersen Windows recommends treating installation day like a mini move — it’s temporary, but the preparation makes a real difference in how smoothly the day goes.
Before the crew arrives:
You’ll prep twice — once for the measure visit, once for install day. The measure visit only needs each window reachable. Full install-day prep (covered below) goes further: furniture moved, pictures down, pets secured, and window sensors turned off.
Remove window treatments first. Blinds, curtains, shades, and shutters need to come down before installation day. This is the single biggest time-saver — removing blinds from 15 windows can take an installer hours if the homeowner hasn’t done it in advance. That’s time spent on hardware removal instead of window installation.
Clear 5 feet of space around each window. Move furniture, lamps, plants, electronics, and anything fragile away from the work area. The crew needs room to maneuver the old window out and the new window in, plus space for tools, shims, and caulking supplies.
Take pictures off the walls. The vibration from removing old windows can knock frames loose. Removing wall decor within 5-6 feet of each window prevents damage and dust accumulation on glass and frames.
Cover remaining furniture. Drop cloths or old sheets over beds, couches, and desks near the windows. There will be dust from removing old trim and debris from the rough opening. Professional crews bring their own drop cloths, but covering items yourself gives extra protection.
Secure pets.Window World’s installation guide notes that technicians can’t always close doors and gates behind them as they move through the house. Keep dogs and cats in a closed room away from the work area, or arrange for them to be off-site for the day.
Notify your alarm company. Opening and removing windows will trigger sensors. Let your security provider know you’re having work done and disable window sensors for the day.
Full-Frame vs Pocket Replacement: Different Levels of Disruption
How much interior work happens depends on which type of window replacement you’re getting:
Pocket (insert) replacement is less disruptive. The existing window frame stays in place — only the sash and operating hardware are replaced. Interior trim usually isn’t disturbed. This is faster (2-3 hours per window) and generates less mess, but it only works when the existing frame is in good condition and square.
Full-frame replacement removes everything — sash, frame, trim, and sometimes the sill. This is more disruptive (4-6 hours per window) but allows inspection and repair of the rough opening, fresh insulation, new flashing, and a complete weathertight installation. For older Mid-Missouri homes where the original frames may have moisture damage or settling issues, full-frame is the more thorough approach.
What to Expect During the Day
Morning start: Most crews arrive between 8:00 and 9:00 AM and work through the day until the scheduled windows are complete.
Open windows = brief exposure: Each window opening will be exposed for the time it takes to remove the old window and install the new one — typically a few hours per window. The crew works on one window at a time and moves sequentially through the house.
Noise and dust: Expect drilling, hammering, and the sound of spray foam cans. Dust from old trim removal and insulation work is normal. Quality crews lay drop cloths and vacuum as they go, but some cleanup will be needed after they leave.
No openings left overnight: This is a firm standard for reputable installers. Any window the crew starts will either be completed or temporarily weatherproofed by the end of the day. You won’t go to bed with an open hole in your wall.
Post-installation walkthrough: Before the crew leaves, walk each window with the installer. Test every sash for smooth operation. Check locks. Look at interior trim for gaps or rough caulk joints. Ask about removing the factory protective film — most windows ship with a plastic film on the glass that you’ll peel off after installation is confirmed correct.
Frequently Asked Questions
Do window installers need to come inside my house?
Yes. While the old window is often removed from the outside, securing the new window, insulating the gap, installing interior trim, and testing operation all require interior access. Plan for the crew to spend roughly equal time inside and outside for each window.
How long does window replacement take per window?
A pocket (insert) replacement takes 2-3 hours per window. A full-frame replacement takes 4-6 hours. For a full-house project with 10-15 windows, expect 2-4 days total depending on window type and house complexity.
Do I need to be home during window installation?
Someone should be home or available. The crew may need to ask about preferences (trim style, hardware placement), access locked rooms, or address unexpected findings like rot in the rough opening. You don’t need to supervise, but being reachable is important.
Will window installers damage my walls or paint?
Minor touch-up around window trim is normal, especially with full-frame replacement. Removing old trim can pull paint or leave small nail holes. Reputable installers will note any pre-existing damage and point out areas where you may want to touch up paint after the new trim cures.
What should I do with my curtains and blinds before installation?
Remove them completely before the crew arrives. This includes curtain rods, brackets, blinds, and any mounted valances. Window treatments are the most common cause of installation delays. Call us at (573) 424-9008 if you have questions about preparing for your installation day.
Ready to Get Started?
We’ve been replacing windows in Mid-Missouri homes for over 25 years. Our crews are experienced, respectful of your home, and thorough in their cleanup. As GAF Master Elite, OC Platinum Preferred, and James Hardie Elite Preferred contractors, we bring the same certified precision to window installations that we bring to every exterior project.
Are Casement Windows More Expensive Than Other Window Types?
Key Takeaways:
Casement windows cost 10-20% more than double-hung windows — typically $400-$1,150 installed versus $400-$1,000 for double-hung.
The price premium comes from the crank mechanism and more complex hinges, not from better glass or frame materials.
Casement windows seal 60% tighter than double-hung against air leakage, which can reduce heating and cooling costs over time.
The best value depends on where the window goes — casement makes sense in kitchens, bathrooms, and hard-to-reach spots. Double-hung works fine for most bedrooms and living rooms.
Federal tax credits cover 30% of qualifying window costs up to $1,200 per year, helping offset the casement premium.
The Short Answer: Yes, But Not by as Much as You’d Think
If you’re replacing windows in your Columbia or Jefferson City home and comparing quotes, you’ve probably noticed that casement windows come in higher than double-hung or sliding windows. The difference is real — but it’s not dramatic. Most homeowners see a 10-20% premium for casement over comparable double-hung windows in the same material and glass package.
On a single window, that might be $50-150 more. Across a full house with 15-20 windows, the total difference could run $750-$3,000. Whether that premium is worth paying depends on where each window goes, how important energy efficiency is to you, and how long you plan to stay in the home.
Let’s break down the real costs, compare window types head-to-head, and help you figure out where to spend and where to save.
What Each Window Type Actually Costs
Installed prices vary based on material (vinyl, wood, fiberglass, composite), glass package (double or triple pane), and your home’s framing. Here’s where the main window types fall in Mid-Missouri pricing:
Window Type
Installed Cost Range
Typical Average
How It Opens
Sliding
$300-$600
~$425
Slides horizontally on a track
Single-hung
$300-$700
~$450
Bottom sash slides up
Double-hung
$400-$1,000
~$500
Both sashes slide up and down
Awning
$300-$700
~$475
Hinged at top, opens outward
Casement
$400-$1,150
~$560
Hinged at side, cranks outward
Picture/Fixed
$150-$800
~$350
Doesn’t open
The casement premium comes almost entirely from the operating hardware. The crank mechanism, folding arm operator, and multi-point locking system add manufacturing cost. The glass, frame material, and weatherstripping are often identical between casement and double-hung windows from the same manufacturer.
Why Casement Costs More (and What You Get for It)
Paying more for casement isn’t just paying for a fancier crank handle. The mechanical difference creates real performance advantages:
Tighter seal against air leakage. When you close a casement window and turn the lock, the sash compresses against weatherstripping around the entire perimeter — similar to how a refrigerator door seals. Marvin’s testing shows that casement windows achieve air leakage rates below 0.01 cfm per square foot — roughly 60% lower than double-hung windows. Double-hung windows have more seams and linear feet of weatherstripping where air can work through, and that leakage tends to increase as weatherstripping compresses over years of use.
Full ventilation opening. A casement window opens its entire sash area to airflow. A double-hung window opens only half — the bottom sash slides up to reveal the opening. For the same size window, casement provides nearly twice the ventilation capacity. In Mid-Missouri’s humid summers, that extra airflow can make a noticeable difference in rooms without strong HVAC circulation.
Easier operation in hard-to-reach spots. The crank mechanism means you don’t need to push or pull the sash — just turn a handle. That matters above kitchen sinks, behind bathtubs, or in any spot where reaching through a window opening to lift a sash would be awkward or uncomfortable.
Where Each Type Makes the Most Sense
You don’t have to pick one type for your entire house. Most homeowners get the best value by mixing window types based on location:
Best rooms for casement:
Kitchen — reach-over-the-counter operation with a crank instead of pushing up a heavy sash
Bathrooms — full ventilation helps with humidity; crank operation works when reaching past a tub
Living room flanking a picture window — casements paired with a fixed center panel create a modern look with functional ventilation on the sides
Basement egress — casement windows that crank fully open meet egress code requirements more easily than double-hung
Best rooms for double-hung:
Bedrooms — easy to operate, easy to clean (tilt-in sashes), fits window AC units
Street-facing windows — traditional aesthetic matches most Mid-Missouri home styles
Upper floors — no sash protruding outward where it could be hit by wind or interfere with screens
Best rooms for sliding:
Wide openings — sliding windows handle wider-than-tall openings that casement can’t cover without mulling multiple units
Tight exterior spaces — sliders don’t protrude outward, so they work next to walkways, patios, or decks
The Energy Savings Angle
Casement’s tighter seal does translate to energy savings — but how much? ENERGY STAR estimates that replacing single-pane windows with certified windows reduces heating and cooling costs by an average of 13%, saving homeowners $126 to $465 per year. Missouri sits in ENERGY STAR’s North-Central climate zone, where both heating and cooling efficiency matter.
The casement advantage within that savings is modest in absolute dollars. The 60% lower air leakage rate sounds dramatic, but air leakage is just one factor in window energy performance alongside U-factor (insulation value) and SHGC (solar heat gain). Since casement and double-hung windows from the same manufacturer typically share the same glass package and frame insulation, the practical energy difference between them comes down to that air seal — which might save an additional $20-50 per year depending on your home’s overall envelope tightness.
Where the energy math tilts more clearly toward casement is in older homes with drafty walls. If you’re replacing windows in a 1960s Columbia ranch or a turn-of-the-century Jefferson City Victorian, the tighter casement seal compounds with other improvements you’re likely making.
The Department of Energy recommends comparing windows using their NFRC ratings — U-factor, SHGC, air leakage, and visible transmittance — rather than relying on window type alone. Two casement windows from different manufacturers can have very different energy performance.
Tax Credits That Offset the Premium
Here’s where the casement cost equation gets more favorable. The federal energy efficiency tax credit covers 30% of the cost of qualifying ENERGY STAR windows, up to $1,200 per year. That applies to both casement and double-hung — but since casement costs more per unit, the credit returns more per window.
On a $560 casement window, a 30% credit is $168 back. On a $500 double-hung, it’s $150. The net difference between the two drops from $60 to $42. Across a full house replacement, tax credits can erase most of the casement premium.
Check with your tax advisor on current eligibility — the credit has product certification requirements and filing specifics that change periodically.
Frequently Asked Questions
Are casement windows more expensive than double-hung?
Yes, typically 10-20% more. For the same size window in the same material, expect to pay $50-150 more per casement window than a comparable double-hung. The premium comes from the crank mechanism and multi-point locking hardware, not from better glass or framing.
Do casement windows add more home value than double-hung?
Window replacement generally recoups 60-75% of cost at resale regardless of type. Casement windows may have a slight edge in modern-style homes where they complement the architecture, but the resale value difference between window types is minimal compared to the overall upgrade from old to new.
How long do casement windows last compared to other types?
Both casement and double-hung windows last 20-30 years with proper maintenance. The casement crank mechanism can wear out before the window frame or glass, but replacement cranks are available for most manufacturers. Double-hung springs and balances also wear over time and are similarly replaceable.
Can I mix casement and double-hung windows in the same house?
Absolutely. Most homeowners get the best value by using casement where the crank operation and tighter seal justify the premium (kitchens, bathrooms, hard-to-reach spots) and double-hung everywhere else. As long as the frame color and exterior profile match, the mix looks cohesive from the outside.
Are casement windows harder to maintain?
Slightly. The crank mechanism needs occasional lubrication, and the hinges should be checked yearly. But casement windows don’t have the spring-balance or tilt-in mechanisms that can fail on double-hung windows. Overall maintenance is comparable. Call us at (573) 424-9008 to discuss the right window mix for your home.
Ready to Get Started?
We’ve been serving Mid-Missouri homeowners for over 25 years with premium window replacement and exterior solutions. As GAF Master Elite, OC Platinum Preferred, and James Hardie Elite Preferred contractors, we bring certified expertise to every project — including helping you decide which window type belongs in which room.
Vinyl vs Fiberglass Windows: Which Is Better for Missouri Homes?
Key Takeaways
In Mid-Missouri communities like Columbia, Jefferson City, Lake of the Ozarks, Boonville, and Moberly, vinyl windows typically make sense for budget-conscious projects, while fiberglass is better for long-term performance and dimensional stability.
Missouri’s hot, humid summers and cold winters amplify the differences in expansion, durability, and energy efficiency between vinyl and fiberglass, making material choice more important here than in milder climates.
Both vinyl and fiberglass windows can be very energy efficient when installed correctly, but fiberglass typically offers better long-term seal performance and less warping over decades of freeze-thaw cycles.
CoMo Exteriors installs both options and helps homeowners choose based on their goals: budget constraints, aesthetic appeal, HOA or historic requirements, and how long they plan to stay in the home.
Ready to explore your options? Contact CoMo Exteriors for a free window evaluation and quote. We’ll help you make an informed decision for your Mid-Missouri home.
Introduction: Why Window Material Matters in Missouri
Replacing windows in Mid-Missouri is about much more than updating the look of your home. The materials you choose, particularly when comparing vinyl and fiberglass, behave very differently when exposed to our region’s demanding weather patterns. From freeze-thaw cycles that stress seals and frames to summer humidity that can accelerate wear, window material directly affects how long your investment lasts and how comfortable your home stays year round.
If you live in Columbia, Jefferson City, Lake of the Ozarks, Boonville, or Moberly, you already know the drill: single-digit temperatures in January, then 90°F and sticky in July. Those swings put serious pressure on any exterior component, and windows are no exception. Choosing between vinyl vs fiberglass windows isn’t just a matter of preference, it’s about matching the right product to our local climate.
This article focuses specifically on vinyl and fiberglass window frames because those are the two most popular low maintenance options we install at CoMo Exteriors. We won’t spend time on wood windows or aluminum here, though both have their place. Instead, we’ll compare cost, durability, maintenance, energy efficiency, and appearance, then give practical recommendations for different homeowner situations. One thing worth noting upfront: professional installation and a strong workmanship warranty matter just as much as the material you pick. Even the best fiberglass windows offer no advantage if they aren’t sealed properly and installed by someone who understands Mid-Missouri conditions.
Missouri Climate: How It Impacts Your Window Choice
Mid-Missouri’s climate is a test for any exterior product. We get hot summers with high humidity averaging 60-70% annually, strong afternoon sun, spring storms with hail and wind gusts reaching 50-60 mph, and cold winters that can dip below 20°F for extended stretches. Ice storms aren’t uncommon, and neither is the rapid swing from freezing nights to 50°F afternoons in late winter.
These extreme temperatures cause window frames to expand and contract. Over time, that movement can stress seals, caulking, and weatherstripping, leading to air leakage, drafts, and reduced energy efficiency. The more a frame material moves with temperature changes, the more likely you’ll see seal failures down the road.
High humidity and driving rain during storms also stress joints and finishes. Moisture resistance becomes especially important when you’re choosing between materials. A window that handles dry desert heat may struggle with the constant humidity we experience from May through September.
Both fiberglass and vinyl can handle Missouri weather, but they don’t handle it equally. Fiberglass expands at roughly the same rate as glass itself (about 9 x 10^-6 in/in/°F), which means the frame and the glass pane move together. Vinyl, by contrast, expands at a much higher rate (30-50 x 10^-6 in/in/°F), creating more differential movement between frame and glass. Over many years, this difference can affect how well seals hold up.
Common issues we see in the field:
Drafty 1980s builder-grade windows in Columbia subdivisions that have lost their seal integrity
Condensation on old single-pane units, especially during humid summers and cold winters
Storm-damaged windows after hail events that expose how much frames have already degraded
Vinyl Windows for Missouri Homes
Vinyl windows are made from polyvinyl chloride (PVC), a thermoplastic polymer extruded into frames with multiple internal chambers that provide insulation. They’re the most common replacement windows in Mid-Missouri, and for good reason. Price and low maintenance make them accessible to many homeowners who need to upgrade from old aluminum or wood frames.
Pros for Missouri Homeowners
Most affordable upgrade path: Vinyl typically offers the lowest upfront investment per window opening, making it practical for whole-house projects on a budget.
Naturally moisture-resistant: PVC won’t rot, rust, or corrode in humid Mid-Missouri conditions, which matters when summer humidity hovers around 70%.
Good insulation and energy performance: When paired with Low-E glass and argon gas fill, vinyl windows can achieve U-factors in the 0.25-0.30 range, delivering solid performance for our heating and cooling demands.
Minimal upkeep: Just cleaning with soap and water. No painting, staining, or special treatments required.
Cons for Missouri Homeowners
Higher expansion and contraction: Vinyl moves more than fiberglass with temperature swings, which can affect seal integrity over 15-20+ years. Real-world data from Kansas City installations shows vinyl seal failures rising 15-20% after 15 years.
Bulkier frame profiles: Frames are usually 2-3 inches thick, slightly reducing visible glass area and natural light compared to fiberglass.
Limited color options: Standard colors are white, tan, and a few earth tones. Dark colors may fade faster under Missouri’s strong summer sun.
Where Vinyl Makes the Most Sense
Rental properties or starter homes in Columbia and Jefferson City where budget is the primary concern
Homeowners planning to move within 5-10 years who still want a noticeable comfort and efficiency upgrade
Projects where HOAs allow standard colors and no special historical appearance is required
At CoMo Exteriors, our process starts with a free in-home consultation. We discuss energy efficient glass options and help you find the best vinyl line for your home’s age and style, no pressure, just education so you can decide what fits.
Fiberglass Windows for Missouri Homes
Fiberglass windows are made from glass fibers embedded in polyester resin, creating a material with exceptional strength and dimensional stability. The manufacturing process (called pultrusion) produces frames with tensile strength roughly eight times that of vinyl, around 500 MPa compared to vinyl’s 60 MPa. This strength allows for slimmer frames and larger glass areas.
Key Advantages
Extreme stability with temperature changes: Fiberglass expands at nearly the same rate as glass, so frames and panes move together. This minimizes stress on seals and weatherstripping over decades of Missouri seasons.
Slimmer frame profiles: Frames can be as narrow as 1.25 inches versus 2-3 inches for vinyl, providing up to 20% more glass area and more natural light in your rooms.
Outstanding durability: Fiberglass resists warping, bowing, and sagging even after 40-50 years of exposure to UV rays, humidity, and freeze-thaw cycles.
Energy Performance
Fiberglass windows offer excellent insulation, and their dimensional stability helps maintain tight seals between frame and glass over the long haul. This translates to consistent energy efficiency that doesn’t degrade as quickly as vinyl. Studies indicate fiberglass homes can save $150-250 yearly on heating and cooling compared to vinyl, especially in regions like Mid-Missouri with roughly 5,500 heating degree days annually.
Fiberglass works particularly well with high-performance glazing packages. At CoMo Exteriors, we can recommend specific glass options, like Low-E 366 coatings with argon fill, optimized for south and west-facing windows that take the brunt of Missouri’s summer sun.
Potential Drawbacks
Higher upfront cost: Fiberglass typically costs 2-4 times more per unit than vinyl, which can be significant for whole-house replacements.
Fewer manufacturers: The fiberglass market is smaller than vinyl, so product selection is more limited. Working with a local installer like CoMo Exteriors who knows which lines perform best in our region helps ensure you get the right product.
When Fiberglass Is the Better Choice
“Forever homes” in Columbia, Ashland, or at the Lake of the Ozarks where owners expect to stay 15-20+ years
Higher-end remodels or new builds where slim frames, darker colors, or wood-look interiors matter
Homes with significant direct sun exposure and temperature extremes where long-term stability is a priority
Vinyl vs Fiberglass: Side-by-Side Comparison for Missouri Homeowners
Here’s a quick, homeowner-friendly comparison focused on what matters most in Mid-Missouri conditions.
Upfront Cost
Vinyl: Lower ($300-800/window installed)
Fiberglass: Moderate to higher ($1,200-3,000/window installed)
Durability/Lifespan
Vinyl: 20-30+ years with quality product and installation
Fiberglass: 30-50+ years
Expansion/Contraction
Vinyl: Higher movement (may affect seals over time)
Fiberglass: Minimal movement (matches glass)
Energy Efficiency
Vinyl: Good with Low-E glass; may degrade over time
Fiberglass: More color options; paintable in many lines
Frame Width
Vinyl: Bulkier (2-3 inches)
Fiberglass: Slimmer (as narrow as 1.25 inches)
Maintenance
Vinyl: Minimal maintenance; no painting
Fiberglass: Minimal upkeep; can be repainted
Real-World Examples
Example 1: Swapping old aluminum sliders in a 1990s Columbia ranch for mid-range vinyl double-hungs. This is a common, budget-friendly upgrade that immediately improves comfort and curb appeal without a major investment.
Example 2: Installing fiberglass casements in a Lake of the Ozarks home with big views and strong afternoon sun. The slimmer frames maximize the glass area, and the material’s stability handles the intense thermal cycling without seal degradation.
The “winner” in the vinyl vs fiberglass debate depends entirely on your budget, how long you plan to stay in your home, and your desired aesthetic appeal. There’s no one-size-fits-all answer, just the right answer for your situation.
Cost, Value, and ROI in Mid-Missouri
Cost isn’t just about the price tag at checkout. It’s about how long windows last and how much energy they save over their lifespan. In Columbia and surrounding areas, where we run both heating and air conditioning for significant portions of the year, those energy bills add up.
General Pricing Tiers
Vinyl typically offers the lowest upfront investment per opening, making it accessible for larger projects or tighter budgets.
Fiberglass usually costs more per window but offers a longer expected service life. The premium often pays for itself in 7-12 years through reduced maintenance and energy savings.
How Local Conditions Affect Value
Missouri’s climate, with its cold winters and hot summers, means energy efficient replacement windows can noticeably reduce heating and cooling costs. At Missouri’s electricity rates around $0.12/kWh, the savings compound over time. Better windows also reduce drafts and eliminate hot and cold spots, making bedrooms and living areas more comfortable.
National remodeling reports consistently show window replacement recouping a significant percentage of cost on resale, especially when you’re replacing old single-pane or visibly damaged units. Buyers notice and appreciate quality windows.
At CoMo Exteriors, we provide free estimates for both vinyl and fiberglass options. We can also discuss financing options to help spread the cost over time, making premium replacement windows accessible without high-pressure sales tactics. We’d rather educate you and let you decide than push you into something that doesn’t fit.
Maintenance, Appearance, and Curb Appeal
Most Mid-Missouri homeowners want windows that require minimal maintenance while also boosting curb appeal and interior comfort. Both fiberglass and vinyl deliver on the low-upkeep promise, though there are differences worth noting.
Maintenance Needs
Vinyl Windows:
Periodic washing with mild soap and water
No repainting ever—what you buy is what you keep
Annual hardware checks recommended to ensure locks and balances work properly
Fiberglass Windows:
Similar cleaning routine
Some lines can be painted in the future if you want to update the look without full replacement
Hardware lubrication occasionally
Appearance Considerations
Vinyl offers a clean, simple look that works well on many ranches, split-levels, and standard subdivisions around Columbia and Jefferson City. The aesthetic is familiar and blends in easily. However, color choices are limited, and you can’t paint them if tastes change.
Fiberglass provides slimmer frames for a more modern, upscale look. It’s a great choice for custom homes, lake homes, or high-visibility front elevations where you want maximum glass and minimal frame. Many fiberglass lines offer interior wood-look finishes and exterior colors that won’t chalk or fade like some other materials.
At CoMo Exteriors, we help coordinate interior options like grids, color choices, and glass styles with your existing siding, roofing, and trim colors. When you’re replacing windows, it’s a good opportunity to think about the whole exterior—and we handle siding, roofing, gutters, decks, and patio doors as well. A cohesive exterior remodel makes a bigger impact than piecemeal updates.
How CoMo Exteriors Helps You Choose the Right Windows
CoMo Exteriors is a locally owned Mid-Missouri exterior specialist founded in 2010. We handle roofing, siding, windows, doors, gutters, and decks across Columbia, Jefferson City, Boonville, Moberly, and Lake of the Ozarks. We’ve seen what works and what doesn’t in our climate over thousands of projects.
Our Consultation Process
Free on-site evaluation of your existing windows. We check for drafts, rot, fogged glass, and operation problems. No cost, no obligation.
Discussion of your goals: How long do you plan to stay in the home? What’s your budget? Do you have specific style preferences or HOA requirements?
Side-by-side explanation of suitable vinyl and fiberglass product lines for your specific house. We’ll show you the differences in person so you can see and feel the materials.
What We Provide
Energy efficient window options matched to Missouri’s climate, including Low-E coatings and gas fills that actually make a difference here
Professional installation backed by our limited lifetime workmanship warranty, we stand behind our work
Help coordinating window projects with insurance claims when storm or hail damage is involved. We speak adjusters’ language so you don’t have to.
Ready to explore your options? Call our office or fill out a short form to schedule a free estimate anywhere in Mid-Missouri. We’ll explain everything so you can make an informed decision whether vinyl or fiberglass turns out to be the right fit for your home. Education first, sales second. That’s how we operate.
Frequently Asked Questions About Vinyl vs Fiberglass Windows in Missouri
Are fiberglass windows always better than vinyl in Missouri’s climate?
“Better” depends entirely on your goals. Fiberglass offers superior long-term stability, longevity (30-50+ years versus 20-30+ for vinyl), and slimmer frames that maximize glass area. However, vinyl can be the smarter choice when upfront budget is limited or you’re planning a shorter-term stay in the home. Both fiberglass and vinyl handle Mid-Missouri weather well when they’re quality products installed by an experienced local contractor. The best approach is having CoMo Exteriors evaluate your specific home—house age, existing openings, and sun exposure all affect which material makes sense.
How long do vinyl and fiberglass windows typically last in Mid-Missouri?
With proper installation and normal weather exposure, quality vinyl windows typically last 20-30+ years. Fiberglass often reaches 30-50+ years before needing replacement. That said, factors like hail damage, poor installation, or neglected hardware and seals can shorten lifespan for any material. CoMo Exteriors’ workmanship warranty helps protect homeowners by backing the installation quality over the long term—because even great materials fail if installation isn’t done right.
Will new vinyl or fiberglass windows really lower my energy bills?
In many Mid-Missouri homes built before the early 2000s, replacing old single-pane or failing double-pane windows can significantly cut drafts and reduce heating and cooling costs. The actual savings vary based on the current condition of your windows, the new glass package (Low-E coatings, argon or krypton gas fill, number of panes), and how well the windows are installed with proper air sealing. Both vinyl and fiberglass can achieve great insulation values when paired with the right glazing. During a free consultation, CoMo Exteriors can estimate likely comfort improvements and discuss energy performance ratings specific to your home.
Can I mix vinyl and fiberglass windows on the same Missouri home?
Mixing materials is possible when done thoughtfully. Some homeowners choose fiberglass in high-sun or high-visibility areas (like front-facing windows or those with a lower U factor requirement) and vinyl in less prominent or shaded areas to manage costs. The key is ensuring color matching and profile differences don’t create a disjointed look. CoMo Exteriors can design a phased or mixed-material plan that respects both your budget and curb appeal—so the exterior still looks cohesive when the project is complete.
When is the best time of year to replace windows in Mid-Missouri?
CoMo Exteriors replaces windows year round, though many homeowners prefer spring and fall for the mild temperatures. Responsible installers work one opening at a time, limiting how much outdoor air enters your home even during winter or summer work. If you have a preferred season in mind, we recommend scheduling your estimate a few weeks ahead, especially before peak spring storm season and summer remodeling periods when demand is highest.
How Much Do Replacement Windows Cost in Mid-Missouri?
If you’re a Mid-Missouri homeowner wondering what replacement windows will actually cost in 2026, you’re in the right place. We’ve helped hundreds of homeowners across Columbia, Jefferson City, Lake of the Ozarks, Sedalia, and surrounding communities navigate this exact question and we know that national price charts rarely tell the whole story.
In this guide, we’ll walk you through realistic local pricing, explain what drives those costs, and help you understand which options make the most sense for our unique climate. Whether you’re dealing with drafty old windows or planning a full-home upgrade, you’ll leave with the information you need to budget confidently.
Key Takeaways
Most Mid-Missouri homeowners in Columbia, Jefferson City, and Lake of the Ozarks can expect to pay roughly $450–$1,200 per window installed in 2026, with typical whole-home projects ranging from about $7,000–$18,000 depending on size, materials, and options chosen.
Local factors, including Mid-Missouri labor rates, home age, and our challenging freeze-thaw climate, influence pricing differently than national averages, but they also make energy efficient windows more valuable here due to our temperature extremes.
The three biggest cost drivers are frame material (vinyl, fiberglass, composite, or wood), window style (double hung windows, casement, bay windows, etc.), and installation type (insert vs. full-frame replacement).
CoMo Premium Exteriors provides free, no-pressure estimates across Mid-Missouri and can give you exact pricing for your specific home, including financing options when the investment needs to fit a tighter monthly budget.
This article walks you through realistic local price ranges, how to budget smartly, and how to choose new windows that make sense for Mid-Missouri weather and your monthly energy bills.
Average Replacement Window Cost in Mid-Missouri (Answer First)
Let’s start with the numbers most homeowners are looking for. In 2026, most Mid-Missouri homeowners typically pay about $450–$1,200 per window installed, with basic vinyl inserts starting closer to $375–$450 and high-end custom windows exceeding $1,500.
Here’s what that looks like for common home sizes in our area:
A 10–12 window ranch in Columbia might run roughly $6,000–$11,000
A 2-story Jefferson City home with 18–22 windows might be closer to $9,000–$18,000 depending on materials and options
A lakefront property with larger windows and specialty shapes could trend higher
These numbers assume professional installation by a licensed, insured local contractor and already include typical Mid-Missouri labor costs, disposal of your old windows, and standard exterior and interior trim work.
One thing worth noting: Mid-Missouri window replacement costs tend to be slightly higher than small-town Missouri averages (by roughly 5–15%) due to labor demand in hubs like Columbia MO and the Lake area. However, we’re still usually lower than big metro markets like St. Louis or Kansas City, where you might pay 15–25% more for the same project.
Think of these as realistic planning ranges. Every home is different. Window sizes vary, some frames need repair, and glass packages affect pricing. That’s why we recommend getting a free estimate from CoMo Premium Exteriors to nail down exact numbers for your specific situation.
Window Replacement Cost by Frame Material
Frame material is one of the largest price drivers in any window replacement project. Here in Mid-Missouri, homeowners most commonly choose between vinyl, fiberglass or composite, and wood based on their budget, aesthetic preferences, and how long they plan to stay in the home.
Here’s a quick overview of typical installed price ranges in our region:
Vinyl: $400–$900 per window — Best for budget-conscious homeowners seeking low maintenance
Fiberglass/Composite: $650–$1,300 per window — Ideal for long-term homeowners wanting high performance
Wood: $800–$1,600+ per window — Suited for historic homes and architectural detail lovers
Aluminum: $350–$700 per window — Commonly used for commercial projects and picture windows
At CoMo Premium Exteriors, we regularly install premium vinyl and composite windows because they balance up-front cost, energy performance for our hot summers and cold winters, and minimal maintenance requirements.
It’s worth remembering that material choice affects more than just the initial invoice. You’re also looking at long-term repainting costs (or lack thereof), maintenance time, and energy bills over the next 20–30 years.
Vinyl Windows
Vinyl windows are the most popular replacement window material in Columbia, Jefferson City, Moberly, and surrounding Mid-Missouri communities, and for good reason. They deliver solid value without demanding much upkeep.
For local projects, expect realistic installed ranges of roughly $400–$900 per window for quality vinyl units in standard sizes. Basic inserts in common sizes land on the low end, while larger windows or specialty shapes push toward the higher end.
Key benefits of vinyl include:
Strong overall value for the investment
Good energy efficiency when paired with double pane windows or triple pane windows
Virtually no painting or staining required
Excellent resilience against Mid-Missouri’s humidity and temperature swings
One important distinction we emphasize with homeowners: there’s a real difference between “builder-grade” vinyl and higher-quality vinyl systems. Paying a bit more for premium vinyl often eliminates problems like warping, seal failures, and hardware breakdowns that cheaper units develop within 10–15 years. We’ve seen too many homeowners replace their windows twice because they went with the cheapest option first.
Care is simple. Occasional cleaning with mild soap and water is typically all that’s required for decades of performance.
Fiberglass and Composite Windows
Fiberglass and composite windows represent a step up from vinyl in both price and performance. They’re ideal for homeowners planning to stay in their Mid-Missouri home long term and wanting maximum energy efficiency without wood’s maintenance demands.
Realistic local installed cost ranges generally fall around $650–$1,300 per window, with larger or architecturally complex units costing more.
Why consider fiberglass or composite?
Excellent structural strength
Minimal expansion and contraction during Mid-Missouri’s freeze-thaw cycles
Very good insulation values
Option for refined profiles that mimic wood aesthetics
Many can be painted to match your home’s exterior
We frequently recommend composite frames for higher-end remodels or when updating historic homes around downtown Columbia or older Jefferson City neighborhoods. The long-term value proposition is compelling: higher up-front investment but lower risk of warping, air leakage, and premature replacement.
Wood Windows
Wood windows provide a classic, high-end look that fits well in older character homes around central Columbia, historic districts, and lake properties where architectural detail matters.
Realistic local installed pricing runs roughly $800–$1,600+ per window, with custom stain-grade interiors and complex shapes trending toward the higher end.
While wood insulates well, it demands ongoing maintenance in Mid-Missouri. Our freeze-thaw cycles, humid summers, and occasional severe weather mean regular painting or staining is necessary to resist moisture, rot, and insect damage.
For homeowners who love the wood look but want less upkeep, we typically suggest either:
Clad-wood windows (wood interior with a protected aluminum or vinyl exterior)
High-quality composite that delivers similar aesthetics with fraction of the maintenance
When comparing wood to other window materials, factor in lifetime repainting costs. That $800 window might need $200 in maintenance every 5–7 years, which adds up over a 30-year ownership period.
Window Replacement Cost by Style and Size
Window style and size affect both material cost and labor requirements. Many Mid-Missouri homes mix several window types—most commonly double hung windows with a few sliders, picture windows, or a bay window at the front.
Here are typical installed price ranges for common styles in our region:
Single hung windows: $350–$750 — Budget-friendly, with one operable sash
Double hung windows: $450–$1,000 — Most popular, easy to clean
Sliders: $450–$900 — Great for wide openings
Casement: $600–$1,100 — Excellent air sealing
Picture windows: $550–$1,300 — Fixed windows maximizing natural light
Bay/Bow windows: $1,800–$4,500+ — Complex installation with dramatic impact
Larger openings, custom shapes, and mulled units (multiple windows combined in one frame) add to both material and installation costs because they often require extra framing and finishing work.
To give you a practical example: replacing a standard 3’x5’ double hung in a typical Columbia ranch might cost $500–$750, while a large 8’ wide living room picture window in the same home could run $1,000–$1,500. The total cost varies significantly based on what’s being replaced.
CoMo Premium Exteriors can often suggest window style changes, like converting two small singles into one larger unit, that improve natural light and curb appeal while staying within a realistic budget.
Double-Hung and Single-Hung Windows
Double hung and single hung windows are by far the most common replacement choice in Mid-Missouri. They match existing openings in many 1980s–2020s homes built in Columbia, Ashland, and Boone County subdivisions.
Local installed ranges:
Single hung: $350–$750
Double hung: $450–$1,000
The functional difference is straightforward: double hung windows have two operable sashes (top and bottom move), while single hung windows only have the bottom sash that opens. This matters for homeowners with upper floors. Double hung windows are much easier to clean from inside since both sashes tilt inward.
We typically recommend double hung for most replacement window installations, especially where homeowners want easy cleaning access and better airflow control during spring and fall when Mid-Missouri weather cooperates.
Casement, Slider, and Picture Windows
Casement, slider, and picture windows each serve specific purposes in a home:
Casement windows crank open outward, providing maximum airflow and excellent air sealing when closed
Sliders work well for wide openings where swing-out operation isn’t practical
Picture windows are fixed (don’t open), maximizing views and natural light
Realistic Mid-Missouri installed cost ranges:
Casement: $600–$1,100
Sliders: $450–$900
Picture windows: $550–$1,300
Picture windows’ fixed design actually improves energy performance and keeps costs reasonable for large window glass areas. They’re popular in living rooms, over kitchen sinks, and anywhere a homeowner wants an unobstructed view.
Casement windows offer better air sealing when closed, an advantage during windy Mid-Missouri winters though their hardware and size can push pricing slightly above comparable double hung units.
Consider a Lake of the Ozarks home replacing an old failed picture window facing the water: a new, energy efficient unit with proper low E coatings can significantly cut glare and heat gain while improving the view.
Bay and Specialty Windows
Bay windows, bow windows, and specialty shapes (arches, circles, trapezoids) are the most expensive per opening because they’re essentially multiple windows combined and often require carpentry modifications to the existing frame and surrounding wall structure.
Realistic local installed price ranges:
Bay and bow windows: $1,800–$4,500+ per opening
The wide range depends on size, frame material, whether structural changes are needed, and the complexity of interior and exterior finishing.
These windows dramatically impact curb appeal and interior space. They often adding a seating area, plant shelf, or reading nook. However, they require careful installation to prevent leaks and framing issues. We’ve seen plenty of bay windows installed incorrectly by inexperienced contractors, leading to water damage and premature failure.
Sometimes replacing an old, leaky bay with a simpler high-performance picture window saves thousands while still brightening the room. It’s worth discussing options before assuming a like-for-like replacement is the only path.
Installation Type: Insert vs. Full-Frame (And How It Impacts Cost)
Understanding the two main window installation approaches helps you make sense of quotes and recommendations. Here in Mid-Missouri, contractors use either insert (also called pocket) replacement or full frame installation.
Insert replacement keeps your existing frame in place. The new window slides into the old frame opening, and interior trim typically stays untouched. This approach:
Costs less, often saving $150–$300 per opening
Works well for homes built after about 1990 with solid framing
Minimizes disruption and installation process time
Full frame installation removes the entire old window, frame, and trim, then rebuilds the opening. This adds labor and materials but also lets the installer:
Correct rot, poor insulation, and flashing issues
Install proper weatherproofing from scratch
Address problems common in homes built before the 1980s
Typical price ranges in Mid-Missouri:
Insert installations: $400–$900 per window
Full-frame replacements: $650–$1,400+ per opening
At CoMo Premium Exteriors, we inspect each opening during a free estimate and explain which method makes the most sense for your specific home. We don’t default to the most expensive option. We recommend what will actually solve your problems and last.
Local Factors That Influence Window Costs in Mid-Missouri
National price charts rarely capture regional realities. Here’s what specifically affects window replacement pricing in our area:
Geographic and access factors:
Multi-story homes require ladders and scaffolding
Steep grades (common around Lake of the Ozarks) add safety equipment and labor time
Hard-to-reach windows on the back of hillside homes increase installation complexity
Home characteristics:
Older homes in central Columbia or historic districts may need custom-sized windows
Pre-1978 homes require lead-safe practices for paint removal, adding to labor costs
Extra carpentry for rotted frames or non-standard openings affects pricing
Climate considerations:
Mid-Missouri’s temperature swings, from winter lows in the teens to summer highs in the 90s, make energy efficient options more important
Many homeowners choose upgraded glass packages that add modestly to up-front cost but significantly reduce cooling costs and heating expenses
Because we’re based right here in Mid-Missouri, CoMo Premium Exteriors prices projects with these local realities in mind. We understand local building codes, know which window manufacturer products perform well in our climate, and can navigate permitting requirements efficiently.
Home Age and Condition
Homes built before about 1980 in Mid-Missouri often have irregular rough openings, aging wood frames, and sometimes hidden rot that’s only discovered once the old windows come out.
What does this mean for your budget?
Repairing or rebuilding damaged frames can add roughly $100–$600 per window in additional carpentry
Severely rotted sills may require structural work
Interior finishes (drywall, trim) may need replacement if damage extends beyond the frame
Many 1990s–2010s homes in Columbia and Jefferson City used lower-cost original windows that now have failed seals or warped frames. These are usually good candidates for insert replacements, keeping overall cost lower while greatly improving performance.
Here’s an example from our experience: During a free inspection at a 1970s ranch near Jefferson City, we discovered significant rotten sills hidden behind intact-looking trim. We showed the homeowner photos so they understood why full-frame replacement was the safe, long-term choice rather than just inserting new windows into compromised framing.
Transparency matters. You should know up front what condition issues might change the final cost. That is why we provide detailed written estimates that account for potential complications.
Energy-Efficient Glass and Upgrades
In Mid-Missouri, upgrading from basic clear double pane windows to energy efficient glass packages typically adds around $40–$150 per window but can save meaningful money on your energy bills year after year.
Common upgrades include:
Low E coatings that reflect heat while allowing visible light through
Argon gas fill between panes for better insulation
Warm-edge spacers that reduce condensation and heat transfer at the glass edge
ENERGY STAR certified windows appropriate for Missouri’s climate zone can reduce energy use for heating and cooling by roughly 10–20% compared to older single pane windows or failing double-pane units. For a home spending $200/month on utilities, that’s potentially $240–$480 in annual energy savings.
Triple pane windows cost more and aren’t necessary everywhere. We typically recommend them selectively:
North-facing rooms that get cold in winter
Large picture windows with significant heat gain or loss
Homes near busy roads where sound control is important
Beyond energy savings, these upgrades improve comfort by cutting drafts, reducing condensation, and limiting hot and cold spots near windows in both January freezes and August heat.
During an estimate, we walk homeowners through glass options using real-world examples rather than just technical jargon. Understanding the difference between installing energy efficient windows and standard units helps you make a confident decision.
DIY vs. Professional Window Replacement in Mid-Missouri
While it’s possible for experienced DIYers to install a window, most Mid-Missouri homeowners choose professional installation because windows are critical to energy efficiency, weather resistance, and long-term home value.
Here’s the honest breakdown:
DIY material-only costs might be as low as $250–$700 per vinyl window purchased from a big-box store. However, that price doesn’t include:
Proper flashing and weatherproofing materials
Spray foam insulation for gaps
Disposal of old windows
Warranty-backed labor
Corrections if something goes wrong
Professional installation in our region typically adds $150–$400 per opening compared to DIY material-only costs. But you get trained crews, correct local building codes compliance, and protection from issues like leaks or air infiltration.
The risk with improper installation is real. Incorrect flashing and sealing can quickly erase any DIY savings by causing water damage, mold growth, and premature window failure. We see these problems regularly after big storms in Mid-Missouri. Windows that weren’t installed correctly fail first.
CoMo Premium Exteriors provides factory-trained crews and backs window installations with a limited lifetime workmanship warranty. That peace of mind is hard to replicate with a DIY project.
When DIY Might Make Sense
DIY window replacement only really makes sense for homeowners with solid carpentry skills who are comfortable handling:
Framing adjustments and shimming
Sheetrock and drywall repair
Exterior trim and flashing work
Caulking and weathersealing
DIY might be reasonable for:
A detached garage or shed window
A single non-critical window where a small cosmetic mistake is acceptable
Situations where warranty coverage isn’t a priority
Even skilled DIYers often hire professional installation for second-story windows or large units that require two or three people to handle safely. A successful installation requires proper technique at every step.
If you’re considering DIY, at least consult with a professional for guidance on correct flashing and insulation, or get a quote from CoMo Premium Exteriors to weigh the true cost difference. You might find professional work is closer to your budget than expected.
Benefits of Hiring a Local Professional
Working with a local Mid-Missouri contractor like CoMo Premium Exteriors offers advantages that go beyond just having someone else do the work:
Code and climate expertise: We understand regional building codes, inspection processes, and weather-related best practices. This reduces risk and ensures your windows perform correctly.
Warranty protection: Professional installation helps keep window manufacturer warranties fully valid. Many brands require certified or trained installers for coverage on glass seals and hardware. Skip this step, and you might void warranty coverage before you even use the windows.
Complete project management: We handle all stages, accurate measurement, ordering custom sizes, removal and disposal of old windows, the installation process itself, interior and exterior trim, and final cleanup. You don’t coordinate multiple trades.
Single point of responsibility: Having one company responsible for both the product and installation makes service simple if there’s ever an issue. You’re not trying to figure out whether a problem is with the window or the installation. We handle it.
Ready to explore your options? Schedule a free consultation anywhere in Mid-Missouri. There’s no obligation, and our goal is always to educate first, then help when you’re ready.
How to Budget and Save on Replacement Windows in Mid-Missouri
Replacing windows is a major investment, and thoughtful planning helps keep the window replacement project manageable. Here’s a practical approach:
Step-by-step budgeting:
Inventory your windows – Count all your windows and note sizes, styles, and current condition
Prioritize problem areas – Identify which windows have the worst drafts, fogging, or operation issues
Choose material and efficiency level – Decide on vinyl, composite, or wood; standard or upgraded glass
Decide on phasing – Replace all at once for efficiency, or phase by room/façade for budget flexibility
Grouping windows by façade (front of house first for curb appeal), floor, or room helps spread replacement costs while still improving comfort noticeably.
CoMo Premium Exteriors provides line-item pricing by window or by group so you can see exactly how different scopes of work affect your total investment. No surprises, no hidden fees.
Don’t forget to explore:
Financing options to spread payments over time
Utility rebates from local providers
Federal tax credits for qualifying ENERGY STAR upgrades (currently up to $600 per home for windows)
We can point you toward current programs and help you maximize available savings.
Practical Ways to Reduce Overall Project Cost
Here are concrete strategies to keep your window replacement pricing reasonable:
Choose quality vinyl or composite over premium wood if budget is tight but long-term performance matters. You’ll save money up front and avoid ongoing maintenance costs.
Stick with existing openings rather than enlarging or moving windows. Structural changes add significantly to labor and material costs. Replace your windows in the same size and location whenever possible.
Prioritize the most problematic windows first if a full-home project isn’t feasible. Target windows with rotted frames, broken seals, or severe drafts. These give you the biggest comfort and efficiency improvements per dollar.
Consider timing – Scheduling during slower installation periods (often late fall and winter in Mid-Missouri) can sometimes provide more scheduling flexibility and potential seasonal promotions.
Ask questions – Get a detailed written estimate and ask about any line items you don’t understand. We pride ourselves on walking homeowners through every part of the quote so you know exactly what you’re getting.
Why Work With CoMo Premium Exteriors for Windows in Mid-Missouri?
CoMo Premium Exteriors has been serving Mid-Missouri homeowners since 2010, with offices and teams working daily in Columbia, Jefferson City, Boonville, Moberly, and around the Lake of the Ozarks. We’re your neighbors, not a corporate chain or out-of-state company that disappears after the job.
We’re triple certified (GAF Master Elite, Owens Corning Platinum Preferred, James Hardie Elite Preferred) for exterior work—the only contractor in our region with all three certifications. This level of training and quality control applies to window installations just as much as roofing and siding.
What you get working with us:
Free, no-pressure estimates with honest recommendations
Clear written proposals with line-item pricing
Limited lifetime workmanship warranty coverage
Factory-trained crews who handle everything from standard replacements to complex projects involving rot repair or design changes
Because all your windows, siding, roofing, and gutters work together to protect your home, we can evaluate your entire exterior and help you prioritize projects for the best overall cost and value. Sometimes a window project reveals siding issues, or vice versa. We’ll give you the complete picture.
Ready for exact pricing on your home’s windows? Give us a call at (573) 424-9008 or request a free estimate online. We’ll answer your questions, walk through your options, and help you make the right choice for your Mid-Missouri home. No pressure, just honest advice from local experts.
FAQ: Replacement Window Costs in Mid-Missouri
This FAQ covers common questions we hear from homeowners in Columbia, Jefferson City, Sedalia, and surrounding communities about timing, phasing, and long-term value.
How long does a typical window replacement project take in Mid-Missouri?
Once custom windows arrive from the window manufacturer (often 3–6 weeks from order in 2026, depending on material and style), installation for a standard 10–15 window home usually takes 1–3 days for a professional crew. Disruption inside the house is minimal. We typically work room by room.
Weather can affect scheduling in Mid-Missouri, especially during winter storms or severe spring thunderstorms. However, we sequence work to keep openings covered and your home secure at all times. Larger or more complex projects, such as multiple bay windows or significant rotten framing repairs, may take slightly longer but are still typically completed within the same week they begin.
Will new windows really lower my energy bills in Mid-Missouri?
For Mid-Missouri homes with older single pane windows or failing double-pane units, many homeowners see meaningful savings on heating and cooling, often in the range of 10–20% annually after upgrading to modern, ENERGY STAR-rated windows. The affect pricing you pay for utilities now versus later is significant.
Savings depend on your home’s insulation, HVAC system, and how many windows are replaced. But improved comfort, fewer drafts and temperature swings, is almost always noticeable immediately. We recommend energy efficient options optimized for Mid-Missouri’s climate zone, including low-E glass tuned to limit summer heat gain while still letting in natural light.
Can insurance help pay for window replacement after a Mid-Missouri storm?
Standard window replacement for age or efficiency upgrades is usually not covered by insurance. However, sudden damage from hail, wind, or debris during storms may be eligible under your homeowner’s policy.
CoMo Premium Exteriors frequently helps Mid-Missouri homeowners document storm-related damage to windows, siding, and roofing as part of broader storm restoration projects. We understand how insurance claims work and can coordinate with adjusters on your behalf.
If you’ve experienced storm damage, call your insurer and a trusted local contractor promptly. Documenting damage before temporary repairs or cleanup hide the evidence is important for getting fair compensation on replacement costs.
Is it better to replace all my windows at once or in phases?
From a cost-per-window standpoint, replacing all windows at once is usually more efficient because it reduces setup time and labor repetition. Window installation companies typically offer better per-window pricing on larger projects.
However, budget and timing often make phased projects more realistic. If phasing is necessary, prioritize the worst-performing windows, often west- and north-facing units that are drafty, fogged, or hard to open. Plan subsequent phases as budget allows.
We can design phased window plans with consistent products so completed sections match perfectly as you work through the house over time. There is no penalty for doing it in stages, just a plan that fits your situation.
Do new windows add resale value for homes in Mid-Missouri?
Nationally, mid-range window replacement projects often recoup roughly 65–75% of their cost at resale. In active markets like Columbia and the Lake area, buyers value newer, energy efficient windows as a sign of a well-maintained home.
Beyond direct recoupment numbers, new replacement windows can help homes appraise better and stand out in listings. “Updated windows, roof, and siding” is exactly what buyers want to see when they’re worried about upcoming maintenance costs on their own windows after purchase.
If you’re planning to sell within the next 3–5 years, discussing window options with us can help you choose products that balance overall cost, curb appeal, and buyer expectations in your specific neighborhood. A free estimate can help you understand your options and make smart decisions about your home’s windows.
Can Storms Damage Windows? What Missouri Homeowners Should Watch For
Key Takeaways
Living in Mid-Missouri means dealing with some of the most unpredictable weather in the country. Here’s what you need to know about storm damage and your home’s windows:
Mid-Missouri storms—including hail, straight-line winds exceeding 60 mph, and tornadoes—can crack glass, loosen seals, and damage frames in ways that aren’t always immediately visible
Even minor window damage can lead to water leaks, persistent drafts, higher energy bills, and long-term problems like rot or mold inside your walls
Homeowners in Columbia, Jefferson City, Boonville, Moberly, and Lake of the Ozarks should visually inspect windows after every major storm and call a professional if anything looks off
CoMo Premium Exteriors offers free post-storm window and exterior inspections across Mid-Missouri and can help navigate the insurance claim process for storm damage
How Missouri Storms Actually Damage Your Windows
If you’ve lived in Central Missouri for any length of time, you know our weather doesn’t do anything halfway. Spring brings hailstorms that can drop golf ball-sized ice in minutes. Straight-line winds regularly exceed 60-70 mph during severe thunderstorms. And the May-June and late fall tornado seasons remind us we’re living on the edge of Tornado Alley—Missouri has recorded over 1,000 tornadoes since 1950.
When we talk about storm damage to windows, most people picture shattered glass scattered across the floor. But the reality is more complicated. Storm damage takes many forms:
Wind pressure and flexing: High winds create pressure differentials that can bow frames, stress seals, and force moisture into places it shouldn’t go
Hail impacts: Even smaller hail (under 1 inch) can create micro-cracks in glass that aren’t obvious at first but spread over time with temperature changes
Flying debris: Winds over 50 mph can turn tree limbs, roof granules, fence panels, and outdoor furniture into projectiles aimed at your windows
Wind-driven rain: Horizontal rain during severe weather can force water past compromised seals and into wall cavities
Here’s something many homeowners don’t realize: damage can be immediate—like broken glass from a direct hit—or delayed, with seals failing and water stains showing up weeks or months after the storm has passed.
Homes in open areas near fields or around the Lake of the Ozarks tend to be especially vulnerable to wind damage since there’s less natural windbreak. And if your Mid-Missouri home was built before the early 2000s, there’s a good chance you have builder-grade windows that are significantly less impact resistant than modern options. These older windows are more likely to fail under repeated storm exposure.
First Things To Do After a Storm Hits Your Missouri Home
Before you even think about checking your windows, make sure the storm has fully passed and conditions are safe. Watch for downed power lines, unstable tree limbs, and broken glass before stepping outside or walking through your home.
Once you’ve confirmed it’s safe, do a quick walk-through of your entire house—both inside and outside. Look for obvious problems: broken windows, visible cracks in glass panes, or water that blew in around window frames during the storm. Check every room, including upstairs and basement windows that are easy to forget.
If you spot any suspected window damage, grab your phone and start documenting immediately:
Take close-up photos of any cracks, chips, or dents
Capture wider context shots showing which window and which side of the house
Record short videos if water is actively leaking or damage is extensive
Note the date, time, and general storm conditions
This documentation is critical for both contractors and insurance adjusters. Don’t skip this step—even if you’re anxious to start cleanup.
For obvious damage like broken glass or gaps where wind is blowing through, take temporary measures to protect your home. Cover openings with heavy plastic, cardboard, or plywood (if you can do so safely) to prevent further damage from additional rain, pests, or debris. These aren’t permanent fixes, but they’ll buy you time until a professional can respond.
Once your property is secure, give us a call at CoMo Premium Exteriors. We can schedule a free, detailed inspection of your windows, siding, roofing, and gutters—typically within a few days of major storm events in the Mid-Missouri area.
Visible Window Damage Missouri Homeowners Should Watch For
Some storm damage is easy to spot if you know what you’re looking for. We recommend walking both the exterior and interior of your home, checking every window—especially those on the side of the house that faced the storm.
Here are the visible issues you should watch for:
What to Look For
Where to Check
What It Means
Cracked or shattered glass
All panes, including small starburst patterns
Direct hail or debris impact; needs repair or replacement
Chipped, bent, or dented frames
Storm-facing exterior frames
Hail damage or flying debris strike
Torn or missing screens
All window screens
Debris impact—glass may also be affected
Water stains or bubbling paint
Interior walls near windows
Water infiltration during the storm
Soft drywall
Touch areas around window interior
Hidden water damage behind walls
Warped sashes or frames
Look at the window from an angle
Frame movement from wind pressure
If you find broken glass or a loose sash, don’t try to operate that window until it’s been inspected. A cracked pane under stress can shatter unexpectedly, and damaged frames may not support the weight of the glass properly.
Any significantly cracked glass or shattered pane typically requires repair or full replacement—this isn’t cosmetic damage you can ignore. A professional contractor can advise whether just the glass, the sash, or the entire window unit needs to be replaced based on the location and severity of damage.
Hidden Storm Damage: Drafts, Leaks, and Seal Failures
In Mid-Missouri, many storm-related window problems don’t show up right away. The visible glass might look fine, but subtle comfort or moisture issues can develop weeks after a big storm—especially after repeated hail or high wind events.
Watch for these hidden signs of damage:
New drafts or temperature swings: If you notice cold air near a window when the wind blows (or hot spots in summer), the weatherstripping or seals may be compromised
Foggy windows or condensation between panes: This cloudy appearance in double pane windows or multi pane windows signals that the seal has failed and the insulating gas has leaked out
Musty odors near windows: This often indicates water has gotten into the wall cavity and moisture is building up
Discolored or separating caulk: Check the caulk lines around window frames for pulling away, cracking, or color changes
Windows that stick or won’t close properly: If a window that worked fine before the storm is suddenly difficult to operate, the frame may have shifted
What causes these hidden problems? High winds and pressure changes during severe weather can flex window frames—sometimes just enough to break the seal between the frame and glass or between the frame and the wall. The glass might look perfect, but the window’s ability to keep air and water out has been compromised.
These hidden issues have real consequences. Failed window seals can reduce the R-value of insulated glass from 3-4 down to nearly zero, meaning your HVAC system works overtime to compensate. Over the course of a Missouri summer and winter, that can add up to significantly higher energy bills. Even worse, hidden moisture can lead to rot or mold behind your trim and inside your walls.
If any of these signs appear after a known storm event, schedule a professional inspection rather than just re-caulking the visible gaps yourself. The problem often runs deeper than surface fixes can address.
How Different Window Frame Materials React to Missouri Storms
Mid-Missouri homes feature a mix of window frame materials, and severe weather affects each type differently. Understanding your frame type helps you know what storm damage to look for.
Wood frames:
Prone to swelling and eventual rot when repeatedly exposed to wind-driven rain
Look for peeling paint, soft spots, or spongy wood after a storm
Check corners and bottom rails where water tends to collect
Older wooden frames in Mid-Missouri homes may already have hidden damage from years of exposure
Vinyl frames:
Can crack, warp, or pull away from the wall under strong wind loads
Hail impacts may leave hairline cracks, especially in corners
Look for discoloration or fading on the storm-facing side
Extreme temperature changes in Missouri (from -10°F winters to 100°F summers) stress vinyl over time
Aluminum or metal-clad frames:
Prone to dents, bends, and corrosion where the finish is chipped by hail
Check for dent marks along exterior faces
Look for rust forming at fasteners and joints
Soft metals like aluminum are particularly vulnerable to hail damage that insurance adjusters sometimes miss
Fiberglass and composite frames:
More stable under Missouri’s dramatic temperature swings
Seals and glass can still be damaged by flying debris or hail impacts
Generally hold up better than older vinyl in repeated storm exposure
Many Mid-Missouri neighborhoods built between the 1990s and 2010s still have their original builder-grade vinyl or aluminum windows. If your home falls into this category, those windows may already be approaching the end of their intended service life—and storm damage can accelerate that timeline significantly.
At CoMo Premium Exteriors, we can recommend modern replacement windows—including energy-efficient vinyl and composite options—that hold up far better to repeated wind and hail than many older windows we see across the region.
Storm-Damaged Windows: When Can You Repair and When Should You Replace?
Not every storm damaged window in Missouri needs full replacement. But some conditions make replacement the safer and more cost-effective long-term choice. Here’s how to think about the decision.
Repair may be appropriate when:
Damage is minor and cosmetic—small chips in the frame finish with no leaks or drafts
Only the caulk or weatherstripping has failed, and the frame and glass are structurally sound
Hardware issues (locks, latches, cranks) can be replaced without disturbing the entire window unit
The window is relatively new and otherwise in good condition
Replacement is the better choice when:
Glass is cracked, shattered, or visibly weakened—especially on double pane windows where the seal is broken
Damaged frames are warped, twisted, or pulled away from the wall after wind damage
You’re seeing ongoing water intrusion around or under the window, with water stains or soft spots in framing materials
The window has needed multiple prior repairs, indicating it’s at the end of its practical life
Cracked frames or severely damaged frames compromise the window’s structural integrity
A trusted professional contractor should evaluate both the window and the surrounding wall structure before making a recommendation. Sometimes what looks like simple window damage actually extends to the rough opening, flashing, or interior framing—and that changes the scope of needed repairs.
At CoMo Premium Exteriors, we focus on long-term value. We’ll walk you through whether a targeted repair makes sense or whether investing in new windows is the better 20-30 year solution. We’ve handled over 500 storm-related projects across Mid-Missouri, and about 70% involve damage to multiple exterior components—so we understand how window issues often connect to roof or siding problems.
How Storm-Damaged Windows Affect Energy Bills and Comfort in Mid-Missouri
Damaged windows can quietly drive up utility costs in ways many homeowners don’t connect to that big storm from last spring. In Columbia, Jefferson City, and surrounding towns—where summers are hot and humid and winters regularly drop below freezing—even minor window damage affects your comfort and your wallet.
Here’s how storm damage impacts window performance:
Lost insulating gas and failed seals: When the seal breaks on double pane windows, the argon gas that provides insulation escapes. This can reduce the R-value to nearly zero, making rooms noticeably hotter in July and colder in January
Drafts from warped frames or damaged weatherstripping: Even small gaps force your HVAC system to run longer, increasing your Ameren or local electric co-op bills
Hidden moisture leaks: Water intrusion can damage insulation inside your walls, decreasing thermal performance and adding to discomfort throughout your home
Temperature swings near windows: Rooms with damaged windows feel uncomfortable even when the rest of the house is fine
If you’ve noticed a sudden spike in energy efficiency problems—higher energy bills without an obvious explanation—after a major storm, consider scheduling a professional window and exterior inspection. The culprit may be storm damage you haven’t connected to your utility costs.
Replacing badly damaged or outdated windows with modern ENERGY STAR-rated units can significantly improve comfort and help stabilize long-term energy costs. Modern impact resistant options can boost efficiency by 15-20%, potentially saving Mid-Missouri homeowners $200-400 per year on heating and cooling.
CoMo Premium Exteriors can explain available glass packages and frame options that perform well in Central Missouri’s challenging climate—humid summers, freeze-thaw cycles, and everything in between.
Insurance, Documentation, and Working With a Local Missouri Contractor
Many wind and hail events in Mid-Missouri are covered by standard homeowners insurance. Severe storms that move through Boone, Cole, and Callaway Counties each spring often trigger legitimate claims—but the process can feel overwhelming when you’re also dealing with cleanup and repairs.
Here’s how to approach the insurance claim process:
Document everything immediately:
Photograph and video all window damage and exterior damage right after the storm
Include close-ups showing specific damage and wider shots for context
Note dates, times, and storm conditions
Keep a written log of what you observed and when
Review your policy:
Check your coverage for wind and hail damage
Understand your deductible and whether you have Actual Cash Value (ACV) or Replacement Cost Value (RCV) coverage
Note any filing deadlines—Missouri policies typically have a 1-2 year window
Contact your insurance company promptly:
After large regional events, adjusters get backed up quickly
Early contact helps establish your place in the queue
Industry data shows about 30% of claims are denied due to poor documentation—don’t let that be you
How a local contractor helps:
At CoMo Premium Exteriors, we can perform a thorough inspection of your entire exterior—windows, siding, roofing, gutters, and doors—and prepare a detailed report with photos. We’ve worked with insurance adjusters for over 25 years across Mid-Missouri, and we know what they look for and what they sometimes miss.
We can meet with your insurance adjuster on-site to point out damage that might be overlooked in a quick walkthrough—including issues like valley flashing interactions with window rough openings and secondary damage that’s not immediately visible. Our team can help you understand the full extent of work needed, local building codes that apply, and upgrade options that may be available within your claim.
One more piece of advice: after major hail events, “storm chaser” crews often knock on doors offering quick repairs. These out-of-state companies frequently disappear after the job, leaving homeowners without warranty support or anyone to call if problems arise. Instead, work with a vetted local company like CoMo Premium Exteriors—we’ve been here since 2010, and we’ll be here when you need us years from now.
Why Mid-Missouri Homeowners Trust CoMo Premium Exteriors After Storms
Since 2010, CoMo Premium Exteriors has served homeowners across Columbia, Jefferson City, Boonville, Moberly, and Lake of the Ozarks as a trusted exterior specialist. We’ve seen firsthand how Missouri’s severe weather—from spring hailstorms to summer derechos to fall tornado outbreaks—affects homes in our region.
What sets us apart:
We’ve completed hundreds of storm-related projects across Mid-Missouri, including window replacement, roofing, siding, and gutters
Our limited lifetime workmanship warranty means we plan for decades of performance, not quick fixes that fail in a few years
We coordinate window work with roofing and siding repairs so you don’t have to juggle multiple contractors after a big storm hits
As the only triple-certified contractor in the region (GAF Master Elite, OC Platinum, James Hardie Elite), we maintain strict quality standards that benefit every project
Our approach—education first:
We start every project with a free, detailed inspection and a clear explanation of what we see. You’ll receive photos you can keep, along with a straightforward assessment of your options. We explain repair vs. replacement considerations, estimated lifespans for different solutions, and how each choice affects your home’s safety, energy efficiency, and long-term maintenance needs.
If you’ve recently experienced hail, high winds, or tornado warnings and aren’t sure whether your windows were affected, give us a call. Catching minor damage in 2024-2025 can often prevent major structural repairs down the road—especially in older Mid-Missouri homes where builder-grade windows have already seen decades of weather exposure.
We’re happy to take a look—no obligation, no pressure, just honest advice from your neighbors who’ve been doing this for over 25 years.
FAQs
How soon should I check my windows after a storm in Mid-Missouri?
Do a basic safety check as soon as the storm has clearly passed and conditions allow—no active lightning, no high winds still blowing, no downed power lines nearby. Walk through your home the same day to look for broken glass, water entry, or obvious frame damage. If anything looks suspicious, schedule a professional inspection within a few days. Early photos and detailed notes help both contractors and your insurance agent understand exactly what happened and when.
Can small hairline cracks in window glass wait, or are they urgent?
Even tiny star-shaped cracks from hail impacts can spread over time. Missouri’s dramatic temperature changes—from freezing winters to scorching summers—put stress on cracked glass with every temperature swing. We recommend avoiding operating a window with cracked glass and having it evaluated promptly. Addressing small cracks early is typically less expensive than waiting until the pane fails completely or the damage extends to the frame.
What if my windows look fine, but the room feels draftier after a storm?
New drafts or cold/hot spots near a window often mean the seals, caulk, or weatherstripping were compromised—even if you can’t see visible damage. Wind pressure during future storms will make these problems worse. A thorough inspection can test for air leakage and check for frame movement or hidden damage before you spend time and money on DIY re-caulking that may not solve the underlying problem.
Do I have to replace all of my windows at once after a hailstorm?
Not necessarily. Storms don’t affect all windows equally—sometimes only the storm-facing side of your home or certain individual units sustain significant damage. A good professional contractor will assess each window individually and help you prioritize which ones need immediate attention versus which can reasonably wait. At CoMo Premium Exteriors, we can phase window replacement over time or coordinate it with other exterior work to fit your budget and schedule.
Can CoMo Premium Exteriors inspect more than just my windows after a storm?
Absolutely. Our team routinely checks roofing, siding, gutters, windows, and doors in a single visit for homeowners across Mid-Missouri. This whole-exterior approach helps catch related damage you might otherwise miss—for example, hail that cracked your windows often also bruises shingles and dents metal gutters. Contact us for a comprehensive exterior assessment and a straightforward explanation of any recommended next steps. Call us at (573) 424-9008 or request an inspection online—we’re here to help.
Top Trends in Replacement Windows for Energy-Efficient Style in 2026
Key Takeaways
2026 window trends blend high-efficiency glass technology, smart controls, and bold aesthetic choices like black frames and expansive glass walls—all designed to work together rather than force trade-offs.
Replacing older single pane windows or early double pane windows with modern energy efficient windows can cut heating and cooling costs by 10–20% for Mid-Missouri homeowners when paired with proper installation.
The smartest “trend” for your home is matching window technology (glazing type, low-E coatings, gas fills) to our local mixed climate zone rather than following national design fads.
CoMo Premium Exteriors helps homeowners in Columbia, Jefferson City, Boonville, Moberly, and Lake of the Ozarks balance energy savings, style preferences, and budget through free estimates and honest consultations.
Many 2026 trends—smart locks, noise-reduction glass, dark frames—can be added selectively to specific openings, so you don’t have to replace every window to see real benefits.
Why 2026 Is a Pivotal Year for Energy-Efficient Window Replacement
Rising utility costs across Mid-Missouri, combined with updated 2025–2026 energy standards and shifting design preferences, are reshaping how homeowners think about window replacement. What used to be a straightforward decision about glass and frames has become a more strategic choice affecting comfort, household energy bills, noise control, security, and resale value.
Windows are now a major energy system and design feature—not just holes in your walls with some glass in them. The right replacement windows can transform how your living spaces feel throughout the year, while the wrong ones leave you dealing with drafts, condensation, and higher energy use for decades.
This article focuses specifically on replacement windows (not new construction) and is written from our perspective as CoMo Premium Exteriors, a local exterior contractor serving Mid-Missouri since 2010. We’ll walk through the top 2026 trends and then show you how to decide which ones are actually worth the investment for your specific home.
Trend 1: Smarter, Climate-Tuned Energy Performance (Not One-Size-Fits-All)
The 2026 approach to energy efficiency moves well beyond slapping a generic energy star label on every product. Manufacturers and informed contractors now focus on climate-specific choices—understanding whether your region is cooling-dominant, heating-dominant, or a challenging mix of both.
What This Means for Mid-Missouri Homeowners
Here in Central Missouri, we deal with hot, humid summers pushing 90°F+ and winters that regularly drop below freezing. That mixed climate means your windows need to block summer heat while retaining warmth during the heating season. Generic “efficient windows” designed for Phoenix or Minneapolis won’t perform the same here.
For most Mid-Missouri homes, the sweet spot in 2026 is:
Window Type
Best Use Cases
Energy Impact
Double pane with low-E
Most rooms, balanced performance
10-15% energy savings vs. older units
Triple glazing
North-facing rooms, noisy streets, large glass areas
30-50% better heat loss prevention
Argon gas fill
Standard for most quality replacements
Reduces heat transmission significantly
Krypton gas fill
Premium applications, thinner profiles
Even better insulation in less space
Understanding the Technology in Plain Language
Low e coatings are transparent microscopic metallic layers applied to glass panes that reflect infrared heat while letting visible light through. In winter, they help keep your heat inside. In summer, they block solar radiation from cooking your rooms. Modern low-E coatings can reduce heat transmission by 30-50% compared to older single-pane units.
Argon gas fills the space between glass panes, insulating better than plain air. It’s the standard for quality new windows in 2026.
Warm edge spacers are the strips separating glass layers at the edges. Older aluminum spacers conducted heat right through the frame—warm edge spacers minimize that thermal bridging, especially important in our temperature swings.
Reading Energy Labels in 2026
The National Fenestration Rating Council provides standardized ratings you’ll see on every window:
U-factor: Measures how well a window prevents heat loss. Lower is better. Look for 0.25 or below for Mid-Missouri.
Solar heat gain coefficient (SHGC): Measures how much solar heat comes through. For our climate, 0.25-0.40 is typically ideal.
Visible Transmittance (VT): How much natural light comes through. Higher means more light—aim for 0.50 or above.
Energy Star “Most Efficient” tiers in 2025–2026 raise the bar on these metrics. When comparing products, these numbers tell you more than marketing claims.
We help homeowners interpret these ratings during free consultations at CoMo Premium Exteriors. You shouldn’t have to guess which glass package actually makes sense for your house.
The 2026 demand for more natural light and seamless indoor-outdoor connection continues growing. Homeowners want larger windows, expansive patio doors, and floor-to-ceiling glass walls that frame views and flood rooms with daylight.
Popular Formats We’re Seeing in Mid-Missouri
Multi-slide patio doors: These can open entire wall sections to patios, decks, or lake views—especially popular at Lake of the Ozarks properties.
Large fixed picture windows: Non-opening units that maximize glass area, often paired with smaller operable windows for ventilation.
Expanded egress windows: Basement window upgrades common in Columbia and Jefferson City ranches, bringing light to lower levels while meeting safety codes.
Floor-to-ceiling glass walls: Using insulated frames with low-E glass and optional automated shades for light control.
Why This Works Now
Modern insulated glass technology makes these bigger openings practical without turning your home into an energy drain. Triple glazing with warm edge spacers and low-E coatings can reduce peak afternoon glare by up to 70% in west-facing installations while maintaining energy performance.
The key is correct specification. A giant picture window facing west in Jefferson City needs different glass than a north-facing bedroom window in Moberly. That’s where working with experienced installers matters.
Practical Design Considerations
Before going big with glass, think through:
Where does the sun set relative to your yard?
How will large windows affect furniture placement and TV viewing?
What’s your privacy situation with neighbors or streets?
Do you need integrated shades or blinds for light control?
CoMo Premium Exteriors evaluates existing wall structures, decks, and patios to determine where larger openings or new doors make the most sense structurally and aesthetically.
Trend 3: Dark, Minimal Frames and Clean Lines for 2026 Curb Appeal
Black and deep bronze window frames remain the dominant aesthetic choice heading into 2026. Paired with narrow sightlines and simple (or no) grille patterns, this minimalist look works equally well on modern builds and updated farmhouse-style homes.
Where We’re Seeing This in Mid-Missouri
Brick colonials in Columbia getting black-framed window replacements for high-contrast curb appeal
Lake homes at Lake of the Ozarks using dark frames against natural wood or stone exteriors
Newer subdivisions around Jefferson City specifying black windows on fiber cement siding
Historic renovations in Fulton blending dark frames with period-appropriate proportions
Materials That Hold Dark Colors
Old painted wood frames would fade, peel, and require constant maintenance. Today’s options for dark-frame windows include:
Material
Pros
Considerations
Vinyl with color-through
Low maintenance, affordable, won’t peel
Limited to lighter dark shades on some lines
Fiberglass composite
Excellent stability, premium appearance
Higher cost, worth it for large units
Aluminum-clad wood
Interior warmth, exterior durability
Requires proper sealing in our humidity
Wood frames with exterior cladding
Traditional interior aesthetic
More upkeep unless using engineered treatments
UV-stable finishes designed for decades of sun exposure are standard on quality 2026 products. Wood fiber composites and engineered wood frames offer the organic warmth many homeowners want while cutting long-term maintenance compared to traditional wood.
Slimmer Doesn’t Mean Weaker
“Minimalist” frame profiles in 2026 don’t sacrifice structural strength. Modern engineering combines slimmer sightlines with improved rigidity—important for big glass areas that need to handle Mid-Missouri’s storm seasons without warping or seal failure.
When choosing frame colors, consider your roof, siding, and trim as a complete system. As a James Hardie Elite Preferred contractor, we can coordinate window colors with new or existing siding and roofing projects for a cohesive exterior design.
Trend 4: Quieter, More Comfortable Interiors With Noise and Draft Control
Homeowners near busy roads, schools, or commercial areas in Columbia, Moberly, and along Highway 63 increasingly ask about noise reduction as a primary goal in 2026—not just energy efficiency.
How Acoustic Glass Works
Laminated and acoustic glass options layer polyvinyl butyral (PVB) between glass panes to dampen sound transmission. These can cut traffic noise by 30-40 decibels—enough to make a busy street sound like a quiet side road.
Unlike full soundproof studio upgrades that cost tens of thousands, quality acoustic glass in standard replacement windows brings meaningful noise reduction at reasonable window replacement costs.
Draft Control and Comfort
Beyond noise, tighter weatherstripping, insulated frames, and professional installation reduce drafts and temperature swings throughout your house. This matters most in:
Rooms over garages (common problem spots in Mid-Missouri homes)
Areas near large glass walls that can create convection currents
Older additions with inadequate original installation
Bedrooms on the windward side of the house
Priority Rooms for Noise and Comfort Upgrades
We consistently see Mid-Missouri homeowners prioritize these spaces:
Home offices: Post-pandemic remote work makes quiet focus spaces essential
Primary bedrooms: Better sleep quality when road noise and drafts are eliminated
Nurseries and children’s rooms: Light sleepers benefit from quieter, more stable temperatures
Media rooms: Reduce outside noise and make rooms feel more comfortable for extended use
At CoMo Premium Exteriors, we focus on the entire building envelope—windows and doors, siding, and insulation details around openings—to deliver the full comfort benefit rather than just dropping in glass.
Trend 5: Integrated Security and Smart Features in Everyday Windows
2026 replacement windows increasingly include built-in security features and optional smart technology instead of relying on add-on bars, aftermarket sensors, or visible retrofit hardware.
Standard Security Upgrades
Modern windows and doors now commonly offer:
Multi-point locking systems: Multiple locks engage along the frame when you turn the handle, not just a single latch point
Reinforced frames: Structural improvements that resist prying and forced entry
Laminated glass: The same technology used for noise reduction also holds together when struck, preventing easy break-ins
Tempered safety glass: Standard in larger units and required by code in certain locations
Smart Integration Options
For homeowners using smart-home systems, 2026 windows can include:
Discrete contact sensors that report open/closed status to your security hub
Smart locks on patio doors compatible with major platforms
Motorized blinds syncing with home automation to optimize cooling energy and privacy
Electrochromic tinting that auto-darkens based on sunlight sensors (higher-end option)
These smart features can potentially save an additional 10-15% on cooling costs by blocking heat preemptively during peak afternoon hours.
Targeting Security Upgrades Strategically
You don’t need maximum security on every opening. Focus enhanced features on:
Basement windows (most vulnerable entry point in many homes)
Sliding patio doors facing alleys, wooded lots, or low-traffic sides of the house
Ground-floor windows hidden from street view
Garage-entry doors where forced entry could bypass the main house
When we plan window projects at CoMo Premium Exteriors, we discuss security priorities alongside energy performance—helping homeowners balance cost, peace of mind, and ease of daily use.
Trend 6: Localized, Whole-Home Planning Instead of Piece-by-Piece Swaps
2026 sees a clear shift away from replacing a single window here and there toward planning whole-home or whole-elevation projects from the start.
Benefits of Grouped Replacements
Approach
Advantages
Considerations
Whole-home replacement
Consistent style, predictable energy savings, best per-window pricing, one construction period
Higher upfront investment
Elevation-by-elevation
Focuses budget on worst-performing sides first, maintains consistency within phases
Slightly higher per-window cost
Single-window replacements
Lowest immediate cost, addresses urgent problems
Inconsistent appearance, less efficient overall
A Real-World Example
Consider a 1970s ranch in Columbia with original aluminum-frame windows on all four sides. These old windows likely have single pane glass or early double-pane units with failed seals, minimal weatherstripping, and significant drafts.
A whole-home approach upgrading all openings to modern vinyl or composite double pane windows with low-E coatings delivers:
Consistent appearance from every angle
Measurable energy savings across the entire building envelope
Reduced installation cost per window
Single disruption to daily life rather than multiple projects
Comprehensive warranty coverage starting from one date
Coordinating With Other Exterior Work
Sequencing windows with other projects—siding replacement, new decks, or roof work—lets contractors address flashing, trim details, and water management together. This matters for long term value and durability.
At CoMo Premium Exteriors, our triple certification (GAF Master Elite, OC Platinum, James Hardie Elite Preferred) means we can handle roofing, siding, and window projects as integrated systems rather than disconnected pieces.
Windows are a 20-30 year decision. We offer limited lifetime workmanship warranties because planning once and doing it right typically delivers better value than patching problems over time.
How to Choose the Right 2026 Window Trends for a Mid-Missouri Home
Not every trend belongs in every house. Good decisions match your climate zone, home age, budget, and how long you plan to stay. Here’s a practical framework for working through your options.
Step 1: Evaluate Existing Problems
Walk through your house and note specific issues:
Which rooms have noticeable drafts, even with windows closed?
Do you see condensation or fogging between glass panes?
Are any frames rotting, warping, or difficult to operate?
Which windows feel hottest in summer or coldest in winter?
Where does outside noise bother you most?
Step 2: Set Energy and Comfort Goals
Be specific about what you want to achieve:
Reduce energy bills by a target percentage
Eliminate drafts in specific problem rooms
Make home offices or bedrooms quieter
Improve year round comfort without constant thermostat adjustments
Step 3: Decide Your Style Direction
Consider how windows fit your overall exterior:
Modern minimalist with dark frames and clean lines?
Traditional with divided lites and classic proportions?
Mixed approach with updated performance but period-appropriate appearance?
Step 4: Align With Budget and Financing
Quality replacement windows are a significant home improvement investment. Options include:
Full replacement now with financing
Phased replacement prioritizing worst-performing areas first
Bundling with other exterior projects for better overall value
Common Mid-Missouri Scenarios
Older wood windows with rotted sills: These typically need full replacement rather than repair. Frame damage compromises weathersealing and structural integrity.
Fogged double-pane units from the 1990s: Failed seals mean the insulating gas is gone and moisture is trapped. Replacement usually makes more sense than reglazing.
Aluminum sliders on three-season rooms: These conduct heat and cold directly through the frame. Modern vinyl or fiberglass replacements transform comfort.
When Triple-Pane Makes Sense
Triple glazing isn’t necessary for every opening. Focus it where you’ll notice the difference:
North-facing rooms with persistent cold-weather comfort issues
Bedrooms or offices facing busy streets needing noise reduction
Large glass walls where energy performance matters most
Areas with extreme sun exposure and condensation problems
Quality double pane windows with appropriate low-E coatings handle most Mid-Missouri applications well. Save money by targeting triple-pane where it solves specific problems.
CoMo Premium Exteriors offers free, no-pressure inspections and written estimates. We walk homeowners through side-by-side options so you understand both cost and energy performance differences before making decisions.
Working With CoMo Premium Exteriors for Window Replacement in 2026
CoMo Premium Exteriors has served Mid-Missouri as a local exterior contractor since 2010, handling roofing, siding, windows, doors, decks, and gutters across the region. We’re not a franchise or out-of-state company—we’re neighbors who understand Central Missouri’s weather patterns and building styles.
Our Approach to Window Projects
We believe in educating first and selling second. That means:
Explaining energy ratings, glass packages, and style choices in plain language you can actually use
Walking through product lines and showing real differences between options
Encouraging you to compare rather than pressure you into quick decisions
Providing written estimates with itemized details so you know exactly what you’re getting
Bundling for Better Results
Window projects often work best coordinated with related exterior work:
Siding replacement: Ensures consistent appearance and proper flashing around new openings
Roof projects: Addresses water management from top to bottom
Deck building: Coordinates with patio door installations for seamless indoor-outdoor flow
Storm restoration: Handles insurance claims advocacy while upgrading to modern efficient windows
As the only contractor in the region with GAF Master Elite, OC Platinum Preferred, and James Hardie Elite Preferred certifications, we bring trained professionals who understand how these systems work together.
Our Service Area and Warranty
We serve Columbia, Jefferson City, Boonville, Moberly, Lake of the Ozarks, and surrounding Mid-Missouri communities. Every installation includes our limited lifetime workmanship warranty—we stand behind our work because we’ll still be here when you need us.
Ready to explore your options? Give us a call at (573) 424-9008 or contact us through our website to schedule an on-site evaluation of your existing windows. We’ll walk through current problems, discuss which 2026 trends make sense for your home, and provide honest recommendations without pressure.
FAQs
How much can I realistically save on energy bills by replacing my windows?
Savings depend on your current window condition, home size, and HVAC system efficiency. Many homeowners moving from single pane windows or early double-pane units to modern energy star certified windows see 10-20% reductions in residential heating and cooling energy costs.
For example, a Mid-Missouri home spending $2,400 per year on heating and cooling might save $240-$480 annually after a full window replacement. Over a 20-year window lifespan, that adds up to significant energy savings.
Keep in mind that windows are one piece of the efficiency puzzle alongside insulation, air sealing, and HVAC maintenance. But they also improve comfort, reduce energy use, and boost resale value beyond pure utility savings—benefits that are harder to quantify but very real in daily life.
Are triple-pane windows worth it in our Mid-Missouri climate?
Triple-pane can make sense for specific locations in your home—noisy streets, north-facing problem rooms, large glass walls, or areas with persistent condensation. The additional glass panes and gas chamber provide 30-50% better heat loss prevention compared to double-pane.
However, triple-pane adds cost (typically 20-40% more per window) and weight (potentially stressing older frames). For many Mid-Missouri homes, quality double pane low-E units are sufficient for most openings.
We can price both options and explain the tradeoffs room by room. The goal is helping you invest wisely—putting triple-pane where it matters and saving money where double-pane performs just fine.
How do I know if my current windows need to be replaced or just repaired?
Clear signs pointing toward replacement include:
Rotting or deteriorating wood frames around the window sill
Failed seals with visible fogging or moisture between glass panes
Difficulty opening, closing, or locking windows
Noticeable drafts even after adding weatherstripping
Visible water damage on interior walls or sills below windows
Minor issues like caulking gaps or worn weatherstripping may be fixable without full replacement. But systemic problems in old windows—especially units over 20 years old—often justify replacement rather than ongoing repairs.
During our free inspections, we explain whether repair, targeted replacement of specific windows, or complete replacement is the smartest long-term move for your situation.
Can I replace my windows in stages instead of all at once?
Staged replacement is common and works well when planned properly. A typical approach prioritizes the worst-performing or most weather-exposed sides of the house first—often north and west elevations in Mid-Missouri, where winter winds and afternoon sun create the biggest comfort problems.
The key is planning the full project upfront even if you’re executing in phases. This keeps future installations consistent in style, color, and performance ratings so your home looks unified when everything is complete.
We can create a phased plan with pricing for each step, helping you budget over time without sacrificing a cohesive final appearance or settling for mismatched product lines.
Are there rebates or tax credits for energy-efficient windows in 2026?
Federal incentives and local utility programs change year to year, so it’s important to check current 2026 programs and eligibility requirements before purchasing. The federal energy efficient home improvement credit has covered qualifying windows in recent years, typically for products meeting Energy Star “Most Efficient” criteria.
Some credits cap the total dollar amount per year or require specific documentation of window ratings and installation costs.
We can point you toward current resources and provide the product specifications and receipts needed for rebate or tax-credit applications. However, we always recommend confirming specific details with a tax professional since program rules can change and individual eligibility varies.