Do Window Installers Need to Come Inside Your Home?
Key Takeaways:
Yes, window installers need interior access — most of the removal, sealing, and trim work happens from inside your home.
The exterior is where the old window comes out; the interior is where the new window gets secured, sealed, insulated, and trimmed.
Clear 5 feet of space around each window and remove all blinds, curtains, and wall decor before the crew arrives.
Each window takes 4-6 hours for a full-frame replacement. Pocket (insert) replacements are faster with less interior disruption.
No window opening will be left exposed overnight — installers complete or weatherproof every window they start each day.
The Short Answer: Yes, They Need to Come Inside
This is one of the most common questions we hear from homeowners in Columbia and Jefferson City before scheduling a window replacement. The concern makes sense — you’re inviting a work crew into your living space, and you want to know what that actually looks like.
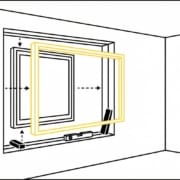
The reality is that window replacement is both an exterior and interior job. The old window is typically removed from the outside, but the new window gets secured, insulated, sealed, and trimmed from inside your home. Your installer will spend roughly equal time on each side of the wall, and some steps — like verifying the sash operates smoothly and checking for air gaps — can only be done from inside.
The good news: professional crews know they’re working in someone’s home, not a construction site. The disruption is manageable if you prepare each room ahead of time.
Before Install Day: Expect a Separate Measure Visit
Replacement windows are built to fit your exact openings, so the project usually starts with a separate measurement appointment — not the installation itself. A CoMo specialist comes inside to record precise dimensions for every window being replaced, note how each sash operates, and check the condition of the existing frame and rough opening. Plan for interior access on this visit too: the measurer needs to reach each window, look behind trim where possible, and confirm whether the frame is square and dry.
What you can do to make the measure visit productive:
Have blinds, curtains, and furniture pulled back so each window is reachable, even ones you’re unsure about.
Be ready with a list of problems you’ve noticed — drafts, hard-to-open sashes, foggy glass, moisture on the sill, or trim that’s pulling away.
Point out any window that sticks, has rot visible at the sill, or has a broken lock; these often shift the recommendation from a pocket insert to a full-frame replacement.
Once measurements are complete, your windows are custom-ordered to those exact sizes. That ordering step is why there’s typically a gap between the measure visit and install day — the windows are being manufactured for your home, not pulled off a shelf. We’ll confirm your install date once the windows are delivered and inspected.
What Happens Outside vs Inside
Exterior work includes:
Removing exterior trim and stops to access the old window
Lifting out the old sash and frame (full-frame replacement) or just the sash (pocket replacement)
Inspecting the rough opening for rot, water damage, or insect damage
Applying flashing tape to the sill for waterproofing
Installing exterior trim and caulking after the new window is set
Interior work includes:
Removing interior window trim, stops, and any hardware
Leveling and shimming the new window in the opening
Driving mounting screws through the window frame into the rough framing
Applying spray foam insulation around the gap between window and framing
Installing interior trim and caulking
Testing sash operation — making sure the window opens, closes, locks, and tilts correctly
Cleaning up dust, debris, and protective film
On brick homes, the installation often happens primarily from the exterior because the outer wall opening is wider than the interior one. But even on brick homes, the installer needs inside access for shimming, sealing, and trim work.
How to Prepare Each Room
Andersen Windows recommends treating installation day like a mini move — it’s temporary, but the preparation makes a real difference in how smoothly the day goes.
Before the crew arrives:
You’ll prep twice — once for the measure visit, once for install day. The measure visit only needs each window reachable. Full install-day prep (covered below) goes further: furniture moved, pictures down, pets secured, and window sensors turned off.
Remove window treatments first. Blinds, curtains, shades, and shutters need to come down before installation day. This is the single biggest time-saver — removing blinds from 15 windows can take an installer hours if the homeowner hasn’t done it in advance. That’s time spent on hardware removal instead of window installation.
Clear 5 feet of space around each window. Move furniture, lamps, plants, electronics, and anything fragile away from the work area. The crew needs room to maneuver the old window out and the new window in, plus space for tools, shims, and caulking supplies.
Take pictures off the walls. The vibration from removing old windows can knock frames loose. Removing wall decor within 5-6 feet of each window prevents damage and dust accumulation on glass and frames.
Cover remaining furniture. Drop cloths or old sheets over beds, couches, and desks near the windows. There will be dust from removing old trim and debris from the rough opening. Professional crews bring their own drop cloths, but covering items yourself gives extra protection.
Secure pets.Window World’s installation guide notes that technicians can’t always close doors and gates behind them as they move through the house. Keep dogs and cats in a closed room away from the work area, or arrange for them to be off-site for the day.
Notify your alarm company. Opening and removing windows will trigger sensors. Let your security provider know you’re having work done and disable window sensors for the day.
Full-Frame vs Pocket Replacement: Different Levels of Disruption
How much interior work happens depends on which type of window replacement you’re getting:
Pocket (insert) replacement is less disruptive. The existing window frame stays in place — only the sash and operating hardware are replaced. Interior trim usually isn’t disturbed. This is faster (2-3 hours per window) and generates less mess, but it only works when the existing frame is in good condition and square.
Full-frame replacement removes everything — sash, frame, trim, and sometimes the sill. This is more disruptive (4-6 hours per window) but allows inspection and repair of the rough opening, fresh insulation, new flashing, and a complete weathertight installation. For older Mid-Missouri homes where the original frames may have moisture damage or settling issues, full-frame is the more thorough approach.
What to Expect During the Day
Morning start: Most crews arrive between 8:00 and 9:00 AM and work through the day until the scheduled windows are complete.
Open windows = brief exposure: Each window opening will be exposed for the time it takes to remove the old window and install the new one — typically a few hours per window. The crew works on one window at a time and moves sequentially through the house.
Noise and dust: Expect drilling, hammering, and the sound of spray foam cans. Dust from old trim removal and insulation work is normal. Quality crews lay drop cloths and vacuum as they go, but some cleanup will be needed after they leave.
No openings left overnight: This is a firm standard for reputable installers. Any window the crew starts will either be completed or temporarily weatherproofed by the end of the day. You won’t go to bed with an open hole in your wall.
Post-installation walkthrough: Before the crew leaves, walk each window with the installer. Test every sash for smooth operation. Check locks. Look at interior trim for gaps or rough caulk joints. Ask about removing the factory protective film — most windows ship with a plastic film on the glass that you’ll peel off after installation is confirmed correct.
Frequently Asked Questions
Do window installers need to come inside my house?
Yes. While the old window is often removed from the outside, securing the new window, insulating the gap, installing interior trim, and testing operation all require interior access. Plan for the crew to spend roughly equal time inside and outside for each window.
How long does window replacement take per window?
A pocket (insert) replacement takes 2-3 hours per window. A full-frame replacement takes 4-6 hours. For a full-house project with 10-15 windows, expect 2-4 days total depending on window type and house complexity.
Do I need to be home during window installation?
Someone should be home or available. The crew may need to ask about preferences (trim style, hardware placement), access locked rooms, or address unexpected findings like rot in the rough opening. You don’t need to supervise, but being reachable is important.
Will window installers damage my walls or paint?
Minor touch-up around window trim is normal, especially with full-frame replacement. Removing old trim can pull paint or leave small nail holes. Reputable installers will note any pre-existing damage and point out areas where you may want to touch up paint after the new trim cures.
What should I do with my curtains and blinds before installation?
Remove them completely before the crew arrives. This includes curtain rods, brackets, blinds, and any mounted valances. Window treatments are the most common cause of installation delays. Call us at (573) 424-9008 if you have questions about preparing for your installation day.
Ready to Get Started?
We’ve been replacing windows in Mid-Missouri homes for over 25 years. Our crews are experienced, respectful of your home, and thorough in their cleanup. As GAF Master Elite, OC Platinum Preferred, and James Hardie Elite Preferred contractors, we bring the same certified precision to window installations that we bring to every exterior project.
Are Casement Windows More Expensive Than Other Window Types?
Key Takeaways:
Casement windows cost 10-20% more than double-hung windows — typically $400-$1,150 installed versus $400-$1,000 for double-hung.
The price premium comes from the crank mechanism and more complex hinges, not from better glass or frame materials.
Casement windows seal 60% tighter than double-hung against air leakage, which can reduce heating and cooling costs over time.
The best value depends on where the window goes — casement makes sense in kitchens, bathrooms, and hard-to-reach spots. Double-hung works fine for most bedrooms and living rooms.
Federal tax credits cover 30% of qualifying window costs up to $1,200 per year, helping offset the casement premium.
The Short Answer: Yes, But Not by as Much as You’d Think
If you’re replacing windows in your Columbia or Jefferson City home and comparing quotes, you’ve probably noticed that casement windows come in higher than double-hung or sliding windows. The difference is real — but it’s not dramatic. Most homeowners see a 10-20% premium for casement over comparable double-hung windows in the same material and glass package.
On a single window, that might be $50-150 more. Across a full house with 15-20 windows, the total difference could run $750-$3,000. Whether that premium is worth paying depends on where each window goes, how important energy efficiency is to you, and how long you plan to stay in the home.
Let’s break down the real costs, compare window types head-to-head, and help you figure out where to spend and where to save.
What Each Window Type Actually Costs
Installed prices vary based on material (vinyl, wood, fiberglass, composite), glass package (double or triple pane), and your home’s framing. Here’s where the main window types fall in Mid-Missouri pricing:
Window Type
Installed Cost Range
Typical Average
How It Opens
Sliding
$300-$600
~$425
Slides horizontally on a track
Single-hung
$300-$700
~$450
Bottom sash slides up
Double-hung
$400-$1,000
~$500
Both sashes slide up and down
Awning
$300-$700
~$475
Hinged at top, opens outward
Casement
$400-$1,150
~$560
Hinged at side, cranks outward
Picture/Fixed
$150-$800
~$350
Doesn’t open
The casement premium comes almost entirely from the operating hardware. The crank mechanism, folding arm operator, and multi-point locking system add manufacturing cost. The glass, frame material, and weatherstripping are often identical between casement and double-hung windows from the same manufacturer.
Why Casement Costs More (and What You Get for It)
Paying more for casement isn’t just paying for a fancier crank handle. The mechanical difference creates real performance advantages:
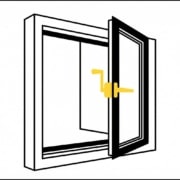
Tighter seal against air leakage. When you close a casement window and turn the lock, the sash compresses against weatherstripping around the entire perimeter — similar to how a refrigerator door seals. Marvin’s testing shows that casement windows achieve air leakage rates below 0.01 cfm per square foot — roughly 60% lower than double-hung windows. Double-hung windows have more seams and linear feet of weatherstripping where air can work through, and that leakage tends to increase as weatherstripping compresses over years of use.
Full ventilation opening. A casement window opens its entire sash area to airflow. A double-hung window opens only half — the bottom sash slides up to reveal the opening. For the same size window, casement provides nearly twice the ventilation capacity. In Mid-Missouri’s humid summers, that extra airflow can make a noticeable difference in rooms without strong HVAC circulation.
Easier operation in hard-to-reach spots. The crank mechanism means you don’t need to push or pull the sash — just turn a handle. That matters above kitchen sinks, behind bathtubs, or in any spot where reaching through a window opening to lift a sash would be awkward or uncomfortable.
Where Each Type Makes the Most Sense
You don’t have to pick one type for your entire house. Most homeowners get the best value by mixing window types based on location:
Best rooms for casement:
Kitchen — reach-over-the-counter operation with a crank instead of pushing up a heavy sash
Bathrooms — full ventilation helps with humidity; crank operation works when reaching past a tub
Living room flanking a picture window — casements paired with a fixed center panel create a modern look with functional ventilation on the sides
Basement egress — casement windows that crank fully open meet egress code requirements more easily than double-hung
Best rooms for double-hung:
Bedrooms — easy to operate, easy to clean (tilt-in sashes), fits window AC units
Street-facing windows — traditional aesthetic matches most Mid-Missouri home styles
Upper floors — no sash protruding outward where it could be hit by wind or interfere with screens
Best rooms for sliding:
Wide openings — sliding windows handle wider-than-tall openings that casement can’t cover without mulling multiple units
Tight exterior spaces — sliders don’t protrude outward, so they work next to walkways, patios, or decks
The Energy Savings Angle
Casement’s tighter seal does translate to energy savings — but how much? ENERGY STAR estimates that replacing single-pane windows with certified windows reduces heating and cooling costs by an average of 13%, saving homeowners $126 to $465 per year. Missouri sits in ENERGY STAR’s North-Central climate zone, where both heating and cooling efficiency matter.
The casement advantage within that savings is modest in absolute dollars. The 60% lower air leakage rate sounds dramatic, but air leakage is just one factor in window energy performance alongside U-factor (insulation value) and SHGC (solar heat gain). Since casement and double-hung windows from the same manufacturer typically share the same glass package and frame insulation, the practical energy difference between them comes down to that air seal — which might save an additional $20-50 per year depending on your home’s overall envelope tightness.
Where the energy math tilts more clearly toward casement is in older homes with drafty walls. If you’re replacing windows in a 1960s Columbia ranch or a turn-of-the-century Jefferson City Victorian, the tighter casement seal compounds with other improvements you’re likely making.
The Department of Energy recommends comparing windows using their NFRC ratings — U-factor, SHGC, air leakage, and visible transmittance — rather than relying on window type alone. Two casement windows from different manufacturers can have very different energy performance.
Tax Credits That Offset the Premium
Here’s where the casement cost equation gets more favorable. The federal energy efficiency tax credit covers 30% of the cost of qualifying ENERGY STAR windows, up to $1,200 per year. That applies to both casement and double-hung — but since casement costs more per unit, the credit returns more per window.
On a $560 casement window, a 30% credit is $168 back. On a $500 double-hung, it’s $150. The net difference between the two drops from $60 to $42. Across a full house replacement, tax credits can erase most of the casement premium.
Check with your tax advisor on current eligibility — the credit has product certification requirements and filing specifics that change periodically.
Why Window Type Doesn’t Change the Installation Timeline
Whether you choose casement, double-hung, sliding, or a mix of all three, one part of the process stays the same: your replacement windows are built to the exact dimensions of each opening. There is no shelf of standard-size windows waiting to be loaded onto a truck. Every unit — regardless of type — is custom-manufactured after the order is placed.
That means the project follows the same general sequence no matter which window type wins each room:
Inspection and estimate. A contractor looks at every opening, checks the frame and surrounding trim, and gives you a written quote with the window type, material, and glass package for each location.
A separate, precise measurement visit. After you approve the quote, a second visit measures every opening to the fraction of an inch. This measurement step needs access to the inside of your home — the installer measures from inside the frame, not just from the exterior.
Order placed and manufactured. The windows are built to those exact measurements and ship when complete. Manufacturing lead time depends on the manufacturer and the time of year, but it is typically measured in weeks, not days.
Delivery and installation. Once the order arrives, the installation is scheduled and each window is set into its prepared opening.
The casement-versus-double-hung decision affects the price per window and which rooms get which operating style. It does not change the fact that the whole project moves through measurement, custom manufacturing, and delivery before a single window goes in. If you are phasing a full-house replacement across multiple visits, understanding this sequence helps you plan around lead times instead of being surprised by them.
What to Document Before Requesting a Window Quote
The more information you can gather before the estimate visit, the more accurate your casement-versus-double-hung comparison will be. A few minutes of preparation helps the contractor quote the right type for each room on the first pass:
Which windows are hard to reach. Note any windows above kitchen counters, behind bathtubs, or in tight corners — these are prime candidates for casement’s crank operation.
Which rooms have humidity or ventilation concerns. Bathrooms, kitchens, and laundry rooms benefit most from casement’s full-sash opening.
Any windows that are hard to open or stick. That tells you something about the frame, balance system, or settling — worth checking before you assume the whole window needs replacing.
Photos of each window from inside and outside. Wide shots showing the whole wall, plus a close-up of the frame, sill, and any visible damage. If you are filing under a storm or hail claim, per-window photos by elevation help document which windows were affected.
Whether any window has a broken seal. Fogging or moisture between the glass panes means the insulated glass unit has failed. That is a glass or sash replacement question, which can be faster than a full-frame replacement — see our window component guide for which part actually needs replacing.
Having this ready means the estimate covers the real conditions in your home, not just a catalog price. It also helps you compare quotes apples-to-apples if you talk to more than one contractor.
Frequently Asked Questions
Are casement windows more expensive than double-hung?
Yes, typically 10-20% more. For the same size window in the same material, expect to pay $50-150 more per casement window than a comparable double-hung. The premium comes from the crank mechanism and multi-point locking hardware, not from better glass or framing.
Do casement windows add more home value than double-hung?
Window replacement generally recoups 60-75% of cost at resale regardless of type. Casement windows may have a slight edge in modern-style homes where they complement the architecture, but the resale value difference between window types is minimal compared to the overall upgrade from old to new.
How long do casement windows last compared to other types?
Both casement and double-hung windows last 20-30 years with proper maintenance. The casement crank mechanism can wear out before the window frame or glass, but replacement cranks are available for most manufacturers. Double-hung springs and balances also wear over time and are similarly replaceable.
Can I mix casement and double-hung windows in the same house?
Absolutely. Most homeowners get the best value by using casement where the crank operation and tighter seal justify the premium (kitchens, bathrooms, hard-to-reach spots) and double-hung everywhere else. As long as the frame color and exterior profile match, the mix looks cohesive from the outside.
Are casement windows harder to maintain?
Slightly. The crank mechanism needs occasional lubrication, and the hinges should be checked yearly. But casement windows don’t have the spring-balance or tilt-in mechanisms that can fail on double-hung windows. Overall maintenance is comparable. Call us at (573) 424-9008 to discuss the right window mix for your home.
Ready to Get Started?
We’ve been serving Mid-Missouri homeowners for over 25 years with premium window replacement and exterior solutions. As GAF Master Elite, OC Platinum Preferred, and James Hardie Elite Preferred contractors, we bring certified expertise to every project — including helping you decide which window type belongs in which room.
Mesh vs Foam Gutter Guards: Which Actually Works in Mid-Missouri?
Key Takeaways:
Micro-mesh gutter guards outperform foam inserts in nearly every category — durability, debris filtration, and heavy rain handling.
Foam gutter guards last 1-2 years before shrinking, crumbling, or clogging with trapped sediment and seeds.
Mesh guards carry 25-30 year warranties; foam guards typically have no warranty at all.
Neither option is maintenance-free — but mesh reduces cleaning frequency from twice a year to once every 2-3 years.
Mid-Missouri’s spring storms and humid summers accelerate foam deterioration and make mesh the more practical long-term choice.
Two Very Different Approaches to the Same Problem
If you’ve been shopping for gutter protection in Columbia or Jefferson City, you’ve probably seen two options at opposite ends of the price range: foam gutter inserts that cost a few dollars per foot at the hardware store, and micro-mesh guard systems that run significantly more but promise decades of performance.
The price gap raises a fair question — is the mesh guard actually that much better, or is it just more expensive? The answer comes down to how each product handles water, debris, and time. And in Mid-Missouri, where spring delivers 2-inch rain bursts followed by humid summers that encourage mold growth, those differences matter more than they would in a dry climate.
Let’s walk through what each type actually does, where each one fails, and which makes sense for your home.
How Foam Gutter Guards Work (and Why They Stop Working)
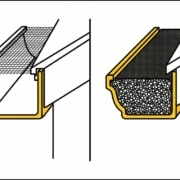
Foam gutter guards are porous polyurethane or polyester inserts that sit inside your gutter channel. The idea is simple: water flows through the foam while leaves and debris sit on top and blow away. At $2-4 per foot, they’re the cheapest gutter protection available and easy to install yourself.
The problem is what happens after the first season. Foam is a sponge. It absorbs and holds water for days after a light rain. In Mid-Missouri’s humid summers, that trapped moisture creates conditions for mold, mildew, and algae to grow inside the foam itself. Seeds that land on top take root in the wet material. Dirt and roof grit work their way into the pores and never come out.
UV exposure from direct sunlight breaks down the foam’s cellular structure. Freeze-thaw cycles — which Columbia sees dozens of times between November and March — accelerate that breakdown further. Industry documentation on foam guard lifespan puts the realistic service life at 1-2 years before the material shrinks, crumbles, or becomes so clogged it actually blocks water flow instead of filtering it.
When foam guards fail, they often cause worse problems than having no guards at all. Water overflows the gutter because it can’t penetrate the clogged foam. The foam itself becomes a saturated weight sitting in your gutter channel, potentially causing sag. And removing degraded foam is messy — pieces break apart and leave residue that needs scrubbing.
How Micro-Mesh Gutter Guards Work
Micro-mesh gutter guards use a fine stainless steel screen — typically with openings between 400 and 600 microns — mounted on an aluminum frame that sits over or clips onto your existing gutter. Water passes through the mesh while debris of virtually any size stays on top.
The key difference from foam is that mesh guards don’t absorb anything. Water flows through and drops into the gutter below. Debris sits on the surface where wind, gravity, and the occasional rinse from your garden hose move it along. There’s no material for seeds to root in, no moisture reservoir for mold to colonize, and no cellular structure for UV or freeze-thaw cycles to destroy.
Quality micro-mesh products use surgical-grade stainless steel with hole sizes around 540 microns — small enough to block pine needles, roof sand grit, and shingle granules. These products meet ANSI/ARCSA standards for rainwater filtration and carry warranties ranging from 25 to 30 years.
The tradeoff is cost. Professional micro-mesh installation runs $15-45 per linear foot depending on the product and your roof configuration. For a typical Mid-Missouri home with 150-200 feet of gutter, that’s $2,250-$9,000 — a meaningful investment compared to $300-800 for DIY foam.
Head-to-Head Comparison
Factor
Foam Inserts
Micro-Mesh Guards
Cost per linear foot
$2-4 (DIY)
$15-45 (installed)
Lifespan
1-2 years
25-30 years
Warranty
None or 1 year
25-30 years
Handles heavy rain
Poor — clogs when saturated
Good — water passes through mesh
Handles pine needles
Poor — needles embed in foam
Excellent — sits on surface
Mold/mildew risk
High — retains moisture
Low — no moisture retention
Maintenance frequency
2x/year minimum + replacement
Once every 2-3 years
Installation
DIY, 30 minutes
Professional, half day
UV/freeze-thaw resistance
Poor — material degrades
Excellent — stainless steel
What Mid-Missouri Weather Does to Each Type
Central Missouri’s climate is particularly hard on foam gutter guards. Here’s why the local conditions matter:
Spring rain intensity: Columbia averages 42 inches of rain per year, with the heaviest downpours arriving in April through June. When 2 inches of rain falls in 30 minutes — not unusual during a spring thunderstorm — foam guards can’t drain fast enough. The foam saturates and water sheets over the gutter edge, defeating the entire purpose. Mesh guards handle high-volume water flow because the screen doesn’t absorb anything.
Humidity and mold: Mid-Missouri summers bring weeks of 80%+ humidity. Foam guards that absorbed water during a Tuesday afternoon storm may still be damp on Friday. That sustained moisture creates ideal conditions for mold colonies inside the foam. Mesh guards dry almost instantly because there’s no absorbent material.
Freeze-thaw cycles: Between November and March, temperatures in Columbia regularly swing above and below freezing — sometimes within the same day. Water trapped in foam expands when it freezes, breaking down the cellular structure from the inside out. After one or two winters, foam inserts often look shredded. Stainless steel mesh is unaffected by freeze-thaw cycles.
Hail and debris: With 79+ hail reports within 10 miles of Columbia in a typical year, shingle granules wash into gutters constantly after storms. Foam traps those granules permanently. Mesh allows granules to wash through with the next rain.
The Real Cost Comparison Over 10 Years
Foam looks cheaper upfront, but the math changes when you account for replacement cycles:
Foam over 10 years: At $3/foot for 175 feet of gutter, that’s $525 per installation. Replacing every 1.5 years means roughly 6-7 replacements over a decade: $3,150-$3,675 in materials alone, plus your time on a ladder each time. If you hire someone for the removal and reinstallation, add $200-400 per visit.
Micro-mesh over 10 years: A one-time professional installation at $25/foot for 175 feet costs $4,375. Over the next decade, maintenance consists of a garden hose rinse once every 2-3 years — maybe 4 times total. The guards are still under warranty at year 10 with decades of life remaining.
By year 5-6, foam has already cost as much as mesh. By year 10, foam has cost more while delivering worse performance the entire time.
Before You Choose a Guard, Check Whether Your Gutters Are Ready for One
A high-quality micro-mesh system is a real investment, so it pays to make sure the gutters underneath it are worth protecting first. Guards improve how your gutter handles debris, but they do not fix structural problems hiding underneath. Installing a guard over a gutter that already needs repair just makes the repair harder to spot and more expensive to deal with later.
Three things are worth confirming before you commit to either type:
The gutter itself. Look for dents along the front edge, sections pulling away from the house, standing water that will not drain, or loose seams between pieces. A gutter that is already sagging or separating will keep doing that under a guard, and the added weight of wet debris sitting on top can make it worse. If your gutters are dented or pulling away after a storm, that repair should come first.
The fascia board the gutter hangs from. The fascia is the horizontal board behind the gutter, and it is what every hanger and fastener anchors into. If that board is soft, rotted, or water-damaged, a guard will not hold securely and the gutter can pull away again under load. This is one of the most common issues that turns a straightforward guard install into a bigger project, because the rotted section has to be replaced before anything gets fastened back to it.
Where the water actually goes. A guard keeps debris out of the gutter channel, but it does nothing for water that reaches the end of the run. If your downspouts discharge too close to the foundation, or a downspout is crushed or disconnected underground, adding a guard will not solve the drainage problem you can see in your yard or basement. Fix the path the water takes before spending on the top of the gutter.
This is why a guard estimate should start with the gutter system, not just the product. Any responsible installer will look at the gutter condition, the fascia, and the downspout discharge points before quoting a guard, because those answers change both the price and whether a guard is even the right next step.
When Foam Might Make Sense
To be fair, foam gutter guards aren’t always the wrong choice. They can work as a temporary solution while you budget for a permanent system. If you’re selling a home within the next year and just need clean gutters for inspections, foam covers the gap. And for detached outbuildings like sheds or workshops where gutter performance isn’t critical, foam’s low cost is proportional to the stakes.
But for your primary home’s gutter system — the one protecting your foundation, siding, and landscaping from water damage — foam is a temporary fix that creates long-term problems.
What Home Inspectors Say About Gutter Guards
Home inspection standards from InterNACHI make an important point that applies to both types: covered gutter systems may be effective in reducing debris buildup, but they are not maintenance-free. No gutter guard — mesh, foam, screen, or reverse-curve — eliminates the need for periodic inspection.
NC State Extension recommends inspecting gutters yearly and after major weather events regardless of what protection system you have installed. The difference is what you find during those inspections. With mesh guards, you’re typically brushing off surface debris. With foam, you’re often discovering the guard itself has become the problem.
Frequently Asked Questions
Do foam gutter guards work in heavy rain?
Poorly. Foam absorbs water like a sponge, and once saturated, additional rainfall sheets over the top of the gutter instead of flowing through it. During the intense spring downpours common in Mid-Missouri, foam guards frequently cause overflow rather than prevent it.
How long do micro-mesh gutter guards last?
Quality micro-mesh systems with stainless steel screens typically last 25-30 years. Most manufacturers back this with a warranty covering the same period. The stainless steel mesh resists corrosion, UV degradation, and freeze-thaw damage that destroys other guard types.
Can I install micro-mesh gutter guards myself?
Some products are designed for DIY installation, though most homeowners benefit from professional installation to ensure proper pitch, secure mounting, and correct overlap at joints. Improper installation can create gaps where debris enters or sections where water overshoots the gutter.
Do gutter guards eliminate the need for gutter cleaning?
No gutter guard eliminates maintenance entirely. Mesh guards reduce cleaning frequency from twice a year to roughly once every 2-3 years. Foam guards may actually increase maintenance because the foam itself needs periodic removal, rinsing, and eventual replacement.
Are foam gutter guards bad for my gutters?
They can be. Saturated foam adds weight to your gutter channel, potentially causing sag over time. Trapped moisture accelerates corrosion on aluminum gutters. And decomposing foam leaves residue that’s difficult to clean without removing the guards entirely.
What type of gutter guard works best in Missouri?
For Mid-Missouri’s combination of heavy spring rain, humid summers, and freeze-thaw winters, micro-mesh guards with stainless steel screens deliver the best long-term performance. They handle high water volume without clogging, resist mold growth, and survive decades of temperature swings. Call us at (573) 424-9008 to discuss options for your home.
Ready to Get Started?
We’ve been protecting Mid-Missouri homes for over 25 years with premium exterior solutions — including gutter installation and gutter guard systems throughout Columbia, Jefferson City, and the surrounding area. As GAF Master Elite, OC Platinum Preferred, and James Hardie Elite Preferred contractors, we bring certified expertise to every project.
Snow Melt, Refreezing, and Hidden Leaks: How Winter Moisture Gets Into Roof Systems
Key Takeaways
Mid-Missouri’s freeze-thaw cycles cause snow to melt during warm days, then refreeze at the colder eaves overnight. This creates ice dams that push water back up under shingles, leading to “mystery” winter leaks that appear without any rain.
Many winter leaks aren’t caused by faulty roof installations—they stem from ice dam formation, attic condensation, and poor insulation or ventilation that allow hidden moisture into the roof system from below.
Watch for warning signs between January and March: water stains on ceilings or exterior walls, wet insulation in the attic, large icicles at the eaves, and musty odors in the attic space. Early action prevents expensive structural repairs.
CoMo Premium Exteriors is Mid-Missouri’s only triple-certified roofing and exterior contractor (GAF Master Elite, Owens Corning Platinum, James Hardie Elite), equipped to inspect, diagnose, and permanently fix winter moisture problems—not just patch interior damage.
Schedule a free winter roof and attic inspection anywhere in Columbia, Jefferson City, Boonville, Moberly, or Lake of the Ozarks by calling (573) 424-9008.
How Snow Melt and Refreezing Create Hidden Winter Leaks
It’s mid-February in Columbia, and a winter storm just dropped six inches of snow on your roof. Two days later, the sun comes out and temperatures climb into the low 40s. You’re feeling good—the snow is melting, the worst is over. Then that night, the mercury plunges back below freezing.
The next morning, you notice a small brown ring on your living room ceiling. There’s no rain in the forecast. No pipes above that spot. So where’s the water coming from?
This scenario plays out in homes across Mid-Missouri every winter. The culprit isn’t a sudden roof failure or a burst pipe—it’s the melt-refreeze cycle that our region’s variable weather creates.
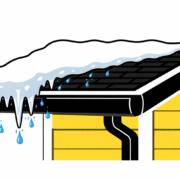
Here’s how it works: During the day, the sun and heat escaping from your attic warm the upper sections of your roof. Snow in these warmer zones begins to melt, and that water flows downhill toward the eaves and gutters. But those lower sections of the roof—especially the overhangs that extend beyond your heated living space—stay colder. When temperatures drop at night, that flowing water refreezes, building a ridge of ice along the roof edge.
This ice ridge, commonly called an ice dam, acts like a small dam on a river. As more snow melts and flows down, it has nowhere to go. Water pools behind the ice barrier and eventually finds its way under shingles, over underlayment, and into nail holes. From there, it can drip into your attic, run along wall cavities, or seep into light fixtures—sometimes showing up as a ceiling stain days after the snow event.
In central and northern Missouri—from Columbia to Moberly to the Lake of the Ozarks—this cycle can repeat dozens of times between December and early March. According to research from the Minnesota Department of Transportation (which shares similar winter patterns with our region), an average of 86 freeze-thaw cycles occur at shallow depths from October to April over a 10-year period. That’s 86 opportunities for water to infiltrate small cracks, expand by approximately 9% when it freezes, and gradually widen those entry points.
Many homeowners first notice issues as small ceiling stains or damp window trim, often assuming a plumbing leak. But when there’s no plumbing above that spot and the weather has been alternating between thaws and freezes, the real culprit is usually snow melt refreezing at the roof edge.
Ice Dams: The Visible Sign of an Invisible Moisture Problem
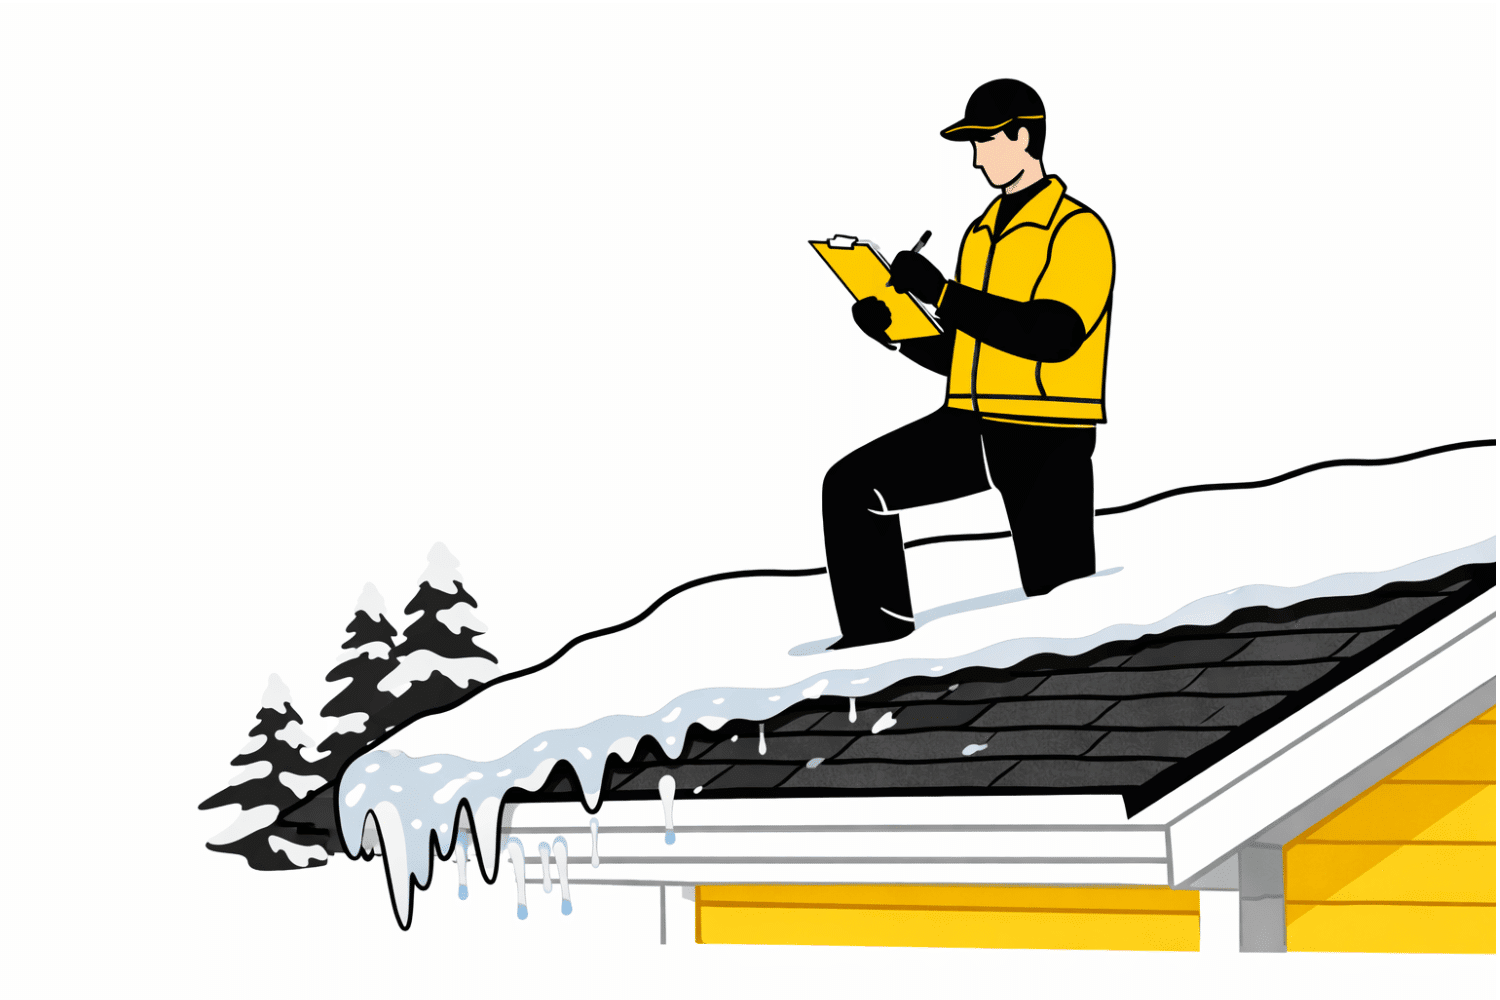
An ice dam is a solid ridge of ice that forms along the eaves and gutters, blocking normal snowmelt from draining off the roof. While the ice itself is visible from the ground, the moisture damage it causes is often hidden inside your roof system for weeks or months.
How Ice Dams Form
Ice dams form when temperatures across your roof surface are uneven. Here’s the typical sequence:
Heat escaping from your attic warms the upper portion of the roof above 32°F
Snow on this warmer section begins to melt, even when outdoor temperatures are below freezing
The meltwater flows down toward the eaves, which are colder because they extend beyond the heated living space
At the cold eaves, the water refreezes, building up a layer of ice
As more melt flows down and refreezes, the ice dam grows thicker
Eventually, liquid water pools behind the dam with nowhere to drain
The University of Minnesota Extension explains that for ice dams to develop, sustained average temperatures must keep lower roof areas below freezing while upper areas thaw snow. The dam essentially self-limits to these cold zones—but it traps water that exploits every crack in your roof’s exterior covering.
Visible Signs of Ice Dam Problems
What to Look For
Where to Check
What It Indicates
Thick icicles hanging from gutters
Roof edges, especially north-facing
Active ice dam with melt-refreeze occurring
Solid band of ice at roof edge
Along eaves above exterior walls
Significant blockage of normal drainage
Ice-filled or sagging gutters
All gutter runs
Debris may be trapping water; drainage compromised
Ice in roof valleys
Where two roof slopes meet
Vulnerable area for water backup
These signs are especially common on north-facing roof slopes in Columbia and Jefferson City, where the sun provides less warming and ice persists longer.
Hidden Effects You Can’t See from the Ground
The real damage from ice dams happens out of sight:
Water backing up beneath shingles saturates the roof deck
Wet insulation loses its effectiveness and can take weeks to dry
Moisture seeps into exterior wall cavities
Weeks later, you may notice bubbling paint, cracked drywall, or mold growth
Here’s an important point many homeowners miss: a good-quality, correctly installed roof can still experience ice dams if the attic isn’t properly insulated and ventilated. The “roof system” includes the attic, ventilation, and insulation—not just shingles. Addressing only the visible roof surface while ignoring what’s underneath often leads to recurring problems.
Attic Heat, Condensation, and Uneven Roof Temperatures
Ice dams and winter moisture issues almost always tie back to what’s happening under the roof deck—especially in the attic space above living areas and garages. Understanding this connection is key to solving the problem permanently.
How Warm Air Escapes Into Your Attic
Warm interior air from your furnace, showers, and cooking constantly tries to rise and escape through the building envelope. Common escape routes include:
Gaps around recessed lights (can lights)
Unsealed attic hatches and pull-down stairs
Plumbing stacks and electrical penetrations
Gaps at the top plates where interior walls meet the attic floor
HVAC ductwork running through unconditioned attic space
When this warm air reaches the attic, it does two things that cause winter moisture problems:
It melts snow on the upper roof – This creates the temperature differential that leads to ice dam formation
It carries moist air that condenses on cold surfaces – During January cold snaps, moisture-laden air hitting the cold underside of roof sheathing forms frost or dripping water
This condensation can mimic a roof leak in surprising ways: wet sheathing, dripping nails, damp insulation, and frost buildup that melts on the first warm day. Homeowners often assume their roof is leaking when the moisture is actually coming from inside the house.
Specific Contributors in Mid-Missouri Homes
In our 25+ years serving Central Missouri, we’ve identified common issues in local homes:
Bathroom fans vented into the attic – Instead of exhausting moist air outdoors, these fans dump humidity directly into the attic space where it freezes and later melts
Older masonry chimneys – The mass of brick retains heat and warms nearby framing, creating localized hot spots that melt snow unevenly
Uninsulated knee walls – Common in 1½-story homes, these walls allow significant heat loss into attic areas behind them
Cathedral ceilings with inadequate air channels – Without proper venting between insulation and roof sheathing, these areas trap heat
Common Indoor Heat Sources That Trigger Winter Moisture Problems
A thorough winter moisture inspection needs to look beyond shingles and flashing. Here are the interior sources we check:
Heat/Moisture Source
How It Affects the Roof System
Recessed (can) lights
Create hot spots that melt snow directly above; gaps allow warm air into attic
Unsealed attic hatches
Major air leakage pathway; warm air flows directly into attic space
Leaky HVAC ductwork
Heats the attic, melts snow above; can also add humidity if connected to humidifier
Whole-house fans
If not sealed in winter, allow significant heat loss to attic
Bath/kitchen exhaust vents terminating in attic
Add large amounts of humidity; condensation forms on cold sheathing
When we perform a winter moisture assessment, checking these penetration points is just as important as examining the roof surface from your driveways or walking the roof itself.
Where Winter Moisture Sneaks In: Typical Leak Paths in Roof Systems
Winter moisture doesn’t always come straight through obvious holes. Water often travels along framing members, nails, and joints, so the leak may show up far from the actual entry point. This is why dripping water in your living room doesn’t necessarily mean the problem is directly above.
Common Vulnerable Areas
Certain locations on any roof are more susceptible to winter moisture infiltration:
Roof valleys – Where two roof slopes meet, snow accumulates deeper and ice dams form easily
Chimney surroundings – Counter-flashing and step flashing joints are common failure points
Skylights – The intersection of glass, frame, and roofing creates multiple potential leak paths
Plumbing vent boots – Rubber and plastic boots crack in freeze-thaw cycles
Sidewalls – Where a lower roof meets second-story siding, step flashing must be correctly integrated
Low-slope sections – Porches, additions, and dormers with shallow pitches hold snow longer
During mid-winter thaws, backed-up snowmelt can push water up under shingles in valleys, around step flashing near second-story walls, and beneath metal counter-flashing at chimneys. The water doesn’t need a large opening—capillary action can draw moisture into surprisingly small gaps.
In homes built before about 2005 in Mid-Missouri, we commonly find limited or no ice-and-water shield membrane at the eaves and valleys. This self-adhering underlayment wasn’t required by code in many areas until more recently, leaving older roofs more vulnerable to wind-driven snow and ice dam backup.
A proper inspection by our team includes not only the top side of the roof, but also attic-side evidence: darkened sheathing, rusty nail heads, wet insulation, and staining around penetration points. Sometimes the attic tells us more about moisture problems than the shingles do.
How Hidden Leaks Show Up Inside the Home
Interior warning signs often appear in January and February, though they may not be recognized as roof-related problems at first:
Common indicators:
Faint yellow-brown rings on ceilings
Sagging or cracked drywall at exterior corners
Swollen or warped window trim
Peeling paint near outside walls
Bubbling wallpaper
Less obvious signs:
Musty smell in the attic
Higher-than-normal winter humidity on main floors
Frost on exposed nail tips in the attic
Ice forming on the underside of roof sheathing during extreme cold
Moisture can flow along the back of drywall or run down top plates, so the visible stain may be several feet away from where water entered the roof system. This makes diagnosis tricky without an attic inspection.
We recommend that homeowners in Columbia, Jefferson City, and surrounding areas do a quick attic check with a flashlight after major snowstorms followed by a warm-up. Look for dark spots on sheathing, damp insulation, or frost patterns—these are early warnings that moisture is getting where it shouldn’t be.
Long-Term Damage from Winter Roof Moisture (and Why Speed Matters)
One ice dam event or condensation episode may seem minor—a small stain, a little dampness. But repeated winter moisture can create serious long-term issues inside the roof system that become expensive to repair.
Structural Risks
When roof decking and framing stay wet through multiple freeze-thaw cycles, deterioration begins:
Rotting roof decking – Plywood and OSB sheathing absorb moisture and eventually delaminate or rot
Soft or spongy spots – Walking on the roof reveals areas where decking has weakened
Weakened rafters or trusses – Chronic dampness leads to wood decay in structural members
Corroded fasteners – Nails and screws rust, losing their holding power
Interior Risks
The damage doesn’t stop at the roof structure:
Mold growth – In attic insulation and wall cavities, mold can develop within 24-48 hours of sustained moisture. Studies suggest 60-70% of untreated attic leaks develop mold within months.
Deteriorating drywall – Repeated wetting weakens drywall, leading to sagging ceilings and crumbling walls
Ruined insulation – Wet insulation compresses and loses R-value, reducing energy efficiency
Increased heating costs – Damaged insulation means your furnace works harder, and you’ll see this reflected in higher energy costs throughout winter
Health Implications
Chronic attic moisture creates health risks for your household:
Mold and mildew can aggravate allergies and respiratory conditions
Spores spread through HVAC systems into living spaces
Winter homes with limited fresh air exchange concentrate these contaminants
Children, elderly residents, and those with asthma face heightened risk
Cost Implications
Here’s the financial reality: repairing minor insulation and flashing issues after the first signs of trouble is far less expensive than replacing sheathing, insulation, and interior finishes after several untreated seasons. What might be a $500-1,500 repair in year one can become a $10,000+ restoration project if moisture damage compounds over three or four winters.
How Winter Moisture Shortens Roof Lifespan
Repeated wetting and refreezing of the roof deck accelerates aging in several ways:
Sheathing warps, causing shingles to lose proper contact and adhesion
Freeze-thaw cycles loosen shingle fasteners
Ice pressing against materials creates new gaps and entry points
Granule loss accelerates on repeatedly frozen shingles
A well-installed roof with good attic ventilation and insulation can last 25-30 years in Mid-Missouri’s climate. A similar roof plagued by chronic moisture issues may show major problems in just 10-15 years.
An important note on warranties: Manufacturer warranties from GAF, Owens Corning, and other major brands assume proper ventilation and underlayment installation. Chronic ice damming and poor attic conditions can compromise warranty coverage, leaving homeowners responsible for repairs that might otherwise be covered.
Preventing Ice Dams, Condensation, and Winter Leaks in Mid-Missouri
Effective winter moisture control isn’t about any single fix—it’s about the whole system working together: roof covering, underlayment, ventilation, insulation, and air sealing.
Short-Term Emergency Measures
When you’re dealing with an active ice dam or leak, here are immediate steps:
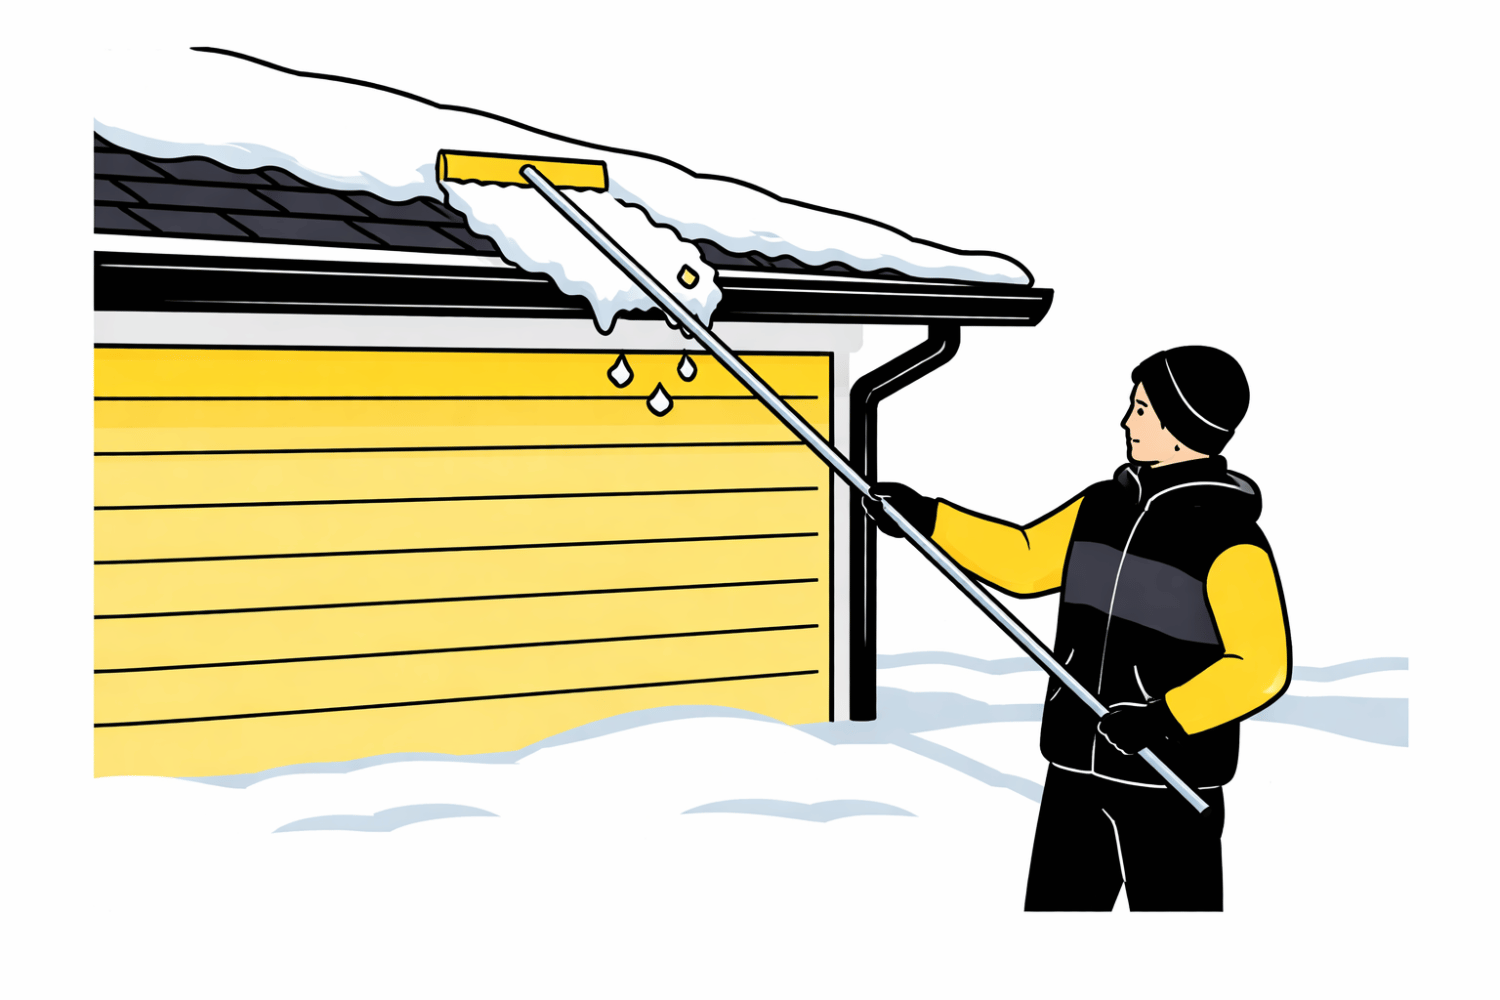
Remove snow from the roof edge – A roof rake (used from the ground) can clear the lower 3-4 feet of roof, reducing melt feeding the ice dam
Create drainage channels – In severe cases, professionals can carefully melt channels through ice dams to allow trapped water to escape
Control interior moisture sources – Run bathroom fans longer, reduce humidifier settings, and ensure dryer vents are clear
However, these are emergency measures, not long-term fixes. Roof raking every storm isn’t sustainable, and aggressive ice removal risks damaging shingles and gutters.
Long-Term Solutions
Based on hundreds of winter moisture cases across Mid-Missouri, here’s what we commonly recommend:
Upgrade attic insulation – Bringing insulation to R-49 (the current Mid-Missouri code minimum for attics) significantly reduces heat loss through the ceiling
Improve attic ventilation – Balanced intake and exhaust ventilation keeps attic temperatures closer to outdoor conditions
Air-seal ceiling penetrations – Sealing gaps around lights, plumbing, and wiring stops warm air leakage at the source
Install ice-and-water shield during reroofing – This self-adhering membrane at eaves, valleys, and penetrations provides a waterproof backup
Solutions should be tailored to each home’s design. Ranch homes in Columbia behave differently than two-story homes in Jefferson City, and lake homes with complex roofs at Lake of the Ozarks present their own challenges. There’s no one-size-fits-all approach.
The good news: properly addressing winter moisture issues often improves comfort and reduces energy costs year-round, not just during snow season.
Ventilation and Insulation Best Practices for Our Climate
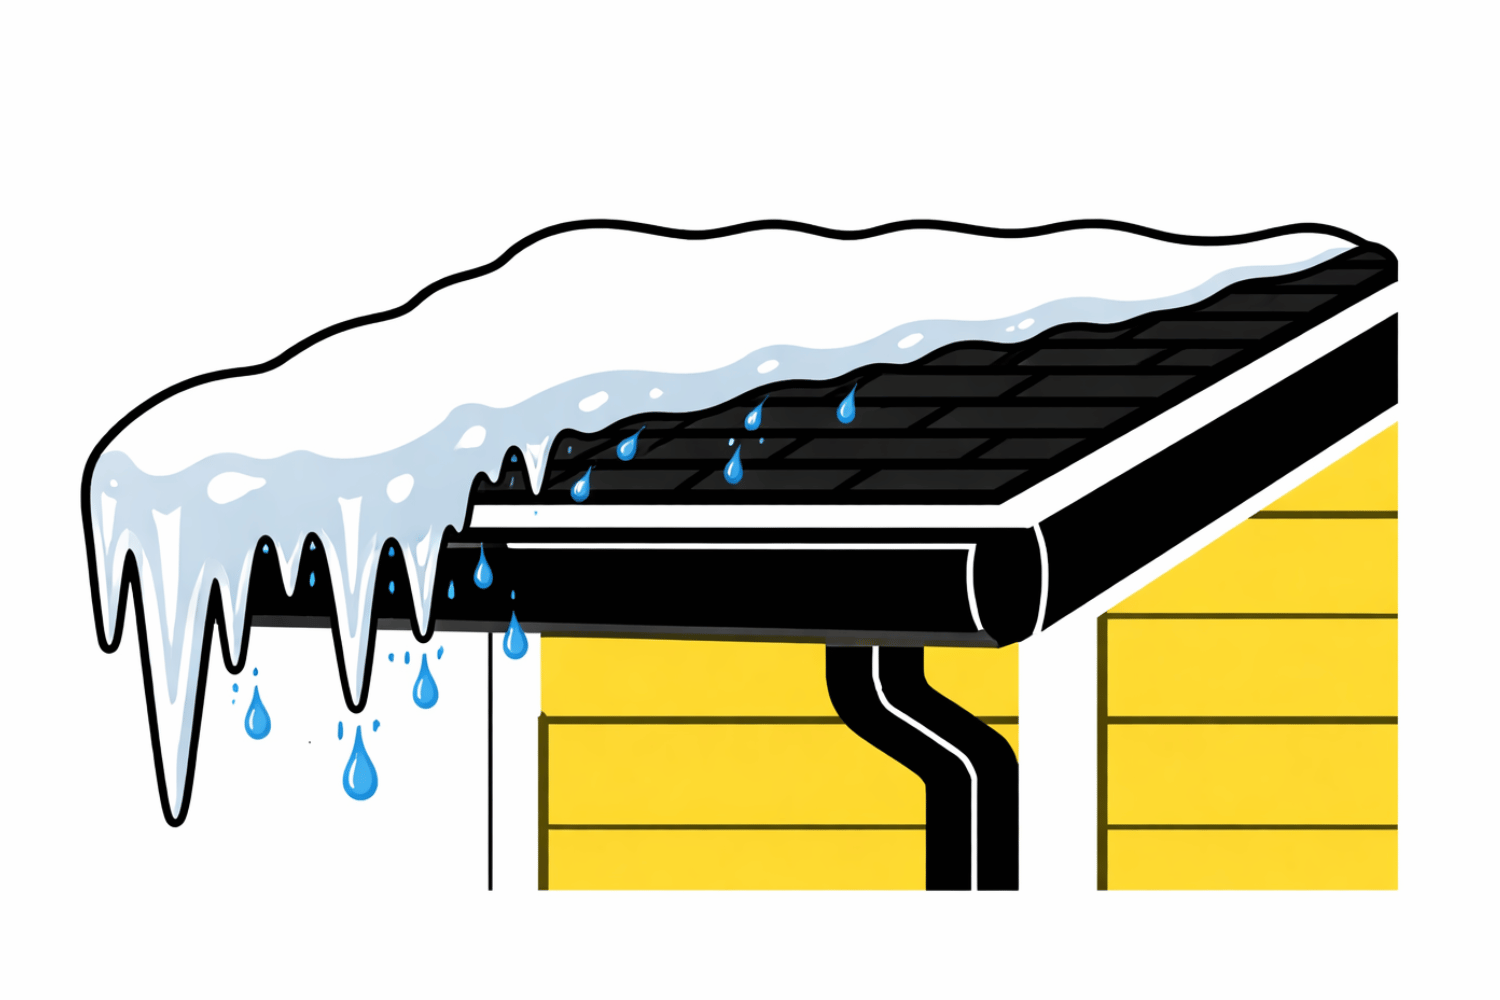
A balanced attic ventilation system works by creating airflow from intake to exhaust:
Intake vents at the soffits or eaves allow cool outside air to enter
Exhaust vents at the ridge or high on the roof let warm air escape
This circulation keeps attic temperatures more uniform, reducing the temperature differential that causes ice dams
For central Missouri homes, we typically follow current building code ratios for net free ventilation area—though many older homes fall short of these standards. The concept is straightforward: prevent your attic from becoming significantly warmer than the outdoors during winter.
Good attic insulation should:
Provide even coverage across the entire attic floor
Maintain proper depth (not compressed or settled)
Include baffles at the eaves to protect soffit vents from being blocked
Remain dry and fluffy, not wet or compacted
If insulation is damaged, wet, or missing in areas, it needs to be corrected before other improvements will be fully effective.
A word of caution: We don’t recommend DIY-ing major ventilation changes in winter. Cutting new vents in freezing weather creates its own risks, and improper vent placement can actually worsen moisture problems. Schedule an assessment with a certified roofing contractor who understands both manufacturer specifications and local conditions.
Roofing Upgrades That Protect Against Winter Moisture
When we install or replace a roof, specific components help limit winter leaks:
Ice-and-water shield membranes – Self-adhering waterproof layer at eaves, valleys, and around penetrations
High-quality synthetic underlayment – Better water resistance and durability than traditional felt
Properly flashed chimneys and sidewalls – Correct integration of step flashing, counter-flashing, and kickout diverters
Correctly sized gutters and downspouts – Adequate capacity to handle snowmelt without backing up
We typically extend ice-and-water protection beyond the minimum code requirements in known trouble spots like low-slope eaves and long valleys. Mid-Missouri’s weather demands this extra margin.
Our triple-certified installation approach (GAF Master Elite, Owens Corning Platinum, James Hardie Elite for siding tie-ins) ensures these details are done to factory standards. This matters for winter performance because manufacturers have engineered their systems to work together—when installation shortcuts happen, winter is often when problems appear.
If your roof was installed before modern underlayment and flashing practices became standard in the 2000s-2010s, a proactive evaluation may prevent potential water damage before it starts.
How CoMo Premium Exteriors Diagnoses and Fixes Winter Roof Moisture Issues
As a local Mid-Missouri contractor, we’ve seen hundreds of winter leak scenarios across Columbia, Jefferson City, Boonville, Moberly, and the Lake of the Ozarks. After 25+ years, patterns repeat—and that experience helps us quickly identify what’s actually going on with your roof system.
Our Inspection Process
When you contact us about a winter moisture concern, here’s what to expect:
Exterior roof assessment – When conditions allow safe access, we inspect the roof surface for missing shingles, damaged flashing, ice dam evidence, and vulnerable areas
Attic inspection – We check for moisture evidence, frost patterns, ventilation adequacy, insulation levels, and air leakage points
Documentation – We photograph conditions and explain what we’re seeing in plain English
Diagnosis – We differentiate between true roof failures (missing shingles, failed flashing) and building-science issues (heat loss, condensation)
This last point is critical. Sometimes the solution is a flashing repair. Sometimes it’s adding insulation and sealing air leaks. And sometimes it’s both. We want you to invest money where it actually solves the problem, not just where it’s most visible.
Creating a Prioritized Plan
Based on our findings, we develop a plan that addresses:
Immediate leak control – If water is actively entering your home, we prioritize stopping it
Short-term stabilization – Temporary measures to maintain safe conditions through the rest of winter
Long-term fixes – Air sealing, ventilation upgrades, insulation improvements, and targeted roof repairs or full replacement if necessary
We also offer free estimates and can coordinate with insurance when winter moisture stems from storm-related damage. We help homeowners understand what is and isn’t typically covered, and we’re experienced in documenting damage for adjusters.
When to Call Us (and What to Expect)
Contact CoMo Premium Exteriors if you notice:
A new ceiling stain appearing after snow, especially without rain
Recurring winter leaks in the same area year after year
Heavy icicles and thick ice bands at the roof edge
Visible frost, dripping, or moisture in the attic
What happens after you call:
We schedule an on-site assessment at a time that works for you
We perform a thorough inspection of roof, attic, and relevant interior areas
We explain our findings in clear, straightforward language
We provide a written estimate with options (repair vs. long-term solution)
There’s no high-pressure sales pitch. Our goal is to educate you and let you decide when and how to move forward. Many of our customers appreciate having the information even if they’re not ready to act immediately.
Ready to get answers? Call us at (573) 424-9008 or request an inspection through our website. With more freeze-thaw cycles ahead this winter, acting before the next major snow or temperature swing helps prevent the situation from getting worse.
FAQs
Can an ice dam damage my roof even if I don’t see water inside the house?
Yes. Ice dams can soak roof decking and insulation without immediately causing interior stains. The moisture may saturate sheathing and insulation for weeks before it eventually shows up as sagging drywall, a musty attic odor, or mold on stored items.
If you see heavy icicles or thick ice at the eaves during January or February, we recommend scheduling a roof and attic inspection even if there’s no active leak yet. Early inspections often let us identify and fix minor issues—like localized underlayment or flashing problems—before they lead to major repairs.
Is it safe to remove ice dams myself with a shovel, hammer, or roof rake?
Using a roof rake from the ground to remove fresh snow is generally safe when done carefully. However, aggressive chipping at ice with hammers, shovels, or picks can easily break shingles, dent gutters, and damage fasteners—creating new leak points that show up during spring rains.
For severe ice dams, professional steam-based removal is safer than mechanical methods. But the real answer is prevention: proper insulation, ventilation, and air sealing address the root cause so you’re not managing an emergency situation every winter.
Will my homeowners insurance cover damage from ice dams or winter roof leaks?
Many policies in Missouri cover resulting interior water damage from sudden ice dam events—things like stained ceilings, damaged drywall, and ruined flooring. However, policies typically don’t cover the underlying cause, such as inadequate attic insulation, poor ventilation, or pre-existing roof wear.
Coverage varies significantly by policy and carrier. We recommend reviewing your policy or talking with your agent to confirm specifics. When appropriate, CoMo Premium Exteriors assists homeowners in documenting winter damage and communicating with adjusters so they understand what repairs are needed. We can help you file a claim correctly when winter damage qualifies.
When is the best time of year to fix winter moisture problems with my roof and attic?
We can perform emergency leak-control work any time, including during winter weather. However, major fixes—like full roof replacements, extensive ventilation modifications, or large insulation projects—are typically best scheduled for spring through fall when weather conditions allow for proper installation.
The key is to call as soon as you notice an issue. We can stabilize the situation, prevent further damage, and plan permanent solutions for the next available weather window. Waiting multiple seasons often compounds the damage, increasing both repair cost and disruption to your household.
How do I know if I need a full roof replacement or just targeted repairs and attic improvements?
The answer depends on several factors: the age of your roof, visible wear patterns (curling shingles, significant missing granules, exposed fasteners), and how widespread the moisture damage is to decking and underlayment.
We evaluate both the roof surface and the attic to determine whether strategic repairs plus insulation and ventilation improvements will solve the problem, or whether a full replacement is the more cost-effective long-term option. Sometimes a 15-year-old roof with localized ice dam damage needs only flashing work and attic upgrades. Other times, widespread sheathing damage makes replacement the smarter investment.
We share photos and clear explanations so you can see exactly what we see before making any decision. Our role is to give you the information—not to pressure you into a particular choice.
Woodpeckers and Vinyl Siding: Effective Solutions for Homeowners
Are woodpeckers and vinyl siding damaging your home’s siding? Vinyl siding offers a potential solution. This article explains why woodpeckers target homes, how vinyl siding helps, and what other strategies you can use to protect your house.
Key Takeaways
Vinyl siding is a durable and cost-effective option that deters woodpeckers, reducing maintenance costs and extending the lifespan of your home’s exterior.
Using visual and auditory deterrents, combined with protective barriers like netting, creates a comprehensive strategy to protect your home from woodpecker damage.
It’s crucial to address existing woodpecker damage promptly and consider upgrading to resilient siding materials for long-term protection against pests.
Woodpeckers and Vinyl Siding: Effective Solutions for Homeowners
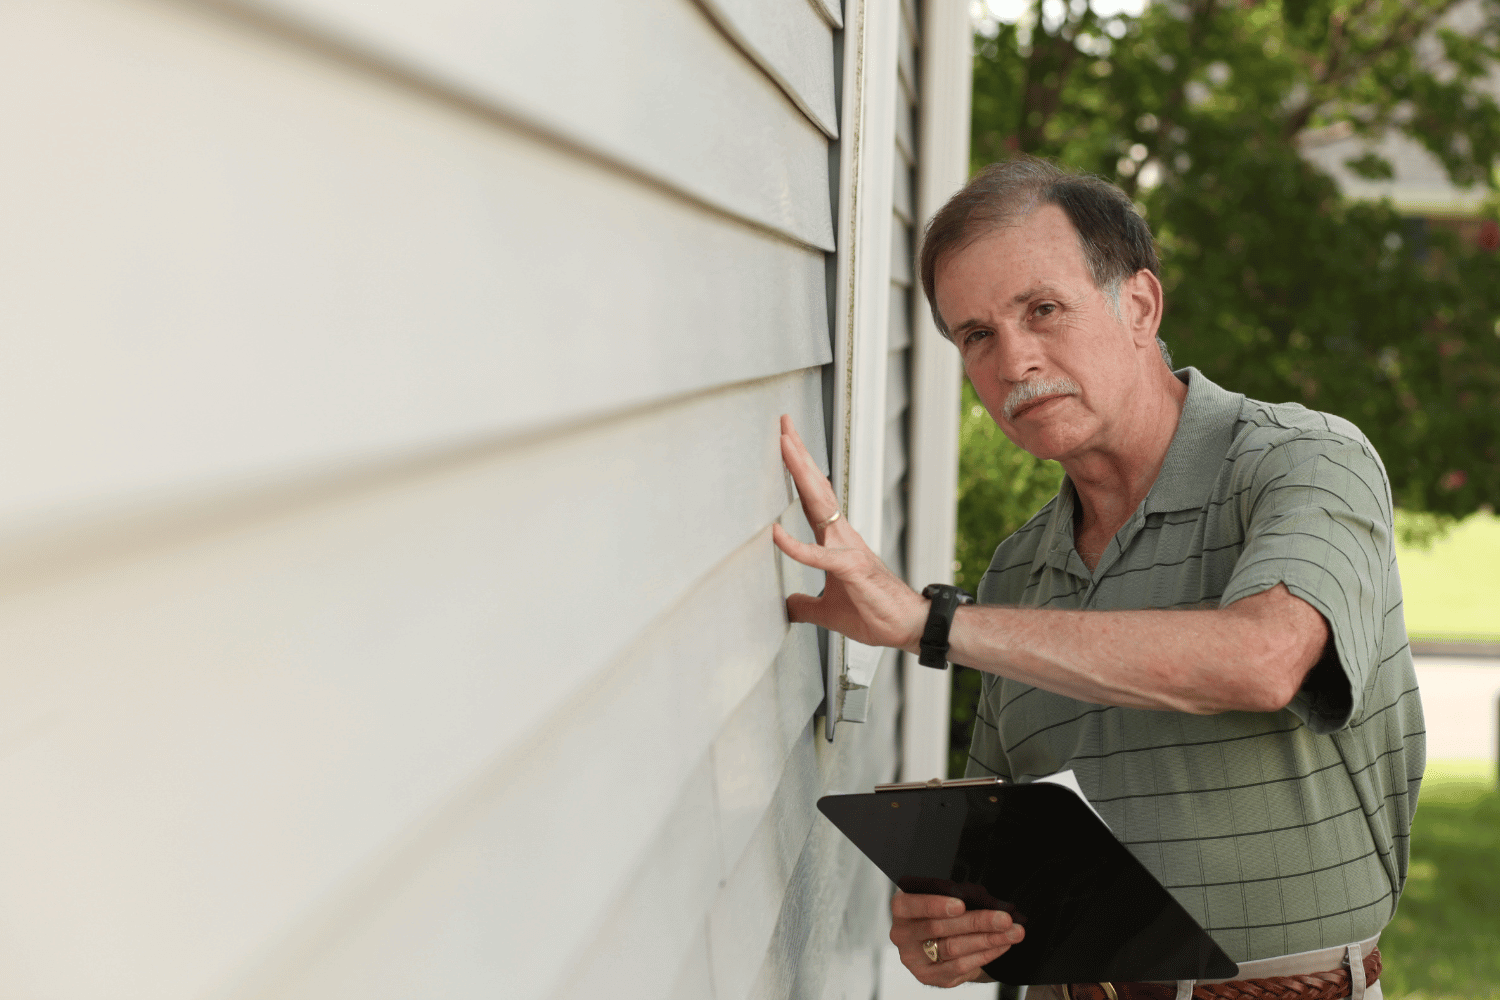
A homeowner inspecting vinyl siding for woodpecker damage.
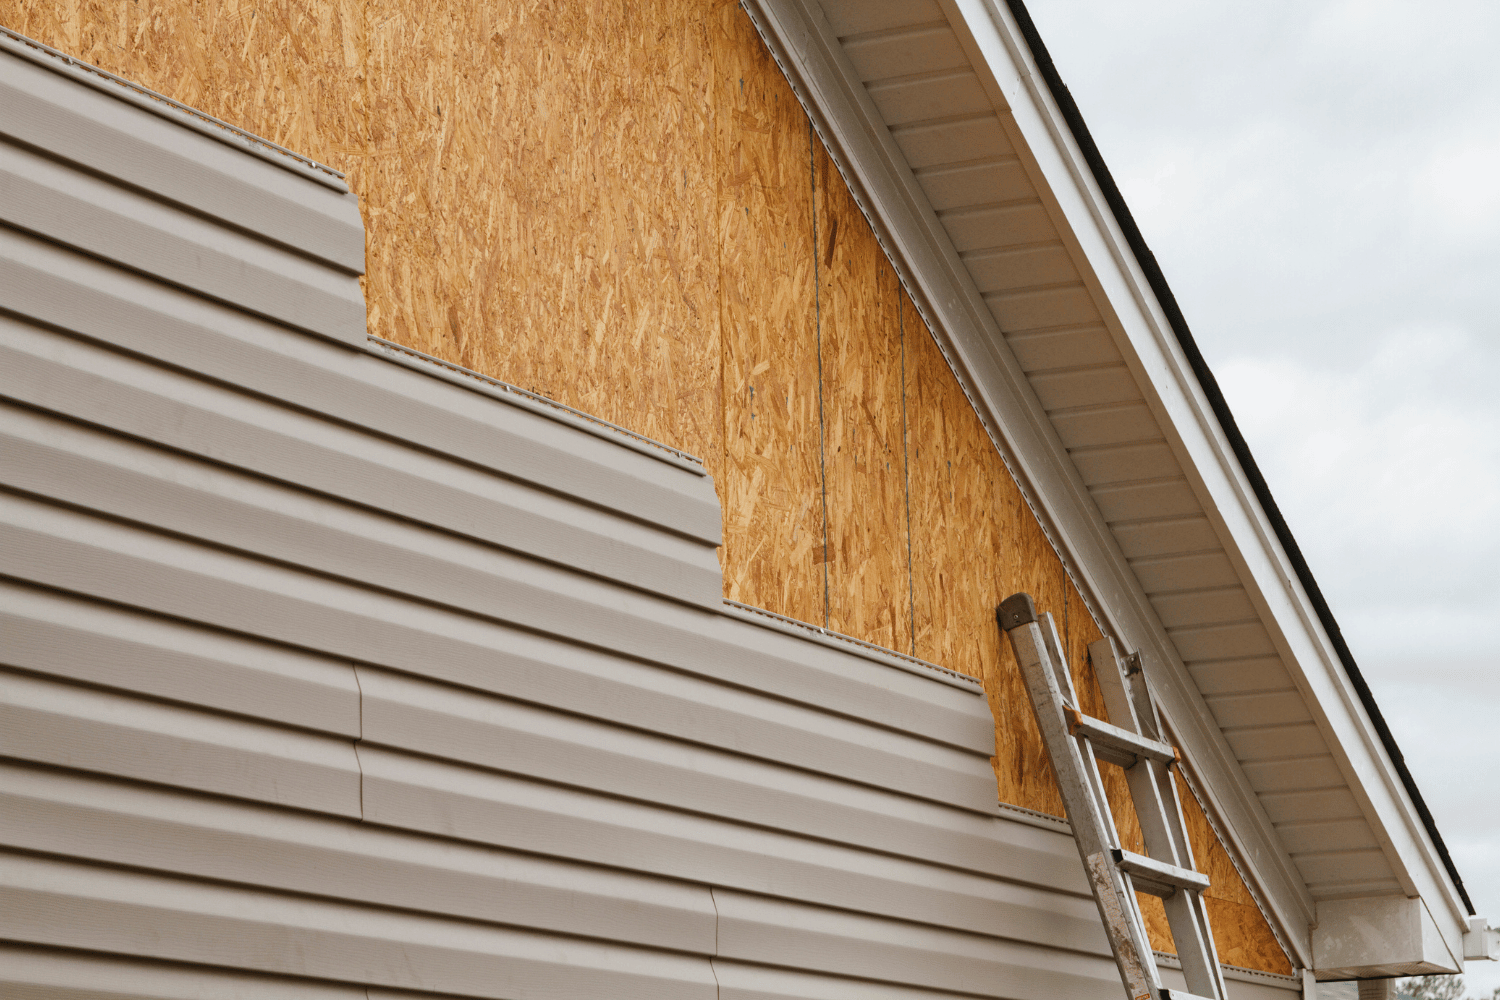
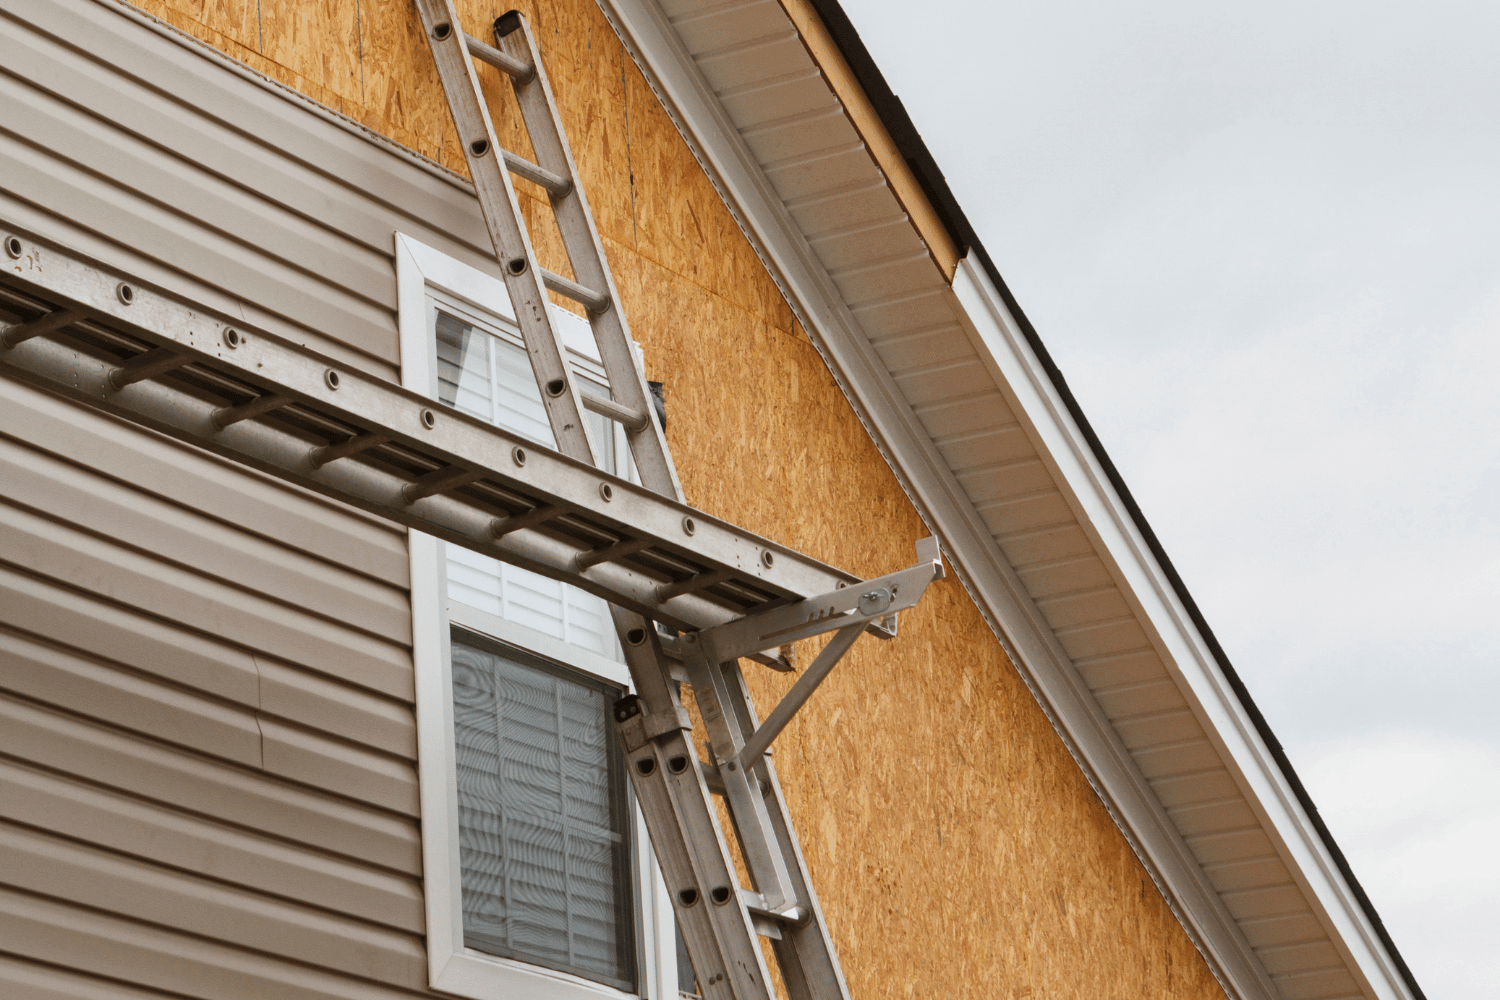
Vinyl siding is not just an aesthetic choice for your home; it’s also a practical one. Due to its hardness and resistance to insects, vinyl siding is less appealing to woodpeckers compared to other materials like wood or cedar shake siding. This means fewer holes and less damage, which translates to lower maintenance costs and a longer lifespan for your home’s exterior.
Steel siding is another durable option that effectively resists woodpecker damage. However, vinyl remains a popular choice due to its affordability and versatility. In contrast, cedar clapboards siding, especially when stained in earth tones, can attract woodpeckers and is easily damaged. Homes painted in white or pastel colors are less likely to be targeted by these birds.
When considering replacement siding, weigh the benefits of different materials. While vinyl siding offers excellent protection against woodpeckers, other options like steel or fiber cement siding may also be worth exploring, especially if you live in an area prone to woodpecker activity.
Introduction
Woodpeckers can cause significant damage to your home’s siding, often creating small holes that can lead to more extensive issues if left unaddressed. This damage typically begins in the spring when woodpeckers are storing food or looking for a mate. Visual deterrents, such as windsocks and reflective streamers, can be effective in scaring woodpeckers away from your home’s exterior.
These methods can create a comprehensive strategy to protect your home when combined with netting. Netting is another effective way to protect vulnerable areas of your house from woodpeckers. Preventing these birds from accessing your siding significantly reduces the risk of damage.
Visual deterrents and netting together create a robust defense system, keeping your home safe from woodpecker damage.
Understanding Woodpecker Behavior
Understanding woodpecker behavior is crucial for effective deterrence. Woodpeckers drill into siding primarily in search of insects living within the wood or to create nesting holes. This behavior is particularly common during the nesting season when they are looking to attract a mate or establish a nest cavity. Even woodpeckers that are not actively nesting may still engage in woodpeckers drumming on your siding as a way to mark their territory and communicate with other birds.
Certain types of woodpeckers, such as acorn woodpeckers, are known for storing food and creating multiple holes in the process. These birds can cause significant damage to cedar and other softwood siding, often creating large holes that penetrate through insulation. Understanding these behaviors can help you implement effective deterrent strategies and protect your home from further damage.
Shiny objects or reflective tape can prevent woodpeckers from targeting your siding. These deterrents work by disorienting the birds and making your home less attractive as a pecking site. Combining these with other strategies creates a comprehensive plan to keep woodpeckers at bay.
Why Vinyl Siding Deters Woodpeckers
Vinyl siding that effectively deters woodpeckers.
Vinyl siding is an excellent choice for homeowners looking to deter woodpeckers. The hardness and insect resistance of vinyl make it less appealing to these birds compared to softer materials like wood siding. Woodpeckers are less likely to drill into materials that do not emit sounds mimicking insect activity, which is why vinyl siding is so effective in preventing woodpecker damage.
Another advantage of vinyl siding is its ability to stop woodpecker drumming and the loud noises associated with it. This can create a more peaceful environment for homeowners and reduce the risk of damage to your home’s exterior. In addition, vinyl siding’s durability means that it can withstand the elements and remain effective in deterring woodpeckers over the long term.
Vinyl siding not only helps deter woodpeckers but also provides a cost-effective and low-maintenance solution for your home. Choosing vinyl siding protects your home from woodpecker damage while enhancing its aesthetic appeal and overall value.
Benefits of Full Vinyl Siding Replacement
Benefits of full vinyl siding replacement illustrated.
Opting for full vinyl siding replacement offers numerous benefits for homeowners. Vinyl siding is a durable and affordable option that enhances your home’s aesthetic appeal, providing long-term protection and value. Made from high-quality PVC compounds, vinyl siding is recognized for its cost-effectiveness, making it a solid investment in home improvement.
Replacing vinyl siding, soffit, and fascia is recommended for effective deterrence against woodpeckers. This approach ensures that all weak points on your house are addressed, reducing the risk of woodpecker damage. New soffit and fascia that match your existing siding can create a cohesive look while providing comprehensive protection.
Eliminating potential weak points through full vinyl siding replacement helps maintain the integrity of your home’s exterior. This not only protects your home from woodpecker damage but also increases its overall value and curb appeal with new siding.
Potential Vulnerable Areas Even with Vinyl Siding
Even with vinyl siding, certain areas of your home may remain vulnerable to woodpecker damage. Wood fascia boards, for example, are still susceptible to damage from woodpeckers creating small clustered holes from drumming. Addressing these vulnerabilities ensures comprehensive protection for your home.
Installing protective barriers, such as bird netting or metal sheathing, can shield siding from damage. Covering affected areas with burlap or bird netting can prevent woodpeckers from accessing these spots and causing further damage. Additionally, promptly repairing or replacing rotting wood can make your property less appealing to woodpeckers.
The brittleness of vinyl siding during cold weather can lead to cracks, making it crucial to address these issues promptly. Sealing small openings and providing alternative food sources reduces the likelihood of woodpeckers targeting your home.
Additional Strategies to Deter Woodpeckers
Besides using vinyl siding, several other strategies can help deter woodpeckers. Visual deterrents like shiny objects, old CDs, or reflective tape can disorient woodpeckers and prevent them from targeting your siding. Streamers with reflective surfaces have also proven effective in deterring these birds.
Auditory deterrents, such as wind chimes, can serve as both visual and auditory deterrents to keep deterred woodpeckers away. Playing distress calls of woodpeckers may make them feel threatened and encourage them to leave. Regularly moving plastic owl decoys can help maintain their effectiveness as a deterrent.
Providing alternative food sources, like suet feeders, can redirect woodpeckers away from your home. Installing bird netting or metal sheathing can create a physical barrier to prevent woodpeckers from accessing vulnerable areas. Combining these strategies creates a comprehensive plan to deter woodpeckers and protect your home.
How to Handle Existing Woodpecker Damage
Address woodpecker damage promptly if your home has already sustained it. Very small holes caused by woodpeckers can be repaired using epoxy putty, which can then be sanded and repainted to match the existing siding. For larger holes that cannot be effectively repaired, replacing the siding might be necessary.
Addressing any underlying insect problems is crucial, as woodpeckers are attracted to areas where they can find food. Treating your home for pests can help prevent future woodpecker damage. Sealing existing holes with wood putty may also discourage further woodpecker activity.
Choosing durable siding options like fiber cement can provide long-term protection against woodpecker damage. By addressing both existing damage and underlying insect problems, you can effectively prevent future woodpecker damage to your home.
Choosing the Right Siding for Your Home
Various types of siding options for homeowners.
When selecting siding for your home, it’s essential to consider the pros and cons of different materials. Vinyl siding is typically the cheapest option and offers excellent protection against woodpeckers. Unlike wood or softer materials, vinyl does not provide an inviting environment for woodpeckers to nest.
James Hardie fiber cement siding is another strong choice for homeowners, offering superior resistance to harsh weather conditions and pests. This durable siding option can last 50 years or more, making it a long-lasting investment for your home. James Hardie siding benefits from proprietary ColorPlus® Technology, enhancing longevity and pest resistance.
Comparing different siding types helps you choose the best option for your home based on your specific needs and preferences. Whether you opt for vinyl, fiber cement, or wood siding, selecting the right material can help protect your home from woodpecker damage and enhance its overall value.
Why Hire CoMo Premium Exteriors for Your Siding Needs
Professional team from CoMo Premium Exteriors working on siding.
CoMo Premium Exteriors is a trusted choice for homeowners looking to install or replace siding. The company offers a 5-Year Craftsmanship Warranty, ensuring that any defects in workmanship are promptly addressed. This warranty provides homeowners with peace of mind, knowing that their investment is protected.
In addition to their warranty, CoMo Premium Exteriors offers flexible financing options, making their services more accessible to a wider range of customers. Their commitment to customer satisfaction is evident through their clear communication and exceptional service during the installation process. Customers have praised the company for their prompt service, excellent communication, and high-quality workmanship.
CoMo Premium Exteriors’ extensive experience includes assisting homeowners with insurance claims, particularly after storm damages. Their team is knowledgeable in local regulations and assists clients with obtaining necessary permits for remodeling projects. Choosing CoMo Premium Exteriors ensures your siding needs will be met with professionalism and expertise.
Summary
Protecting your home from woodpecker damage requires a combination of the right siding materials and effective deterrent strategies. Vinyl siding stands out as a top choice due to its hardness and insect resistance, making it less appealing to woodpeckers. Other materials like steel and fiber cement siding also offer strong protection against these persistent birds.
By understanding woodpecker behavior, implementing visual and auditory deterrents, and addressing any existing damage, you can safeguard your home from further issues. Choosing the right siding and working with a trusted provider like CoMo Premium Exteriors ensures that your home remains protected and maintains its aesthetic appeal.
Frequently Asked Questions
What is the best siding to put on a house?
The best siding for your house really hinges on your climate, budget, and style preferences. Vinyl is a popular choice for its low maintenance, while wood and fiber cement can offer a more traditional look.
Which house siding is the cheapest?
Vinyl siding is usually the most budget-friendly choice for house siding. If you’re looking to save money, it’s definitely worth considering!
What are the three types of siding?
The three types of siding you’ll commonly find are vinyl siding, fiber cement siding, and wood siding. Each offers unique benefits, so choose based on your needs and preferences!
What is the best type of exterior siding?
The best exterior siding really hinges on what you need—fiber cement is known for its durability, vinyl is great if you’re on a budget, and wood offers that beautiful natural look. So, think about your priorities to make the right choice!
What exterior siding lasts the longest?
Fiber cement siding and stone veneer are your best bets for longevity, with fiber cement potentially lasting over 50 years. If you want a durable choice, these materials are definitely worth considering!
Most Popular Roof Colors for Lake of the Ozarks Homes in 2026
Picking a roof color might seem like a small decision, but it shapes how your entire home looks from the street. At the Lake of the Ozarks, where lakefront views, wooded lots, and a mix of traditional and contemporary homes define the landscape, your roof color does double duty — it needs to look great and hold up against Missouri’s weather swings.
Here’s what homeowners across the Lake of the Ozarks area are choosing in 2026, and how to pick a color that works for your home, your climate, and your neighborhood. When you’re ready to move forward, CoMo Premium Exteriors offers professional roofing services at the Lake of the Ozarks backed by premier certifications from both Owens Corning and GAF.
Top Roof Shingle Colors Trending in 2026
Popular roof shingle colors trending in 2026 for Lake of the Ozarks homeowners.
Earth tones and cool neutrals continue to dominate, but Lake of the Ozarks homeowners are also embracing bolder choices that stand out against wooded backdrops and lake views.
Charcoal Black
Charcoal black shingles remain the most versatile option for a reason. They pair with nearly any siding color — white, gray, stone, even cedar — and give both modern builds and traditional lake homes a sharp, finished look. On the darker side of the spectrum, charcoal works especially well when you want the roof to frame the home without competing with landscaping or waterfront views.
Weathered Wood
Weathered wood shingles mimic aged timber and are a natural fit for the Lake of the Ozarks. Cabins, A-frames, and rustic retreats benefit from the warm, layered look that blends with the surrounding tree canopy. This color also hides minor wear and debris better than lighter tones — a practical advantage in wooded areas.
Heather Blend
Heather blend combines brown and green undertones for a dimensional, natural appearance. It’s a strong choice for homes with wood or stone accents, adding depth and character without looking too uniform. Heather blend has been gaining ground at the Lake as homeowners look for colors that age gracefully.
Deep Blue
Deep blue shingles are the bolder pick that’s been growing in popularity. Against the lake backdrop, a deep blue roof creates a cohesive, intentional look. This shade works best on homes with white, light gray, or cream siding, where the contrast is clean rather than busy.
Desert Tan
Desert tan shingles bring warm, inviting tones that pair well with beige, cream, and light brick exteriors. They also reflect more sunlight than darker options, which helps keep cooling costs down during Missouri’s humid summers. Desert tan is a reliable choice for homeowners who want a classic look that won’t go out of style.
How to Choose the Right Roof Color for Your Lake of the Ozarks Home
Matching roof color to your home’s style and surroundings matters as much as the color itself.
Color preference is personal, but a few practical factors should shape the final decision.
Match Your Home’s Siding
The simplest rule: warm siding pairs with warm roof tones, cool siding with cool tones. White siding works with almost anything — black, green, blue, or red shingles all create clean contrast. Gray siding looks best with darker shingles like charcoal or deep blue. Beige or tan siding pairs naturally with brown and weathered wood tones.
Consider Missouri’s Climate
Central Missouri summers push into the 90s regularly, while winters can drop below freezing. Lighter shingle colors reflect more solar heat, which helps reduce cooling costs in summer. Darker colors absorb heat, which can be a modest advantage in winter but may increase attic temperatures in July and August. For Lake of the Ozarks homes, a mid-range color like heather blend or weathered wood balances both seasons well.
Your Home’s Architecture
Modern lakefront builds can pull off bolder colors like deep blue or black without looking out of place. Ranch homes and traditional colonials tend to look best in classic neutrals — grays, tans, and blends. When in doubt, drive your neighborhood and note which roof colors complement similar home styles.
Roof Color and Siding: Quick Pairing Guide
A few well-matched roof and siding combinations can make a dramatic difference in curb appeal.
Here are the most reliable combinations we see working well on homes across the Lake of the Ozarks:
White siding: charcoal black, deep blue, forest green, or classic red shingles
Gray siding: dark gray, black, or blue shingles for a modern, cohesive look
Beige or tan siding: weathered wood, desert tan, or brown blend shingles
Red brick: lighter grays or weathered wood soften the overall appearance
Blue siding: charcoal gray shingles create an elegant, polished combination
Cedar or wood siding: heather blend or weathered wood for a unified natural feel
Why Your Roof Color Choice Matters Beyond Looks
The right roof color affects curb appeal, energy costs, and how long your roof lasts.
Curb appeal and resale value: A roof that complements your home’s exterior makes a strong first impression. Real estate agents consistently note that coordinated exteriors — including the roof — help homes sell faster and closer to asking price.
Energy efficiency: Lighter shingles can measurably reduce attic temperatures. In a Lake of the Ozarks summer, that translates to lower AC bills. Darker shingles absorb more heat, which matters less when your attic is properly ventilated and insulated, but it’s still a factor worth considering.
Longevity: Color affects heat absorption, and sustained high temperatures can accelerate shingle aging. Mid-tone colors tend to offer the best balance of durability and aesthetics for Central Missouri’s four-season climate.
2026 Color Trends to Watch
Nature-inspired tones and bolder choices are defining 2026 roof color trends.
Nature-inspired tones: Forest green and moss-toned shingles are moving from niche to mainstream, especially on properties surrounded by trees. At the Lake, these colors blend with the environment in a way that makes the home feel intentional rather than intrusive.
Warmer grays: Pure cool gray is giving way to warmer gray blends that have slight brown or taupe undertones. These read as more natural and complement the stone and wood accents common on Lake of the Ozarks properties.
Matte and textured finishes: Manufacturers are releasing shingles with more dimensional textures and lower sheen. The result is a roof that looks more like natural slate or shake without the weight or maintenance requirements.
Get Expert Roofing Help at the Lake of the Ozarks
CoMo Premium Exteriors is the only Lake of the Ozarks roofing company with premier-level certifications from both Owens Corning and GAF. Whether you’re replacing an aging roof, choosing colors for a new build, or need a professional eye on color and material options, our team handles every step — from inspection to final cleanup.
We serve homeowners across Camden, Miller, and Morgan counties with roof inspections, repairs, full replacements, and storm damage restoration. Reach out for a free consultation and let us help you choose a roof color that looks great and performs for decades.
Frequently Asked Questions
What is the most popular roof color in 2026?
Charcoal black and weathered wood are the two most popular roof colors heading into 2026. Both are versatile enough to work with a wide range of siding colors and home styles, which is why they remain consistent top sellers at the Lake of the Ozarks and across Central Missouri.
Does roof color affect energy bills?
Yes. Lighter roof colors reflect more sunlight and can reduce attic temperatures by 20-40 degrees compared to dark shingles. In Missouri’s hot summers, that difference can lower cooling costs. However, proper attic insulation and ventilation have a larger overall impact than color alone.
What roof color is best for resale value?
Neutral colors — charcoal, gray, weathered wood, and desert tan — tend to appeal to the broadest range of buyers. Bold colors like deep blue can add curb appeal but may narrow your buyer pool if the shade doesn’t coordinate with the rest of the exterior.
Should I match my roof color to my neighbors?
You don’t need to match exactly, but your roof should feel cohesive within the neighborhood. If most homes on your street have neutral-toned roofs, a bright or unusual color could look out of place. Check any HOA guidelines as well — some Lake of the Ozarks developments have approved color palettes.
Can I see shingle colors on my actual home before committing?
Yes. Most manufacturers offer large sample boards, and tools from Owens Corning and GAF let you upload a photo of your home and preview different shingle colors digitally. CoMo Premium Exteriors can also bring samples to your property so you can see how colors look in your specific lighting and surroundings.
How long do shingle colors last before fading?
Premium architectural shingles from brands like Owens Corning and GAF are engineered with ceramic-coated granules that resist UV fading for 20-30 years. Lower-grade shingles may show noticeable fading within 10-15 years. The color you choose matters less than the quality of the shingle itself when it comes to long-term color retention.
Does Stone Veneer Increase Home Value? Discover the Benefits Today.
Does stone veneer increase home value? Absolutely. Installing stone veneer can not only elevate your home’s curb appeal but also offer one of the highest returns on investment in home improvement. This article dives into how stone veneer enhances visual interest, improves energy efficiency, and is a cost-effective upgrade.
Key Takeaways
Stone veneer offers a high return on investment, recouping up to 153% of installation costs while boosting curb appeal and market value.
Manufactured stone veneer provides an affordable, lightweight alternative to natural stone, offering significant savings on installation and long-term maintenance.
With increasing demand and popularity, investing in stone veneer not only enhances a home’s aesthetic but also positively impacts resale value in a competitive market.
How Stone Veneer Enhances Home Value
Cost-effective manufactured stone veneer applied to a home’s exterior.
Stone veneer is not just an aesthetic upgrade; it’s a strategic investment that can significantly enhance your property’s value. Stone veneer offers remarkable aesthetic and practical benefits, which directly correlate to increased home value. High-quality materials like stone veneer contribute to a home’s unique appearance, making it more appealing to potential buyers. In fact, homes with stone veneer can recoup up to 153% of their installation cost, making it one of the highest rates of return on investment in home improvement.
Stone veneer offers three main benefits: boosting curb appeal, creating visual interest, and increasing perceived value. Each factor enhances your home’s desirability and value. Here’s how stone veneer can transform your home.
Boosting Curb Appeal
The exterior of a home has a significant impact on how potential buyers perceive its value. Stone veneer can elevate a home’s curb appeal and provide a timeless architectural quality. A house with a stunning stone facade immediately stands out and captures attention. This enhanced curb appeal can translate into higher resale values, making your investment in stone veneer worthwhile.
Stone veneer can be applied to various parts of a home’s exterior, including entryways and columns, to create striking focal points with stone panels. These elements can transform your home’s entrance, making it more inviting and grandiose.
Stone veneer outshines materials like vinyl siding in aesthetic appeal, durability, and weather resistance. This makes it an attractive option for homeowners looking to boost their property’s curb appeal with minimal upkeep.
Creating Visual Interest
One of the most remarkable qualities of stone veneer is its ability to add visual interest to any home. Stone veneer can significantly elevate a home’s visual appeal and create a distinctive architectural style. This makes the property stand out in the neighborhood, attracting more attention from prospective buyers. The unique textures and patterns of stone veneer add depth and character, making your home visually interesting and appealing.
Stone veneer is often favored over vinyl and fiber cement siding for its aesthetic charm and durability. The rich, natural look of stone veneer is hard to replicate, making it a preferred choice for homeowners seeking elegance and sophistication. This increased visual interest can make a significant difference in your home’s appeal and market value.
Increasing Perceived Value
Stone veneer doesn’t just improve the look of your home; it also elevates the perceived value with stone by giving an impression of quality and craftsmanship. Stone veneer can enhance a home’s perceived quality, potentially stone veneer increase home its market value and appeal. When buyers see a home with stone veneer, they often associate it with durability, luxury, and high-end construction.
Stone veneer also improves energy efficiency with its insulation properties. An extra layer of insulation from stone veneer helps regulate indoor temperatures, reducing heating and cooling costs. This not only makes the home more comfortable to live in but also adds to its long-term value.
With homes featuring stone veneer recouping up to 153% of their installation cost, it’s clear that this investment pays off, positively impacting a home’s value.
Cost-Effectiveness of Manufactured Stone Veneer
A beautiful home featuring stone veneer that enhances its value and curb appeal.
Manufactured stone veneer offers a cost-effective alternative to natural stone for enhancing your home’s exterior. Manufactured stone veneer mimics the appearance of natural stone at a fraction of the price, making it a financially viable option for homeowners. This budget-friendly option provides an attractive solution for upgrading homes without breaking the bank, without compromising on aesthetic appeal or versatility.
The cost-effectiveness of manufactured stone veneer goes beyond the initial purchase price. The lighter weight of manufactured stone veneer reduces shipping costs and simplifies the installation process, leading to significant savings on labor and materials. Let’s explore these cost benefits in more detail.
Affordable Aesthetics
Homeowners can achieve a high-end look with manufactured stone veneer without the high-end price tag. More affordable than natural stone, manufactured stone veneer is a budget-friendly option for enhancing home exteriors. This option doesn’t skimp on visual appeal, offering the rich textures and colors of natural stone at a more accessible price.
Manufactured stone veneer can dramatically improve curb appeal and overall aesthetics, making it attractive to both homeowners and potential buyers. With minimal upkeep, manufactured stone veneer provides a low-maintenance way to achieve a sophisticated exterior.
Installation Savings
Manufactured stone veneer offers significant savings during installation. Its lightweight nature simplifies installation, lowering labor expenses. Easier to cut and handle than natural stone, manufactured stone veneer reduces installation time and effort.
These installation savings make manufactured stone veneer an excellent choice for home improvement projects. Updating your home’s exterior or adding a new feature with easy-to-install manufactured stone veneer leads to substantial cost savings, making it a smart investment.
Long-Term Savings
The cost benefits of manufactured stone veneer extend well beyond the initial installation. Resistant to mold and decay, stone veneer requires less upkeep than other materials. Regular inspections and occasional cleaning prolong the lifespan of stone veneer, ensuring it remains attractive and durable for years.
Manufactured stone veneer offers an impressive return on investment, with reports showing a 153% ROI. This high return on investment, combined with the low maintenance requirements, makes manufactured stone veneer a smart long-term choice for homeowners looking to enhance their property’s value while minimizing upkeep costs.
Practical Benefits of Adding Stone Veneer
A family enjoying their home with stone veneer, showcasing its practical benefits.
Beyond its aesthetic appeal and cost-effectiveness, stone veneer offers several practical benefits that make it an excellent choice for home improvement projects. Stone veneer offers enhanced durability, longevity, improved energy efficiency, and low maintenance, adding significant value to your home.
Let’s dive into the specific practical benefits of adding stone veneer, focusing on its durability, energy efficiency, and low maintenance requirements.
Durability and Longevity
Stone veneer endures severe weather conditions without compromising its appearance or structure. Its high resistance to moisture ensures that it remains intact over time, making it a reliable and long-lasting option for your home’s exterior. Manufacturing treatments enhance stone veneer’s resistance to fading and cracking, ensuring long-lasting beauty.
Stone veneer’s durability leads to fewer replacements and repairs, resulting in significant long-term savings. Warranties of up to 50 years reflect the durability and potential cost savings of manufactured stone veneer. This long lifespan makes stone veneer a practical and cost-effective choice for homeowners looking to invest in their home’s future.
Energy Efficiency
Stone veneer can significantly improve your home’s energy efficiency. Stone veneer enhances insulation, helping regulate indoor temperatures more effectively. This insulation layer reduces heating and cooling costs, making your home more energy-efficient and comfortable.
Improved energy efficiency offers practical benefits beyond cost savings. A more energy-efficient home is environmentally friendly, reducing your overall impact. Investing in stone veneer enhances your home’s appeal and contributes to a sustainable future.
Low Maintenance
Stone veneer’s minimal maintenance requirement makes it a convenient choice for many. Requiring minimal upkeep, stone veneer contributes to lower maintenance costs over its lifespan. Stone veneer materials resist staining, chipping, and fading, minimizing frequent repairs and replacements.
Stone veneer maintenance is easy, requiring only standard cleaning products. This low-maintenance feature makes stone veneer an attractive option for homeowners seeking to add value without extensive upkeep.
Long-term savings and easy upkeep make stone veneer a practical, cost-effective choice for home improvement.
Popular Uses of Stone Veneer in Home Improvement Projects
Exterior facade of a home featuring stone veneer, enhancing its overall appeal.
Stone veneer is versatile and can be used in various home improvement projects. From enhancing exterior facades to creating stunning interior accent walls, stone veneer adds elegance and sophistication to your home. Stone veneer’s lightweight nature and easy installation make it ideal for new builds and renovations.
Let’s explore some of the most popular uses of stone veneer in home improvement projects, focusing on exterior facades, accent walls, and entryways/columns.
Exterior Facades
Stone veneer enhances the exterior of a home, creating a more attractive and visually interesting facade. The aesthetic diversity of manufactured stone veneer allows for customization that mimics natural stone at a lower price. This makes it an excellent choice for homeowners looking to elevate their home’s curb appeal and overall aesthetic. Does stone veneer provide the same benefits as natural stone?
Stone veneer on exterior facades transforms your home’s look, making it stand out. Rich textures and colors of stone veneer add depth and character, creating a timeless exterior that appeals to buyers and enhances property value.
Accent Walls
Stone veneer can also be used to create stunning interior accent walls. Stone veneer on interior walls creates a sophisticated focal point, adding elegance and texture. Stone veneer on interior walls adds texture and sophistication, making the space feel luxurious and inviting.
Whether you’re looking to enhance your living room, dining room, or bedroom, stone veneer can transform an ordinary space into something extraordinary. The added texture and visual interest make your interior spaces more appealing and unique, adding value to your home.
Entryways and Columns
Integrating stone veneer into entryways can transform them into impressive statements that elevate the home’s entrance. Stone veneer on entryways creates impactful focal points, elevating overall design and making your home more inviting. Stone veneer on columns creates a dramatic look, adding elegance and sophistication to your home’s exterior.
Using stone veneer on entryways and columns not only enhances the visual appeal but also adds to the structural integrity and durability of these features. This combination of beauty and strength makes stone veneer an ideal choice for homeowners looking to make a lasting impact with their home improvement projects.
Market Trends and Demand for Stone Veneer
Graph illustrating the rising market trends and demand for stone veneer, indicating its impact on home value.
Demand for stone veneer has been steadily rising, reflecting its growing popularity among homeowners and real estate professionals. The U.S. stone veneer market was valued at approximately $675.7 million in 2023 and is projected to reach $974.2 million by 2032, reflecting a compound annual growth rate (CAGR) of 4.2%. This surge in demand is driven by the material’s aesthetic appeal, durability, and ability to enhance property value.
Manufactured stone veneer is a favored choice in home improvement projects, offering a cost-effective and visually appealing alternative to natural stone veneer. As market trends continue to evolve, the preference for stone veneer is expected to grow, making it a smart investment for homeowners looking to enhance their property’s curb appeal and resale value.
Rising Popularity
The increasing popularity of stone veneer among homebuyers and real estate professionals is notable. Stone veneer can significantly enhance a home’s resale value, as buyers often see it as a desirable upgrade. Growing demand indicates that stone veneer plays a crucial role in modern home improvement projects, offering both aesthetic and functional benefits.
Compared to materials like vinyl and fiber cement siding, stone veneer is increasingly in demand for its unique appearance and potential to raise property values. This trend highlights the importance of investing in materials that not only improve the look of a home but also offer long-term value and appeal to discerning buyers.
Impact on Resale Value
Stone veneer notably impacts home resale value. Recent evaluations show stone veneer outperforms other cladding materials, including vinyl and fiber-cement siding, in resale value. Adding stone veneer can significantly enhance a home’s resale value, making it a compelling choice for sellers.
Improving curb appeal and perceived quality, stone veneer attracts buyers and increases property market value. Stone veneer’s long-term value and return on investment make it a smart choice for homeowners looking to maximize property worth.
Comparative Analysis
Compared to traditional materials like vinyl and fiber cement siding, stone veneer continues to grow in demand, appealing to buyers seeking unique, high-quality exterior options. The increasing popularity of stone veneer among homebuyers suggests a shift towards more aesthetically appealing materials.
Adding stone veneer can positively influence resale value, positioning properties favorably in the competitive real estate market. As real estate demands evolve, the trend towards stone veneer is likely to continue, driven by homeowners’ desire for distinct, durable exterior finishes.
Summary
Stone veneer offers a multitude of benefits that can significantly enhance the value and appeal of your home. From boosting curb appeal and creating visual interest to increasing perceived quality and offering practical advantages like durability and energy efficiency, stone veneer is a versatile and cost-effective choice for any home improvement project.
As market trends continue to favor stone veneer, its popularity and demand are expected to grow, making it a smart investment for homeowners looking to enhance their property’s value. By choosing stone veneer, you not only improve the look of your home but also ensure long-term value and appeal. Consider incorporating stone veneer into your next home improvement project and experience the transformative impact it can have on your home.
Frequently Asked Questions
How does stone veneer boost a home’s curb appeal?
Stone veneer instantly elevates your home’s exterior, providing a timeless look that captivates onlookers and enhances curb appeal. Investing in this stylish upgrade can truly transform your property’s first impression!
Is manufactured stone veneer more cost-effective than natural stone?
Absolutely! Manufactured stone veneer offers the beauty of natural stone but at a fraction of the cost, making it a smart choice for budget-conscious homeowners.
What are the practical benefits of adding stone veneer to a home?
Adding stone veneer to your home not only boosts its durability and energy efficiency but also reduces maintenance efforts. It’s a smart investment that enhances both the aesthetic appeal and functionality of your space!
How does stone veneer impact the resale value of a home?
Stone veneer can greatly boost your home’s resale value by enhancing its curb appeal and perceived quality, making it an attractive choice for potential buyers. Investing in stone veneer is a smart move for those looking to maximize their return when selling.
Why is stone veneer becoming more popular in home improvement projects?
Stone veneer is increasingly popular because it offers a stunning aesthetic, exceptional durability, and can significantly enhance your property value. Embrace this stylish option to elevate your home’s appeal!
Board and Batten vs Lap Siding: Pros & Cons for Columbia, MO Homeowners
Board and batten and lap siding are the two most popular siding profiles we install across Central Missouri. Each has strengths, and the right choice depends on your home’s architecture, your budget, and how you want the finished exterior to look. At CoMo Premium Exteriors, we work with both styles daily in Columbia, Jefferson City, and the Lake of the Ozarks area, so here is an honest, side-by-side breakdown.
What Is Board and Batten Siding?
Board and batten siding uses alternating wide vertical boards and narrow strips (battens) that cover the seams between them. The design originated on barns and farmhouses nearly 200 years ago, and has seen renewed interest in modern residential architecture. The vertical lines create a tall appearance that works particularly well on gable ends, entryways, and accent sections.
Today’s board and batten comes in several materials:
Wood: Traditional cedar or pine. Beautiful and authentic, but requires painting or staining every 3 to 7 years in our Mid-Missouri climate.
Fiber cement:James Hardie is the most common brand we install. Extremely durable, rot-proof, and low maintenance.
Vinyl: The most affordable option. Modern vinyl board and batten profiles have improved significantly in appearance and durability.
Engineered wood: Products like LP SmartSide offer real wood appearance with better moisture and insect resistance.
What Is Lap Siding?
Lap siding (also called clapboard or bevel siding) consists of horizontal boards installed so each row overlaps the one below it. This is the most common siding profile in the United States and has been used on American homes for centuries. The overlapping design naturally sheds water, making it a strong choice for moisture management.
Common lap siding styles include:
Traditional lap: Flat or tapered boards with a clean horizontal line
Dutch lap: Features a decorative notch at the top of each board, creating shadow lines
Shiplap: Boards fit together with a rabbet joint for a tighter, flatter appearance
Lap siding is available in the same material options as board and batten: wood, fiber cement, vinyl, and engineered wood. According to James Hardie, their HardiePlank lap siding is the most popular brand of siding in America, and it is our top recommendation for Mid-Missouri homes seeking the horizontal look.
Side-by-Side Comparison
Appearance and Curb Appeal
Board and batten makes homes look taller and adds a modern farmhouse or contemporary feel. You will see this style in Columbia neighborhoods like Thornbrook, The Highlands, and newer developments in Ashland and Hallsville. The vertical lines create bold shadow lines that photograph well and give the home distinctive character.
Lap siding gives a home a more traditional, grounded appearance. The horizontal lines visually widen the home and complement classic architectural styles like Cape Cod, Colonial, Ranch, and Craftsman — all common across Mid-Missouri. Lap siding is the safe, timeless choice that appeals to the broadest range of buyers if resale value is a consideration.
Cost Comparison in Central Missouri
Here is what each style typically costs installed in the Columbia and Jefferson City market:
Vinyl lap siding: $3 to $7 per square foot installed
Vinyl board and batten: $4 to $8 per square foot installed
Fiber cement lap siding: $8 to $13 per square foot installed
Fiber cement board and batten: $10 to $15 per square foot installed
Wood lap siding: $6 to $12 per square foot installed
Wood board and batten: $8 to $14 per square foot installed
For a typical 1,500-square-foot Columbia home with approximately 1,200 square feet of siding area, the total siding replacement cost ranges from $3,600 for basic vinyl lap to $18,000 for fiber cement board and batten.
Durability in Mid-Missouri Weather
Our climate is tough on siding. The National Weather Service confirms that Central Missouri experiences temperature swings from below zero to above 100 degrees, 40+ inches of annual rainfall, regular hail, and ice storms.
Lap siding’s advantage: The overlapping horizontal design naturally channels water downward and away from the wall. This gives it a natural edge in moisture management, which is critical in our humid climate. Fiber cement lap siding from James Hardie is rated to withstand sustained winds up to 150 mph.
Board and batten’s challenge: The vertical seams between boards can allow moisture to penetrate if the battens are not properly installed and sealed. Quality installation matters more with board and batten than with lap siding. When done right with fiber cement or properly maintained wood, board and batten performs well in our conditions.
Installation Complexity
Lap siding is faster and simpler to install. The single-piece overlapping design means a crew can cover more area per day. A full lap siding project on a typical Columbia home takes 3 to 7 days depending on material and complexity.
Board and batten takes longer because it requires two-piece construction — the boards go up first, then the battens. Alignment must be precise for both structural integrity and visual appeal. Expect 5 to 10 days for a full board and batten installation. The added labor contributes to the higher installed cost.
Maintenance Requirements
Maintenance needs depend more on material than on profile style:
Fiber cement (either profile): Minimal maintenance. Repaint every 15 to 20 years. No rot, no insects, no warping.
Vinyl (either profile): Almost zero maintenance. Occasional pressure washing. Replace cracked panels after hail damage.
Wood (either profile): High maintenance. Repaint or restain every 3 to 7 years. Inspect annually for rot, insect damage, and moisture infiltration.
Combining Board and Batten with Lap Siding
One of the most popular design trends in Mid-Missouri right now is combining both profiles on the same home. This mixed-profile approach creates visual depth and architectural interest. Common combinations we install include:
Board and batten on gable ends with lap siding on the main walls — the most popular combination in our market
Board and batten on the upper story with lap siding on the lower story — creates a clear visual break
Board and batten accent sections around entryways or bump-outs with lap siding elsewhere
When combining profiles, we recommend using the same material (for example, all fiber cement) and coordinating colors to keep the design cohesive. The City of Columbia building codes treat both profiles the same, so there are no permitting complications with mixed installations. You can check specific requirements through the City of Columbia Building Division.
Which Style Is Right for Your Home?
Choose board and batten if:
You want a modern farmhouse or contemporary look
Your home has tall walls or dramatic gable ends that benefit from vertical emphasis
You are building new or doing a complete re-side and want a distinctive appearance
Budget allows for the higher installation cost
Choose lap siding if:
You prefer a classic, traditional look
Moisture management is a top priority (our humid climate favors the overlapping design)
You want the most cost-effective option per square foot
Resale value is important and you want the broadest buyer appeal
Choose a combination if:
You want the best of both worlds — a unique exterior that stands out without being unconventional
Your home has architectural features that benefit from mixed profiles
You are investing in premium materials like fiber cement and want to maximize visual impact. Browse our siding replacement services for more Mid-Missouri options
Frequently Asked Questions
Is board and batten siding more expensive than lap siding?
Yes, board and batten typically costs 15 to 30 percent more than lap siding in the same material. The difference comes primarily from the more complex installation requiring two-piece construction. In the Central Missouri market, expect to pay $1 to $3 more per square foot installed for board and batten compared to lap siding in the same material.
Which siding style handles Mid-Missouri weather better?
Lap siding has a natural advantage in moisture management because its overlapping design channels water away from the wall. Board and batten can perform equally well in our climate when properly installed with quality flashing and sealant, but it is less forgiving of installation shortcuts. In either profile, fiber cement is the most weather-resistant material choice for our area.
Can I mix board and batten and lap siding on the same house?
Absolutely, and it is one of the most popular design choices we see in Columbia right now. The key is to use the same material for both profiles and choose complementary colors. Most homeowners use board and batten as an accent (gable ends or entryways) with lap siding as the primary profile.
Which siding profile has better resale value?
Lap siding has the broadest market appeal because it fits the widest range of architectural styles. However, board and batten can command a premium on homes where it fits the design, particularly in the modern farmhouse style that is popular in newer Columbia subdivisions. The material matters more than the profile for resale — fiber cement consistently outperforms vinyl in appraisal values.
How long does each siding style last in Central Missouri?
Lifespan depends primarily on material, not profile. Fiber cement (either profile) lasts 50 or more years. Vinyl lasts 30 to 50 years. Wood lasts 20 to 40 years with proper maintenance. Our freeze-thaw cycles, humidity, and storm exposure are the biggest factors affecting siding longevity regardless of style.
Do I need a permit to replace siding in Columbia, MO?
The City of Columbia generally does not require a building permit for siding replacement if the project does not involve structural changes. However, if you are changing the wall structure, adding insulation, or your home is in a historic district, a permit may be required. We handle permitting as part of our project management when needed.
What is the most popular siding combination in Mid-Missouri right now?
James Hardie fiber cement with lap siding as the primary profile and board and batten accents on gable ends is our most requested combination. The HardiePlank/HardiePanel pairing gives a clean, modern look with the durability that handles our Central Missouri weather year after year.
Should I hire a professional or can I DIY board and batten or lap siding?
Both profiles require precise installation for proper weather performance and warranty coverage. Board and batten in particular demands exact alignment and sealing. Professional installation ensures the manufacturer warranty remains valid — James Hardie warranties, for example, require certified installer credentials. For Columbia homeowners, professional installation also means the project stays on schedule and meets local code requirements.
Does board and batten work on all architectural styles?
Board and batten suits specific styles best — modern farmhouse, contemporary, craftsman, and some Prairie designs. It can look out of place on traditional Colonial or Cape Cod homes. Lap siding works across a broader range of styles. If you are unsure which profile fits your home, a design consultation can clarify what will complement your architecture.
What maintenance does fiber cement board and batten require?
Fiber cement board and batten needs minimal upkeep. Plan to rinse off dirt occasionally and inspect caulking around windows and doors every few years. Repainting typically happens every 15 to 20 years rather than every 3 to 7 years like wood. No concerns about rot, termites, or or warping from Missouri humidity.
Can I install board and batten over existing siding?
In most cases, we recommend removing old siding before installing new material. Going over existing siding can trap moisture, hide rot, and void manufacturer warranties. Columbia building codes may also require removal for permit compliance. The exception: some vinyl siding in good condition can accept new vinyl board and batten directly, though this limits material choices.
How do I know if my current siding needs replacement?
Look for cracking, warping, fading, or or loose panels. Check for soft spots on wood siding (rot indication). If you see granules from asphalt shingles accumulating near your siding, your roof may be failing and the siding could be next. Energy bills climbing steadily can mean your siding lacks proper insulation. When in doubt, a professional inspection identifies issues before they become expensive problems.
Ready to explore your siding options? Call CoMo Premium Exteriors at (573) 424-9006 or schedule a free exterior inspection. We serve Columbia, Jefferson City, Lake of the Ozarks, Fulton, Boonville, Ashland, and communities throughout Mid-Missouri.
How Long Does Cedar Siding Last? Tips for Longevity and Maintenance
How long does cedar siding last? Typically, cedar siding can last anywhere from 20 to 40 years and even longer with proper care. Its lifespan depends on factors like wood type, climate, and installation quality. This article will guide you through the essentials for maximizing the longevity of cedar siding.
Key Takeaways
Cedar siding can last 20 to 40 years with proper maintenance, affected by factors such as wood type, climate, and installation quality.
Regular maintenance practices, including cleaning, staining, and prompt repairs, are essential for extending the lifespan and durability of cedar siding.
Choosing the right type of cedar siding based on aesthetic preferences, environmental conditions, and maintenance needs is crucial for optimal performance and longevity.
How Long Does Cedar Siding Last? Tips for Longevity and Maintenance
The longevity of cedar siding depends on several key factors, including the type of wood, climate conditions, and the quality of installation. Selecting the right type of cedar siding for your home involves considering its visual appeal, durability, and how well it will withstand local weather conditions. Regular maintenance is also crucial in preserving the siding and preventing long-term damage.
With proper care, cedar siding can last 20 to 40 years or even longer. Humidity, temperature changes, and exposure to elements can impact its longevity. Regular maintenance helps keep cedar siding in great shape for many years.
Introduction
Maintaining cedar siding is crucial for preserving your home’s beauty and integrity. Proper care and timely replacement decisions extend its life. Knowing the lifespan of cedar siding aids in planning maintenance and replacement, keeping your home’s exterior in top shape.
Cedar siding durability depends on the wood type, climate, and installation quality. Regular cleaning and cedar siding maintenance can greatly extend its life.
This blog post offers tips and information to maximize the lifespan of your cedar siding.
Understanding Cedar Siding Durability
Cedar siding durability hinges on the wood type, climate exposure, and installation quality. Regular maintenance prevents damage and prolongs its life.
Homeowners should consider the wood type, architectural compatibility, and maintenance level when selecting cedar siding.
Types of Cedar Wood Siding
Cedar wood siding comes in various types, each offering unique aesthetics and durability characteristics. For instance, cedar shake siding and cedar shingles provide distinct looks and benefits.
Proper stains, particularly those with UV protection, can greatly enhance the lifespan of cedar shake siding.
Impact of Climate on Cedar Siding
Climate significantly impacts cedar siding longevity. High humidity accelerates wood deterioration, causing mold and aging. Prolonged rain exposure can lead to water damage if not properly sealed.
Additionally, extreme temperature fluctuations can cause the wood to expand and contract, potentially leading to cracks and warping.
Importance of Proper Installation
Proper installation extends cedar siding’s lifespan and prevents issues. Correct installation can make it last at least 30 years, while poor installation speeds up degradation. Effective techniques, including proper flashing, ensure longevity.
Perfect installation and regular maintenance keep cedar siding in top condition. Professionals who understand these practices should handle the installation to maximize lifespan.
Average Lifespan of Cedar Siding
Cedar siding typically lasts 20 to 40 years, sometimes reaching 60 to 70 years under ideal conditions. Cedar shake siding can exceed 30 years. Proper installation and maintenance are essential for this longevity.
Environmental factors such as humidity and temperature changes also play a significant role in determining the lifespan of cedar siding.
Well-Maintained Cedar Siding
Well-maintained cedar siding lasts 15 to 40 years. Painting or staining every 2-3 years helps maintain its durability.
Re-stain cedar shake siding every three years to protect it from the elements.
Untreated Cedar Siding
Untreated cedar siding often lasts less than five years due to moisture damage and rot. Over time, untreated cedar shakes turn gray and weather, requiring regular maintenance or quick replacement.
Painted Cedar Siding
Painted cedar siding typically lasts up to 15 years. Solid stains can extend its lifespan to 8-10 years. Proper maintenance can further extend it up to 25 years.
Dark-painted cedar shake siding usually needs repainting every 8-12 years.
Essential Maintenance Practices for Cedar Siding
Regular maintenance extends cedar siding’s lifespan. Annual cleaning removes mold and mildew, enhancing longevity. Inspections every six months help identify and address damage.
Staining or painting significantly enhances cedar siding’s durability.
Regular Cleaning
Using a mild detergent and a soft brush for cleaning prevents dirt and mildew buildup. Regular cleaning maintains cedar siding’s appearance and longevity. Neglecting cleaning can lead to dirt and mildew buildup, damaging the wood over time.
Establishing a regular cleaning schedule keeps cedar siding regularly in optimal condition.
Staining and Sealing
Applying high-quality, UV-resistant stains every few years protects cedar siding from sun damage. Without UV protection, the surface may fade and deteriorate. Proper moisture management also prevents deterioration over time.
UV-resistant finishes significantly extend cedar siding’s life by protecting it from sun exposure.
Repairing Damage Promptly
Promptly addressing small issues prevents major problems and prolongs siding life. Ongoing maintenance, including timely repairs and regular checks, prevents moisture-related problems and maintains visual appeal.
Common Issues with Cedar Siding and Solutions
Common problems with cedar siding include moisture penetration, insect infestation, and UV damage. Proper ventilation prevents moisture buildup, which is crucial for longevity. Regular inspections for damage like cracks and splits can prevent extensive repairs later.
Proper wall construction and moisture control prevent damage to cedar siding.
Moisture and Rot
Managing moisture exposure prolongs cedar siding’s life. Installing a rainscreen provides drainage or evaporation paths, protecting the siding.
Moisture damage, like rot in untreated cedar siding, can reduce its lifespan to less than five years. Ongoing moisture issues often lead to mold growth and decay, requiring replacement.
Insect Infestations
Termites, carpenter ants, and wood-boring beetles commonly threaten cedar siding. Signs of infestation include visible insect activity, small holes from boring insects, and wood dust accumulation.
Prevent pest infestations by ensuring proper ventilation, performing regular inspections, and maintaining a barrier between mulch and siding. If an infestation is detected, consult a pest control professional immediately.
UV Damage
UV rays can significantly damage cedar siding, causing fading and deterioration. UV-resistant finishes like stains and sealers protect from sun exposure and extend lifespan.
Reapplying UV-resistant finishes every three to five years is crucial for combating UV damage and ensuring cedar siding’s longevity.
Comparing Cedar Siding to Other Siding Materials
Cedar siding has a charm and natural beauty that many homeowners appreciate. Comparing it with other siding materials helps understand its pros and cons.
Cedar siding high maintenance generally requires more maintenance than fiber cement, vinyl, and metal siding but offers a unique aesthetic appeal.
Fiber Cement Siding
Fiber cement siding is durable and low-maintenance, lasting 25-50 years with minimal upkeep. Unlike cedar, it does not require regular painting or sealing, offering maintenance savings.
Fiber cement siding can closely mimic cedar wood, offering a similar look without high maintenance demands.
Vinyl Siding
Vinyl siding typically lasts 20-40 years, making it durable. Its longevity depends on environmental factors like climate and installation quality. Minimal maintenance includes occasional cleaning with a garden hose or pressure washer.
Available in various colors and styles, vinyl siding enhances aesthetic appeal and matches home architecture. It offers longevity, low maintenance, and customizable looks for different home designs.
Metal Siding
Metal siding is known for its impressive durability, lasting over 40 years with proper maintenance. Unlike cedar, it resists rot, decay, and weather-related deterioration, handling extreme conditions like heavy rain, wind, and hail.
Cedar siding requires regular maintenance to prevent rot and weather damage, while metal siding offers a low-maintenance alternative.
Signs It’s Time to Replace Your Cedar Siding
Recognizing when to replace cedar siding is crucial for maintaining your home’s structural integrity and aesthetic appeal. Here are some signs that indicate it’s time for a replacement:
Visible rot or decay undermines siding integrity and necessitates replacement.
Widespread rot.
Persistent moisture issues.
Visible warping or cracking.
A significantly deteriorated protective finish indicates cedar siding is absorbing moisture. Prompt replacement prevents further structural damage.
Extensive Rot or Decay
Rot or decay beneath the siding generally requires complete replacement. Cedar siding, though durable, is susceptible to rot and decay, especially with prolonged moisture exposure. Severe rot or decay indicators include visible surface damage and compromised structural integrity.
Prompt replacement maintains building integrity and prevents further structural damage.
Persistent Moisture Problems
Persistent moisture issues despite repairs signal the need for siding replacement. Neglecting these problems can cause severe damage and health risks from mold growth.
If moisture issues cannot be mitigated, siding replacement is the most effective solution.
Aesthetic Deterioration
Regular inspections are crucial to identify aesthetic deterioration, signaling a need for replacement. Fading indicates exposure and loss of protection. Warping or cracking suggests material stress and potential failure, often necessitating replacement.
Ignoring aesthetic deterioration can cause further damage, reducing property value and appeal.
Choosing the Right Cedar Siding for Your Home
Choosing the right cedar siding involves considering aesthetic preferences, cedar types, and maintenance willingness. Types like Western Red Cedar and Alaskan Yellow Cedar offer different appearances and characteristics to complement various home styles.
Climate factors like humidity and temperature affect cedar siding’s longevity and performance, making some types more suitable for specific environments. Maintenance willingness is crucial; choose a type that matches your maintenance preferences.
Evaluating Different Cedar Grades
Clear cedar grades are prized for their minimal natural imperfections, making them ideal for high-quality applications. Clear grades of cedar siding have fewer imperfections, making them more aesthetically appealing compared to knotty grades.
Knotty cedar offers a more rustic look and is commonly offered in unseasoned forms, contributing to its unique appearance. Choosing between clear and knotty cedar grades depends on the desired aesthetic and budget considerations.
Matching Cedar Siding with Home Style
Cedar siding complements various architectural styles, from traditional to modern, providing a versatile option that enhances a home’s overall aesthetic. Cedar siding can enhance the visual appeal of a home by complementing its design, whether it is traditional, rustic, or modern.
Considering Environmental Impact
Sourcing cedar products from sustainably managed forests ensures that the wood is harvested without harming the environment. Look for certifications such as the Forest Stewardship Council (FSC) label when choosing cedar siding to confirm responsible sourcing.
Natural wood siding, like cedar, contributes to better air quality as it absorbs CO2 and produces oxygen.
Professional Cedar Siding Services by CoMo Premium Exteriors
CoMo Premium Exteriors specializes in cedar siding installation and is known for its professional services. CoMo Premium Exteriors is committed to providing quality workmanship in cedar siding services.
Choosing professional cedar siding services from CoMo Premium Exteriors ensures quality installation and long-lasting results..
Comprehensive Maintenance Plans
CoMo Premium Exteriors provides tailored maintenance plans aimed at prolonging the lifespan of cedar siding. These detailed maintenance plans are designed to enhance the lifespan of cedar siding. Comprehensive maintenance plans are essential for ensuring the longevity of cedar siding.
Selecting a professional service like CoMo Premium Exteriors ensures effective maintenance of cedar siding.
Summary
Cedar siding offers a beautiful, durable option for home exteriors, but its longevity depends on several factors, including the type of cedar, climate, and quality of installation. Regular maintenance is crucial to preserving its appearance and extending its life. Comparing cedar siding with other materials like fiber cement, vinyl, and metal can help homeowners make informed decisions. For those considering cedar siding, CoMo Premium Exteriors provides expert installation and comprehensive maintenance services to ensure lasting results. By understanding these aspects, homeowners can enjoy the natural beauty of cedar siding for many years to come.
Frequently Asked Questions
How long does cedar siding last with proper maintenance?
Cedar siding can last between 20 to 40 years or even longer with proper maintenance. Ensuring regular care and upkeep is essential for maximizing its lifespan.
What are the main factors affecting the longevity of cedar siding?
The longevity of cedar siding is primarily influenced by the type of cedar wood used, prevailing climate conditions, and the quality of the installation. Ensuring these factors are addressed can significantly enhance the lifespan of the siding.
How often should cedar siding be stained or painted?
Cedar siding should be stained or painted every 2-3 years to ensure its durability and aesthetic appeal. Regular maintenance will help protect the wood from weather damage and prolong its lifespan.
What are common issues faced by cedar siding?
Cedar siding commonly faces issues such as moisture penetration, insect infestations, and UV damage. Regular maintenance and proper installation are essential to mitigate these concerns effectively.
Why should I choose CoMo Premium Exteriors for cedar siding services?
Choosing CoMo Premium Exteriors for cedar siding services ensures you receive expert installation and maintenance, combined with exceptional customer service and tailored care for your home. Their specialization guarantees high-quality workmanship that stands the test of time.
Wondering how much does new siding increase home value? On average, new siding can boost your home’s value by around 7%. The increase depends on the material chosen, with fiber cement siding offering up to 88% return on investment. This article covers the main factors that affect this value increase and helps you choose the right siding for maximum benefit.
Key Takeaways
New siding can increase home value by approximately 7%, with fiber cement siding offering the highest ROI at 88.5%.
Choosing the right siding material is crucial, as factors like durability, maintenance needs, and local market trends affect overall value and appeal.
Investing in modern, energy-efficient siding improves insulation and reduces utility costs, further enhancing home value.
How Much Does New Siding Increase Home Value? Find Out Here!
An illustration showing how much new siding can increase home value.
Updating your home’s siding can significantly enhance the value of your home. Recent data indicates that new siding can boost your home’s value by around 7%. The return on investment (ROI) varies with the siding material, with fiber cement siding offering about 88.5% ROI, and vinyl siding providing 68.9% ROI.
Several factors influence the increase in your home’s value from new siding. The type and quality of the material, its durability, and maintenance needs all contribute. Selecting the right siding material can maximize the financial benefits.
Introduction
Replacing your home’s siding is a strategic investment that can significantly raise your property’s value and enhance its overall appeal. A well-maintained exterior is often the first thing potential buyers notice, and new siding can dramatically improve curb appeal.
New siding reduces maintenance demands and offers better protection against environmental factors, making your home more attractive to buyers. Whether planning to sell soon or simply wanting to boost your home’s appearance, new siding is a smart choice.
The Financial Impact of New Siding on Home Value
Investing in new siding can significantly boost your home’s value. Estimates indicate that new siding can increase home value by about 7%. Fiber cement siding stands out with an ROI of around 88.5%, translating to an average increase of $17,129 in home value. Vinyl siding, with a slightly lower ROI of 68.9%, still enhances property value.
Durable options like Allura fiber cement siding are recommended for their long-lasting protection and high durability, positively affecting home value. Additionally, insulated vinyl siding can further increase home value due to superior energy efficiency.
Durability is a critical factor. Weather, pest, and fire-resistant siding enhances curb appeal while minimizing maintenance and repair costs, contributing to a more valuable property.
Enhancing Curb Appeal with New Siding
A beautiful house showcasing enhanced curb appeal with new siding.
New siding can greatly enhance your home’s curb appeal, making it more attractive to buyers. Fresh, vibrant siding exudes care and attention to detail, making a substantial difference in how buyers perceive the property.
Replacing outdated or damaged siding transforms the exterior, making your home visually appealing and boosting its sales potential. Neglected exteriors often give a negative impression, lowering property value. Consider investing in exterior renovations to enhance your home’s appeal.
Upgrading to new, energy-efficient siding can attract more buyers and siding increase the value of your home’s resale value.
Improved Energy Efficiency and Insulation
Diagram illustrating the energy efficiency benefits of new siding.
Modern siding materials offer improvements in energy efficiency and insulation, leading to substantial savings on energy bills. Insulated vinyl siding reduces air leakage, maintaining indoor temperatures and lowering heating and cooling costs.
Properly installed new siding reduces air leakage and prevents moisture from entering the home, reducing risks of mold and structural issues. This enhances energy efficiency and improves overall comfort and health.
Long-term cost savings from lower utility bills due to improved insulation and energy efficiency can also increase your home’s value. Investing in energy-efficient siding offers both immediate and long-term financial benefits.
Protecting Your Home from the Elements
Visual representation of a home protected from the elements by new siding.
Siding protects your home from harsh weather and pests. Vinyl siding, for example, resists rain, wind, and hail, safeguarding structural integrity. Quality siding options prevent moisture infiltration, avoiding costly rot and mold growth.
Durable siding materials like fiber cement endure heavy rainfall and resist extreme weather damage. Modern siding products also enhance resistance against pests, reducing infestation risks. This added protection preserves your property’s condition and contributes to its overall value.
Choosing the Right Siding Material
Choosing the right siding material is crucial for maximizing benefits. Different materials offer varying levels of durability, maintenance, and aesthetic appeal, impacting home value.
Vinyl siding is known for its affordability and low maintenance, while wood siding offers a beautiful, natural aesthetic but requires more upkeep. Regional preferences and market trends also influence the best choice for your home.
Understanding the pros and cons of each material helps you make an informed decision that aligns with your budget and goals. The following subsections provide an overview of some popular siding materials.
Vinyl Siding
Vinyl siding is popular due to its affordability and low maintenance. It provides an estimated ROI of around 80%, with some reports suggesting as high as 94.7%. This makes vinyl siding a cost-effective option for enhancing your home’s exterior.
Vinyl siding reduces upkeep expenses due to minimal maintenance requirements. Cleaning is as simple as using a garden hose, making it convenient for busy homeowners.
Woodbridge vinyl siding products are noted for their durability, impact resistance, and insulation properties, adding to their appeal.
Fiber Cement Siding
Fiber cement siding is renowned for its durability and aesthetic appeal. It withstands severe weather conditions, making it a reliable choice for long-lasting protection. Allura fiber cement siding offers various styles and colors, allowing for customization.
Fiber cement siding offers an impressive ROI of approximately 88%. This material enhances curb appeal and provides robust protection against the elements, significantly increasing home value.
Wood Siding
Wood siding is celebrated for its natural beauty, offering a warm and inviting look that enhances curb appeal. Homeowners can choose from various wood types and finishes, allowing for customization to match style preferences, including options like steel siding.
However, wood siding requires regular maintenance, such as painting or staining, to protect it from moisture and weather damage. Despite this, investing in wood siding can significantly increase home value due to its aesthetic appeal and desirability.
Stone Veneer
Stone veneer siding imparts a luxurious aesthetic that significantly enhances curb appeal and beauty and visual appeal. Its elegant natural stone appearance attracts buyers and contributes to a positive first impression. Additionally, stone siding offers a durable and stylish option for homeowners.
Known for its durability, stone veneer can last for decades with minimal maintenance, making it financially savvy. Investing in stone veneer siding typically yields a high return on investment, boosting its appeal.
Factors to Consider Before Replacing Siding
Before replacing your home’s siding, consider several factors to ensure the best decision. Local market trends can influence the impact on home value. In some regions, certain materials may be more popular, affecting resale value.
The condition of your existing siding is crucial. While minor damage can often be repaired, extensive issues may necessitate complete replacement. Assessing the state of your siding helps determine the best option.
Finally, align the investment with your homeowner goals. Whether aiming to sell soon or planning to stay for years, new siding can enhance your property’s appeal and market value.
Local Market Trends
Understanding local market trends is vital when choosing new siding. Different regions have preferences for specific materials due to climate, availability, and architectural styles. Homes in areas preferring materials like vinyl or fiber cement may see larger value increases when these are used.
Regional economic conditions, demographic shifts, and local housing demands can impact the demand for new siding. In areas experiencing renovation booms or housing shortages, investments in new siding can lead to higher returns on home value.
Condition of Existing Siding
Evaluating the condition of your existing siding is crucial before deciding on replacement. Indicators for replacement include extensive damage, loose pieces, or high maintenance requirements. If your siding is relatively new, repairing minor issues might be more cost-effective than replacing the entire surface.
However, when siding materials show significant wear or are old, replacement is generally recommended. Most siding materials can last for decades, making regular assessment essential to determine the need for repair or replacement.
Homeowner Goals
Aligning your siding project with your homeowner goals is essential for maximizing benefits. Investing in new siding can significantly enhance your property’s appeal and market value, reflecting your overall objectives.
Whether seeking immediate curb appeal improvements to attract buyers or long-term benefits like energy efficiency and lower maintenance costs, choosing the right siding material can yield significant returns on investment.
Real-Life Examples of Home Value Increase
Real-life examples illustrate the impact of new siding on home value. For instance, a homeowner in Ohio spent $12,000 on new vinyl siding, increasing the property’s value by about $18,000, yielding a 50% return on investment. This notable uplift showcases the financial benefits of investing in new siding.
Similarly, in Oregon, a homeowner invested $15,000 in replacement siding, enhancing the property’s aesthetic and increasing resale value by an estimated $20,000, resulting in a 33% return on investment. These examples highlight how new siding can boost your home’s marketability and overall value at resale.
Why Choose CoMo Premium Exteriors for Your Siding Project
Choosing the right contractor for your siding project is as important as selecting the right material. CoMo Premium Exteriors stands out with deep community roots, commitment to quality, and a customer-centric approach. Their local expertise and extensive experience with insurance claims ensure a seamless process from consultation to project completion, including installation by smart exteriors.
CoMo Premium Exteriors uses high-quality materials, guaranteeing lasting durability and enhanced aesthetics for homes. Many clients report satisfaction with the quick response times and high-quality workmanship, emphasizing the company’s professionalism and dedication to excellence.
Customers frequently commend CoMo Premium Exteriors for their excellent communication, professionalism, and exceptional quality of work. This positive feedback underscores the company’s reputation as a reliable and trusted provider of siding services.
Our Service Areas
CoMo Premium Exteriors operates in several key areas, including Columbia, Jefferson City, Moberly, Boonville, and surrounding regions such as Fulton, Mexico, and Hallsville. Their emphasis on local expertise ensures that each project is tailored to the specific needs and preferences of homeowners in these areas.
Customer Testimonials
Customers have praised CoMo Premium Exteriors for their professionalism, quick service, and quality workmanship, often recommending them for roofing and siding projects. This widespread customer satisfaction highlights the company’s dedication to delivering exceptional results and building long-lasting relationships with their clients.
Summary
In summary, replacing your home’s siding is a strategic investment that can significantly increase its value, enhance curb appeal, improve energy efficiency, and protect against the elements. Whether you choose vinyl, fiber cement, wood, or stone veneer, each material offers unique benefits that can align with your homeowner goals and regional preferences.
If you’re considering a siding project, CoMo Premium Exteriors is the ideal choice for ensuring high-quality results and professional service. With their local expertise, commitment to quality, and excellent customer feedback, you can trust them to transform your home’s exterior and boost its value. Don’t wait—take the first step towards enhancing your home’s appearance and marketability today.
Frequently Asked Questions
How much value does new siding add to a home?
New siding can add about 7% to a home’s value, with fiber cement siding providing an impressive return on investment of approximately 88.5%. This significant enhancement makes siding a worthwhile home improvement.
What are the benefits of vinyl siding?
Vinyl siding is a cost-effective and low-maintenance option that provides impressive durability and a high return on investment, making it an excellent choice for homeowners.
How does new siding improve energy efficiency?
New siding significantly enhances energy efficiency by reducing air leakage and maintaining stable indoor temperatures, leading to lower heating and cooling costs. Investing in modern materials, like insulated vinyl, can yield substantial long-term savings.
What factors should I consider before replacing siding?
Before replacing siding, assess the condition of your existing siding, local market trends, and your long-term homeowner goals to make an informed decision. This evaluation will guide you in deciding whether to repair or replace.
Why should I choose CoMo Premium Exteriors for my siding project?
Choosing CoMo Premium Exteriors guarantees high-quality materials and professional service backed by extensive local expertise, ensuring a seamless and satisfying siding project.