• (573) 424-9008
  • Get Free Estimate
CoMo Premium Exteriors
  • Home
  • About us
    • Our Team
    • Careers
    • Service Areas
    • Portfolio
    • Our Blog
  • Roofing
    • Roofing Shingles
    • Metal Roofing
    • Slate Roofing
    • Shake Roofing
    • Flat Roofing
    • Concrete Tile Roofing
    • Commercial Roofing
  • Siding
    • Vinyl Siding
    • James Hardie
    • Wood Siding
  • Exteriors
    • Windows
    • Doors
    • Gutters
    • Decks
  • Reviews
  • COVID-19
  • Contact Us
  • Get A Free Estimate
  • Menu Menu

Tag Archive for: Roofing

Top-rated flat roof sealants.

Top Tips on Waterproofing for Flat Roof Durability

Waterproofing for flat roofs is vital for preventing leaks and water damage. Flat roofs are more susceptible to water pooling, which can lead to serious issues if not addressed. This article covers the best methods for waterproofing for flat roofs, how to spot damage, and maintenance tips to keep your flat roof in top condition. Proper waterproofing for flat roofs ensures longevity and durability, effectively protecting your investment.

Key Takeaways

  • Waterproofing is essential for flat roofs to prevent water pooling and UV damage, ensuring longevity and structural integrity.

  • Regular inspections for cracks, blisters, and water pooling are crucial for early detection and repair, minimizing potential damage.

  • Choosing the right waterproofing method and sealants, such as liquid rubber or elastomeric, enhances flat roof durability and performance.

Understanding Flat Roof Waterproofing

An overview of flat roof waterproofing techniques.

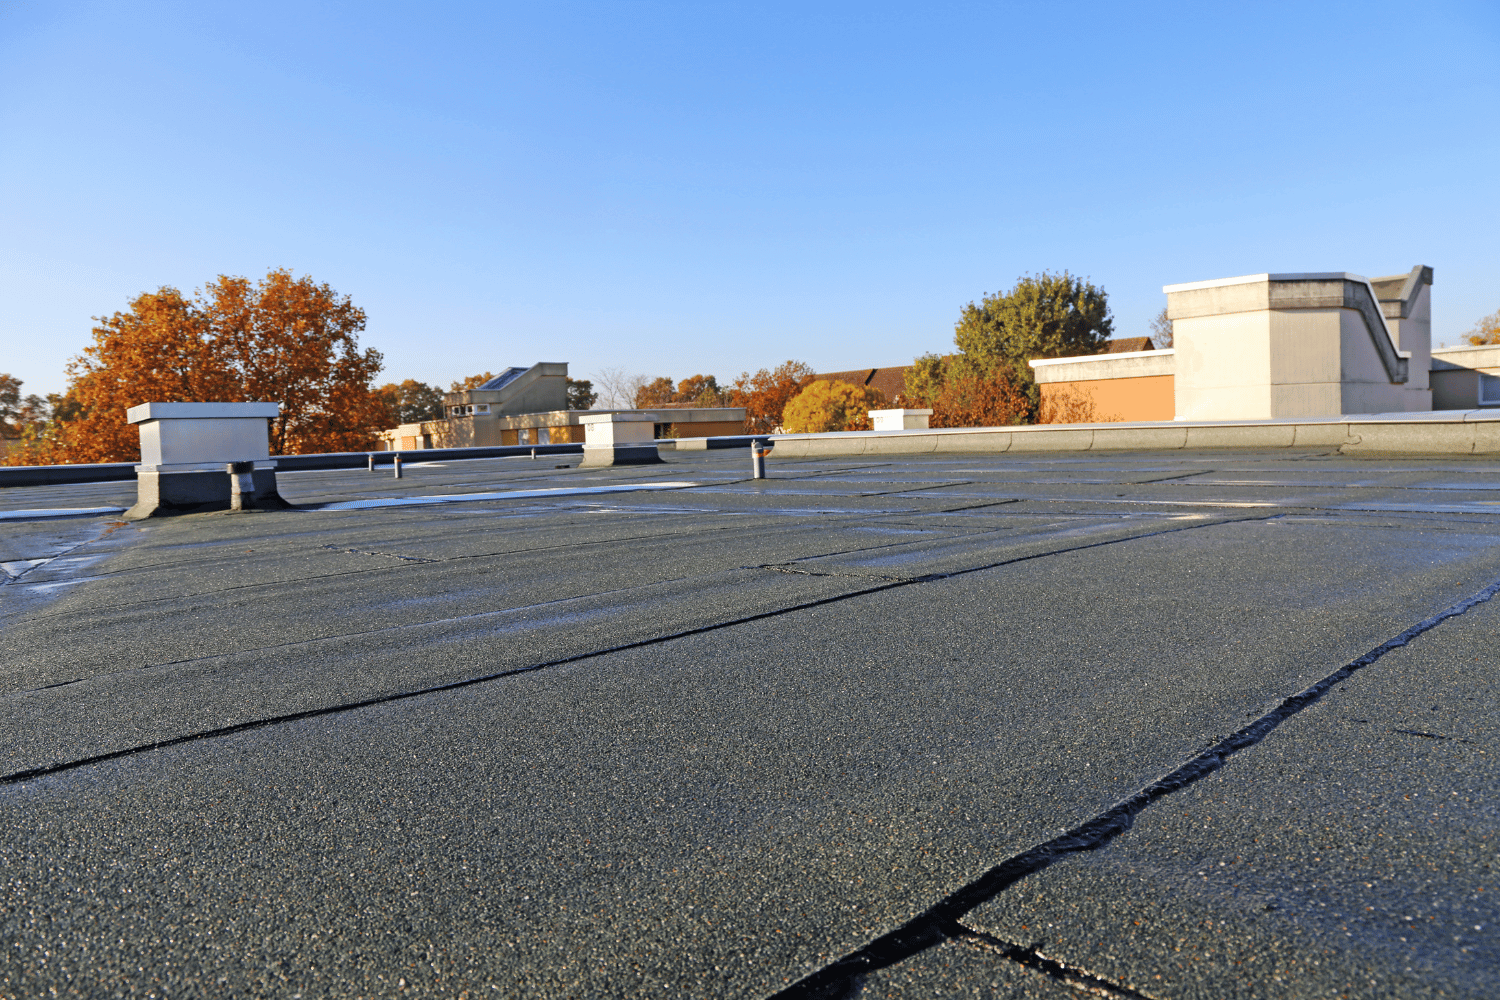
Waterproofing flat roofs is crucial as it shields the structure from water damage and prolongs the roof’s lifespan. Flat roofs, unlike their sloped counterparts, do not naturally drain water, which means they are more susceptible to water pooling and subsequent leaks. This makes waterproofing an absolute necessity to prevent deterioration and maintain the integrity of the building.

Flat roofs commonly face issues such as water pooling and UV damage. Water pooling can lead to leaks, while prolonged sun exposure can cause the roofing materials to break down, leading to cracks and holes. These issues can compromise the watertight seal of the roof, allowing moisture to seep in and cause further damage. Therefore, regular maintenance and effective waterproofing are essential to avoid costly repairs and roof replacement.

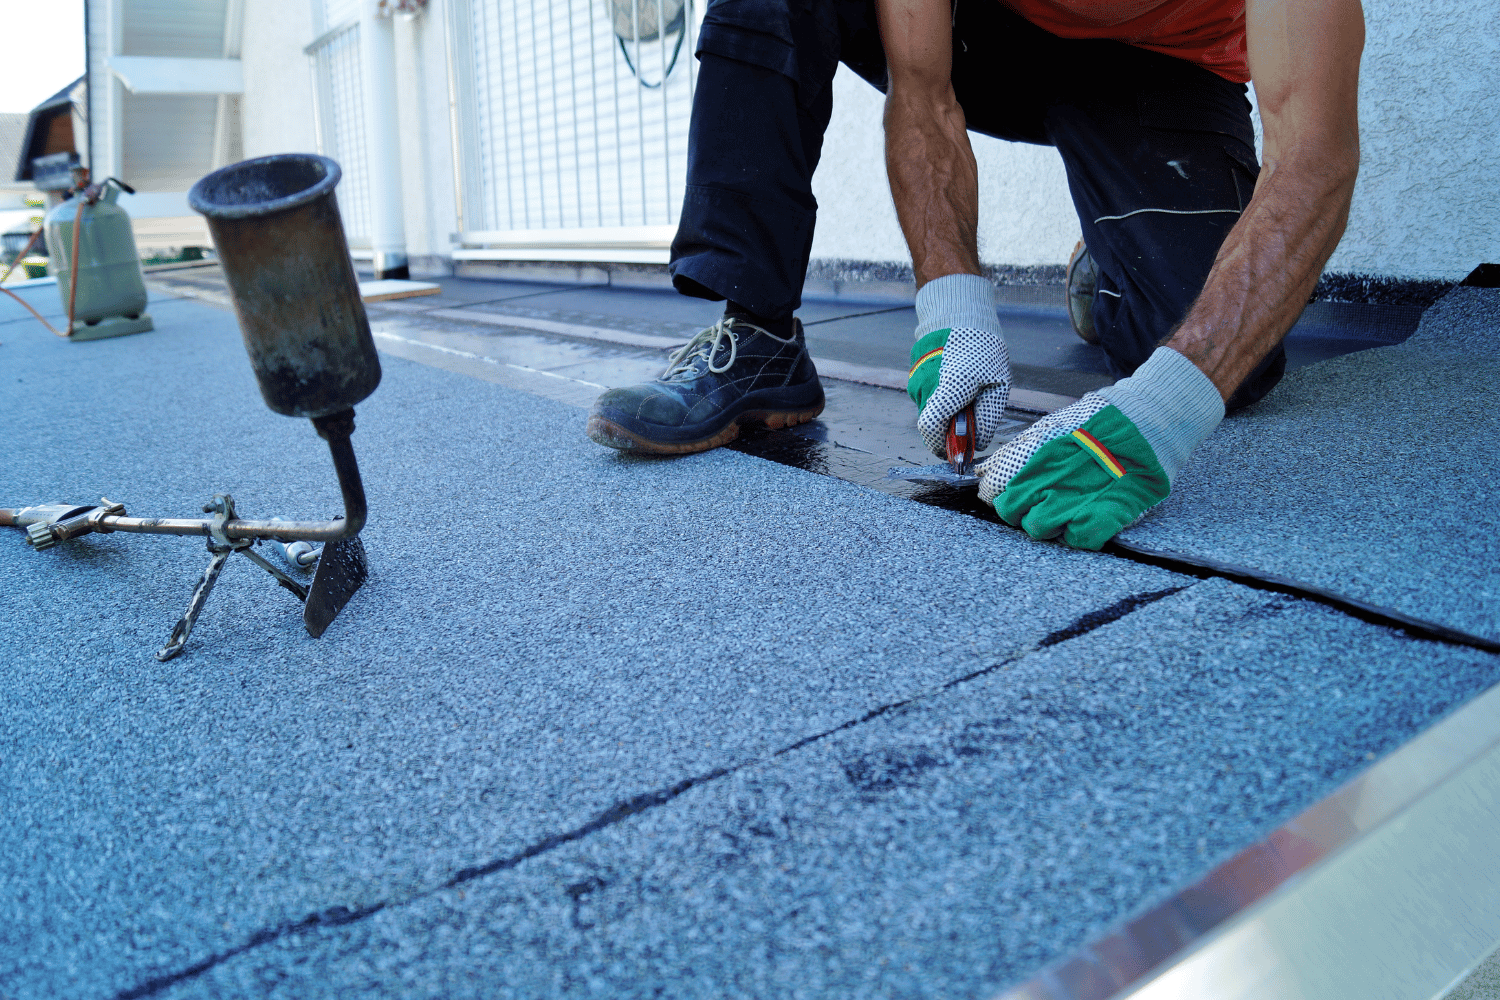
Different waterproofing methods, such as liquid waterproofing and reinforced bitumen membranes, offer various benefits tailored to the unique needs of flat roofing. Selecting the appropriate waterproof material and method not only ensures protection against water damage but also enhances the durability and performance of low slope roofs. With proper waterproofing, your flat roof can withstand the elements, keeping your residential or commercial property safe and dry.

Inspecting Your Flat Roof for Damage

Before diving into waterproofing, it’s crucial to inspect your flat roof for any signs of damage. Ensuring safety during the inspection is paramount; use secured ladders and check for anti-skid coatings to prevent accidents. A thorough inspection should focus on areas prone to damage, such as roofing membranes and gutters, as well as any visible signs of wear and tear.

Look for common damage signs such as blisters, cracks, and pooling water. Upon discovering leaks, promptly patching or repairing the damaged sections can avert extensive water damage. Keeping gutters clear of dirt and debris ensures effective water management on flat roofs.

Identifying Cracks and Holes

Spotting cracks and holes in flat roofs is vital, as unaddressed damage can become significant. Alligatoring, a common type of cracking caused by sun exposure and moisture, creates a pattern resembling alligator skin. Regularly inspecting the whole surface of your flat roof can help you spot these cracks early.

Repair cracks wider than 10mm using a flexible mesh with products like Acrypol Plus. Acrypol Plus is equally effective for fixing cracks up to 10mm, providing a durable and flexible solution.

Promptly addressing these issues can prevent further damage and extend the life of your flat roof.

Recognizing Blisters

Blisters occur as air bubbles or pockets of moisture trapped under the roofing membrane. Blisters form when air or moisture is trapped beneath the membrane, posing potential damage. The expansion of these blisters is primarily caused by temperature changes that heat the trapped air inside, causing them to grow.

If blisters are intact, it’s best to leave them alone to avoid further damage. However, if blisters burst, they need to be patched quickly to prevent water from infiltrating the roof and causing more severe issues.

Regular inspections can help you monitor these blisters and decide the best course of action.

Spotting Pools of Water

Ponding or standing water can significantly damage a flat roof’s protective membrane, indicating drainage issues. If water pools on a flat roof for more than 48 hours, it indicates a drainage problem that should be addressed promptly. Immediate attention to ponding water is vital to prevent structural damage from prolonged wet conditions.

Standing water can damage the protective membrane of the roof, leading to leaks and other issues. Regularly inspecting your flat roof, especially after heavy rain, can help you spot and resolve water pooling issues before they cause extensive damage.

Ensuring proper drainage and maintaining the roof’s surface can prevent these problems and extend the roof’s lifespan.

Essential Maintenance Tips for Flat Roofs

Essential maintenance tips for flat roofs.

Conducting visual inspections of flat roofs at least twice a year, ideally in spring and fall, is recommended. Focus routine inspections on identifying cracks and holes, critical points for potential leaks. Implement safety measures like secured ladders and anti-skid coatings to prevent accidents during inspections.

Removing debris from the roof is another crucial maintenance task. Regular debris removal prevents drainage issues that could cause water accumulation and leaks. Trimming trees and vegetation can prevent surface damage and reduce debris buildup.

Proper drainage maintenance on flat roofs is vital. Keeping gutters clean and ensuring the correct gradient can prevent ponding. In winter, removing snow and ice can reduce weight and prevent collapse. Preparing a maintenance plan for extreme weather events and budgeting for regular maintenance and repairs can help you avoid costly future issues.

Choosing the Right Waterproofing Method

Choosing the right waterproofing method for flat roofs.

Choosing the correct waterproofing method protects flat roofs from water damage. Main waterproofing methods for flat roofs include liquid waterproofing, reinforced bitumen membranes, and single-ply membranes. Each method offers unique benefits suited to specific flat roof requirements and environmental conditions.

Liquid waterproofing solutions, reinforced bitumen membranes, and single-ply membranes all provide effective protection. Factors such as the roof’s specific needs and the environmental conditions should be considered when selecting a waterproof material. A watertight seal prevents leaks, extends the roof’s lifespan, and reduces costly repairs.

Liquid Waterproofing Solutions

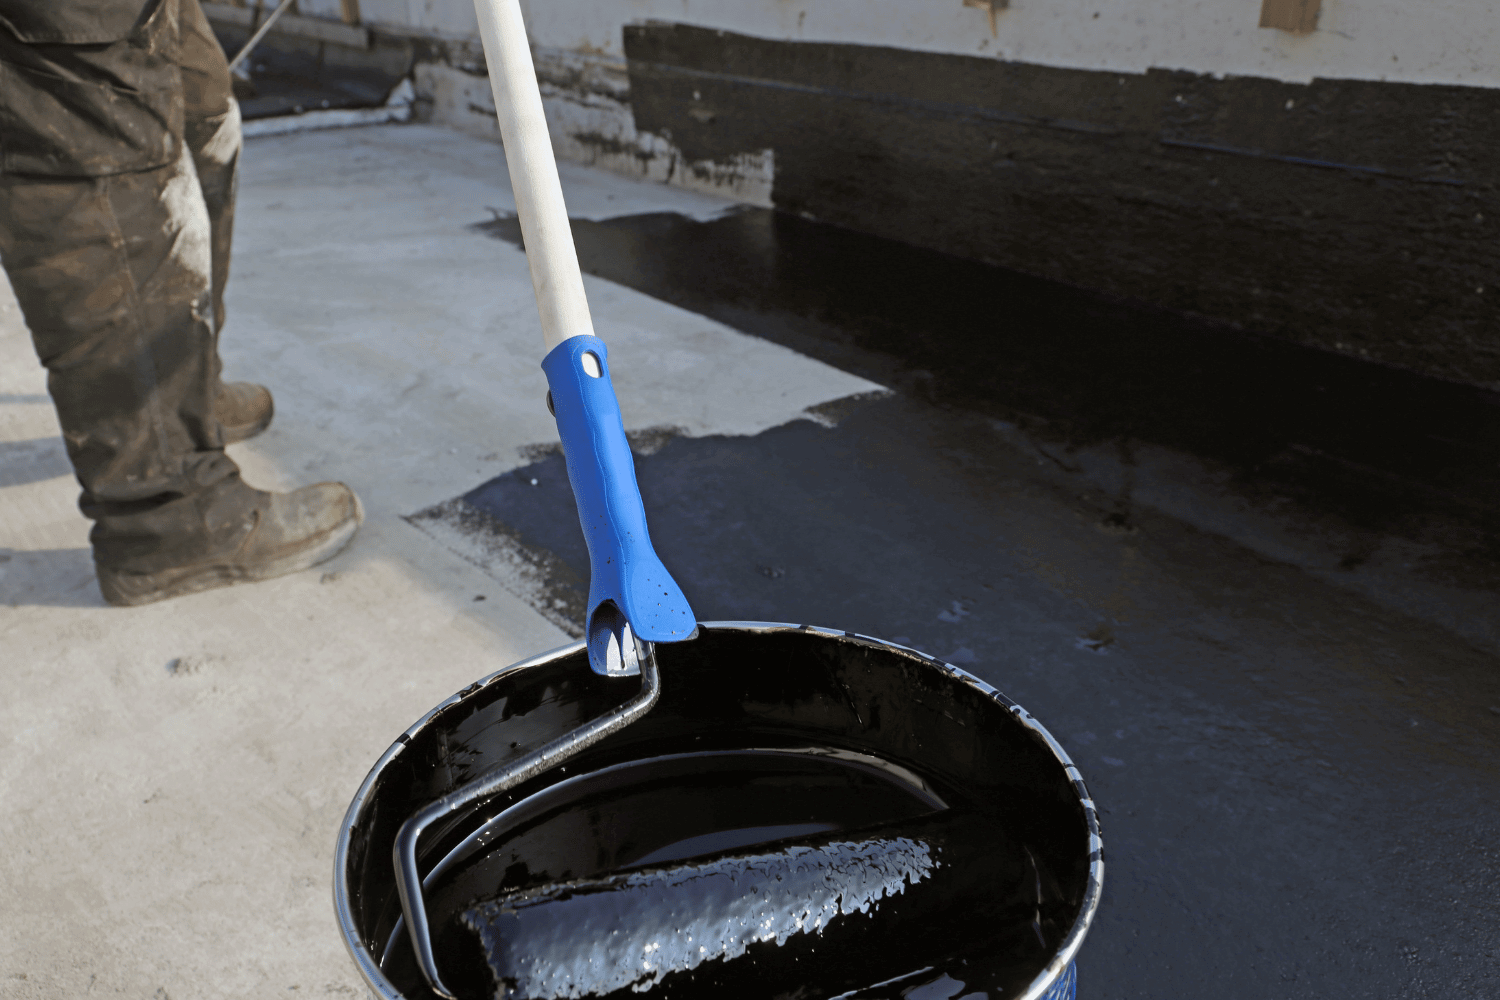
Acrylic coatings, a type of liquid waterproofing, are praised for strong UV resistance and adaptability. These coatings create a tough elastic overlay that stops moisture and allows trapped moisture to evaporate, making them ideal for flat roofs. Liquid waterproofing membranes bond directly to the substrate without seams, preventing lateral water migration and offering robust water infiltration protection.

These membranes can adhere to various substrates, including concrete, bituminous membranes, PVC, TPO, and EPDM. Their flexibility, durability, and ease of application make liquid waterproofing solutions practical and effective for protecting flat roofs in various weather scenarios.

Reinforced Bitumen Membranes (RBM)

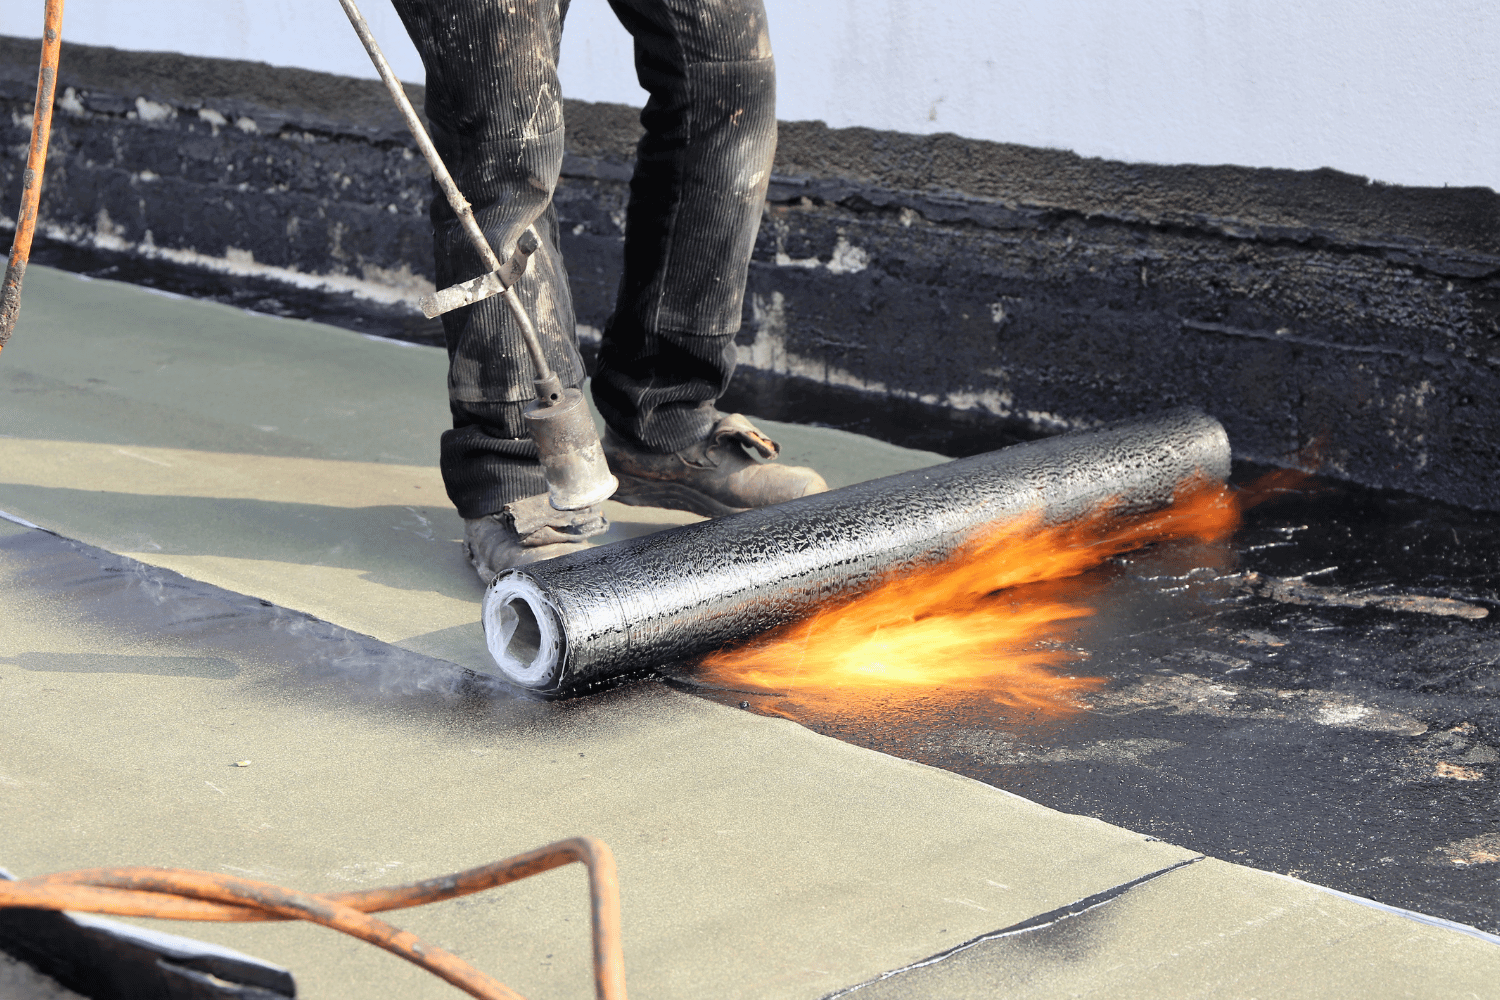
Reinforced Bitumen Membranes (RBM) are tailored for flat roofing, offering superior waterproofing and durability. RBMs typically employ 2-3 layers for optimal waterproofing, installed using methods like hot, cold adhesive, and torching techniques. This multi-layer application and robust materials contribute to their excellent waterproofing capabilities.

RBM installation can involve materials like hot bitumen, cold adhesive, and self-adhesive methods. These methods ensure a strong bond, making RBMs reliable for both residential and commercial flat roofs. Superior puncture and UV resistance make them ideal for long-lasting protection.

Single Ply Membranes

Single ply membranes like TPO and PVC roofing offer benefits including energy efficiency, durability, and a 25-30 year lifespan. Installation techniques for single ply membranes include ballasting, adhesion, and fastening, with heat-welding used to secure seams. These methods ensure a strong bond, offering reliable protection against water infiltration.

Single ply membranes are mainly synthetic rubber, with EPDM representing ethylene propylene diene monomer. Known for flexibility and UV resistance, these single ply membrane membranes are a practical, long-lasting waterproofing solution. Ease of installation and maintenance further enhance their appeal for residential and commercial applications.

Top-Rated Flat Roof Sealants

Top-rated flat roof sealants.

Selecting the right sealant is vital for maintaining flat roofs’ integrity and waterproofing. Liquid Rubber Waterproof Sealant is regarded as the best overall due to its thicker consistency, ideal for larger gaps and cracks. These sealants offer strong waterproofing, extending flat roofs’ lifespans by preventing leaks.

Proper surface preparation and application techniques are vital for these sealants’ effectiveness. This section will introduce top-rated sealants, including liquid rubber, elastomeric, and silicone sealants, each offering unique benefits for flat roofing applications.

Liquid Rubber Sealants

Liquid rubber sealants like Rubberseal offer superior water protection and durable membranes, effectively withstanding pooling water and temperature changes. Flex Seal Liquid forms a strong waterproof barrier that withstands extreme weather, demonstrating robust durability.

The elastomeric properties of liquid rubber sealants allow them to expand and contract, preventing cracks and ensuring long-lasting performance. This flexibility and UV resistance make them a practical choice for various roofing applications, providing reliable protection against water damage and environmental challenges.

Elastomeric Sealants

Elastomeric sealants are known for flexibility and stretchability, offering excellent adhesion and accommodating roofing material movement. Often available in white, these sealants enhance reflectivity and energy efficiency, making them a cost-effective flat roof solution.

Their capacity to expand and contract with temperature changes ensures a durable, watertight seal, preventing leaks and extending the roof’s lifespan. Elastomeric sealants are a versatile and effective option for maintaining the integrity of flat roofing systems.

Silicone Sealants

Silicone sealants are prized for their exceptional waterproof properties, suitable for various weather conditions. UV rays resistance and uv resistant properties help maintain their integrity under sunlight, ensuring long-lasting performance.

Silicone sealants form a long-lasting barrier, enhancing roof waterproofing durability. Superior protection against water infiltration and environmental elements makes them reliable for residential and commercial flat roofs.

Professional Help for Flat Roof Waterproofing

Professional help for flat roof waterproofing.

Hiring professionals for flat roof sealant application is vital due to the task’s time-consuming nature and specific skills required. CoMo Premium Exteriors provides services including emergency repairs, routine maintenance, residential roofing, and commercial roofing repair. Their use of top-grade roofing materials ensures durability and high-quality roof replacement results.

Regular professional inspections can catch hidden issues that may cause significant damage, maintaining the roof’s condition. CoMo Premium Exteriors assists with insurance claims for hail or storm damage, leveraging extensive experience to simplify the process. Customers highly rate CoMo Premium Exteriors for superior customer service, quick response times, and quality workmanship.

CoMo Premium Exteriors is committed to the community through local project involvement, enhancing aesthetic and structural resilience. They offer warranties including a 5-Year Workmanship Warranty and a 1-Year Clean Up Guarantee, providing peace of mind and quality assurance.

Summary

Waterproofing a flat roof is essential for protecting the structure and extending its lifespan. Regular inspections, proper maintenance, and choosing the right waterproofing methods and sealants can prevent water damage and costly repairs. By understanding the unique challenges of flat roofing and taking proactive measures, homeowners and commercial property managers can ensure their roofs remain in top condition.

Whether you opt for DIY solutions or professional help, the key is to act promptly and effectively. CoMo Premium Exteriors is here to assist with all your flat roofing needs, offering expert services and quality materials to keep your roof waterproofed and durable. Trust in the expertise and commitment of professionals to safeguard your investment and maintain the integrity of your flat roof.

Frequently Asked Questions

Which coating is best for a flat roof?

The Ure-A-Sil (urethane-silicone) System is considered the best flat roof coating due to its superior performance and value, while silicone-based coatings like ROOF X TENDER 985 are ideal for roofs prone to ponding. Choosing either option will ensure optimal protection for your flat roof.

Why is waterproofing essential for flat roofs?

Waterproofing is essential for flat roofs as it prevents water damage and extends the roof’s lifespan. Given their vulnerability to water pooling, effective waterproofing safeguards the building’s integrity and prevents costly repairs.

What are the common signs of damage to look for during a flat roof inspection?

During a flat roof inspection, common signs of damage include blisters, cracks, alligatoring patterns, and standing water that remains for over 48 hours, indicating potential drainage problems. Address these issues promptly to maintain the roof’s integrity.

What are the benefits of using liquid waterproofing solutions for flat roofs?

Using liquid waterproofing solutions for flat roofs provides excellent UV resistance and creates a seamless, flexible membrane that prevents water infiltration. This makes them a highly effective option for protecting your roof from potential water damage.

How do reinforced bitumen membranes (RBM) ensure the durability of flat roofs?

Reinforced Bitumen Membranes (RBM) ensure flat roof durability through their multi-layer applications and strong materials, which offer excellent waterproofing, puncture resistance, and UV resistance. This makes RBMs an outstanding choice for maintaining long-lasting roof protection.


Various materials used in drip edges including galvanized steel and aluminum.

The Ultimate Guide to Drip Edges for Roofs: Types, Benefits, and Installation Tips

Drip edges for roofs prevent water damage and block pests by directing water away from the roof’s edge. This helps avoid rot and leaks, maintaining your roof’s longevity. In this guide, we will explore the different types of drip edges, their benefits, and step-by-step installation tips.

Key Takeaways

  • Drip edges are essential metal flashings that guide water away from roofs, preventing damage from leaks and rot, and are often required by building codes.

  • There are three primary types of drip edges (Type C, Type D, and Type F), each serving unique purposes in protecting roofing systems and directing water effectively.

  • Proper installation of drip edges is crucial; mistakes such as incorrect placement and inadequate overlap can lead to water damage and reduced lifespan of the roofing system.

What Are Drip Edges?

A close-up view of a roof's edge showcasing the drip edge installation.

A drip edge is a strip of metal flashing installed along the roof’s edge to guide water away from the roof and its underlying structures. Drip edges prevent water from seeping into vulnerable areas, avoiding wood rot, leaks, and other forms of water damage. This simple yet effective solution, known as drip edge flashing, is crucial in maintaining the longevity of your roof. To ensure proper water drainage, it is essential to install drip edge flashing and consider the roof drip edge.

Think of drip edges as the guardians of your roof deck. Without them, water could easily run down the fascia or seep under the shingles, leading to significant damage over time. They are also a must-have according to many building codes, ensuring that homes are adequately protected from water infiltration. In fact, most jurisdictions in the United States require drip edge installation as per the International Residential Code (IRC).

In addition to managing water runoff, drip edges also contribute to pest control. They help keep pests from infiltrating the roof space, adding an extra layer of protection to your home. In essence, without a drip edge, your roof is left vulnerable to a multitude of potential issues.

The Role of Drip Edges in Roofing Systems

Illustration of how drip edges protect a roofing system from water infiltration.

Drip edges are integral to a well-functioning roofing system. They act as a barrier, preventing water from getting behind the gutters and safeguarding the fascia and roof deck from water infiltration. This is especially important during heavy rains and storms when water can be driven by the wind under the shingles and into the roof structure. Roof drip edges reduce moisture exposure and prevent damage to the fascia and soffit by directing water into the gutters.

Without properly installed drip edges, rainwater can drip behind the gutters, leading to potential damage to the soffit boards and siding. This water can also run down the fascia boards, causing leaks and further structural issues. Moreover, damaged or missing drip edges can lead to more severe problems like ice dams in winter, which can cause additional roof damage.

In protecting the roof deck and underlayment, drip edges ensure the overall integrity of the roofing system and roof decking. This protection extends to all types of roofing materials, from asphalt shingles to metal roofs, and is a crucial aspect of any roofing project, whether it’s a new installation or a roof replacement.

Types of Drip Edge Profiles

Drip edges come in three primary profiles: Type C (L-Style), Type D (T-Style), and Type F. Each drip edge profile has unique characteristics that cater to different roofing needs and preferences. Understanding these types will help you choose the right drip edge for your specific roofing project.

Let’s delve into the details of each profile.

Type C (L-Style)

The Type C drip edge, also known as the L-Style, features a simple L-shaped profile. This design is particularly effective in guiding water away from the roof edge, thus preventing water penetration at the roof’s edge. Its straightforward shape makes it a popular choice for many roofing projects, ensuring that water is efficiently channeled away from the roof and underlying structures.

Despite its simplicity, the L-Style drip edge provides robust protection against water damage. It helps maintain the structural integrity of the roof and prevents issues like rot and mold growth by keeping water away from the fascia and roof deck.

Type D (T-Style)

The Type D drip edge, also known as T-Style, is designed in the shape of the letter T. It includes an extra flange that extends beneath the roofing material. This design is particularly effective in directing rainwater further away from the fascia, making it a superior choice for residential roofs. The lower flange aids in preventing water from being blown back onto the fascia by the wind, thus reducing moisture damage.

The T-Style drip edge is highly recommended for its effectiveness in water diversion. Its design ensures that water is kept away from vulnerable areas of the roof, thus enhancing the overall protection of the roofing system.

Type F

Type F drip edges are typically used for finished roofs and feature a longer leading edge. This extended edge provides additional protection by directing water further away from the fascia and roof edge. The F-Style drip edge is particularly beneficial for installations on finished roofs where an extended feature is advantageous.

In addition to its functional benefits, the F-Style drip edge offers aesthetic appeal. Aluminum is a popular material choice for this type due to its flexibility and the ability to match various house colors through painting.

Materials Used in Drip Edges

Various materials used in drip edges including galvanized steel and aluminum.

Drip edges are made from various materials, each offering unique benefits and suited to different roofing needs. Common materials include plastic, vinyl, fiberglass, aluminum, and galvanized steel. The choice of material can significantly impact the effectiveness and longevity of the drip edge.

Let’s explore the specific properties of some of these materials in the following subsections.

Aluminum

Aluminum is a preferred material for drip edges due to its durability and lightweight characteristics. Its corrosion resistance makes it ideal for various climates, including those with harsh weather conditions. The lightweight nature of aluminum also facilitates easier installation, making it a popular choice among roofing professionals.

Moreover, aluminum drip edges are versatile and compatible with a wide range of roofing materials. This flexibility ensures that aluminum can be used effectively in diverse roofing projects, providing reliable protection against water damage.

Galvanized Steel

Galvanized steel is recognized for its durability. It is also praised for its strength. The zinc coating on galvanized steel provides excellent rust protection, making it suitable for use in areas with high moisture levels. This material is ideal for protecting roofs in moist environments, ensuring long-lasting performance and durability.

The robustness of galvanized steel makes it a reliable choice for drip edges, particularly in regions prone to strong winds and heavy rainfall. Its ability to withstand such conditions ensures that the roof remains protected from water infiltration and structural damage.

Copper

Copper drip edges offer a classic and elegant appearance, enhancing the overall look of a roofing system. Copper’s natural resistance to corrosion and weather makes it a highly durable material, providing long-lasting performance in roofing applications. Over time, copper develops a protective patina that adds to its aesthetic appeal and further enhances its durability.

The combination of beauty and functionality makes copper a premium choice for drip edges. Its ability to withstand the elements while maintaining its visual appeal makes it an excellent investment for any roofing project.

How to Install Drip Edges

Step-by-step guide on how to install a drip edge on a roof.

Installing drip edges is a critical step in ensuring the overall protection of your roofing system. The best time to install a new drip edge is during roof replacement. Before starting the installation, it’s essential to consult local building codes to ensure compliance. You will need several tools to install drip edges. These include a ladder, flat pry bar, hammer, galvanized roofing nails, tin snips, and eaves stripping.

Begin by installing the roof drip edge installation on the eaves first to ensure proper drainage into the gutters. Secure the drip edge with nails placed every 12 inches to maintain its position. Overlap each section of the drip edge by at least 2 inches to ensure a continuous barrier against water. Make necessary cuts at corners where rakes and eaves meet to ensure proper fitting of the drip edge.

After installing the drip edge on the eaves, proceed to the rake edge after the underlayment is in place. Ensure that the lower flange of the drip edge extends two to four inches for effectiveness against wind-driven rain. Confirm that the drip edge extends beyond the fascia for proper drainage.

Following these steps ensures effective installation and long-term protection for your roof.

Signs Your Drip Edge Needs Replacement

Several signs indicate the need for drip edge replacement:

  • Rotten fascia

  • Discoloration

  • Peeling

  • Soft or moldy fascia

Ceiling water damage can also signal roofing problems, suggesting that it’s time to check the condition of the drip edge. Leaks behind the drip edge, often caused by clogged rain gutters and downspouts, are another sign that replacement may be necessary.

Visible damage such as rust or corrosion on the drip edge indicates that it may no longer be effective and needs replacement. A perforated nail flange can also be a potential cause of a roof leak, indicating the failure of the drip edge’s function.

Regular inspection of your drip edges can help identify these issues early, preventing more significant damage to your roofing system.

Benefits of Installing Drip Edges

Benefits of installing drip edges on a roofing system.

Installing drip edges offers numerous benefits, primarily by preventing water from getting trapped behind gutters. This is a significant cause of water damage, and drip edges help mitigate this risk. They also improve the lifespan of the roof by preventing water from running beneath shingles, thus reducing the likelihood of rot and mold growth.

Drip edges also play a crucial role in pest control, minimizing the gaps where pests can enter the roof space. They block the nesting of birds and other wildlife, providing additional protection for your home. Moreover, all types of drip edges provide similar levels of protection, making the choice often based on aesthetics rather than functionality.

Copper drip edges, for instance, are appreciated for their premium appearance and the attractive patina that develops over time, enhancing aesthetic value. Regardless of the material, drip edges and drip metal offer protection from severe weather and additional damage to roofing structures.

Common Mistakes to Avoid During Drip Edge Installation

Avoiding common installation mistakes is crucial to ensure the effectiveness of drip edges. One such mistake is installing the drip edge too close to the fascia, which can cause water to seep back onto the fascia board instead of flowing into the gutters. Shingles should extend over the drip edge by about 3/8 to 1/2 inch to prevent water from being drawn back under the shingles.

Proper nail spacing is also essential for securing the drip edge; nails should be placed 8-10 inches apart to maintain the drip edge’s integrity. When connecting two sections of the drip edge, ensure they overlap by at least 2 inches to create a continuous barrier against water.

Selecting an inappropriate drip edge for your climate, such as a narrow design in a rainy area, can also hinder its effectiveness. Avoiding these mistakes will ensure that your drip edges provide the maximum protection for your roof.

Summary

In summary, drip edges are essential components of any roofing system, providing critical protection against water damage and pests. They come in various profiles and materials, each suited to specific needs and preferences. Proper installation and regular maintenance of drip edges can significantly extend the lifespan of your roof and prevent costly repairs.

By understanding the types, benefits, and installation tips for drip edges, homeowners and contractors can ensure that their roofs remain resilient against the elements. Investing in quality drip edges is a small step that can make a big difference in the overall health and longevity of your roofing system.

Frequently Asked Questions

Do you need drip edge with shingles?

Yes, a drip edge is essential for shingles, as it helps direct water away from your roof and prevents potential damage. Installing a drip edge is also a requirement under most building codes to ensure proper roof protection.

Where should drip edge be installed on a roof?

Drip edge should be installed along the eaves and rakes of the roof, ensuring proper overlap with the flashing for optimal water drainage. This prevents moisture damage and enhances the durability of your roofing system.

What is the difference between flashing and drip edge?

Flashing is used to protect roof areas where surfaces meet vertical structures, while drip edge is a specific type of flashing installed at the roof’s edges to channel water away from the fascia. Both are essential for effective water management on a roof.

Is a drip edge on a roof necessary?

Yes, a drip edge is necessary for roofs as it is highly recommended by roofing contractors and mandated by building codes like the International Building Code (IBC) for both eaves and gables. It helps protect the roofing structure from water damage.

What is a drip edge, and why is it important?

A drip edge is essential for directing water away from your roof and protecting underlying structures from moisture-related damage, such as wood rot and leaks. Investing in a drip edge enhances the longevity of your roofing system and maintains the integrity of your home.


Before and after images of a roof treated with shingle sealant.

Best Shingle Sealant: Protect Your Roof with Top-Rated Coating Solutions

Looking to protect your roof and extend its lifespan? Shingle sealant is essential for bonding shingles, preventing leaks, and enhancing your roof’s durability. This guide will help you understand what shingle sealants are, the benefits they offer, and how to apply them for optimal protection.

Key Takeaways

  • Shingle sealants provide crucial bonding for asphalt shingles, enhancing roof durability and protecting against harsh weather conditions.

  • Using quality sealants extends roof lifespan, reduces moisture penetration, and minimizes repair needs, leading to long-term cost savings for homeowners.

  • Proper application and surface preparation are essential for sealant effectiveness, ensuring optimal performance and protection against leaks and UV degradation.

Understanding Shingle Sealants

An overview of various shingle sealants used on asphalt shingles.

Shingle sealants are asphalt-based materials specifically designed to bond individual asphalt shingles together, creating a cohesive and robust covering for your asphalt shingle roof. These sealants are activated by heat and UV rays, which soften the material and enhance its adhesive properties. This bonding action is crucial for maintaining the structural integrity of your roof, especially in areas prone to high winds and storms.

Proper installation of shingle sealants is vital to their performance. When applied correctly, they effectively bond shingles together, providing enhanced protection against water leaks and UV degradation.

Choosing the right sealant involves evaluating its water resistance and UV protection to ensure it meets the specific needs of your roof. With a well-installed shingle sealant, your roof can withstand the harshest elements, ensuring a longer lifespan and better protection for your home.

Benefits of Using Shingle Sealant

A well-maintained asphalt shingle roof showcasing the benefits of using shingle sealant.

Using shingle sealants offers numerous benefits that go beyond merely bonding shingles together. Here are some key advantages:

  1. They significantly extend the lifespan of your roof by enhancing its overall durability.

  2. Sealants decrease shingle permeability, making them less prone to moisture penetration.

  3. They help prevent leaks and water damage.

Moreover, shingle sealants improve wind resistance and protect against various elements such as UV rays, hail, moisture, and sun. This added layer of protection not only safeguards the shingle roof structure but also minimizes the need for frequent repairs, ultimately saving homeowners money in the long run. Additionally, roof shingles can benefit from these sealants.

Investing in a quality shingle sealant means investing in a more resilient roof that stands the test of time.

Types of Shingle Sealants

When it comes to shingle sealants, there are several types to choose from, each with its unique properties and advantages. One popular option is Shingle Saver, a 100% acrylic elastomeric sealant that can be used on a variety of surfaces, including asphalt, fiberglass, and slate shingles. Acrylic sealants are known for their excellent UV protection and cost-effectiveness, though they should not be applied in freezing conditions.

Other types of shingle sealants include silicone and oil-based options. Silicone coatings offer strong adhesion and high elasticity, making them effective against ponding water and harsh weather conditions. Oil-based sealants, on the other hand, provide durable protection and are well-suited for various roofing materials.

The key to choosing the right sealant is to ensure compatibility with your roofing material for effective adhesion.

How to Apply Shingle Sealant

Shingle sealant involves several critical steps to ensure optimal performance.

Applying shingle sealant involves several critical steps to ensure optimal performance. Using appropriate tools such as a high-quality brush or sprayer can significantly improve the distribution of the sealant.

Additionally, following the manufacturer’s instructions regarding drying times and application techniques is crucial for effective application.

Preparing the Roof Surface

Preparation is the first and most crucial step in applying shingle sealant. Start by thoroughly cleaning the roof deck to ensure proper adhesion of the sealant. This involves removing all dirt, debris, and moss, which can be achieved through pressure washing. A clean surface is essential for the sealant to bond effectively and provide maximum protection.

Once the roof is clean, it’s important to allow it to dry completely before applying the sealant. Moisture can hinder the bonding process, so make sure the roof is thoroughly dry. This step ensures that the sealant adheres properly and performs as expected, providing a durable and long-lasting protective layer for your roof.

Applying the Sealant

When applying the sealant, start from the highest point of the roof to prevent excess sealant from dripping onto already covered areas. Use a brush, roller, or sprayer to apply the sealant evenly, paying special attention to seams and joints to prevent leaks. Ensuring even coverage is key to creating a strong, cohesive protective layer.

Post-Application Care

After applying the sealant, it’s essential to follow the manufacturer’s instructions for curing time to achieve the best results. Post-application care, including sufficient drying time and proper roof maintenance, ensures the sealant’s longevity and effectiveness.

This care rejuvenates aging roofs by hydrating them and maintaining shingle pliability, essential for withstanding storm-related wind damage.

Choosing the Right Shingle Sealant

Different types of shingle sealants suitable for various roofing needs.

Selecting the right shingle sealant involves considering various factors, including the local climate, roof material, and specific needs of your roof. Silicone coatings, for instance, offer strong adhesion and high elasticity, making them suitable for areas prone to ponding water and harsh weather conditions. Acrylic sealants provide excellent UV protection and are cost-effective, though they are not ideal for freezing conditions.

Research and compare different sealant products to make an informed choice that balances quality and price. Consider the lifespan of the sealant and whether it aligns with your roof’s lifespan to reduce the frequency of reapplication. Some sealants offer added benefits such as UV protection or energy efficiency, which may justify higher prices for long-term savings.

Common Issues with Shingle Sealants

While shingle sealants offer numerous benefits, they can sometimes present common issues. Cracking is a frequent problem in aging shingles and may indicate installation mistakes or ventilation problems if seen in newer roofs. Granule loss from shingles, often caused by uneven asphalt application or overheating, can lead to roof failure if not addressed.

Mold, mildew, and algae growth on shingles can trap moisture, leading to more severe damage if not treated quickly. Regular maintenance checks are necessary to identify areas where the sealant may need reapplication to ensure ongoing roof protection, especially after a rain.

Inspect the roof after curing to identify any missed spots that may need reapplication.

Cost Considerations

Consider the cost factors of shingle sealants for effective budgeting. The application method can influence overall cost, with professional installation being more expensive than DIY applications. Additionally, the quantity of sealant needed for a given area will directly affect the total cost, as larger roof surfaces require more sealant.

Homeowners should consider various factors such as the price of materials, application method, and quantity required to make informed decisions about shingle sealants. Understanding these cost factors helps homeowners manage their roofing budgets and invest in the appropriate sealant.

Case Studies: Success Stories with Shingle Sealants

Before and after images of a roof treated with shingle sealant.

Real-life success stories highlight the practical benefits of using shingle sealants. For instance, a homeowner in Lagos transformed a worn roof with shingle sealants, enhancing its energy efficiency and curb appeal. This not only improved the appearance of the roof but also contributed to significant energy savings.

In another example, an industrial facility in Port Harcourt benefited from a high-performance coated roof overlay, which improved productivity and reduced long-term maintenance expenses. Facilities utilizing high-performance sealants have reported increased durability and significant cost savings on maintenance, thanks to the coating applied.

These success stories demonstrate the tangible benefits and improved outcomes that shingle sealants can provide.

Summary

In summary, shingle sealants play a crucial role in protecting and extending the life of your roof. They offer numerous benefits, including enhanced durability, improved resistance to elements, and cost savings on repairs. By selecting the right type of sealant and applying it correctly, homeowners can ensure their roofs remain resilient and long-lasting.

Investing in a quality shingle sealant is a wise decision that pays off in the long run. Whether you’re dealing with an aging roof or looking to enhance the protection of a new one, shingle sealants provide a reliable and effective solution. Take the time to research and choose the best sealant for your needs, and enjoy the peace of mind that comes with a well-protected roof.

Frequently Asked Questions

Can I put roof coating on shingles?

It is not advisable to apply roof coating on shingles, as it can negatively impact their performance, including resistance to impact, algae, and fire, as well as disrupt ventilation, potentially leading to moisture issues. Such actions could compromise the integrity of the roofing system.

What to put on shingles to stop leak?

To stop a leak in shingles, apply roofing cement or an appropriate sealant to fill any imperfections and create a watertight barrier. This will effectively protect against future leaks.

What is the best way to seal asphalt shingles?

The best way to seal asphalt shingles is to use polyurethane sealants for their strong adhesion or hot melt adhesive, particularly when addressing imperfections in the roof deck. Both methods ensure effective bonding and longevity of the shingles.

What are shingle sealants made of?

Shingle sealants are primarily made from asphalt-based materials, which bond individual shingles together to form a cohesive roofing system.

How do shingle sealants extend the lifespan of a roof?

Shingle sealants significantly extend a roof’s lifespan by lowering moisture absorption, enhancing resistance to wind and UV rays, and providing protection against hail damage. This proactive measure ensures your roof remains durable and resilient over time.


Matching roof shingle colors with various siding colors to enhance home aesthetics.

Discover What Is the Most Popular Roof Color in 2024

Are you wondering what is the most popular roof color for 2024? This year, earth tones and cool grays are leading the way. Homeowners are choosing shades like light grey, dark grey, rich black, and even deep blue. In this article, we’ll explore these trending colors and help you choose the best one for your home.

Key Takeaways

  • In 2024, earth tones and cool grays are trending for roof shingles, with favorites like charcoal black, heather blend, and deep blue gaining popularity.

  • Choosing the right roof shingle color depends on your home’s siding, climate, and architectural style, enhancing curb appeal and energy efficiency.

  • Opting for the right roof colors not only boosts your home’s appearance but also affects energy consumption and longevity of the roof.

The Most Popular Roof Shingle Colors in 2024

An array of popular roof shingle colors for 2024, showcasing various styles and shades.

In 2024, the roofing industry is seeing a surge in popularity for earth tones and cool grays, including light grey, dark grey, and darker shades. Homeowners are gravitating towards rich blacks, various shades of gray, earthy taupe, and even bold hues like deep blue and vibrant blacks.

These colors not only enhance the aesthetics of a home but also contribute to its overall value and energy efficiency.

Charcoal Black

Charcoal black shingles are incredibly versatile, making them a favorite among homeowners. They blend seamlessly with both modern and traditional home designs, providing a sleek, sophisticated look. This rich color is perfect for those looking to make a bold statement while maintaining a timeless appeal.

Charcoal black shingles complement various exterior colors, enhancing the home’s overall aesthetic. Whether paired with lighter shades or darker hues, these black shingles offer a striking contrast that elevates the curb appeal.

Heather Blend

Heather Blend shingles are a harmonious mix of brown shingles and green shades, designed to complement both rustic and modern home styles. This unique color combination adds depth and character to the roof, making it stand out while still blending naturally with the environment.

These shingles are ideal for homeowners who appreciate a natural, earthy look. Heather Blend shingles work exceptionally well with homes featuring wood siding or other natural materials, enhancing the overall aesthetic and creating a cohesive appearance.

Deep Blue

Deep blue shingles are gaining traction for their bold and vibrant appearance. They add a captivating depth and character to any home, significantly enhancing its curb appeal.

Ideal for making a bold statement, this color of the year also maintains a sophisticated look.

Weathered Wood

Weathered wood shingles mimic the look of aged timber, adding a rustic charm to any home. These shingles are particularly suitable for country homes or rustic cabins, creating a cozy, inviting atmosphere.

The natural beauty of weathered wood shingles lies in their ability to blend seamlessly with the surrounding environment. They are an excellent choice for homeowners who want to achieve a rustic vibe without compromising on durability and protection.

Desert Tan

Desert Tan shingles draw inspiration from the warm, inviting hues of desert landscapes. These shingles offer a timeless appeal that pairs well with a variety of exterior finishes, making them a versatile choice for many homeowners.

Desert Tan shingles’ warm tones create a welcoming atmosphere, enhancing the home’s visual appeal. They are particularly effective in reflecting sunlight, making them an excellent choice for homes in hotter climates.

How to Choose the Right Roof Shingle Color for Your Home

Choosing the right roof shingle color for your home, with examples of different styles.

Choosing the right roof shingle color involves considering the home’s siding, climate, and architectural style. These factors ensure the chosen color enhances the home’s appearance and complements its structural and environmental context.

Consider Your Home’s Siding

Matching roof shingle colors with your home’s siding is crucial for a cohesive and appealing look. Warmer colors should be paired with warmer tones, while cooler colors work well with cooler shades. This harmony can significantly boost your home’s curb appeal and market value.

For example, homes with white siding pair well with green, blue, red, or black shingles, while light gray siding works best with red, medium blue, or black shingles. Beige siding, on the other hand, is complemented by darker roof colors.

Climate and Geographic Location

Your home’s climate and geographic location significantly influence the right roof shingle color. In warmer climates, lighter shingles are preferred as they reflect sunlight, helping to keep the home cooler.

Conversely, darker shingles are better suited for colder climates as they absorb heat, providing better insulation.

Architectural Style

Your home’s architectural style should also guide your choice of roof shingle color. Modern homes can accommodate bolder shingle colors without clashing, while traditional homes might benefit from more classic, neutral shades. Choosing the right roof shingle colors is essential for enhancing your home’s aesthetic appeal.

Aligning the roof shingle color with the architectural style enhances the home’s aesthetic and curb appeal.

Matching Roof Shingle Colors With Different Siding Colors

Matching roof shingle colors with various siding colors to enhance home aesthetics.

Achieving a harmonious home’s exterior involves matching your roof shingle color with your home’s siding color. This enhances the home’s aesthetic and ensures a balanced, cohesive look.

White Siding

White siding creates a clean, bright aesthetic that pairs well with contrasting roof colors. Solid primary colors like black and red create a striking contrast, while green shingles offer a more natural, harmonious look, especially in historical or forested areas.

Gray Siding

Gray siding is incredibly versatile and pairs beautifully with darker roof colors. Opt for dark gray, blue, green, or even black shingles to create a bold, sophisticated look that enhances the overall aesthetic of your home.

Beige Siding

Beige siding offers great flexibility in choosing roof shingle colors. The contrast between dark roofs and beige siding adds a classic touch to your home’s appearance, making it an attractive choice for many homeowners.

Red or Brick Siding

Red or brick siding pairs well with lighter roof colors like gray, which offer a fresh, modern take on traditional exteriors. This combination enhances the visual appeal and gives your home a unique, stylish look.

Blue Siding

Blue siding is best complemented by charcoal gray shingles, which enhance the overall aesthetic and create a cohesive, appealing look. This combination is particularly striking and adds a touch of elegance to your home.

Benefits of Selecting the Right Roof Shingle Color

The benefits of selecting the right roof shingle color for your home.

Selecting the right roof shingle color offers benefits like enhancing curb appeal, improving energy efficiency, and ensuring your roof’s longevity.

This decision can have a lasting impact on your home.

Enhancing Curb Appeal

The right roof shingle color can significantly boost your home’s curb appeal, making a positive impression on visitors and potential buyers. A well-chosen roof color enhances your home’s visual impression, increasing its perceived value and attractiveness.

Energy Efficiency

Your roof shingle color can impact energy consumption by reflecting or absorbing sunlight. Lighter shingle colors reflect sunlight, helping to keep your home cooler in hot climates and potentially lowering energy bills.

Longevity and Protection

High-quality brown roof shingles in the right color can enhance your roof’s durability and longevity. Opting for a roofing shingle service with certified expertise ensures superior materials and installation techniques, offering better protection for your home.

Trends in Roof Shingle Colors

Trends in roof shingle colors for 2024, including nature-inspired tones.

Keeping up with the latest roof shingle color trends helps you make a stylish, contemporary choice for your home. In 2024, there’s a shift towards bolder, more vibrant shades, and nature-inspired tones.

Nature-Inspired Tones

Nature-inspired tones like greens and dark brown are becoming increasingly popular. These colors harmonize with outdoor surroundings, enhancing homes’ overall aesthetic.

Forest green and emerald green shingles are top choices for those embracing this trend.

Bold and Vibrant Shades

A growing trend in 2024 is bold and vibrant roof shingle colors. Deep blue shingles, for instance, offer depth and vibrancy, significantly boosting homes’ curb appeal. This trend reflects homeowners’ desire to stand out and make a statement with their roof colors.

Why Choose CoMo Premium Exteriors for Your Roofing Needs

CoMo Premium Exteriors stands out for its certified expertise, comprehensive services, and commitment to customer satisfaction. They are the only roofing company in the area with premier certifications from both Owens Corning and GAF, ensuring high-quality service.

Certified Expertise

CoMo Premium Exteriors holds top-level certifications from industry leaders like Owens Corning and GAF. These certifications show their commitment to high standards and superior roofing services. This expertise ensures homeowners receive the best roofing solutions.

Comprehensive Services

CoMo Premium Exteriors provides a full range of services, including inspections, maintenance, repairs, replacements, and emergency solutions. This approach ensures all your roofing needs are met, providing peace of mind and long-term protection for your home.

Customer Satisfaction

CoMo Premium Exteriors prioritizes customer satisfaction with effective project management and clear communication. Their team of licensed and insured professionals ensures every project runs smoothly from start to finish. This commitment to excellence and transparency builds trust and ensures customers are informed and satisfied with the results.

Summary

Choosing the right roof shingle color is more than just a matter of aesthetics; it impacts your home’s energy efficiency, longevity, and overall appeal. The popular roof shingle colors for 2024, such as charcoal black, heather blend, deep blue, weathered wood, and desert tan, offer a variety of options to suit different styles and preferences. By considering factors like your home’s siding, climate, and architectural style, you can make an informed decision that enhances your home’s value and appearance. CoMo Premium Exteriors stands ready to help you with their certified expertise and comprehensive roofing services, ensuring you get the best results for your roofing needs.

Frequently Asked Questions

What are the most popular roof shingle colors for 2024?**?

For 2024, the hottest roof shingle colors are charcoal black, heather blend, deep blue, weathered wood, and desert tan. These shades not only look great but also enhance the overall appeal of your home.

How do I choose the right roof shingle color for my home?**?

To choose the right roof shingle color, match it with your home’s siding and consider your climate and architectural style. This not only boosts curb appeal but can also improve energy efficiency.

What are the benefits of selecting the right roof shingle color?**?

Selecting the right roof shingle color boosts your home’s curb appeal and can even improve energy efficiency. It’s not just about looks; it plays a key role in your roof’s durability and protection too!

Why should I choose CoMo Premium Exteriors for my roofing needs?**?

You should choose CoMo Premium Exteriors for your roofing needs because they bring certified expertise and commitment to customer satisfaction, standing out as the only local company with top-level certifications from Owens Corning and GAF. Trust in their comprehensive services for peace of mind with your roofing project.

How do roof shingle colors affect energy efficiency?**?

Choosing the right roof shingle color is key for energy efficiency: light colors help keep your home cool by reflecting sunlight, while dark colors can provide warmth by absorbing heat. So, think about your climate when selecting shingle colors!


Cost considerations for flat roof maintenance, highlighting affordable materials and long-term savings.

Flat Roof Maintenance: Solving Common Problems with Flat Roofs

Are you dealing with problems with flat roofs? Flat roofs are popular but come with unique challenges. Common issues include leaks, pooling water, and membrane separation. This article will explore these problems and offer solutions to help you maintain your flat roof effectively.

Key Takeaways

  • Flat roofs are prone to common problems like pooling water, blistering, and membrane separation, making regular maintenance crucial.

  • Effective drainage solutions and quality materials play a significant role in preventing leaks and extending the lifespan of flat roofs.

  • Hiring professional roofing services ensures comprehensive inspections, expert repairs, and efficient replacements, leading to long-term cost savings.

Common Issues with Flat Roofs

An overview of common issues with flat roofs, including signs of roof leaks and pooling water.

Flat roofs, with their sleek and modern aesthetic, are a popular choice among homeowners. However, they come with their own set of challenges. Due to their constant exposure to the sun, rain, and other environmental factors, flat roofs are particularly vulnerable to deterioration. Common flat roof problems include roof leaks, pooling water, blistering and cracking, membrane separation, low-quality flashing, and punctures and tears. Neglecting these issues can lead to severe complications and costly damage.

Regular maintenance helps prevent these issues and extends the lifespan of your flat roof. Proactive care avoids major repairs and keeps your roofing system in good condition.

Here are some of the most common problems you might encounter with your flat roof.

Pooling Water on Flat Roofs

One of the most common flat roof problems is pooling water. This occurs when there is improper drainage due to a lack of slope. Flat roofs that are too flat can lead to standing water, which, if not managed properly, can cause the roof to sag and eventually lead to leaks. A sloped roof can help mitigate these issues.

Effective drainage prevents water accumulation and potential structural damage. Water that doesn’t drain within 72 hours is considered pooling and indicates that your roof needs attention.

Blistering and Cracking

Blistering and cracking are other common issues with flat roofs. These problems are primarily caused by heat-induced expansion and contraction. Blistering occurs when the membrane pulls away, creating pockets of air or moisture beneath the roof surface. Over time, these blisters can lead to cracks, allowing water to infiltrate and cause leaks.

Prolonged sunlight exposure can worsen these issues, so regular inspections and maintenance are crucial.

Membrane Separation

Membrane separation is another significant issue in flat roofing systems. It can occur due to poor installation or aging. When the membrane layer separates from the layer below it, the building becomes vulnerable to leaks and other forms of damage.

Aging can also trigger membrane separation, exposing the roofing layers to potential leaks. Proper installation and regular maintenance can mitigate this problem.

Low-Quality Flashing

Low-quality flashing is a common culprit behind many flat roof problems. Flashing is designed to direct water away from critical areas of the roof, but if it is of low quality or improperly installed, it can fail to prevent water ingress. This can lead to water collecting in inappropriate areas, causing wide-ranging damage.

High-quality materials and proper installation help avoid such issues.

Punctures and Tears

Punctures and tears in flat roofs are often caused by foot traffic or debris. These issues can compromise the integrity of the roof surface, leading to leaks and further damage.

Restoration systems that incorporate proper walk paths can help mitigate these problems by providing a clear path for foot traffic and reducing the risk of punctures.

Factors Contributing to Flat Roof Problems

Factors contributing to flat roof problems, including weather exposure and debris accumulation.

Several factors can contribute to the degradation of flat roofs. Unlike sloped roofs, flat roofs are more exposed to environmental elements such as sun, wind, and freezing conditions. The unique desert climate and local conditions can significantly affect the lifetime of flat roofs. Neglecting routine maintenance and inadequate flashing can also lead to significant damage over time.

Common causes of cracks in flat roofs include:

  • Pooling water

  • Blistering

  • Thermal movement

  • Roof buckling

If these issues are not addressed promptly, they can lead to water infiltration and further damage. Having a routine maintenance plan and conducting regular inspections are crucial steps in preventing these problems.

Weather Exposure

Weather exposure is one of the primary causes of flat roof problems. Flat roofs are constantly exposed to the sun, wind, and freezing conditions, which can lead to various issues. Common exposure problems include over-exposure to the sun and lightning strikes. Additionally, freezing, hail, wind damage, wind-driven debris, oil damage, and pollutants or chemicals are also significant concerns.

These elements can cause the roof surface to degrade, leading to leaks and structural damage.

Structural Movement

Structural movement is another factor that can affect the integrity of flat roofs. Natural expansion and contraction due to temperature changes can cause the membrane to warp and crack. Building settlement can also lead to membrane warping, further contributing to roof problems.

Commercial buildings are particularly susceptible to thermal movement, making regular inspections and maintenance essential for any energy efficient commercial building.

Debris Accumulation

Debris accumulation on flat roofs can obstruct drainage systems, leading to serious water damage. Regular cleaning is essential to ensure that drainage systems remain unobstructed and effective in preventing water accumulation.

Proper drainage is crucial to avoid standing water and potential structural issues.

Preventative Maintenance for Flat Roofs

Preventative maintenance for flat roofs, emphasizing the importance of regular inspections.

Preventative maintenance is key to extending the lifespan of flat roofs and avoiding major problems. Regular inspections, proper drainage solutions, and using quality materials are essential steps in maintaining a flat roofing system. Proactive maintenance provides peace of mind and significantly reduces the risk of serious issues. Hiring professional roofing services can also enhance roof performance and longevity through expert installation techniques.

Timely expert repairs can prevent further issues from developing on flat roofs, helping to maintain their structural integrity. Specialized repair services use appropriate materials and techniques to prolong the lifespan of flat roofs. Routine maintenance significantly reduces long-term repair expenses and keeps your flat roof in good condition.

Regular Inspections

Routine professional inspections help identify and address roof issues early, especially after major weather events. Punctures on flat roofs often arise from foot traffic or debris and require inspections after harsh weather to prevent further damage.

Proper Drainage Solutions

Installing effective drainage systems is essential to avoid water accumulation and potential damage on flat roofs. Proper drainage solutions prevent water accumulation, avoiding leaks and structural issues.

Regular maintenance of drainage systems prevents costly repairs and extends the lifespan of a properly maintained flat roof.

Quality Materials and Installation

High-quality roofing material and skilled installation ensure a flat roof’s durability, greatly enhancing its longevity.

High-quality roofing materials prevent costly future repairs and reduce long-term repair costs.

Benefits of Professional Roofing Services

Benefits of Professional Roofing Services

Hiring professional roofing services offers numerous advantages for flat roof maintenance. Professionals conduct comprehensive inspections that accurately assess the condition of flat roofs and recommend appropriate actions. Expert repairs help maintain the integrity and extend the life of flat roofs, preventing leaks and deterioration. Professional services ensure efficient and reliable roof replacements, minimizing disruptions and maximizing quality.

By leveraging their expert knowledge and experience, professional roofers can provide long-term solutions that enhance the performance and longevity of your flat roofing system. Their services include everything from initial inspections to final installations, ensuring that your roofing needs are met with the highest standards of quality and reliability.

Comprehensive Inspections

Qualified inspectors can accurately identify roof conditions and suggest the best maintenance strategies. A free roof inspection is crucial for determining the condition of your current roof and deciding whether to install a new roof or upgrade your roofing system.

Professional inspections are crucial for maintaining the longevity and performance of flat roofs.

Expert Repairs

Expert repairs play a crucial role in preserving the structural integrity of flat roofs, preventing leaks and deterioration. Prompt expert repairs significantly extend the lifespan of flat roofing materials.

Investing in expert repairs can lead to long-term savings, as they reduce the likelihood of major repairs and premature roof replacement.

Efficient Replacement

Professional roofing services play a crucial role in ensuring efficient and reliable roof replacements, minimizing disruption for building users. Professional services emphasize quality and reliability, ensuring the replacement meets high standards.

Their expertise minimizes disruption, allowing for a smoother roof replacement process.

Cost Considerations for Flat Roof Maintenance

Cost considerations for flat roof maintenance, highlighting affordable materials and long-term savings.

Understanding cost considerations for flat roof maintenance helps homeowners make informed decisions. Replacing a flat roof typically costs between $7,000 and $12,000, especially if extensive repairs are needed. The average cost for repairing a flat roof ranges from $300 to $1,250, depending largely on the severity of the damage. Professional roof replacements minimize disruptions and often come with warranties that ensure quality.

Professional roofing services streamline the replacement process, minimizing inconvenience for homeowners. They provide comprehensive support from initial inspection to final installation, emphasizing quality and reliability throughout the project. Investing in professional services can lead to long-term savings by ensuring that the roof is installed correctly and maintained properly.

Affordable Materials

For homeowners on a budget, rolled roofing or bitumen roofing is the cheapest option for flat roofs. Another affordable choice for flat roofing is EPDM (ethylene propylene diene monomer) roofing, known for its durability and cost-effectiveness.

Minimizing installation complexity reduces costs, making rolled roofing and EPDM rubber roofing economical solutions for flat roofs.

Long-Term Savings

Regular inspections identify problems early, preventing major damages and saving homeowners significant repair costs in the long run. High-quality materials during installation greatly enhance the durability of flat roofs, reducing the frequency and cost of repairs.

Affordable roofing materials, like EPDM rubber roofing, offer cost-effective and reliable performance without compromising quality. By investing in quality materials and regular maintenance, homeowners can ensure their flat roofs remain in good condition for many years, ultimately leading to long-term savings.

Summary

Maintaining a flat roof requires a proactive approach to address common issues such as pooling water, blistering, membrane separation, low-quality flashing, and punctures. Understanding the factors that contribute to these problems, including weather exposure, structural movement, and debris accumulation, is crucial. Preventative maintenance, including regular inspections, proper drainage solutions, and the use of high-quality materials, plays a vital role in extending the lifespan of your flat roofing system.

Engaging professional roofing services offers numerous benefits, from comprehensive inspections and expert repairs to efficient replacements. These services not only ensure the quality and reliability of the work but also provide long-term savings by preventing major repairs and premature roof replacements. By taking a proactive approach and investing in professional services, homeowners can enjoy the peace of mind that comes with a well-maintained and durable flat roof.

Frequently Asked Questions

What are the most common problems with flat roofs?

Flat roofs often face issues like pooling water, blistering, and cracking. Regular maintenance is key to preventing these problems.

How can I prevent water pooling on my flat roof?

To prevent water pooling on your flat roof, make sure it has a proper slope and install effective drainage solutions. This will help you avoid standing water and potential damage.

Why is regular maintenance important for flat roofs?

Regular maintenance for flat roofs is crucial as it allows you to catch issues early and prevent bigger problems down the line. By keeping up with inspections and repairs, you can greatly extend the life of your roofing system.

What are some affordable materials for flat roofing?

If you’re looking for affordable materials for flat roofing, rolled roofing or bitumen roofing is your best bet. EPDM roofing is another budget-friendly option that offers great durability.

How much does it cost to replace a flat roof?

Replacing a flat roof usually costs between $7,000 and $12,000, but if you’re just looking at repairs, it might set you back around $300 to $1,250. It’s good to know the range so you can plan your budget accordingly!


A close-up view of roof eaves showing the intricate details of the roof's edge.

Understanding Your Roof Eave: Functions and Styles Explained

Curious about what a roof eave is and why it matters? A roof eave is the part of a roof that extends beyond your home’s walls, helping to protect the foundation and direct rainwater away. In this article, we’ll explore the functions, styles, and benefits of roof eaves to help you appreciate their role in home design.

Key Takeaways

  • Roof eaves are essential for protecting the home from water damage, enhancing energy efficiency, and improving curb appeal, with various styles offering different functional and aesthetic benefits.

  • Types of roof eaves—boxed, open, and closed—each have unique advantages, catering to specific architectural designs and functional needs, while also influencing maintenance requirements.

  • Proper maintenance of roof eaves, including regular inspections and repairs, is crucial to prolong their lifespan and prevent structural damage, while installation costs can vary significantly based on materials and labor.

What Are Roof Eaves?

A close-up view of roof eaves showing the intricate details of the roof's edge.

Roof eaves are the overhanging lower edges of a roof that extend beyond the exterior walls, directing rainwater away from the house and protecting the foundation and walls. Key components include fascia boards, soffits, and flashing. The fascia protects the ends of the rafters, while the soffit closes the gap between the fascia and the exterior wall, creating an effective eave overhang.

Eaves can vary significantly in size and style, affecting both their appearance and functionality. For instance, wide eaves provide more shade and protection, while narrow eaves can offer a sleeker look. The choice of eave style often depends on the architectural design of the house and the specific needs of the homeowner.

The versatility in design allows for a range of aesthetic and functional possibilities, from rustic exposed eaves to modern, streamlined boxed eaves.

Functions of Roof Eaves

An illustration depicting the functions of roof eaves in protecting a house.

Roof eaves serve both functional and aesthetic purposes that are vital for a home’s usability and appearance. One of their primary functions is to direct rainwater away from the home’s foundation, reducing the risk of water damage and erosion. Eaves protect windows and doors from heavy rain, keeping them dry and extending their lifespan, especially in areas prone to heavy rainfall or snow.

Beyond protection from the elements, roof eaves contribute significantly to a home’s energy efficiency. They provide shade that helps regulate indoor temperatures, reducing the need for air conditioning in warmer climates. Well-designed eaves improve attic ventilation, preventing moisture buildup and the potential for mold and structural damage.

Additionally, aesthetically pleasing eaves enhance the overall beauty and curb appeal of a home, showcasing the architectural silhouette and adding decorative touches.

Types of Roof Eaves

A diagram illustrating the benefits and drawbacks of roof eaves.

Roof eaves come in various types, each with unique advantages that cater to specific architectural styles and functional needs. The four basic types are boxed eaves, open eaves, closed eaves, and exposed rafter eaves.

Understanding the characteristics of each type can help homeowners choose the right design that complements their home and meets practical requirements. Each type has distinct features worth exploring.

Boxed Eaves

Boxed eaves offer a clean, polished appearance with a streamlined look extending horizontally under the roof. Their simple, straight design encases the rafters without exposing the siding, enhancing aesthetic appeal and providing increased protection from the elements.

The soffit eaves in boxed eaves is fully attached, keeping out pests and debris, and reducing moisture buildup. This design is especially effective in climates with frequent rain or snow, as it channels water away from the walls, protecting structural integrity.

Boxed eaves are a great choice for homeowners looking for a combination of functionality and aesthetic appeal, especially when considering box eaves.

Open Eaves

Open eaves, or exposed eaves, feature visible roof rafters without soffit coverings. Often used in rustic and traditional styles, this design gives homes a rugged, natural look. The exposed rafters add charm and reveal the roof’s structure, creating a visually appealing effect.

Open eaves offer improved ventilation, beneficial in warmer climates. The absence of soffit allows better air circulation, preventing moisture buildup in the attic or roof space.

However, this design may require more maintenance to keep the exposed roof rafters in good condition and free from pests.

Closed Eaves

Closed eaves offer a polished look by covering the underside of the roof overhang with soffits, connecting the roof’s bottom edge to the house wall and preventing any exposed siding. They are popular in traditional and modern styles due to their clean lines and aesthetic appeal.

The soffits in closed eaves conceal the roof structure at a 90-degree angle, protecting from the elements and reducing moisture buildup. This design also prevents pests from entering the attic or roof space.

However, it’s essential to ensure proper ventilation within the closed eaves to avoid issues related to poor air circulation.

Benefits and Drawbacks of Roof Eaves

Various styles of roof eaves including boxed and open eaves.

Roof eaves enhance both the functionality and aesthetic appeal of a home but also come with certain drawbacks. Understanding these pros and cons can help homeowners make an informed decision about the type of eaves that best suit their needs.

Benefits

Roof eaves protect from rain, snow, and debris by directing them away from the house, reducing erosion and water damage to the foundation and walls. They also prevent moisture buildup, which can lead to mold growth and structural issues, enhancing the roof’s overall durability.

Roof eaves also improve energy efficiency by providing shade, keeping the house cooler in the summer, and reducing the need for air conditioning. Additionally, they enhance a home’s curb appeal, adding aesthetic value and potentially increasing market value.

Roof eaves help keep pests like birds, rodents, and insects out of the attic or roof space, which is particularly important in areas prone to infestations. This contributes to a healthier and more comfortable living environment.

Drawbacks

Despite their benefits, roof eaves require regular maintenance, including cleaning, repairs, and repainting, which can be time-consuming and costly, especially if the eaves are damaged or pests are attracted to open-style eaves.

Another drawback is the increased risk of wind damage during storms, as roof eaves can catch the wind, causing uplift and structural damage. Proper design and installation can mitigate this risk, but it remains a concern for homeowners in windy regions.

Maintenance Tips for Roof Eaves

Maintaining roof eaves ensures their longevity and functionality. Regular tasks include cleaning gutters, inspecting for wear and tear, and promptly addressing any issues.

Proper maintenance can prevent minor problems from escalating into major repairs.

Identifying Damage

Early identification of damage is key to maintaining roof eaves. Signs include rotting wood, paint deterioration, and sagging structures. Thoroughly inspect the eaves to determine if the damage is localized or extends to the underlying structure. Extensive damage may require repairing both the eaves and soffits.

During maintenance, remove any rotted or damaged wood, trim, or soffit to ensure the roof eaves’ integrity. Regular inspections and prompt repairs help maintain your home’s structural health and prevent costly issues.

Repair and Replacement

The extent of damage dictates the course of action for repairing or replacing roof eaves. Minor damage can be addressed by replacing siding or fascia materials and soffit boards with pressure-treated wood or PVC. Repainting the eaves after repairs is essential to protect and restore their appearance.

For extensive damage, hiring a professional roofing contractor is advisable to ensure the job is done correctly. Professionals offer quality workmanship and use materials that withstand the elements, ensuring the repairs’ longevity, saving time, and ensuring the roof’s safety and durability.

Choosing the Right Type of Roof Eaves for Your Home

A selection of different roof eave styles suitable for various homes.

Selecting the right type of roof eaves involves considering factors like local climate, architectural style, and personal preferences. Wider eaves might suit areas with heavy rainfall, while narrow eaves offer a modern, minimalist look. Professional consultation can tailor the choice to meet both aesthetic and functional needs.

Additionally, eaves combined with soffits can serve as locations for installing security cameras and lights, enhancing home security and usability. Considering these factors can help choose roof eaves that complement your home’s design and meet practical requirements.

Cost Considerations for Installing or Replacing Roof Eaves

The cost of installing or replacing roof eaves varies depending on materials, work extent, and labor charges. Replacing roof eaves typically costs between $2,000 to $5,000. Installing new eaves can increase the overall cost of roofing projects due to additional materials and labor.

Repairing eaves can be more affordable, costing $6 to $20 per linear foot, while replacement ranges from $15 to $30 per linear foot. Labor charges for eaves repair typically range between $75 to $150 per hour. Budgeting for these expenses ensures the eaves are properly maintained and functional.

Summary

Understanding the importance, types, functions, and maintenance of roof eaves can significantly enhance the longevity and aesthetic appeal of your home. Roof eaves offer protection from the elements, improve energy efficiency, and increase curb appeal. By choosing the right type of eaves and ensuring regular maintenance, homeowners can enjoy the benefits of a well-protected and beautiful home.

Frequently Asked Questions

What is the difference between an eave and a soffit?

The primary difference between an eave and a soffit is that the eave refers to the entire overhanging section of the roof, while the soffit specifically denotes the underside of that overhang. Understanding this distinction can aid in effective home maintenance and design.

What are the main components of roof eaves?

The main components of roof eaves are fascia boards, soffits, and flashing. These elements play a crucial role in protecting the roof and enhancing its aesthetic appeal.

How do roof eaves contribute to energy efficiency?

Roof eaves significantly enhance energy efficiency by providing shade that helps regulate indoor temperatures, ultimately reducing the reliance on air conditioning and lowering energy costs.

What are the benefits of boxed eaves?

Boxed eaves provide a clean and polished appearance, enhance protection against the elements, and aid in roof maintenance by preventing pests and debris accumulation.

How can I identify damage in roof eaves?

To identify damage in roof eaves, look for signs such as rotting wood, paint deterioration, and sagging structures. A thorough inspection will help you assess the extent of any damage present.


Architectural styles featuring gable roofs, including Craftsman and Tudor styles.

Top 7 Gable Roof Design Ideas to Elevate Your Home’s Aesthetic

Looking to enhance your home’s aesthetic with a gable roof design? This article showcases the top 7 gable roof design ideas that can elevate the look and functionality of your home. From standard gables to intricate cross gables, discover the best styles and materials to create a stunning and durable roof.

Key Takeaways

  • Gable roofs are characterized by their triangular shape, providing structural support and enhancing aesthetic appeal through proper construction and ventilation.

  • There are various types of gable roofs, such as standard, box, and cross gables, each offering unique visual and functional benefits suited to different architectural styles.

  • Key factors to consider for gable roofs include material choice, weather resistance, maintenance needs, and potential cost implications, all of which affect durability and aesthetics.

Understanding Gable Roof Design

An example of a gable roof design showcasing its triangular shape.

Gable roofs, recognized by their iconic triangular shape formed by two sloping sides, are a timeless roofing choice. This design not only defines the silhouette of a home but also supports the roof and protects the interior. The gable end, the triangular wall portion between the roof edges, is a crucial structural and aesthetic feature. Gable roofs are celebrated for their simplicity and effectiveness, making them a popular choice across various architectural styles.

However, the beauty and functionality of gable roofs heavily depend on their construction quality. Proper construction ensures structural integrity, optimal ventilation, and efficient drainage, while also enhancing the home’s visual appeal. Poor construction, on the other hand, can lead to issues such as roof collapse under heavy snow or wind damage.

Basic Components of a Gable Roof

A well-built gable roof comprises several essential components:

  • The rafters, which are crucial as they bear the weight of the roof and define its shape.

  • Ridge boards, which connect the rafters at the top and form the central structural spine of the roof.

  • Wall plates at the base, which provide a stable foundation for the rafters, ensuring the entire structure’s stability.

Understanding these components helps in appreciating the engineering behind gable roofs. Each element, from the rafters to the ridge boards, works together to create a strong and functional roof.

Importance of Proper Construction

A well-constructed gable roof provides optimal ventilation, efficient drainage, and ample attic space, enhancing the home’s aesthetic appeal. The sloping sides of a gable roof are particularly effective at directing rainwater and snow away from the house, especially when equipped with a gable vent.

Conversely, improperly constructed gable roofs risk collapsing under heavy snow and being compromised by strong winds. Poor design can also limit usable attic space, reducing functionality.

Popular Types of Gable Roofs

Different types of gable roofs displayed on various homes.

Gable roofs come in various styles, each offering unique aesthetic and functional benefits. From the standard gable to the more complex cross gable, homeowners have a range of options to match their preferences and architectural needs.

Popular types of gable roofs include the standard gable, box gable, and cross gable. These designs cater to different tastes and requirements, making gable roofs versatile for various architectural styles.

Standard Gable Roof

The standard gable roof shape features two sloping sides that meet at a peak, forming a triangular shape. This style is popular in snowy areas for its effective snow-shedding capabilities.

Its simplicity makes the standard gable roof and simple gable roofs both functional and aesthetically pleasing.

Box Gable Roof

Box gable roofs extend beyond the main roofline and enclose the ends, creating a boxed appearance that adds visual interest and architectural depth, including the elegant design of an open gable roof and a dutch gable roof.

Found in Colonial and Victorian homes, box gable roofs provide a charming and classic look.

Cross Gable Roof

The cross gable roof features two or more gable sections intersecting at right angles, creating a complex and visually intriguing design. This style accommodates separate wings or larger porches, adding both functionality and charm.

Cross gable roofs offer increased attic or living space due to their design, making them an excellent choice for maximizing interior space while maintaining a unique and appealing exterior.

Enhancing Gable Roofs with Different Materials

Selecting the right roofing materials greatly impacts the durability and aesthetic appeal of gable roofs. Different materials offer benefits like enhanced weather resistance and improved energy efficiency, ensuring longevity and resilience to local weather conditions.

Common materials for gable roofs include asphalt shingles, metal, and cedar shakes, each bringing unique qualities that enhance the roof’s overall look and functionality. The choice of roofing material can significantly impact the durability and aesthetic appeal of gable roofs.

Asphalt Shingles

Asphalt shingles are economical and popular for their weather resistance and availability in various colors and styles, suiting different aesthetics.

Their versatility allows them to conform to various roof shapes and slopes, simplifying installation.

Metal Roofing

Metal roofing offers a longer lifespan, better energy efficiency, and resistance to extreme weather conditions compared to traditional shingles. Metal roofs withstand high winds, extreme temperatures, and hail, making them durable and low-maintenance for gable roofs.

Cedar Shakes

Cedar shakes add rustic charm to gable roofs, enhancing aesthetic appeal. They naturally resist decay and insects, making them durable. Cedar shakes also provide natural insulation, contributing to the home’s energy efficiency.

Architectural Styles Featuring Gable Roofs

Architectural styles featuring gable roofs, including Craftsman and Tudor styles.

Gable roofs are prominent in various architectural styles, adding character and charm. From Colonial to Victorian-era houses, they enhance visual appeal and functionality. These roofs can be ornamented with decorative elements such as pediments and brackets, further enhancing aesthetics.

Architectural styles like Craftsman, Cape Cod, and Tudor utilize gable roofs and a unique roof style to create distinctive and attractive exteriors.

Craftsman Style Homes

Craftsman-style homes feature a side-gabled roof, front porch, overhanging eaves, and low-pitched roof. The substantial overhangs serve functional purposes and enhance aesthetic appeal.

Cape Cod Houses

Cape Cod houses are recognizable by their steeply pitched gable roofs, often accompanied by dormers. These dormer windows provide additional living space and enhance aesthetics.

Tudor-Style Homes

Tudor-style homes feature multiple front-facing gables, adding to their distinctive and charming appearance. These gables often incorporate decorative half-timbering and arched windows, contributing to Tudor architecture’s rustic charm.

Practical Considerations for Gable Roofs

A gable roof showcasing its practical considerations for weather resistance.

When considering a gable roof, think about practical aspects such as weather resistance, maintenance, and cost. Gable roofs are known for effective drainage and relatively low initial installation costs, but they may require more frequent maintenance in windy areas.

Weather Resistance

Weather resistance is crucial for gable roofs. While they handle heavy rainfall and snow well, they can be vulnerable to high winds. Metal roofs offer superior durability and can withstand extreme weather conditions, making them reliable for gable roofs.

Maintenance Tips

Regular maintenance protects your investment in a gable roof. Look for signs of hail damage, such as dents or missing granules, and address issues promptly to prevent further damage. Proper maintenance extends the roof’s life and ensures it remains in good condition.

Cost Implications

Gable roofs’ simplicity often results in lower initial installation costs compared to more complex roof types. However, long-term maintenance costs may be higher due to potential wind damage and repair needs.

A new roof can increase property value by enhancing curb appeal and assuring potential buyers of reduced maintenance costs.

Benefits of Gable Roofs

Benefits of gable roofs, highlighting increased attic space and ventilation.

Gable roofs provide numerous benefits, from increased attic space to improved ventilation and aesthetic versatility. Their design allows for higher ceilings and more attic space compared to flat roofs, making them practical and attractive.

These roofs also promote natural ventilation, regulating temperature and minimizing moisture buildup. The timeless charm and structural integrity of gable roofs make them popular for enhancing a home’s character.

Increased Attic Space

Gable roofs offer more attic space compared to hip roofs due to their steep slope. This extra space can be used for storage or converted into living areas, providing more flexibility and functionality.

Enhanced Ventilation

Gable roofs facilitate airflow, maintaining a comfortable temperature within the home. Dormer windows in Cape Cod houses enhance natural light and ventilation, creating a pleasant living environment.

Metal roofs contribute to energy efficiency by reflecting solar heat.

Aesthetic Versatility

Gable roofs are known for their aesthetic versatility, allowing homeowners to customize designs with various architectural elements. This adaptability enhances visual appeal and contributes to the home’s overall charm and character.

Summary

In summary, gable roofs offer a blend of functionality and aesthetic appeal that can significantly enhance your home’s exterior. With various design options and material choices, gable roofs provide increased attic space, improved ventilation, and a timeless charm that suits many architectural styles. Whether you’re looking for a practical roofing solution or aiming to elevate your home’s curb appeal, gable roofs are an excellent choice.

Frequently Asked Questions

What are the basic components of a gable roof?

A gable roof primarily consists of rafters, which support the weight and shape of the roof; ridge boards, that connect the tops of the rafters; and wall plates, which serve as a foundation for the rafters. These components work together to create a sturdy and effective roofing structure.

What are the popular types of gable roofs?

The popular types of gable roofs are the standard gable, box gable, and cross gable roofs, each providing distinct aesthetic and functional advantages to suit various architectural styles. Choosing the right type can enhance both the appearance and usability of your home.

How does metal roofing benefit gable roofs?

Metal roofing significantly enhances gable roofs by providing durability, energy efficiency, and resistance to harsh weather conditions. Its long lifespan and low maintenance requirements further make it an ideal choice for homeowners.

What architectural styles feature gable roofs?

Gable roofs are prominently featured in Craftsman, Cape Cod, and Tudor architectural styles, enhancing their distinctive and appealing appearances.

What are the benefits of gable roofs?

Gable roofs provide numerous benefits, including increased attic space, better ventilation, and aesthetic versatility that can elevate your home’s architectural character. Their distinct triangular shape allows for customization to suit various styles, enhancing both function and design.


A close-up of an EPDM roofing system installation showcasing the rubber membrane.

TPO Versus EPDM: Choosing the Best Commercial Roofing System

Choosing between TPO and EPDM roofing systems hinges on your specific needs. TPO is known for its heat-reflecting properties, making it excellent for warm climates. EPDM is praised for its durability and flexibility. This article will help you compare TPO versus EPDM so you can make an informed choice for your commercial roof.

Key Takeaways

  • TPO roofing systems are known for their energy efficiency and long lifespan of 20 to 30 years, making them suitable for warmer climates.

  • EPDM roofing systems offer exceptional durability and flexibility, with a lifespan of 25 to 30 years, ideal for flat roof surfaces and harsh weather conditions.

  • Both TPO and EPDM have their advantages and disadvantages, and selecting the right system depends on factors like geographical location, budget, and specific building needs.

Understanding TPO Roofing Systems
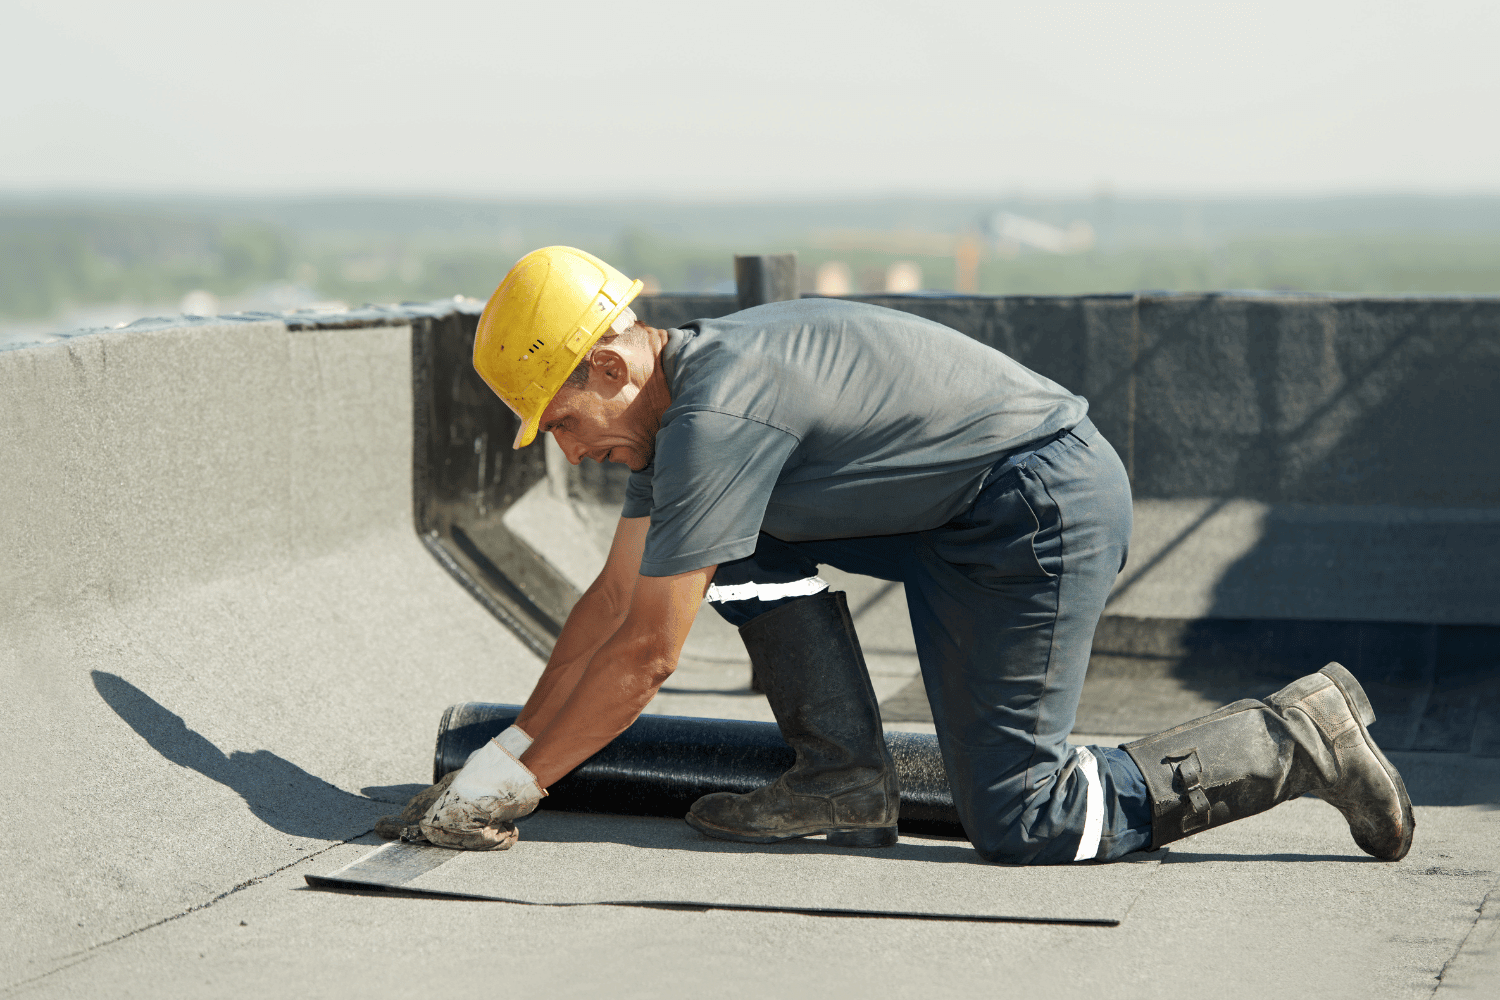
An overview of TPO roofing systems showing a flat roof installation.

Thermoplastic Polyolefin (TPO) roofing systems have gained significant popularity in the commercial roofing industry due to their durability and energy efficiency. Composed of polypropylene and ethylene-propylene rubber, TPO membranes often include reinforcements like polyester or fiberglass to enhance their strength and stability. The key components in TPO roofing sheets, such as polyesters, UV stabilizers, fillers, and pigments, contribute to their robustness and longevity.

One of the standout features of TPO roofing is its energy efficiency, making it an ideal choice for warmer climates. Reflecting heat rather than absorbing it, TPO roofs help keep buildings cooler, which can lead to significant savings on cooling costs.

With an estimated lifespan of 20 to 30 years, a high-quality TPO roofing system is a long-term investment that balances initial costs with lasting benefits.

Pros and Cons of TPO Membranes

TPO roofing systems offer several advantages, particularly in terms of energy efficiency. Their ability to reflect heat makes them an excellent choice for buildings in warmer climates, reducing the need for air conditioning and lowering energy bills. Additionally, TPO membranes are relatively easy to install, which can save time and labor costs during the installation process.

However, TPO membranes are not without their disadvantages. One of the main drawbacks is their susceptibility to punctures, which can compromise the integrity of the roof if not promptly addressed. Despite their robust construction, TPO roofs require careful handling and maintenance to ensure their longevity and performance.

Installation Methods for TPO Roofs

The installation of TPO roofs can be carried out using several methods, each with its own set of advantages. One of the most common methods is heat welding, which involves using hot air to weld the seams of the TPO membranes together, creating a strong and watertight bond. This method is particularly effective in ensuring the durability and waterproofing of the roofing system.

TPO roofs can be installed in different ways. They can be fully adhered or mechanically attached. Fully adhered installations use adhesives to bond the TPO membrane to the roof deck, while mechanically attached installations involve securing the membrane with fasteners.

Regardless of the method chosen, proper installation is crucial for ensuring the longevity and performance of the TPO roofing system.

Exploring EPDM Roofing Systems

A close-up of an EPDM roofing system installation showcasing the rubber membrane.

Ethylene Propylene Diene Monomer (EPDM) roofing systems have long been a staple in the commercial roofing industry due to their exceptional durability and flexibility. Made from synthetic rubber, EPDM membranes are robust, lightweight, and low maintenance, making them a reliable choice for various commercial applications, including those with a rubber roof. Their flexibility enhances their versatility, allowing them to accommodate a wide range of building types and roof designs.

EPDM roofing systems are particularly well-suited for large, flat roof surfaces, which are common in commercial buildings. Available in thicknesses ranging from 45 to 90 mils, EPDM roofing membrane can be tailored to meet different performance needs and budgets. This adaptability, combined with their proven track record, makes EPDM roofs a popular choice for property owners looking for a long-lasting roofing solution.

Advantages and Disadvantages of EPDM Roofs

One of the primary advantages of EPDM roofing systems is their durability. EPDM membranes are highly resistant to UV rays, ozone, and weathering, which significantly contributes to their long lifespan. This resistance makes them an excellent choice for buildings exposed to harsh weather conditions, ensuring reliable protection year-round.

However, EPDM roofs do have some limitations. Their poor resistance to mineral and petroleum oils can lead to degradation if exposed to these substances. Additionally, while EPDM roofs are generally durable and reliable, their limited color options may not suit all aesthetic preferences, which can be a consideration for some property owners.

Installation Techniques for EPDM Roofs

EPDM roofs can be installed using various methods, including fully adhered, ballasted, and mechanically attached systems. Fully adhered installations involve using adhesives to secure the EPDM membrane to the roof deck, providing a strong and uniform bond. This method is particularly effective in ensuring the membrane remains securely in place, even under extreme weather conditions.

Alternatively, EPDM roofs can be installed using a ballasted system, where the membrane is held in place by a layer of rock ballast. This method is often used for larger roof surfaces and provides additional stability.

Mechanically attached installations, which use fasteners to secure the membrane, are another option, especially for roofs that require additional reinforcement. Each installation method has its benefits, and the choice often depends on the specific requirements of the building and the preferences of the property owner.

Comparing TPO and EPDM Roofing Systems
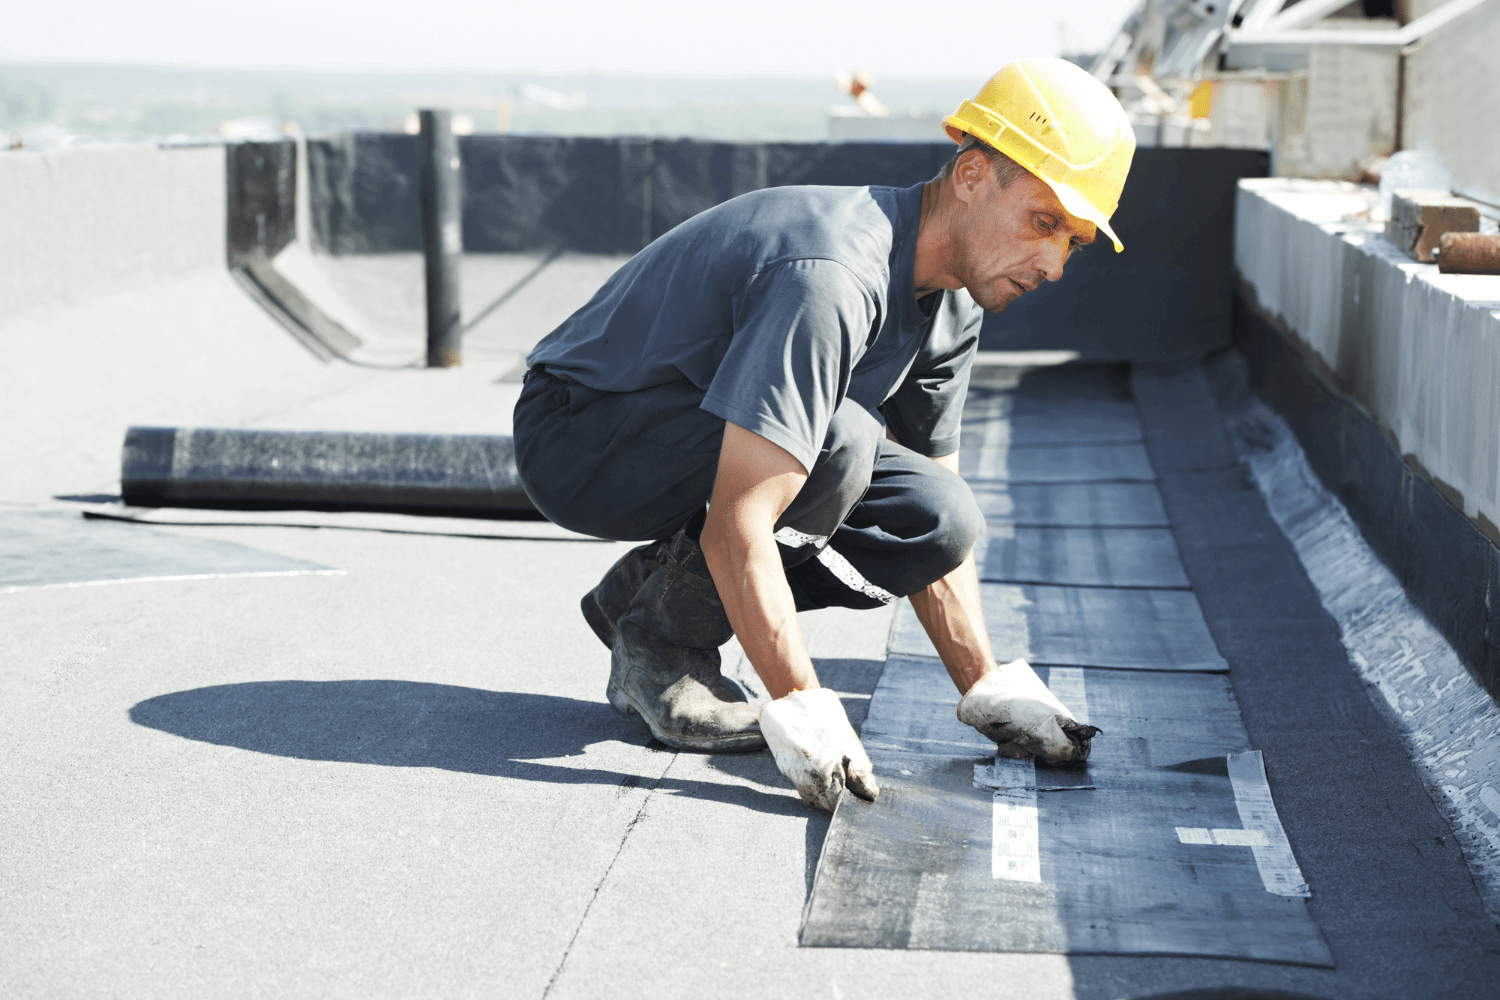
A side-by-side comparison of TPO and EPDM roofing systems.

When comparing TPO and EPDM roofing systems, it’s essential to consider their material composition and performance characteristics. TPO is a thermoplastic membrane, while EPDM is a synthetic rubber membrane. Both roofing systems are classified as single-ply roofing materials, known for their lightweight and cost-effective properties.

Despite their differences, both TPO and EPDM offer exceptional durability and weather resistance, making them popular choices for commercial roofing. They share common attributes such as Class A fire resistance and the ability to withstand a wide range of temperatures without significant degradation.

Understanding these similarities and differences can help property owners make an informed decision based on their specific needs and preferences.

Cost Analysis: TPO vs. EPDM

Cost is a significant factor when choosing between TPO and EPDM roofing systems. The cost range for both TPO and EPDM roofing is approximately $12 to $17 per square foot, depending on the size and complexity of the project. The average cost of TPO roofing materials generally ranges from $3 to $5 per square foot, making it a relatively affordable option compared to other roofing materials.

While TPO roofing offers energy efficiency benefits that can lead to long-term savings, it may come with a higher initial cost compared to alternatives like asphalt shingles. On the other hand, EPDM roofing systems, known for their durability and low maintenance requirements, may offer a more cost-effective solution over the long term.

Longevity and Durability Comparison

The longevity and durability of TPO and EPDM roofs are crucial factors to consider. TPO roofs usually last around 15 to 20 years. In contrast, EPDM roofs have a lifespan of approximately 25 to 30 years. Despite TPO’s UV resistance, it is still vulnerable to degradation over time, which can affect its longevity.

EPDM roofing systems are renowned for their exceptional durability and resistance to weathering, UV rays, and ozone. Timely repairs on minor leaks and damage are essential for both TPO and EPDM roofs to prevent costly repairs and extend their service life. Addressing seam failures and other minor issues promptly can significantly enhance the longevity and performance of the epdm roofing system.

Energy Efficiency and Environmental Impact

Energy efficiency and environmental impact are critical considerations for modern commercial buildings. TPO roofing systems are particularly noted for their reflective properties, which can reduce heat absorption and lower cooling costs during the summer months. This energy efficiency can contribute to a more sustainable and cost-effective building operation.

EPDM roofs, while not as reflective as TPO, still offer significant environmental benefits due to their long lifespan and recyclability. Both TPO and EPDM roofing systems can help reduce the overall environmental impact of a building by minimizing waste and energy consumption. Considering these factors can help property owners make a more eco-friendly choice that aligns with their sustainability goals.

Choosing the Right Roofing System for Your Building
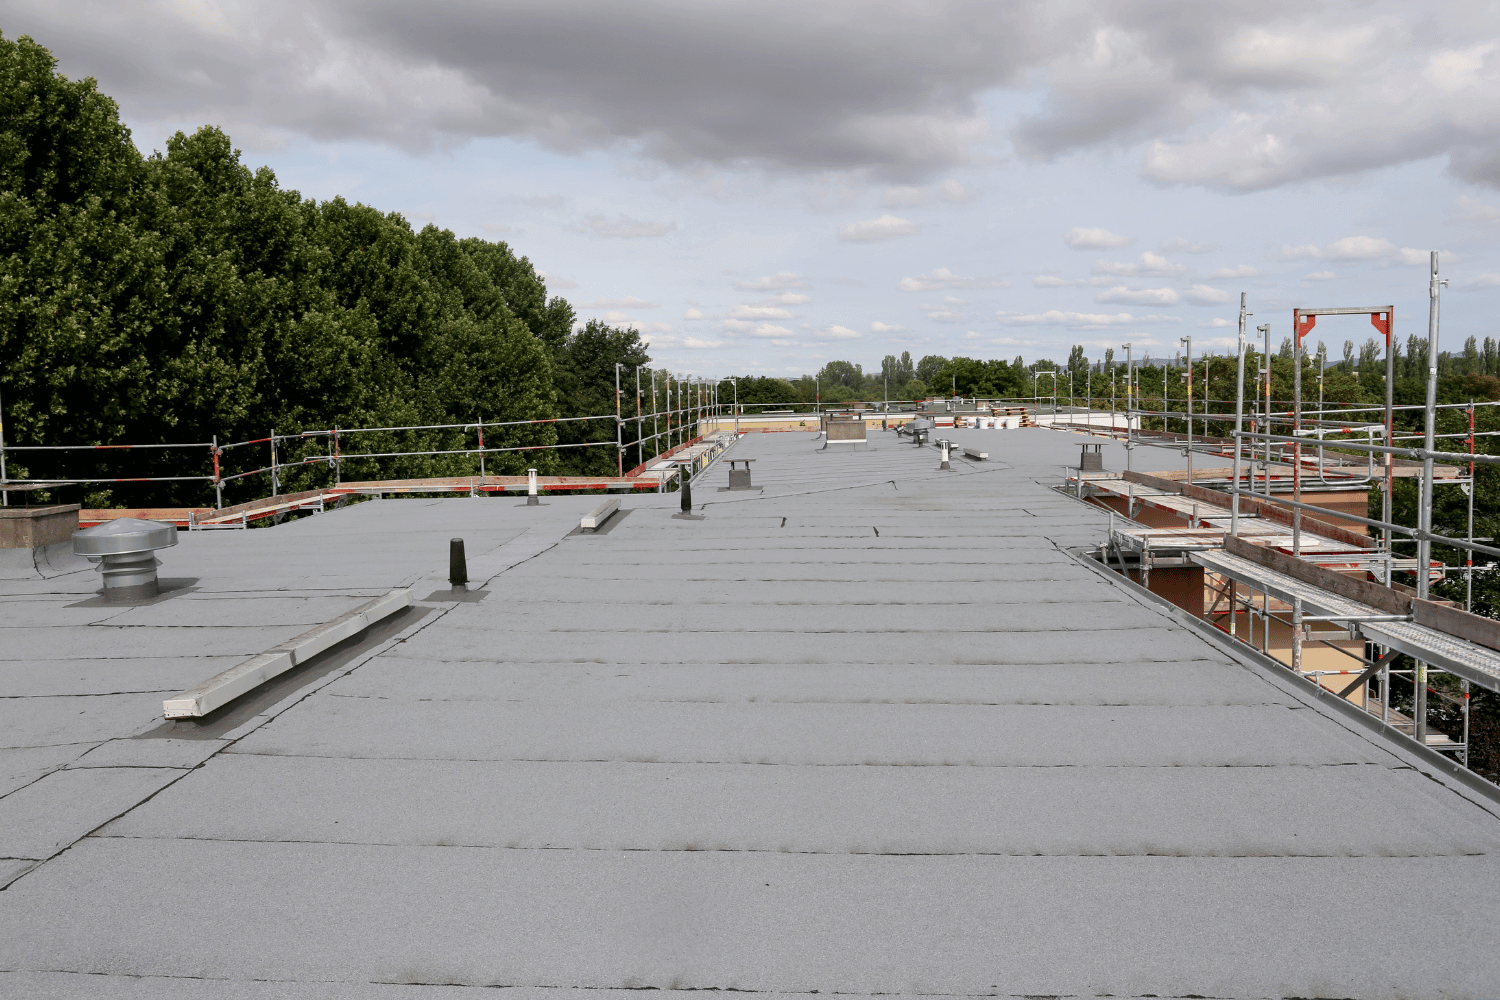
A professional consulting with a property owner about roofing options.

Selecting the right roofing system for your building involves evaluating several factors, including geographical location, budget, and building requirements. Roofing contractors play a crucial role in assessing these aspects to determine the most suitable roofing choice. Factors such as climate, local building codes, and the intended use of the building significantly influence the decision-making process.

Engaging with experienced roofing professionals is essential for making an informed decision. They can provide valuable insights and recommendations based on their extensive knowledge of various roofing systems. Consulting with professionals ensures that the chosen roofing system meets the specific needs and budget of the project, leading to a successful and cost-effective installation.

Factors Influencing Your Decision

Several factors influence the decision between TPO and EPDM roofing systems. Geographical location is a significant consideration, as different climates can affect the performance and longevity of the roofing materials. Local building codes may also dictate specific requirements that impact the choice between TPO and EPDM roofing systems.

The intended use of the building plays a crucial role in determining which roofing system is more appropriate. For instance, buildings that require high energy efficiency may benefit more from TPO roofing, while those needing long-term durability might prefer EPDM. Evaluating these factors helps property owners make a well-informed decision that aligns with their specific needs.

Consulting with Roofing Professionals

Consulting with roofing professionals is a critical step in the decision-making process. Professional roofing contractors can provide valuable insights based on their experience with various roofing systems, ensuring that the chosen system aligns with the specific project needs and budget. Their expertise helps property owners navigate the complexities of roofing choices and make informed decisions.

Engaging with roofing experts throughout the decision-making process ensures that all aspects of the project are considered, from initial assessment to final installation. This comprehensive approach leads to a more successful and cost-effective roofing solution, providing peace of mind for property owners and ensuring the long-term performance of the roofing system.

The Importance of Professional Installation

Professional installation is crucial for maximizing the performance and longevity of roofing systems. Collaborating closely with roofing professionals ensures that the installation process adheres to manufacturer guidelines and industry best practices. Proper installation is vital for avoiding common issues such as seam separation and leaks, which can lead to costly repairs.

Ensuring that the roofing system is installed correctly from the outset helps maintain its integrity and performance over time. By prioritizing professional installation, property owners can significantly reduce the risk of future problems and prolong the lifespan of their roofing system.

Benefits of Hiring Certified Installers

Hiring certified installers offers several benefits, including ensuring that the roofing system is installed correctly and in accordance with manufacturer guidelines. Certified installers have undergone extensive training and are knowledgeable about the best practices for installing TPO and EPDM roofing systems, which enhances the quality and reliability of the installation.

Certified professionals help avoid common pitfalls, such as improper sealing and inadequate drainage, which can lead to future repair costs. By hiring certified installers, property owners can have peace of mind knowing that their roofing system will be installed correctly and perform optimally for years to come.

Common Installation Pitfalls to Avoid

Avoiding common installation pitfalls is essential for maintaining the performance and longevity of roofing systems. Poor installation can lead to issues such as seam separation and leaks, which can compromise the integrity of the roof and require costly repairs. Proper installation methods and thorough training for installers are crucial for preventing these problems.

Ensuring that the roofing system is installed correctly from the outset helps maintain a watertight seal and extends the lifespan of the roof. By adhering to best practices and avoiding common mistakes, property owners can ensure the long-term success of their roofing system and minimize the risk of future issues.

Maintenance Practices for TPO and EPDM Roofs
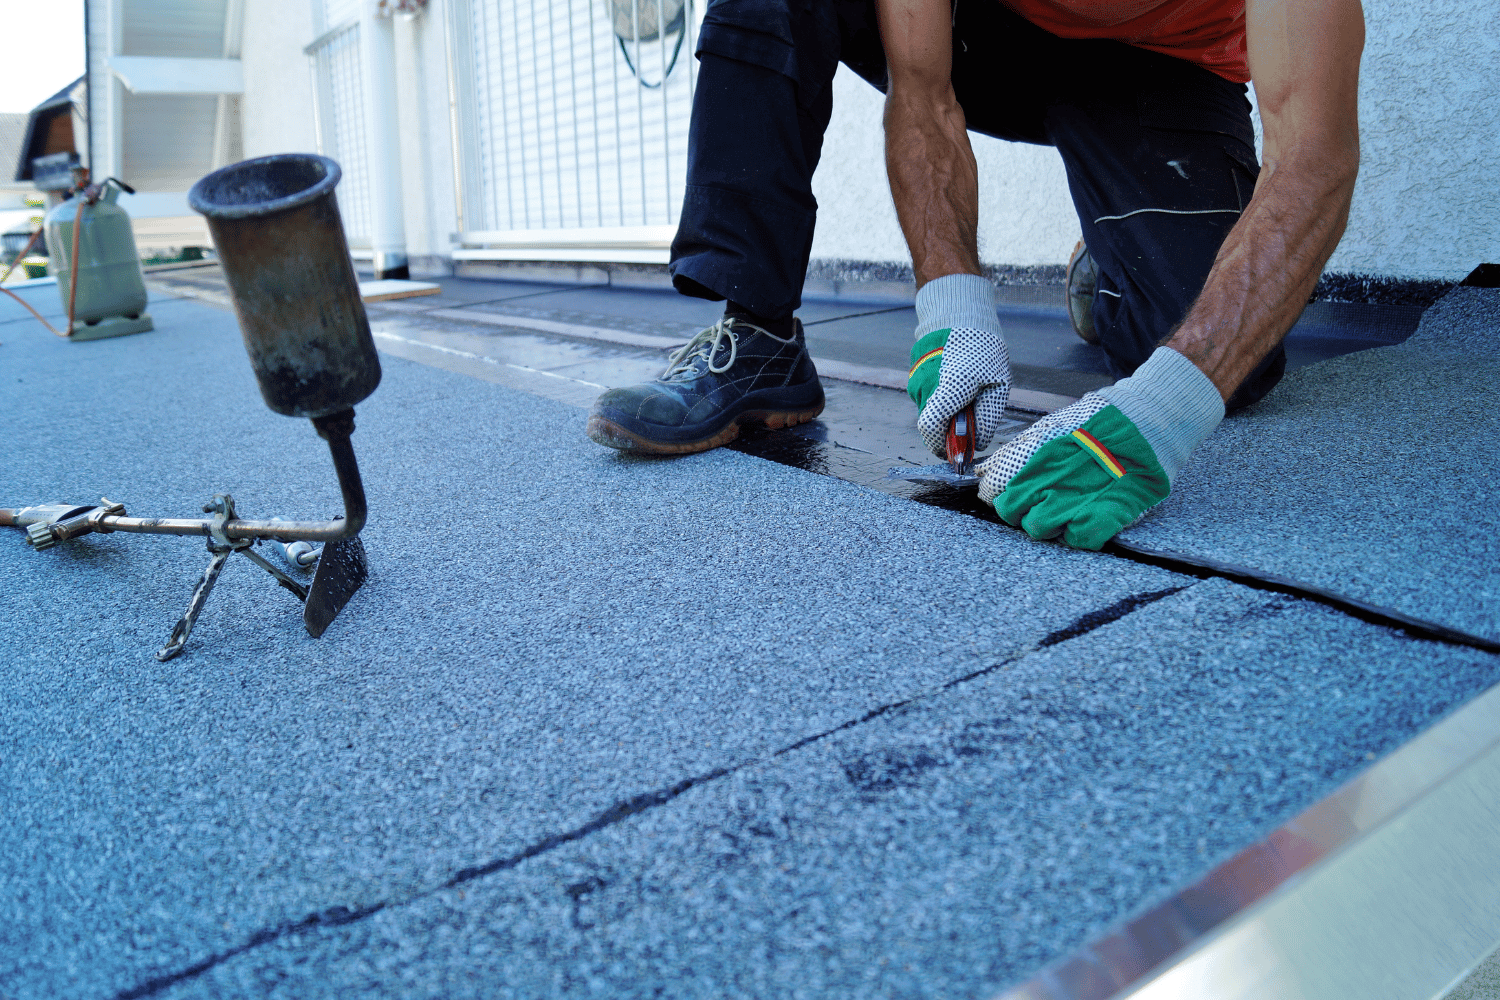
A maintenance worker inspecting a TPO roof for signs of wear.

Maintaining TPO and EPDM roofs is essential for extending their lifespan and ensuring optimal performance. Regular maintenance practices, such as inspections and cleaning, play a critical role in preventing issues like seam separation and leaks. Proper installation from the start is crucial for maintaining a watertight seal and preventing common problems.

Regular maintenance can significantly prolong the lifespan of TPO and EPDM roofs, minimizing the risk of costly repairs and ensuring the roofing system performs optimally. By adhering to a regular maintenance schedule, property owners can maximize the longevity and efficiency of their roofing systems.

Routine Inspections and Cleaning

Routine inspections and cleaning are vital components of maintaining TPO and EPDM roofing systems. A thorough inspection should be conducted at least biannually to identify potential issues before they escalate. Cleaning involves removing debris, dirt, and algae to prevent material degradation and maintain the roof’s appearance.

The frequency of cleaning TPO roofs is influenced by environmental factors like climate, precipitation, and roof slope. Using a low-pressure power washer and a soft bristle broom with TPO-safe cleaning solutions is recommended for cleaning, helping to maintain energy efficiency by reflecting sunlight and preventing mold growth.

Addressing Minor Repairs Promptly

Addressing minor repairs promptly is crucial to prevent small issues from escalating into major problems. Timely repairs can significantly reduce long-term costs associated with major repair work and extend the lifespan of the roofing system. Routine inspections should be scheduled after severe weather events to identify and address minor issues early.

Regular maintenance and prompt repairs are essential for ensuring the long-term performance of TPO and EPDM roofing systems. By staying proactive and addressing minor repairs promptly, property owners can prevent significant structural issues and maintain the integrity of their roofs.

Summary

In conclusion, both TPO and EPDM roofing systems offer unique benefits and considerations that make them suitable for different commercial applications. TPO roofing systems are known for their energy efficiency and ease of installation, while EPDM roofing systems are celebrated for their durability and flexibility. Understanding the specific needs of your building and consulting with roofing professionals can help you make an informed decision.

Choosing the right roofing system is a crucial investment in the longevity and performance of your commercial property. By carefully considering factors such as cost, durability, energy efficiency, and maintenance requirements, property owners can select the roofing system that best meets their needs and ensures long-term protection and efficiency.

Frequently Asked Questions

What are the main differences between TPO and EPDM roofing systems?** **?

TPO roofing systems are more energy-efficient due to their reflective properties, whereas EPDM systems excel in durability and flexibility. Your choice may depend on your specific needs for energy savings or long-lasting performance.

How long do TPO and EPDM roofs last?

TPO roofs generally last 15 to 20 years, whereas EPDM roofs can endure for 25 to 30 years. Choosing EPDM may provide a longer-term solution for your roofing needs.

What are the common installation methods for TPO roofs?

Common installation methods for TPO roofs include heat welding, fully adhered systems, and mechanically attached configurations. Choosing the right method depends on the specific requirements of your roofing project.

What maintenance practices are recommended for TPO and EPDM roofs?

Regular inspections, cleaning to remove debris and algae, and prompt attention to minor repairs are essential for maintaining TPO and EPDM roofs. Implementing these practices will help extend the lifespan of your roof.

How do TPO and EPDM roofs impact energy efficiency?

TPO roofs enhance energy efficiency with their reflective properties, leading to reduced heat absorption and lower cooling costs. Although EPDM roofs may not be as reflective, they provide substantial longevity and recyclability advantages, contributing positively to overall energy sustainability.
 

An overview of various roof types residential homes can have.

Top 10 Roof Types Residential for Residential Homes: A Comprehensive Guide

Planning to roof your home? Understanding residential roof types will help you choose the best one for your needs. In this guide, we’ll discuss the most popular roof types—residential roof types included—their advantages, and the environments they are best suited for.

Key Takeaways

  • Selecting a roof type for your home involves considering local climate, architectural style, and functionality, with various options available, such as hip, gable, and flat roofs.

  • Asphalt shingles are popular for their affordability and ease of installation, while metal roofing offers superior durability, often lasting longer despite a higher initial cost.

  • Maintaining your roof through regular inspections and debris removal is essential for extending its lifespan and ensuring optimal performance.

Understanding Roof Types for Residential Homes

An overview of various roof types residential homes can have.

The roof you choose for your home significantly impacts its overall design and functionality, making it a critical element of the architectural structure. For instance, hip roofs, with their sloping design, offer excellent wind resistance, making them suitable for hurricane-prone areas. On the other hand, flat roofs, often seen in commercial buildings, are gaining popularity in residential settings due to their modern look and ease of installation.

Gable roofs are another classic choice, offering a cost-effective solution particularly suited for areas with heavy rainfall due to their efficient water drainage. Meanwhile, unique designs like saltbox roofs, with their asymmetrical slopes, not only promote water drainage but also add a distinctive charm to the home. Similarly, gambrel roofs evoke a rustic appeal, ideal for enhancing the outdoor charm of your property.

Choosing the right roof type involves considering factors such as local climate and architectural style to ensure both functionality and aesthetic appeal. For example, a mansard roof is perfect for snowy regions due to its space-saving design, while skillion roofs, or mono-pitched roofs, add modern curb appeal with their single steep surface.

Asphalt Shingles: The Popular Choice

Asphalt shingles are a popular choice among homeowners due to their affordability and ease of installation. This roofing material allows many to achieve a reliable roofing system without breaking the bank. Available in a wide range of colors and styles, asphalt shingles can be customized to fit various home aesthetics.

One of the major advantages of asphalt shingles is their accessibility; they are easy to source from contractors and suppliers. However, their lifespan typically ranges from 20 to 30 years, which is shorter compared to some other roofing materials. Despite this, the variety available in asphalt shingles includes three-tab, architectural, and luxury shingles, each offering unique benefits.

Architectural shingles, for instance, are thicker and provide a more textured appearance and enhanced durability compared to three-tab shingles. Luxury shingles replicate the look of high-end materials like slate, offering extensive design options and superior durability. While environmental factors like intense sunlight and wind can affect the performance of asphalt shingles, their overall ease of installation and cost-effectiveness make them a popular roofing material.
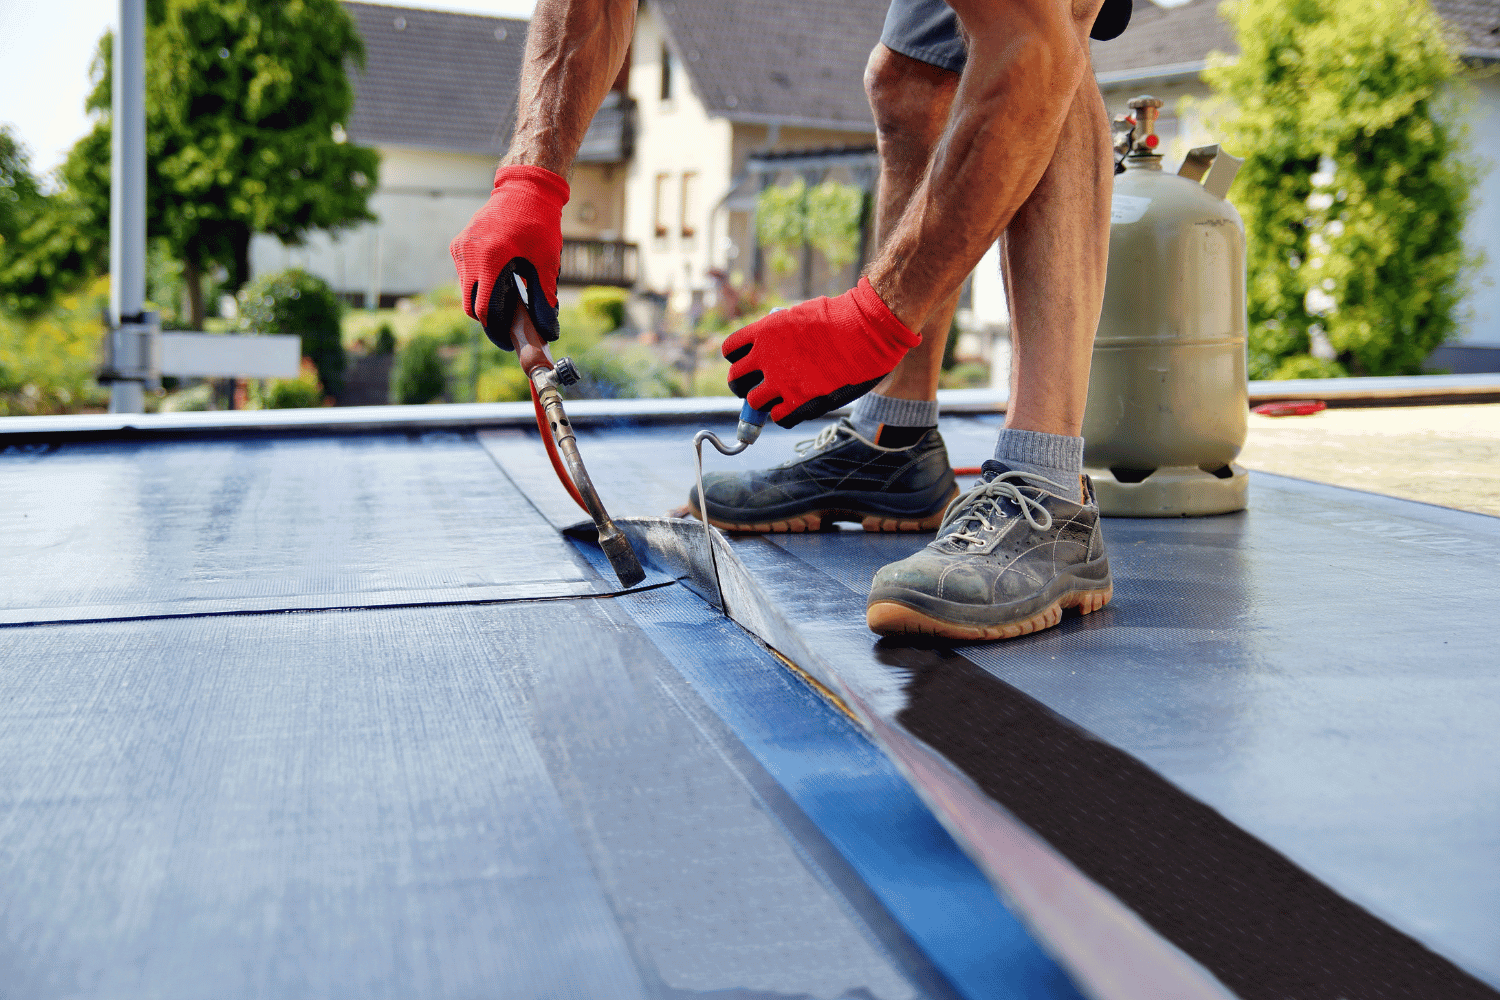
Metal Roofing: Modern and Durable

A modern metal roof highlighting its durability and style.

Metal roofing stands out for its durability and modern appeal, offering homeowners a long-lasting roofing solution. Known for its resistance to fire, rot, and insect damage, metal roofing ensures robust protection for your home. Additionally, the smooth surface of metal roofs prevents snow accumulation, reducing structural stress during winter.

Metal roofing comes in various popular types of roofing. These include metal shakes, shingles, standing seam metal roofing, and stone-coated steel. The variety in styles, such as the standing seam and shingle lookalikes, provides ample choices for homeowners looking for both functionality and aesthetics. Metal roofs can also be effectively insulated, aiding in heat retention during colder months.

The growing popularity of metal roofing is attributed to its longer lifespan and superior durability compared to traditional shingles. While the initial installation cost may be higher, the long-term benefits and reduced maintenance needs make metal roofing a worthwhile investment for many homeowners.

Wood Shingles and Shakes: Rustic Appeal

Wood shingles and shakes providing rustic charm to a home.

Wood shingles and shakes bring a natural, rustic charm to any home, enhancing its aesthetic appeal and creating a luxurious look. Typically sourced from 200 to 300-year-old conifer trees, these roofing materials offer a sustainable option with significant environmental benefits.

However, wood shingles and shakes require more labor-intensive and time-consuming maintenance compared to asphalt roofs, making them a pricier option overall. In damp conditions, they can last approximately 20 to 30 years, though this lifespan can vary based on environmental factors.

Clay and Concrete Tiles: Traditional Elegance

Clay and concrete tiles exude traditional elegance, adding a timeless appeal to any home. Known for their durability, clay tiles often last more than a century, while concrete tiles typically have a lifespan of 50 years or longer. Both materials are ideal for hot climates, providing excellent temperature regulation.

However, clay tiles require less maintenance as they absorb less moisture, whereas concrete tiles need regular inspections and maintenance. While concrete tiles are generally more budget-friendly, both types complement Spanish-style architecture beautifully.

Installation considerations, such as roof slope and weather conditions, are crucial, as these tiles are not advisable in areas with heavy rains and freezing temperatures.

Slate Roofing: Luxury and Longevity

Slate roofing epitomizes luxury and longevity, offering a beautiful appearance and exceptional durability. With a lifespan of 75 years or more, and the potential to endure over a century with proper maintenance, slate roofs are a long-term investment.
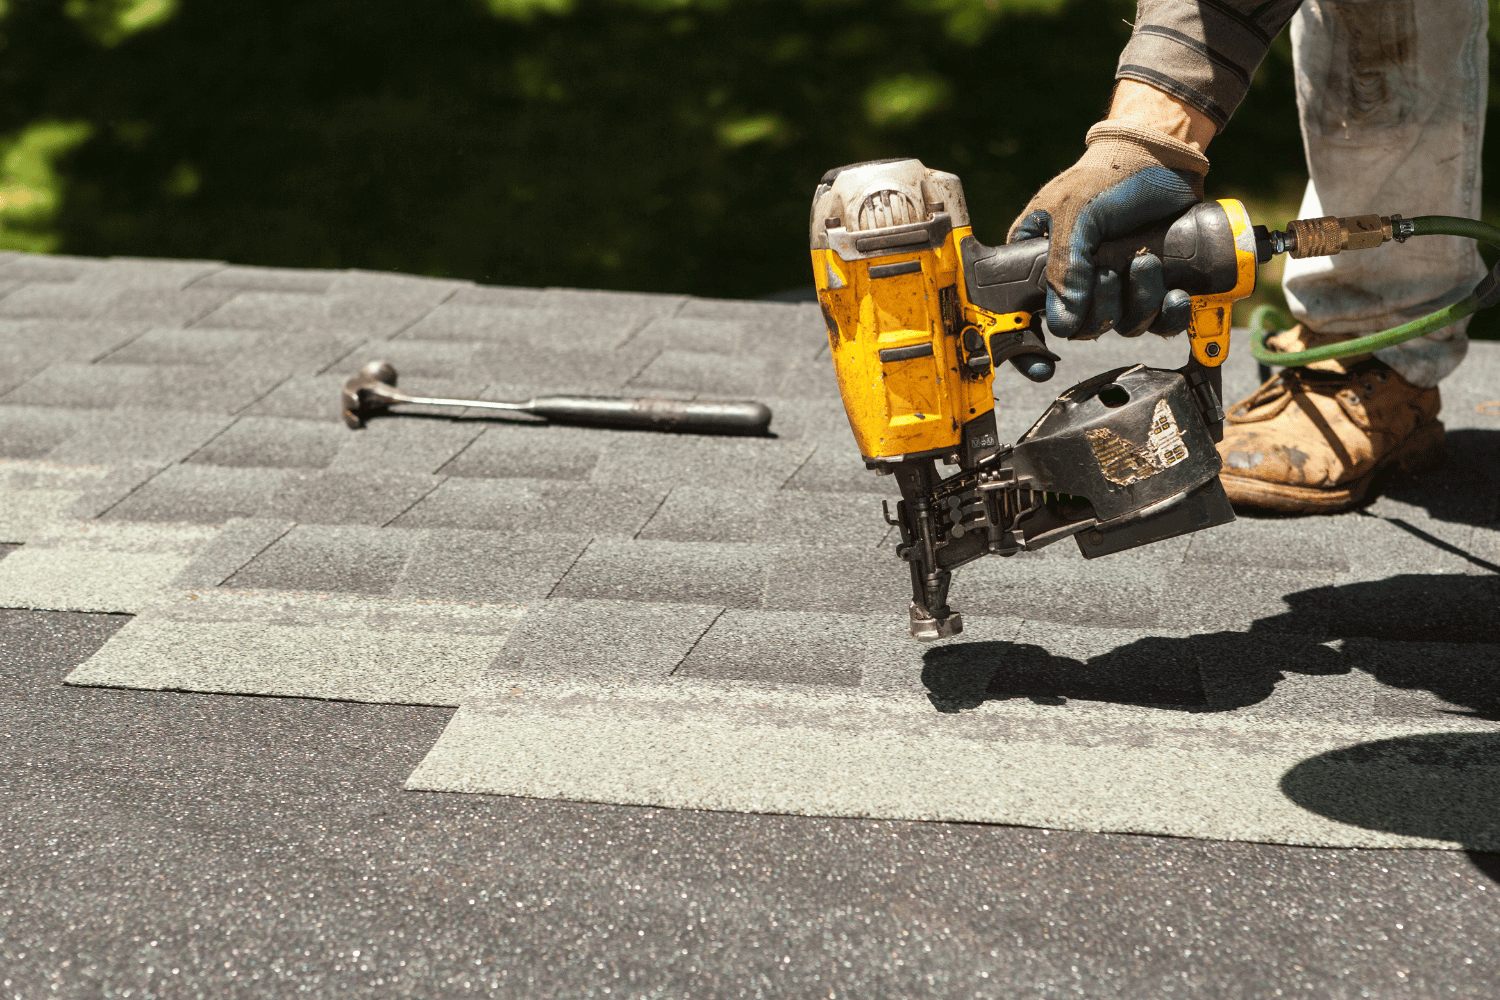
The low maintenance requirements of slate roofs contribute to their appeal, though their installation demands specialized skills due to their weight and fragility. Sourcing roofing slate from specific regions like Vermont and Pennsylvania adds to the cost, but the unique aesthetic and enduring quality make it worth the investment.
Synthetic Roofing Materials: Versatile and Cost-Effective

Synthetic roofing materials offer a versatile and cost-effective alternative to natural products. Engineered for enhanced durability and weather resistance, synthetic roofs replicate the look of natural materials while offering better performance.

Synthetic composite shingles are lightweight, affordable, and extremely durable. They boast high impact and fire ratings, wind resistance, UV protection, and insulation, with a lifespan of 40 to 50 years. These materials require minimal maintenance, making them a practical choice for homeowners.

Flat Roofs: Modern and Functional

A flat roof showcasing modern design and functionality.
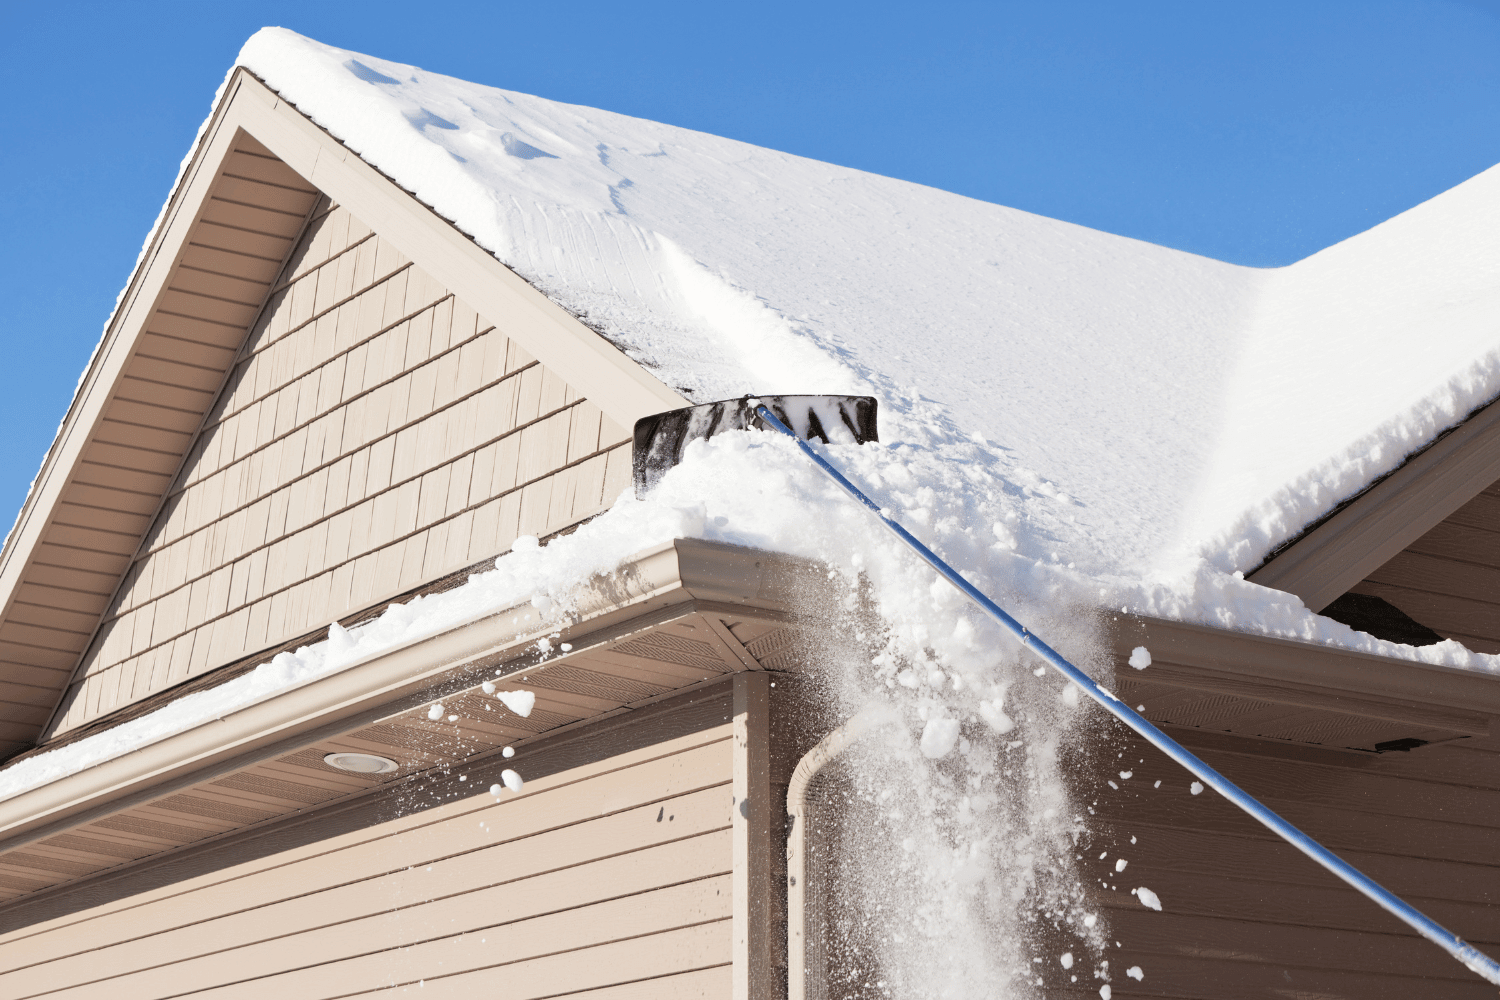
Flat roofs are increasingly favored for their modern and functional design. Common materials used for flat roofing include EPDM, TPO, PVC, and other options like Modified Bitumen and Built-Up Roofing (BUR). EPDM roofing, known for its elasticity and toughness, can last between 20 to 35 years or more with proper maintenance, making it a popular choice among roofing systems for commercial roofing systems.

Despite their flat appearance, flat roofs typically have a slight slope for drainage. They require adequate waterproofing to prevent leaks and prolong their lifespan, making regular maintenance essential.

Green Roofs: Eco-Friendly and Insulating

Green roofs, also known as living roofs, offer an eco-friendly roofing solution by incorporating plants and soil over a waterproof membrane roof. These roofs provide excellent insulation, helping to regulate indoor temperatures in both hot and cold weather.

Green roofs can absorb significant amounts of stormwater, reducing runoff and flooding. Intensive green roofs require more regular maintenance than extensive ones, but maintenance costs can significantly decrease after the establishment period.

Solar Shingles: Energy-Efficient Innovation

Solar shingles represent a cutting-edge innovation in roofing, seamlessly integrating with traditional asphalt shingle roofs to provide energy efficiency. These advanced roof shingles help reduce heat absorption and lower utility costs for homeowners.

Photovoltaic solar panels convert sunlight into usable energy, significantly reducing electricity costs. Though solar shingles come with high installation costs and fragility, they offer potential savings through energy buyback programs and tax incentives for meeting Energy Star standards.

Choosing the Right Roof Type for Your Home

A selection of various roof types for homeowners to consider.

Selecting the right roof type involves considering various factors, including budget, local weather conditions, and aesthetic appeal. Energy-efficient roofing materials can lower utility bills and support sustainable living, making them a valuable investment.

Homeowners can receive a tax credit of 30% on expenses up to $5000 for energy-efficient roofing materials, promoting sustainable home improvements. The complexity of installation and maintenance requirements should also be factored into the decision.

Warranties from contractors and manufacturers are essential to protect against future roofing issues, ensuring peace of mind for homeowners. By considering these factors, you can choose a roof that not only meets your practical needs but also enhances the beauty and value of your home.

Essential Roof Maintenance Tips

Proper maintenance is crucial for extending the lifespan of your roof. Regularly inspecting flashing ensures a watertight seal at roof intersections, preventing leaks. Vent pipes should also be checked periodically to ensure their seals remain intact against the elements.

Removing organic debris at least twice a year prevents moisture retention and shingle damage. Trimming tree branches can prevent them from rubbing against the roof and disturbing the shingle granules.

Preventing moss and algae growth is crucial, as they can harm shingles by raising their edges and exposing them to water.

Summary

Choosing the right roof for your home involves understanding the various options available and considering factors like budget, climate, and aesthetic appeal. Whether you opt for the popular asphalt shingles, durable metal roofs, or innovative solar shingles, each roofing material offers unique benefits and challenges.

By making an informed decision and maintaining your roof properly, you can enhance your home’s beauty, functionality, and value. Invest in a roof that not only protects but also elevates your living experience.

Frequently Asked Questions

How long has CoMo Premium Exteriors been in the roofing business?

CoMo Premium Exteriors has been in the roofing business for over ten years, demonstrating extensive experience in the industry.

What factors should be considered when choosing roofing material in Columbia, MO?

When choosing roofing material in Columbia, MO, it’s essential to consider your budget, the architectural style of your home, and local weather conditions. Making an informed choice based on these factors will ensure durability and aesthetic appeal.

Are there tax incentives for installing energy-efficient roofing?

Yes, there are often tax incentives or rebates available for installing energy-efficient roofing, though these can vary based on your location and specific programs. Be sure to check local regulations to maximize your benefits.

How can a new roof affect property value?

A new roof can significantly enhance property value by improving curb appeal and minimizing maintenance costs for potential buyers. Investing in a new roof is a smart decision that pays off when it’s time to sell.

What are the benefits of metal roofing compared to traditional shingles?

Metal roofing offers a longer lifespan, improved energy efficiency, and enhanced resistance to severe weather, making it a superior choice compared to traditional shingles. Opting for metal can ultimately provide greater value and durability for your home.


An image depicting the process of shingle removal from a roof.

Effortless Shingle Removal: A Step-by-Step DIY Guide

Need guidance on shingle removal? This guide will show you when and how to remove shingles safely and efficiently. Get ready for step-by-step instructions, essential tools, and preparation tips.

Key Takeaways

  • Watch for signs like missing shingles or water damage to know when it’s time for removal.

  • Use the right tools, such as a roofing shovel and safety gear, for a safer and smoother shingle removal process.

  • Proper clean-up and assessment post-removal are crucial to prepare your roof for the next steps and ensure its integrity.
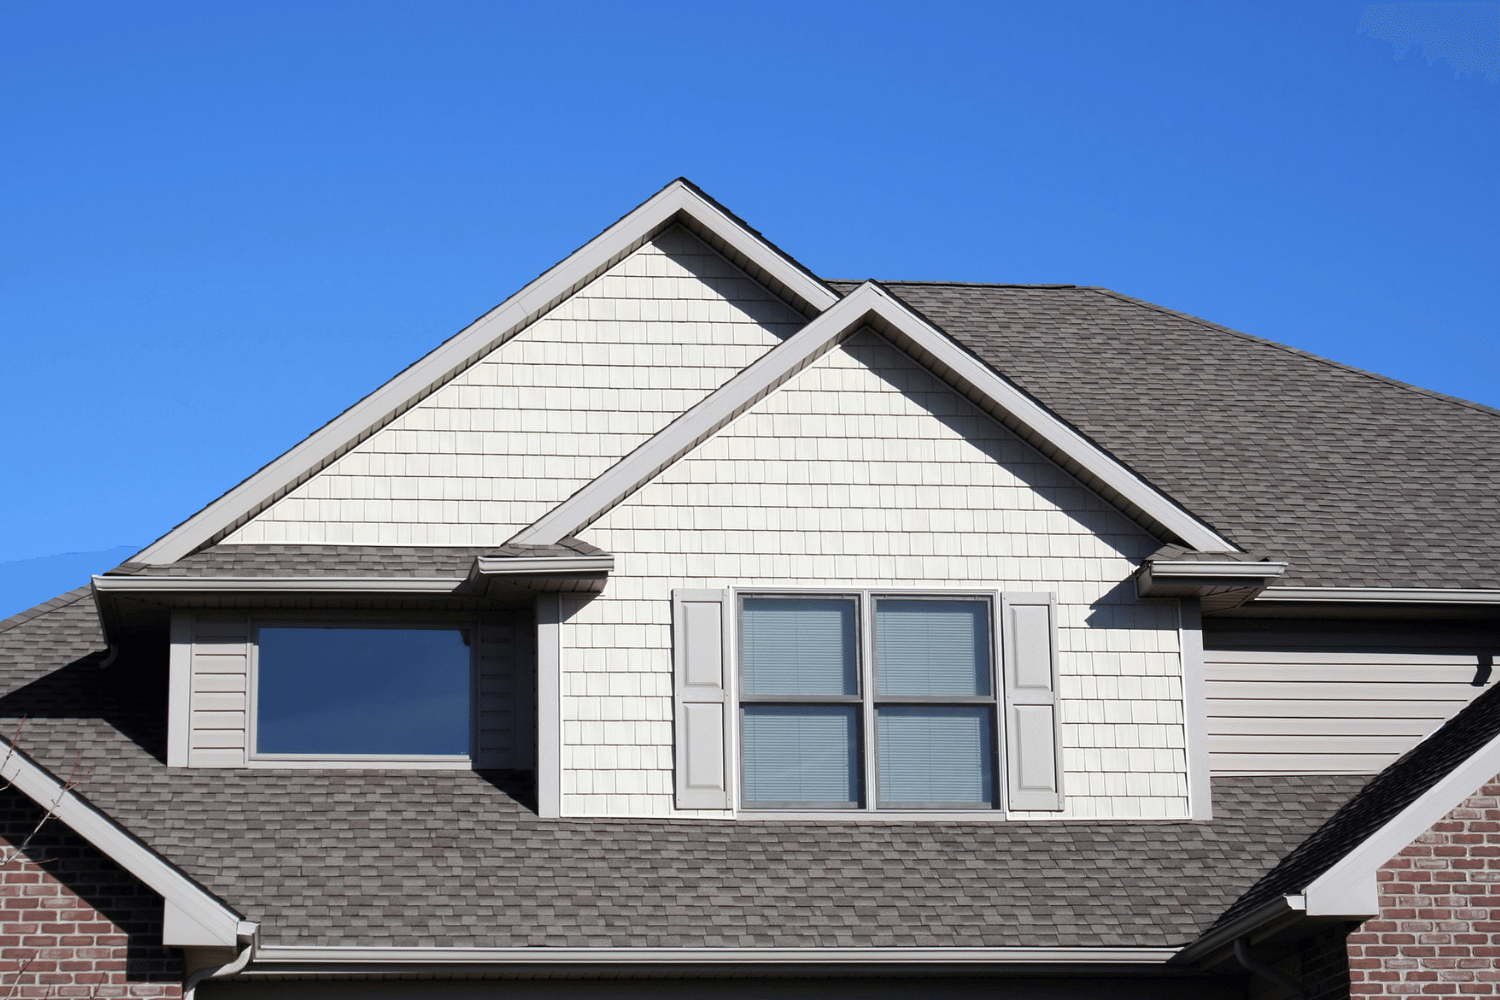
When to Consider Shingle Removal

An image depicting the process of shingle removal from a roof.

Determining the right time to remove roof shingles is vital for your home’s integrity. Signs such as missing shingles, water infiltration, and shingle granules in your gutters are clear indicators that it’s time to act. Neglecting these issues can cause further damage to your roof and home. Promptly addressing these signs can prevent more significant problems later.
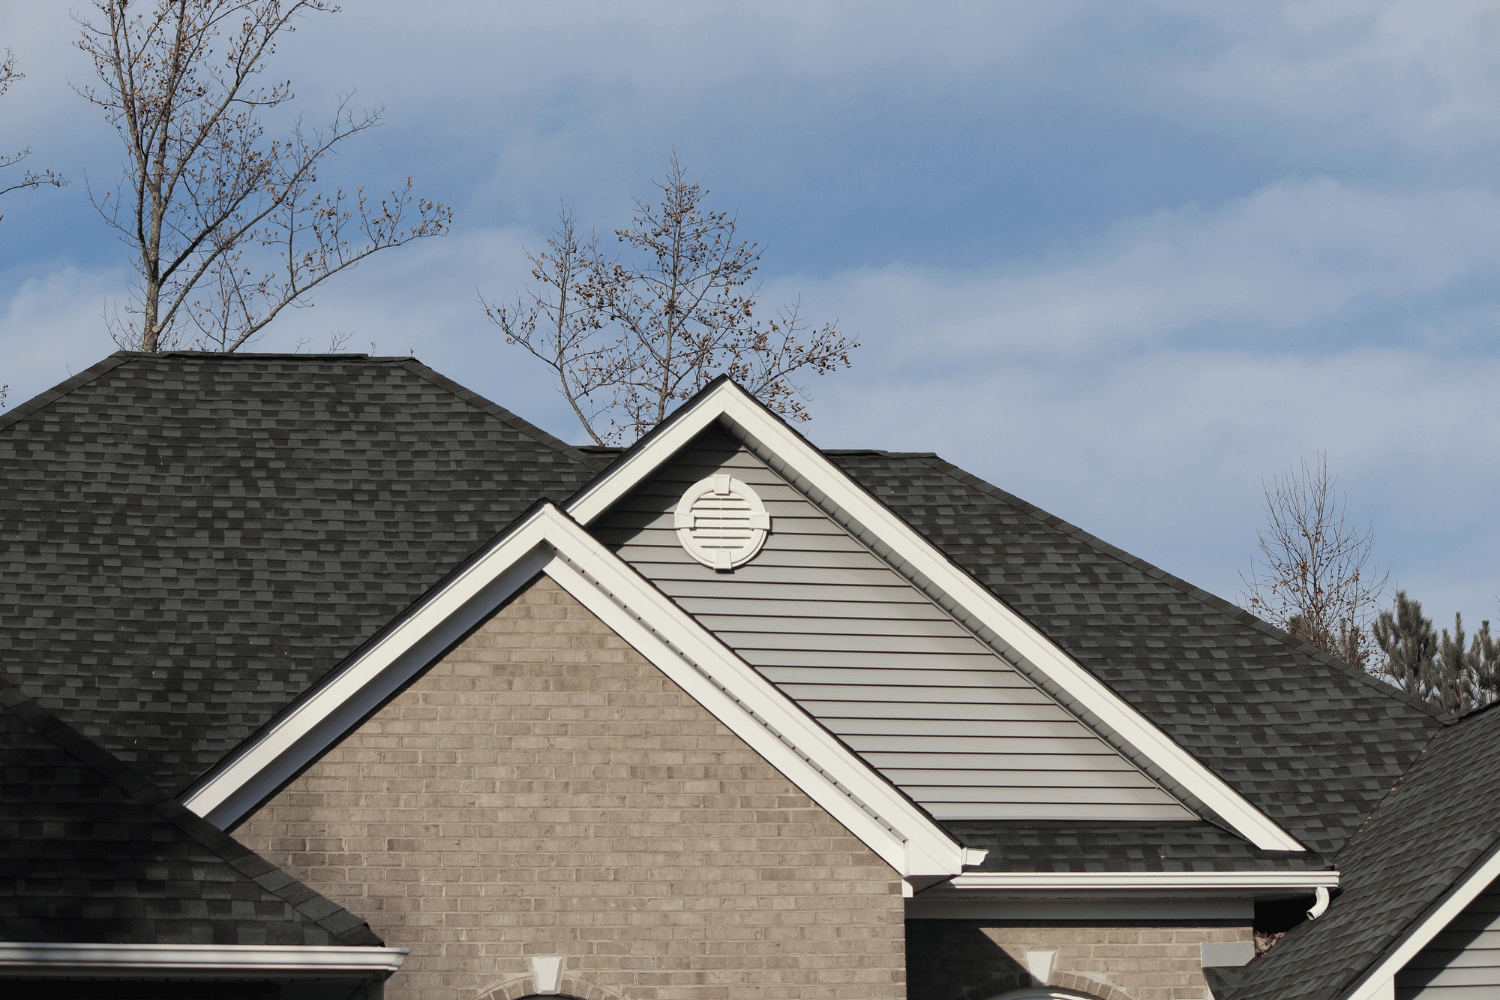
Timing plays a crucial role in shingle removal. Clear weather conditions ensure safety and efficiency. Performing roofing work under ideal weather conditions not only makes the job easier but also minimizes the risk of accidents. Removing old shingles maintains the integrity of your roofing system, setting the stage for a new, robust roof.
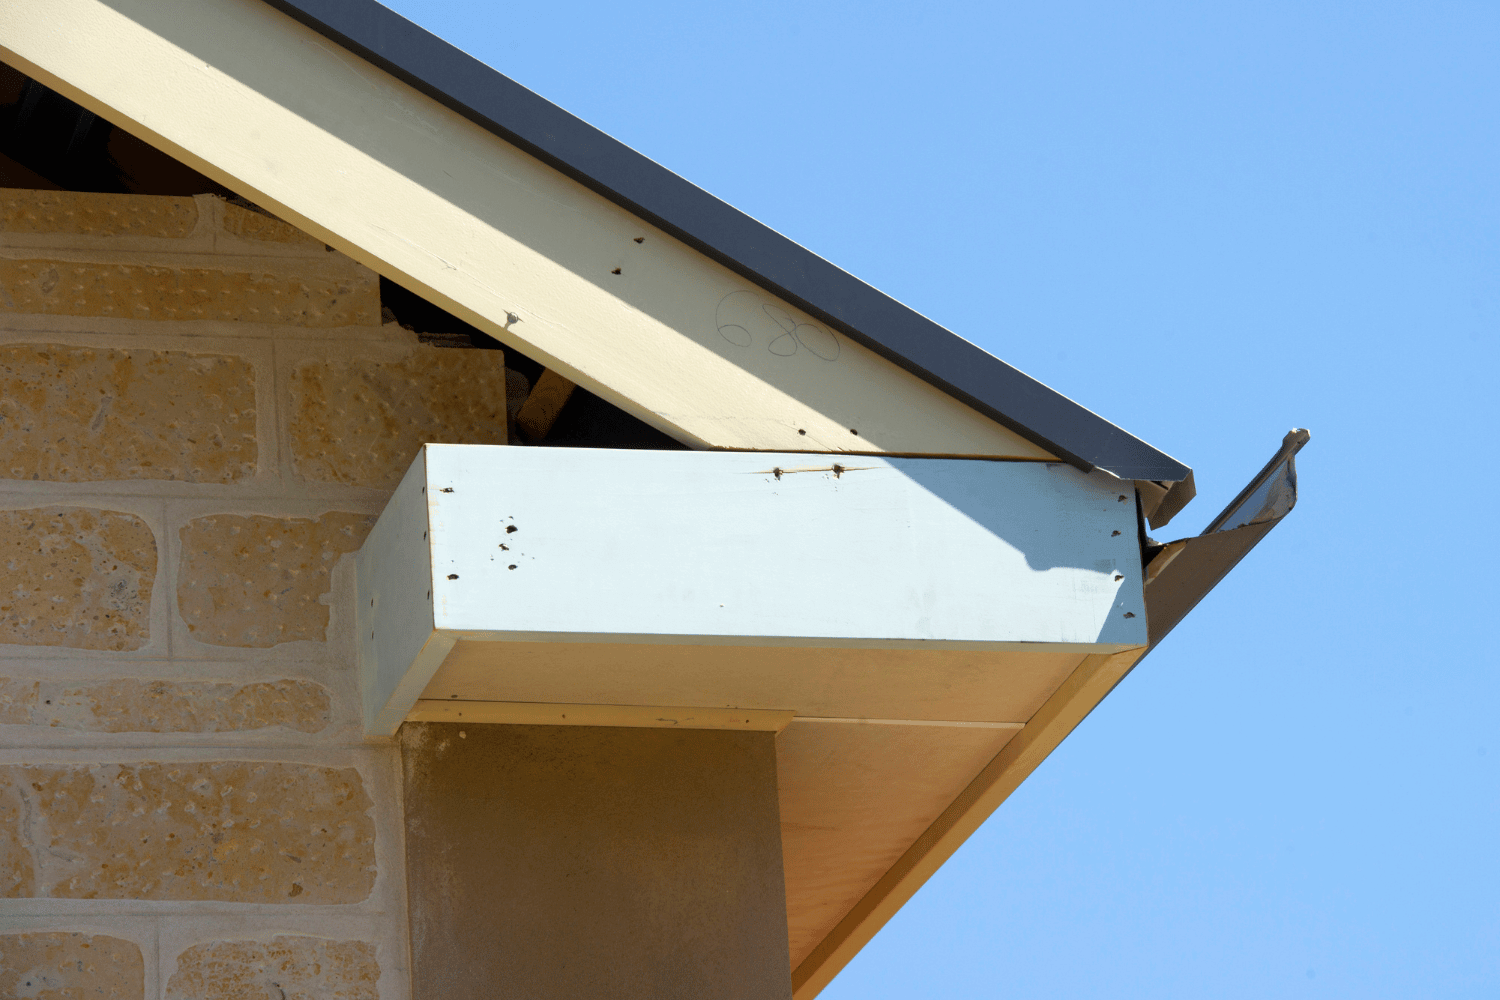
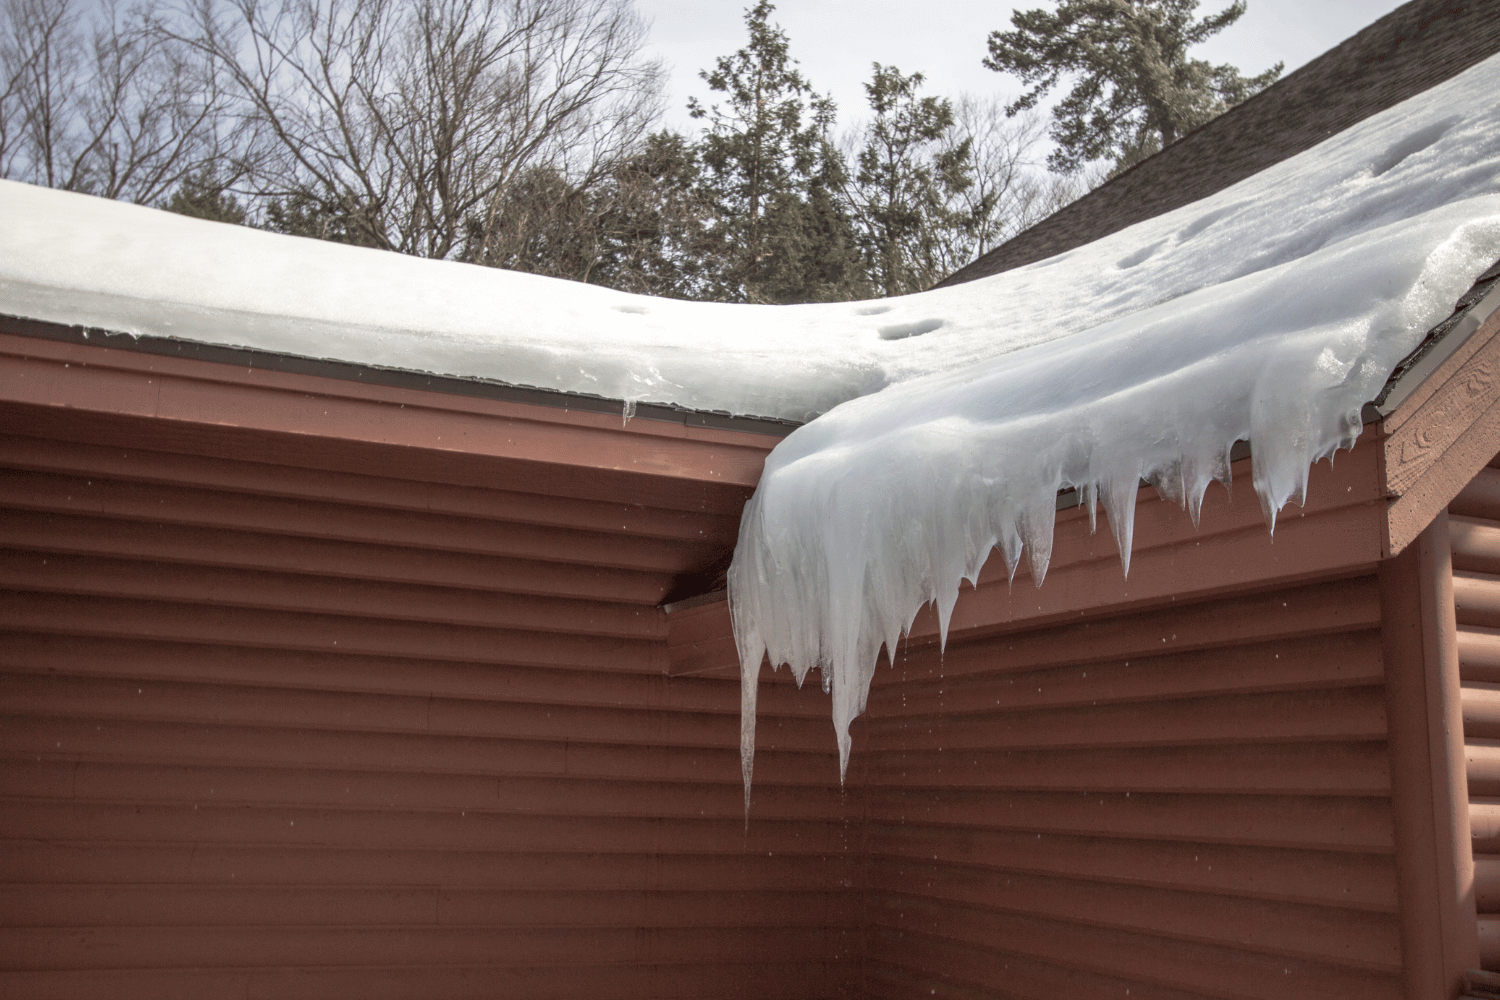
Essential Tools and Materials

Before:

Having the right tools and materials before you start ensures a smooth shingle removal process. Key tools include a roofing shovel, pry bar, safety harness, and a trash container to manage waste. A roofing shovel or flat pry bar, specifically designed for lifting shingles, makes the task more manageable. Additionally, a broom, work gloves, safety goggles, a ladder, tarps, and plywood contribute to safety and efficiency.

After: ice and water

Key tools for a smooth shingle removal process include:

  • Roofing shovel

  • Pry bar

  • Safety harness

  • Trash container to manage waste

  • Broom

  • Work gloves

  • Safety goggles

  • Ladder

  • Tarps

  • Plywood

Having the right tools and materials ensures safety and efficiency during the task.

Renting a dumpster helps manage roofing debris effectively, ensuring proper disposal and keeping your work area clean and safe. Equipped with the right tools, you’ll be ready to tackle the shingle removal process.

Preparing Your Roof and Surrounding Area

Proper preparation is key to a successful roofing project. Use tarps to catch falling shingles, reducing the cleanup effort. Protect your landscaping by covering the ground around the house, especially beneath the eaves, with tarps or plywood. This simple step prevents damage to plants and vegetation from falling debris.

Never compromise on safety. Attach sheets of plywood to safeguard windows from potential damage. Adjustable roof jacks enhance safety and provide support for the work area. Positioning a trash container nearby makes debris disposal more efficient. These preparations ensure a safe and organized work environment.

Step-by-Step Shingle Removal Process

A visual guide to the step-by-step shingle removal process on a roof.

A structured approach is essential for methodically removing all the shingles from the peak down to the eaves. This method ensures efficiency and reduces the risk of missing any areas. The removal process can be broken down into three main steps: starting at the peak, working downward, and removing the flashing.

Following these steps allows for systematic and thorough shingle removal. Here’s a detailed look at each step.

Start at the Peak

Start the shingle removal process at the ridge caps, the topmost shingles on the roof. Carefully lift the shingles with a roofing tear-off shovel, starting from the edges. This tool is designed for this task, making it easier to pry up shingles without damaging the roof deck during a roof tear off.

Repeat the process of lifting shingle edges until all are detached. This method ensures efficient removal, paving the way for the next step.

Work Downward

After removing the ridge caps, tear off the shingles in 2 to 3-foot sections. This allows debris to slide down towards the roof jacks, making it easier to manage. Use a garden fork or roofing shovel to lift and pry shingles, ensuring complete coverage.

Be cautious of soft spots on the entire roof deck as you progress; they may indicate underlying damage or rot related to roof decking. Clearing 2 to 3-foot wide sections at a time helps maintain control over debris and ensures thorough work.

Remove Flashing

With the shingles removed, address the roof flashing. Remove and inspect the flashing for rust or corrosion. If the flashing is in good condition, pry it up with a smaller pry bar or hammer to minimize damage. If the flashing is in poor condition, replace it during the shingle removal process.

Starting fresh with new flashing generally provides a better seal. This ensures the longevity and integrity of your new roof.

Cleaning Up After Shingle Removal

Cleaning up after shingle removal with debris and tools displayed.

Cleaning up is the next crucial step once the asphalt shingles are removed. Begin by tossing the old roofing material into the trash container and clearing the yard of debris. This maintains a clean work environment and prevents accidents.

Collect stray nails and metallic debris with a magnetic wand. Finish the cleaning process with a broom, ensuring the area is hazard-free and ready for the next phase of the roofing project, including the collection of loose nails.

Assessing Roof Deck Condition

After removing the old shingles, assess the condition of your roof deck and the existing shingles. Check for damage signs like granule loss, curling shingles, and nails popping out, which may indicate deck warping. These signs suggest the roof deck may be compromised and need repairs.

Inspect for water stains, mold, and gaps in the roof deck, as these may indicate moisture issues and potential damage. Making necessary repairs and replacing any damaged flashing ensures the longevity and integrity of your new roof.

Tips for Safe and Efficient Shingle Removal

Safety precautions during shingle removal process.

Safety must always be a priority during any roofing project. Properly secure your safety harness before climbing onto the roof to prevent accidents. Wearing safety gear like goggles and gloves is essential for preventing injuries. Sturdy shoes with good traction are crucial for maintaining grip on the roof while working.

Avoid working during rainy or icy conditions to minimize slip hazards. Organizing your work area and positioning the trash bin for easy access helps maintain an efficient workflow and reduces accident risks.

Professional Help vs. DIY Shingle Removal

Comparison between DIY shingle removal and professional help.

Choosing between professional help and DIY shingle removal depends on several factors. Hiring a professional ensures efficiency and quick installation, completing the project in a timely manner. Professional roofers typically offer warranties against defects, which DIY efforts usually lack.

Opting for DIY shingle removal can significantly save on labor costs. However, lack of experience can lead to costly mistakes and potential future repairs.

Safety is a major concern during roof removal, and falls can cause serious injuries without proper measures.

CoMo Premium Exteriors: Your Local Roofing Experts

CoMo Premium Exteriors has served the Mid-Missouri area for over a decade, earning a reputation as a trusted roofing contractor.

They are dedicated to community engagement and actively participate in local events and initiatives.

They serve:

  • Columbia

  • Jefferson City

  • Moberly

  • Boonville

  • Surrounding areas

Offering services including roof inspection, maintenance, repair, replacement, and emergency repairs, CoMo Premium Exteriors is your go-to for all roofing needs.

With extensive experience in handling insurance claims and offering various warranties, they ensure quality workmanship and customer satisfaction.

Summary

In conclusion, removing old shingles is a critical step in maintaining the integrity of your roof. By following the step-by-step guide and using the right tools, you can efficiently tackle the shingle removal process. Preparing your roof and surrounding area, cleaning up after the job, and assessing the condition of your roof deck are all essential steps to ensure a successful project.

Whether you decide to go the DIY route or hire a professional, safety should always be your top priority. And if you need expert help, CoMo Premium Exteriors is always here to provide top-notch roofing services. Ready to take on your next roofing project? Get started today!

Frequently Asked Questions

What are the signs that indicate it’s time for shingle removal?

If you notice missing shingles, water leaks, or granules collected in your gutters, it’s definitely time to consider removing your old roof shingles. Don’t wait until the damage gets worse!

What tools and materials are essential for shingle removal?

To effectively remove shingles, you’ll need a roofing shovel, pry bar, safety harness, and a trash container. Don’t forget gloves, goggles, a ladder, a broom, tarps, and some plywood for extra safety and convenience!

How should I prepare my roof and surrounding area for shingle removal?

To prepare for shingle removal, spread tarps to catch falling debris and protect your landscaping with plywood. Don’t forget to place a trash container within reach for easy cleanup!

What are the benefits of hiring a professional for shingle removal?

Hiring a professional for shingle removal guarantees efficiency, safety, and proper installation, along with warranties that DIY projects often miss. It’s a smart choice to avoid potential headaches down the line!

What services does CoMo Premium Exteriors provide?

CoMo Premium Exteriors provides a range of services including roof inspection, maintenance, repair, replacement, and emergency repairs, along with assistance for insurance claims and various warranties. They’re there to help you with all your roofing needs!


Page 1 of 41234

Services

Roofing
Roofing
Shingles
Shake Roofing
Slate Roofing
Metal Roofing
Flat Roofing
Commercial
Roofing
Concrete Tile
Roofing
Vinyl Siding
James Hardie
Siding
Exteriors
Wood / LP
Siding
Doors
Windows
Deck Building
Gutter
Installation
Siding

Latest Blog Posts

  • roof inspection
    What Are The Signs That I Need a Roof Inspection?
  • roofing contractor in columbia mo
    Benefits of Choosing Polymer Composite Roofing Shingles in Mid-Missouri
  • A person preparing for window replacement with tools and materials laid out.
    Changing a Window: Expert Tips for a Smooth Replacement
Popular
  • CoMo Premium Exteriors Blog local contractor
    Columbia, MO’s Trusted Local Contractor for Quality...in: Roofing
  • What is James Hardie Siding?
    James Hardie Maintenancein: Siding
  • Shingles vs Metal Roofing
    Shingles vs Metal Roofingin: Roofing
Recent
  • roof inspection
    What Are The Signs That I Need a Roof Inspection?in: Roofing
  • roofing contractor in columbia mo
    Benefits of Choosing Polymer Composite Roofing Shingles...in: Roofing
  • A person preparing for window replacement with tools and materials laid out.
    Changing a Window: Expert Tips for a Smooth Replacementin: Exteriors, Windows

Our Locations

Columbia Jeff City Moberly Boonville

Services

  • Roofing
  • Decks
  • Siding
  • Windows
  • Gutters

Damage Repair

  • Storm Damage
  • Hail Damage

Company

  • About Us
  • Service Area
  • Portfolio
  • Careers

Help Center

  • Our Blog
  • Roofing Types
  • Roofing Questions
  • Warranties

Special Offers

  • Financing Options
  • Free Inspection

We’re Proud to Serve These Mid-Missouri Areas

Columbia MO
Moberly MO
Mexico MO
Lake Ozark MO
Centralia MO
Booneville MO
Fayette MO
Jefferson City MO
Fulton MO
Hallsville MO
Ashland MO

como logo transparent

CoMo Premium Exteriors

We are the #1 roofing contractor in Lake of the Ozarks Columbia, Missouri Moberly, Missouri Jefferson City, Missouri Boonville, Missouri Mid-Missouri

Business Hours

24-7 Every Day

Columbia
3504 Interstate 70 Dr SE
Columbia, MO 65201

(573) 424-9008

Boonville
411 Main Street,
Boonville, MO 65233

(660) 219-9700

Moberly
1112 N Morley St,
Moberly, MO 65270

(660) 455-4398

Jefferson City
200 E Cedar Way,
Jefferson City, MO 65101

(573) 639-7663

Lake Ozark
2140 Bagnell Dam Blvd. #104,
Lake Ozark, MO 65049

(573) 969-2104

CoMo Premium Exteriors © 2024 All Rights Reserved. Proudly serving Columbia MO and all of Mid Missouri | Privacy Policy
Roofer SEO Provided by Robben Media

Scroll to top