Double Pane vs Triple Pane Windows: Which Is Right for Your Mid-Missouri Home?
When it’s time to upgrade your windows, choosing between double pane and triple pane can make a big difference in your home’s comfort, energy efficiency, and value. The choice between double and triple pane glass can significantly affect the comfort and efficiency of your house. Homeowners across Mid-Missouri—from Columbia to Jefferson City to Lake Ozark—are increasingly weighing these options to combat fluctuating temperatures and rising energy costs. But how do you know which is the better fit for your specific home and location?
In this guide, we’ll break down the differences, benefits, and considerations to help you make a confident, locally informed choice about the best pane glass option for your house.
What Are Double and Triple Pane Windows?
Double pane windows feature two layers of glass separated by a spacer filled with air or gas (typically argon). This design helps insulate your home by reducing heat transfer. Double pane windows are also known as double glazed windows or double paned windows, and they are a significant upgrade from single pane windows, which offer poor insulation. Compared to single pane windows, double glazed windows provide much better insulation and energy efficiency, making them a popular choice for homeowners seeking improved comfort and lower energy bills. Double pane glass is a type of glazing that forms part of glazed windows, offering decent energy efficiency and sound reduction through its multiple layers.
Triple pane windows go a step further with three layers of glass and two gas-filled chambers. These are also referred to as triple glazed windows, triple paned windows, or triple glass windows. The additional pane—making a total of three panes—provides even better insulation and noise reduction than double paned windows. Triple glazing refers to the use of three layers of glass (triple pane glass), and triple glass windows are especially beneficial in extreme climates due to their superior thermal performance. The multiple layers and advanced glazing in triple paned windows result in higher energy efficiency and better soundproofing compared to double paned or double glazed windows. While both double pane glass and triple pane glass are types of glazed windows, triple paned windows offer superior performance. Double paned and triple paned windows are both considered paned windows, but the triple paned option includes an additional pane for enhanced benefits in insulation, energy savings, and comfort.
Need help deciding which window option is right for your Mid-Missouri home? Request a free inspection today from our local teams in Columbia, Jefferson City, or Moberly.
Energy Efficiency: Which Performs Better?
Energy efficiency is a key factor when comparing double pane vs triple pane windows. Triple pane models typically:
- Reduce heat loss more effectively
- Improve indoor temperature stability
- Lower heating and cooling costs over time
Triple pane windows can help lower your energy bill and save money over time, especially in colder climates. They do a better job of reducing noise and keeping your home cooler in summer and warmer in winter. Triple pane windows are also less likely to have condensation issues compared to double pane models. Choosing Energy Star rated windows and ensuring they are installed correctly maximizes energy efficiency and savings.
However, the difference may be marginal in milder climates. For homeowners in Columbia, Jefferson City, Moberly, or Boonville—where winters can get frigid and summers are humid—triple pane windows may offer worthwhile long-term savings.
Explore our window replacement services trusted by Mid-Missouri homeowners.
Cost Considerations
Double pane windows are more budget-friendly, making them a popular choice for standard upgrades or rental properties.
Triple pane windows come at a premium, often 10-15% more than double pane. While triple pane windows cost more upfront, many homeowners wonder if triple pane windows are worth the investment. The higher triple pane windows cost can be justified by the energy savings and increased comfort they provide, especially in colder climates. Over time, these windows can help you save on utility bills and may help meet stricter energy codes, making them a smart long-term choice if you plan to stay in your home for many years.
Want to finance your upgrade in Fulton, Centralia, or Lake Ozark? Learn about our flexible financing options.
Noise Reduction
Triple pane windows significantly outperform double pane in soundproofing. They are especially effective at blocking outside noise, making your home quieter and more comfortable. If your home is near a busy road, school, or industrial area—like parts of Columbia or Mexico, MO—triple pane can make a noticeable difference in interior comfort.
Not sure what level of sound insulation you need? Our experts in Mid-Missouri can help with an honest recommendation—contact us.
Climate and Location Factors
Missouri’s climate—with its cold winters and hot, humid summers—makes energy efficiency a top priority. Triple pane windows are ideal for extreme climates, providing superior insulation during both hot summers and cold winters. In colder zones, triple pane is especially beneficial. During winter, triple pane windows help keep indoor temperatures stable and reduce heating costs. For homes in places like Boonville, Fulton, Hallsville, or Lake Ozark, investing in triple pane may mean fewer drafts and more stable indoor temperatures year-round.
Window Frame and Installation Quality Matters
No matter which glass package you choose, high-quality framing and professional installation are critical. Double and triple pane windows must be installed correctly to achieve their full energy efficiency and noise reduction benefits. Poorly installed windows—regardless of pane count—won’t deliver the efficiency you’re paying for.
See how our team ensures flawless installations backed by a 5-Year Craftsmanship Warranty, trusted by homeowners throughout Mid-Missouri.
Installation and Maintenance: What to Expect
When upgrading to double pane or triple pane windows, the quality of installation is just as important as the window itself. Proper installation ensures your new windows deliver the energy efficiency, noise reduction, and comfort you expect—especially in the variable climate of Mid-Missouri.
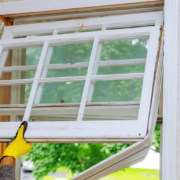
The installation process begins with the careful removal of your old windows and a thorough inspection of the window opening. For both double pane and triple pane windows, the area is cleaned, repaired if needed, and insulated to prevent drafts and heat loss. Triple pane windows, with their extra layer of glass, are heavier and may require reinforced frames or additional support to ensure a secure fit. Professional installers will make sure each window is level, properly sealed, and installed to maximize performance.
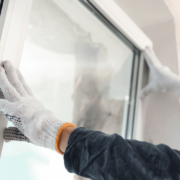
Once your new double pane or triple pane windows are in place, maintenance is simple but important. Regularly clean the glass and frames with a mild detergent and water to keep them looking their best and to allow natural light to brighten your home. Periodically inspect the seals and weatherstripping for any signs of wear, as a tight seal is key to maintaining energy efficiency and reducing heating and cooling costs. If you notice condensation between the panes, it could signal a broken seal—addressing this promptly will help preserve the insulation benefits of your windows.
Triple pane windows offer significant benefits in terms of better insulation and noise reduction, but they require the same straightforward care as double pane windows. By keeping up with basic maintenance, you’ll enjoy a peaceful indoor environment, lower energy bills, and long-term energy savings—especially during Mid-Missouri’s cold winters and hot summers.
Whether you choose double pane or triple pane, investing in professional installation and regular upkeep ensures your windows perform at their best for years to come. This attention to detail not only protects your investment but also helps create a more comfortable, energy efficient home for you and your family.
The Verdict: Which Should You Choose?
Choose double pane windows if:
- You’re on a tighter budget
- You live in a milder climate
- You’re upgrading for resale in the near term
- You’re replacing old or single pane windows and want improved comfort and energy efficiency
Choose triple pane windows if:
- You want maximum energy savings
- You’re in a cold or noisy area
- You’re investing in your forever home in Mid-Missouri
- You’re replacing existing double pane units to further enhance insulation and noise reduction
Still unsure when to replace your windows? Let CoMo Premium Exteriors provide a tailored recommendation based on your goals and location. Schedule a free consultation today.
Final Thoughts
Your window upgrade is an investment in comfort, energy efficiency, and home value. At CoMo Premium Exteriors, we help Missouri homeowners make informed decisions with transparent advice, expert craftsmanship, and products that last.
For even greater comfort and efficiency, consider upgrading to energy-efficient doors alongside your new windows.
Let us guide you toward the right solution for your home—double or triple pane—with honesty and care.
Proudly serving Columbia, Jefferson City, Moberly, Boonville, Fulton, Lake Ozark, and all of Mid-Missouri.