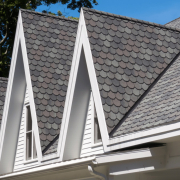
If you’re considering a new roof for your Jefferson City home, asphalt shingles deserve a spot on your roofing shortlist. They’re the most popular roofing choice in Mid-Missouri for good reason: they balance cost, durability, and curb appeal in a way that makes sense for our climate and housing stock.
This guide covers the practical details that matter when you’re weighing an asphalt roof — the shingle types, what installation actually involves, what you’ll pay, and how long you can expect it to last.
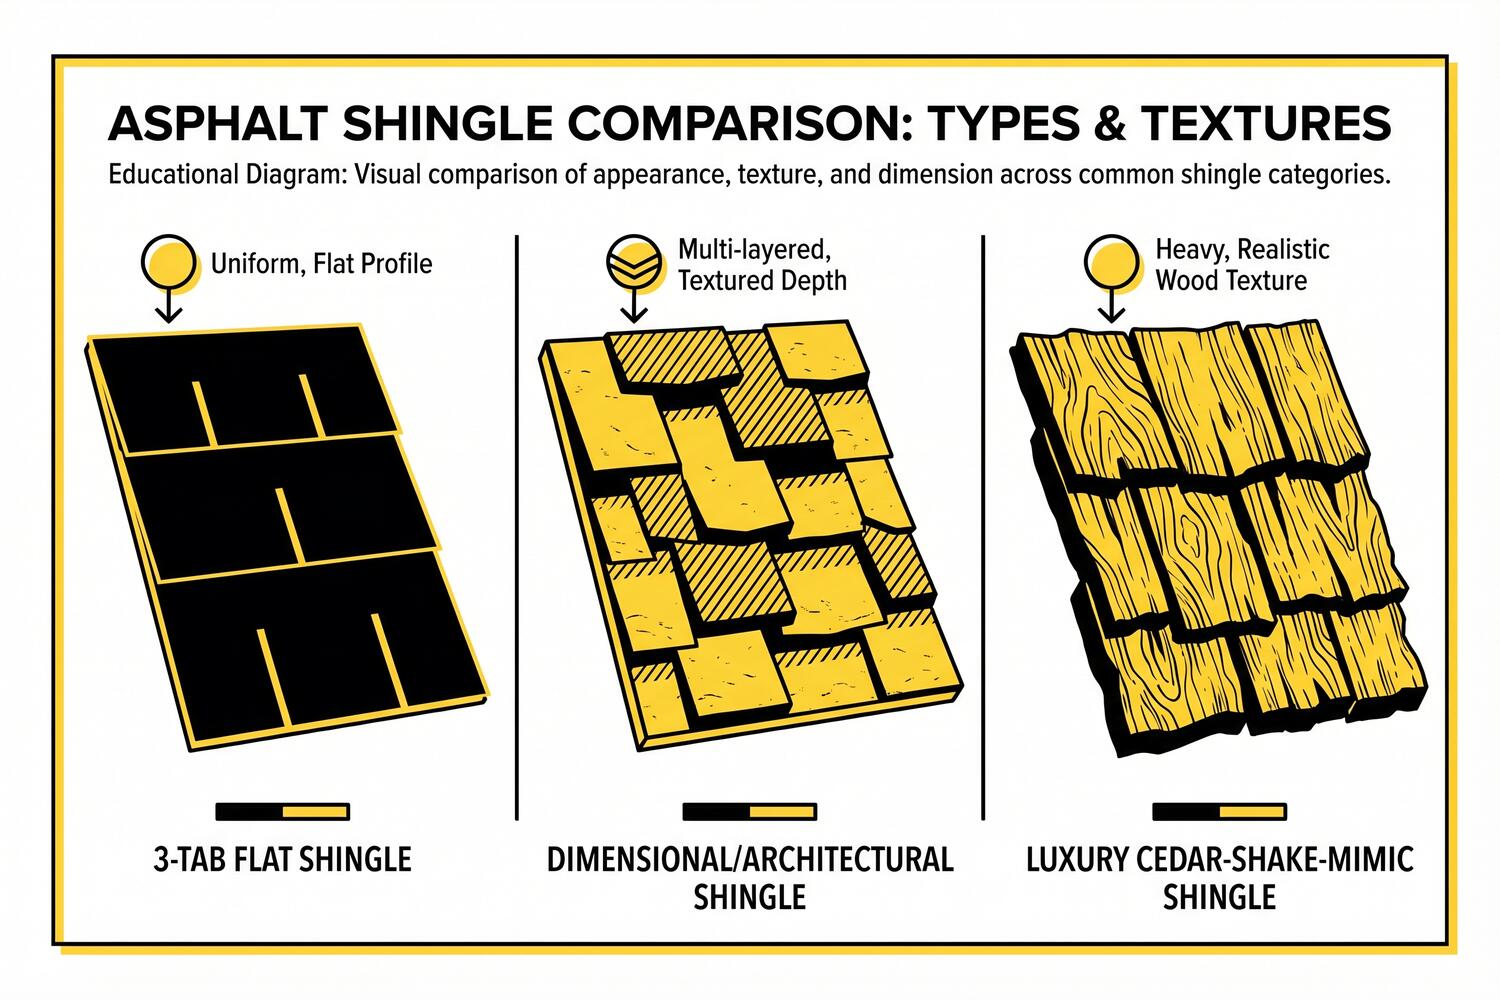
Not all asphalt shingles are the same. The type you choose affects both your upfront cost and how the roof performs over time.
These are the most basic option — a single layer of asphalt with a flat, uniform look. They’re the most affordable upfront but have the shortest realistic lifespan. You’ll typically see 15 to 20 years out of them in Missouri conditions. They work fine for budget-conscious projects or homes where longevity isn’t the top priority.
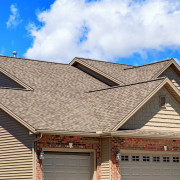
This is what most Jefferson City homeowners end up choosing. These shingles have two or more fused layers, which gives them a thicker, more textured appearance and better durability. Realistically expect 22 to 25 years. They hit a sweet spot between cost and performance that makes sense for most homes.
The premium tier. These mimic the look of slate or cedar shakes but with the easier maintenance of asphalt. They’re heavier, more durable, and more expensive. If you’re planning to stay in your home for decades and want the roof to match, they’re worth a look.
A proper asphalt roof installation isn’t just about nailing shingles to plywood. The sequence matters.
Deck preparation. The roof deck needs to be solid, dry, and properly fastened. If there’s rot or movement, it gets fixed before anything else goes down.
Underlayment and leak barriers. A secondary water-shedding layer goes beneath the shingles. Ice and water shield goes at the eaves and valleys — critical in Missouri where ice dams can form.
Starter course and field shingles. Starter shingles go along the eaves first, creating a seal point. Then the field shingles go up in courses, with proper nail placement being essential for wind resistance.
Ridge caps. Hip and ridge cap shingles finish the edges and shed water down both slopes.
If you’re looking at roofing contractors in Jefferson City, ask about their installation process. A contractor who cuts corners on underlayment or nail placement isn’t doing you any favors, even if the quote looks attractive.
The price varies based on shingle type, roof size, and complexity. Here are realistic 2026 installed cost ranges for Mid-Missouri.
The most budget-friendly option. For a typical 2,000-square-foot Jefferson City ranch home, expect $9,000–$15,000 total. These shingles work well for homeowners planning to sell within 10–15 years or for rental properties where upfront cost matters most.
Most Jefferson City homeowners choose this tier. Same 2,000-square-foot home runs approximately $12,000–$20,000 total. The extra cost buys you better wind resistance, a more textured appearance, and 5–7 more years of service life compared to 3-tab.
Premium shingles that mimic slate or cedar. For that 2,000-square-foot home, budget $18,000–$28,000+. These make sense when you’re planning to stay in your home for decades and want the roof to match your timeline, or when you’re renovating a historic Jefferson City property where appearance matters as much as performance.
Beyond shingle type, several factors push your number up or down:
Jefferson City labor rates run slightly below major metro areas like St. Louis or Kansas City, which keeps total project costs competitive. Scheduling during off-peak months (March–April or October–November) can sometimes save 5–10% on labor when crews have more availability.
The only way to get an accurate number for your specific roof is an on-site inspection. Online calculators can’t see your roof’s condition, measure its true square footage, or spot potential complications.
There are two types of warranties, and they cover different things.
Manufacturer warranties cover defects in the shingles themselves. If the material fails due to a manufacturing problem, this kicks in. It doesn’t cover installation errors.
Workmanship warranties cover the installation. If the roof leaks because someone didn’t nail or flash it correctly, this is what you need. These typically run 2 to 5 years from the contractor, though some manufacturers offer extended coverage when certified installers do the work.
Read both. A 30-year shingle warranty doesn’t help you if the roofer botched the installation and the workmanship warranty expired after two years.
Manufacturer claims tend to be optimistic. In real Missouri conditions:
Your actual mileage depends on installation quality, attic ventilation, sun exposure, and whether storms decide to test your roof’s impact resistance.
If you’re seeing multiple signs, it’s usually more cost-effective to plan a replacement than to keep patching.
Attic ventilation. A properly ventilated attic runs cooler in summer and drier in winter. Heat buildup cooks shingles from below; moisture buildup causes deck problems. Both shorten roof life.
Keep it clean. Leaves and debris trap moisture against the shingles. Clear them off periodically, especially in valleys.
Gutters. Clogged gutters back water up under the edge of the roof. Clean them twice a year.
Tree trimming. Branches that scrape against the roof in wind will damage shingles over time.
Inspections. Have a professional look at the roof annually. Small problems caught early are cheaper than big problems ignored.
If the damage is isolated — a few missing shingles, a single leak source, localized storm damage — a repair might make sense. If the roof is near the end of its expected lifespan, has widespread issues, or leaks in multiple places, replacement usually becomes the better investment.
For most Jefferson City homeowners, yes. The dimensional shingles last longer, look better, and perform better in wind. The upfront cost difference gets partially offset by not needing to replace the roof as soon.
You can, but it’s usually not the best approach. A tear-off lets you inspect and repair the deck, ensures proper underlayment installation, and avoids the weight of two roofing systems. Some jurisdictions also limit the number of layers allowed.
Most residential roofs in the Jefferson City area take one to three days depending on size, pitch, and complexity. Weather can extend that timeline.
A good contractor will have a plan. They’ll stage the work so the roof is never left vulnerable overnight, and they’ll have tarps ready if an unexpected storm rolls in. Ask about their weather protocol before the project starts.
Not required, but it helps if you want to see progress or ask questions. The crew will need access to power and a clear driveway for the dump trailer and material delivery.
If you’re weighing an asphalt roof for your Jefferson City home, the right next step is an on-site inspection. That’s the only way to get an accurate quote based on your actual roof, not a generic average.
CoMo Premium Exteriors works with Jefferson City homeowners on asphalt roofing projects regularly. We can walk you through your options, give you a real quote based on your roof, and answer questions specific to your situation without turning it into a sales pitch.


If you’re looking into skylights for your Mid-Missouri home, you’ve probably run into the broad national pricing ranges online. Here’s what matters: most skylight projects in Columbia run between $1,200 and $4,000 total, and your actual number depends on three things: the type of skylight, your roof’s condition, and how involved the installation gets.
The range is wide because the jobs vary that much. A tubular skylight going into a clean, accessible roof is a straightforward afternoon project. A ventilated deck-mounted unit that needs framing work and custom flashing is a different story entirely. Before you compare prices, it helps to talk with a contractor who handles roofing in Columbia, MO so your quote reflects your actual roof, not a generic calculator.
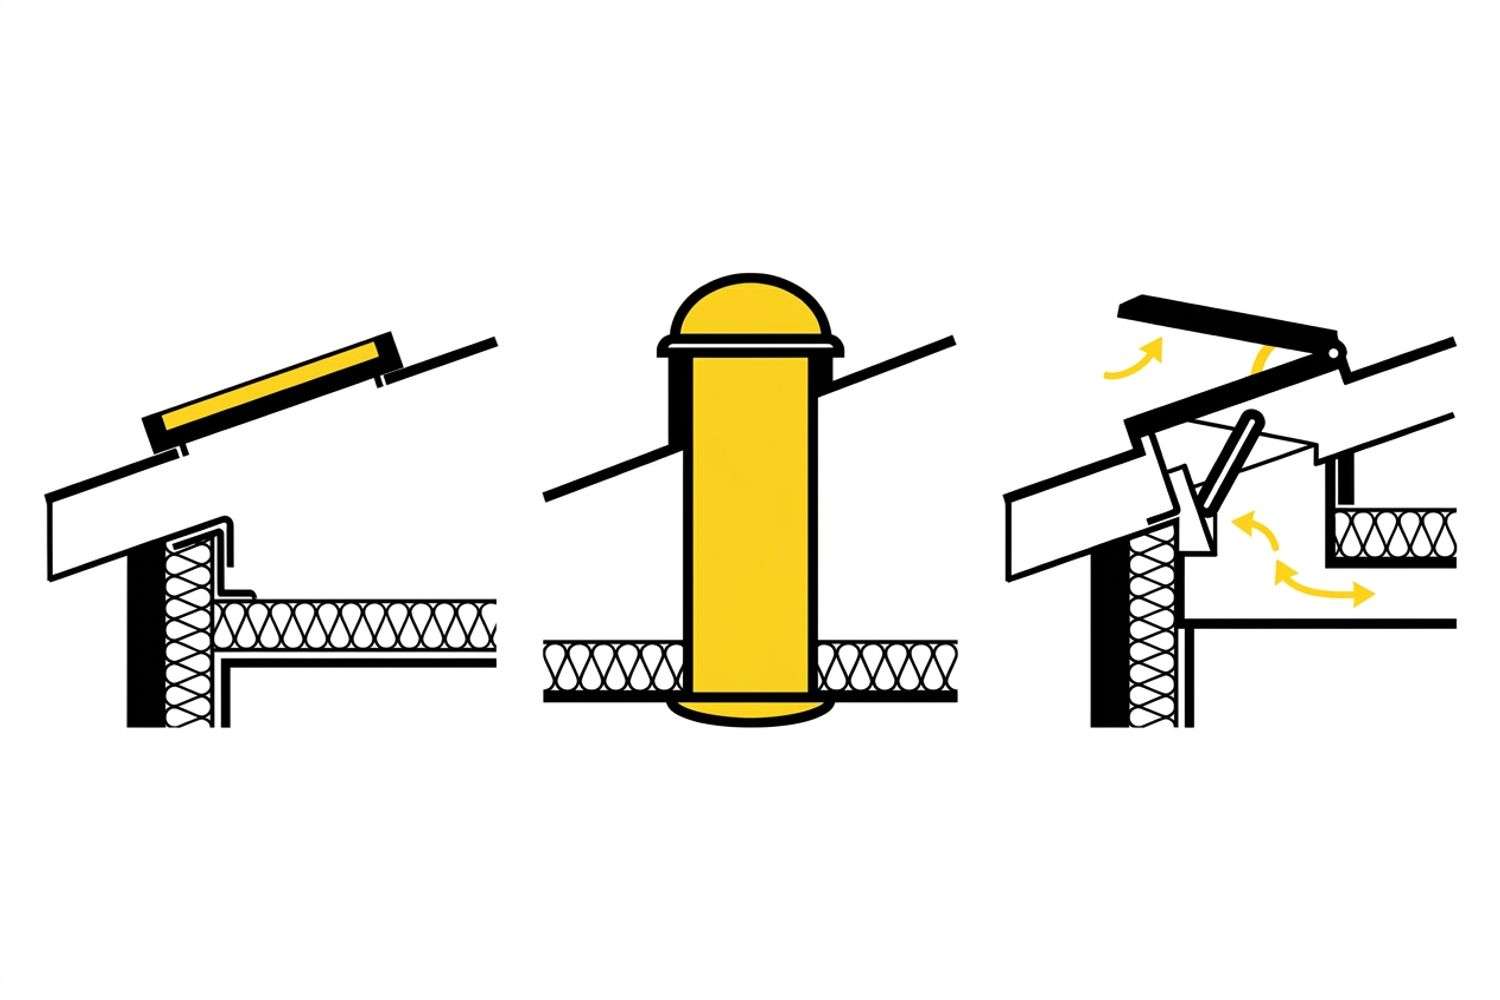
Fixed skylights (non-opening) are the most affordable option. Tubular skylights work well for tight spaces like hallways, bathrooms, and closets where you want daylight without the cost of a full-size unit. Ventilated skylights cost more but let hot air escape during Missouri’s humid summers, which can reduce your cooling costs.
Size affects both material and labor. The U.S. Department of Energy recommends keeping skylights to no more than 5% of a room’s floor area when the room has other windows, or up to 15% if it doesn’t. Going larger increases both cost and heat gain in summer.
A pitched asphalt shingle roof in good shape is the easiest scenario for installation. If your roof is older, has multiple shingle layers, or needs repairs around the opening area, those costs add up quickly. Flat roofs require different flashing methods and typically cost more.
Mid-Missouri roofs also deal with regular storm exposure. If your roof has hail damage or wind damage from recent storms, get a full inspection before adding a skylight. Addressing underlying issues first prevents leaks and structural problems down the road.
Deck-mounted skylights sit flush with the roofline for a cleaner look, but they require more precise framing and flashing. Curb-mounted skylights sit on a raised frame and usually cost less to install.
Access matters too. A skylight above a vaulted ceiling takes more work than one over a standard attic. Steep roofs, multiple dormers, or hard-to-reach areas all add labor time and cost.
Professional installation in Mid-Missouri typically runs $400 to $900 for straightforward projects in 2026, with more complex installations reaching $1,800 or higher. The range reflects roof pitch, access difficulty, and whether any framing or repair work is needed.
DIY skylight installation is possible but risky. Cutting into your roof requires precise measurements, proper flashing technique, and a reliable watertight seal. Mistakes lead to leaks, structural damage, and voided manufacturer warranties. For most Columbia homeowners, the savings don’t justify the risk.
Columbia and surrounding Boone County municipalities require building permits for skylight installation. Permit costs usually run $200 to $500. A reputable contractor handles this as part of the project, but always confirm before work begins.
If your roof needs repairs before or during skylight installation, budget for those separately. A pre-installation roof inspection (typically $150 to $250) can catch issues early and prevent expensive surprises mid-project.
Skylights need regular cleaning once or twice a year. Professional cleaning runs $150 to $300 if you don’t want to handle it yourself. Repairs for leaks, drafts, or mechanical issues range from $200 to $1,500 depending on severity.
National averages don’t account for your specific roof, your home’s orientation, or local labor rates. The most reliable way to budget is to get an on-site inspection from a local contractor who understands Mid-Missouri roofs.
When comparing quotes, make sure each one covers:
A vague quote is a red flag. You should know exactly what’s included before signing anything.
Skylights make the most sense when you have dark interior spaces that standard windows can’t reach. Hallways, bathrooms, interior kitchens, and vaulted-ceiling living rooms are common candidates in Columbia-area homes.
They also add value. According to the National Association of Realtors, quality skylight installations can recoup a significant portion of their cost at resale, especially when they solve a genuine lighting problem rather than serving as a decorative add-on.
Missouri’s climate means you want to pay attention to placement. South-facing skylights bring in the most light but also the most heat gain in summer. North-facing units provide consistent, even light without the thermal penalty. Your installer should walk you through orientation trade-offs based on your specific roof layout.
Most Columbia homeowners pay between $1,200 and $4,000 for a professionally installed skylight in 2026, including the unit, labor, and basic permits. Tubular skylights fall at the lower end, while large ventilated units with complex installations reach the higher end.
Yes. Skylights can be installed on existing roofs as long as the decking and framing are structurally sound. Your contractor will cut through the sheathing, frame the opening, install the skylight, and flash it to prevent leaks. If your roof is already nearing the end of its lifespan, it usually makes more sense to add skylights as part of a full roof replacement.
Properly installed skylights don’t leak. Problems show up when flashing is done incorrectly or when ice dams force water under the seal. Missouri’s freeze-thaw cycles make professional installation especially important here. Deck-mounted units with proper ice and water shield provide the best protection against winter leaks.
A straightforward skylight installation on an accessible roof typically takes one day. Complex installations involving framing modifications, multiple units, or difficult access can take two to three days. Your contractor should give you a clear timeline during the estimate.
Yes. Columbia and Boone County require building permits for skylight installation. Permit costs usually range from $200 to $500. Your contractor should handle the permit process as part of the project.
Deck-mounted skylights sit flush with the roof surface for a cleaner appearance but require more precise installation. Curb-mounted skylights sit on a raised frame built above the roofline and are typically less expensive to install. Both work well in Missouri when properly flashed.
It depends on the glazing and placement. Older single-pane acrylic units can increase both heating and cooling costs. Modern double-pane glass skylights with low-E coatings minimize heat transfer. South-facing skylights gain the most light but also the most summer heat, while north-facing units provide even light with less thermal impact.
Ready to explore skylight options for your home? Schedule a free inspection with CoMo Premium Exteriors. We’ll assess your roof’s condition, walk you through skylight options that fit your budget, and give you a straightforward quote with no pressure.
A mansard roof features two slopes on each side — a steep lower pitch and a gentle upper one — giving you more usable attic space than nearly any other roof style. If you’ve spotted these distinctive roofs around Columbia, Jefferson City, or older neighborhoods in Mid-Missouri and wondered whether one makes sense for your home, this guide covers what you need to know.
A mansard roof (sometimes called a French roof or curb roof) has two distinct slopes on all four sides. The lower slope is nearly vertical, while the upper slope has a much gentler pitch. This design creates a spacious attic area that can serve as a full living space rather than just storage.
The style traces back to 16th-century French architecture — specifically the work of François Mansart — and became a signature look of the Second Empire period. You’ll see these roofs on historic homes and commercial buildings throughout Missouri, especially in older Columbia and Jefferson City neighborhoods.
The steep lower slope is what sets a mansard apart. Instead of a cramped attic with sloped ceilings you can’t stand under, you get a full-height upper floor. Many Mid-Missouri homeowners convert this space into bedrooms, offices, or bonus rooms without adding to the home’s footprint.
Dormer windows are a natural fit for mansard roofs. They bring daylight deep into the upper floor and improve ventilation — something that matters during humid Missouri summers when attic heat can build up fast.
A mansard roof stands out. Whether you prefer a classic look or a more modern interpretation, the dual-slope profile adds architectural character that can increase your home’s value and differentiate it from neighboring properties.
If you’re considering a full roof replacement for your Columbia-area home, a mansard design is worth discussing with your contractor to see if it fits your home’s structure and your goals.
The dual-slope design requires more framing, more materials, and a contractor who understands the structural demands. This complexity means higher installation costs compared to a standard gable or hip roof. For accurate pricing in the Mid-Missouri market, it’s best to get a local estimate.
The shallow upper slope of a mansard roof behaves somewhat like a flat roof — water and debris can collect if drainage isn’t properly managed. Regular inspections are important, especially after heavy rain or snow. According to the National Weather Service St. Louis office, Mid-Missouri sees an average of 18 inches of snow annually, which can stress low-pitch roof sections.
Missouri’s storm season brings hail, high winds, and heavy rain. The lower pitch on the upper slope means water sheds more slowly than on a steep gable, so proper flashing and waterproofing are critical. If you have storm damage concerns, our storm damage roofing page covers what to look for and next steps.
The most common style. Uniform lower slopes create clean lines and maximize interior space. This is what you’ll see on most residential mansard roofs in Missouri.
The lower slope curves inward, creating a dramatic visual effect. You trade a bit of interior space for a bolder exterior look. Less common in residential construction but striking when done well.
The lower slope bows outward, adding both interior volume and a baroque aesthetic. This style is more often seen on commercial buildings or high-end custom homes.
Combines concave and convex curves for a flowing S-profile. This is the rarest variation and requires skilled craftsmanship to execute properly.
Material choice matters more on a mansard than on many other roof types because both slopes are visible and the upper slope needs to handle standing water risk.
The most popular choice for mansard roofs in Missouri. They handle the steep lower slope well, come in styles that complement traditional and modern homes, and keep costs reasonable. Architectural shingles are a good balance of durability and appearance for the lower slope.
Metal handles precipitation effectively and works well on the gentler upper slope where water runoff is slower. It’s durable enough to withstand Missouri hail and wind. The sleek look also pairs well with modern mansard interpretations.
Slate delivers the classic mansard look and can last over a century. The trade-off is cost and weight — your home’s structure needs to support it. For a premium project where longevity and appearance are the top priorities, slate is hard to beat.
Material recommendations vary by your specific roof pitch, budget, and how long you plan to stay in the home. The Missouri building code also dictates minimum standards for roof installations, which a licensed local contractor will factor into the project.
A mansard roof is not a standard installation. It requires a contractor who understands the framing complexity, proper flashing techniques, and material selection for both slopes. If you’re in Columbia, Jefferson City, or anywhere in Mid-Missouri, working with a local team familiar with Missouri weather patterns and building codes makes a real difference in the final result.
Planning a mansard roof project? Contact our Columbia roofing team at CoMo Premium Exteriors for a free consultation. Call (573) 424-9008 or schedule your inspection online.
The biggest advantage is usable space. The steep lower slope creates a full-height attic that can become a bedroom, office, or living area without changing your home’s footprint. No other residential roof style provides as much interior space per square foot of roof area.
Yes. The dual-slope design requires more framing, more materials, and specialized labor. Expect higher upfront costs compared to a standard gable or hip roof. However, the added living space can offset the investment by increasing your home’s usable square footage.
The steep lower slope handles wind and rain well, but the shallow upper slope can collect snow and water. Proper flashing, waterproofing, and regular inspections are essential in Mid-Missouri’s climate, where heavy spring rain and winter snow are common. NWS data shows the region averages 40+ inches of rain per year.
It’s possible but involves significant structural work. The framing requirements are different from standard roofs, so a structural assessment is necessary before committing. A qualified contractor can evaluate whether your home’s walls and foundation can support the additional load.
Architectural asphalt shingles are the most common choice for the steep lower slope due to cost-effectiveness and durability. For the upper slope, metal roofing is a strong option because it sheds water well on the lower pitch. Slate is the premium choice for both slopes if budget allows.
At least once a year, ideally in fall before winter weather arrives. After any severe storm with hail or high winds, schedule an additional inspection to check for damage on both the steep and shallow slopes. Missouri’s storm season (April through June) is the highest-risk period.
Why opt for PVC roofing? With unmatched durability, environmental benefits, and design flexibility, PVC roofing stands out as a smart choice for those seeking a long-term solution for commercial and residential buildings. Learn the ins and outs and why it might be the best fit for your project.

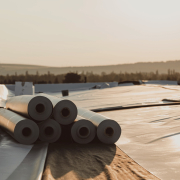
Illustration of PVC roofing systems
PVC roofing systems have carved a niche in the roofing industry, offering a combination of durability, versatility, and a long history of performance. Recognized by professionals as a stalwart among roofing materials, PVC—or pvc polyvinyl chloride—boasts a composition that includes chlorine from industrial-grade salt and ethylene from natural gas, making it a reliable choice for any roofing project. With over six decades of use, PVC roofing membranes have established themselves as a durable solution in the market, evolving through rigorous testing and technological advancements.
When considering a PVC roofing system, factors like initial costs, temperature sensitivity, and long-term benefits play pivotal roles in the decision-making process. The material quality of PVC not only affects the roof’s durability but also its appearance, ensuring that a PVC roof meets both functional and aesthetic demands. Whether it’s a flat roof for a commercial building or a residential roof looking for a modern touch, PVC roofing membranes stand out as a prime choice, blending structural integrity with style.
At the heart of every PVC roofing system lies the PVC membrane, a marvel of modern engineering designed for strength and flexibility. The standard PVC membrane is crafted by blending PVC with various additives that enhance its durability and performance. At its core is a polyester reinforcement layer, crucial for providing the necessary tensile strength a roof needs to withstand the elements. This blend also includes a significant proportion of chlorine, sourced from common salt, which not only contributes to the membrane’s robustness but also helps reduce its carbon footprint during production, a clear advantage over other plastics reliant on petroleum.
PVC membranes’ composition is a testament to the roofing industry’s commitment to innovation and environmental stewardship. By incorporating materials that enhance the membrane’s flexibility and longevity, PVC roofing membranes have emerged as a superior choice for those seeking a roofing material that balances performance with ecological consideration. It’s a combination that positions PVC as a front-runner in the evolution of roofing solutions.
Navigating the landscape of PVC roofing solutions, one encounters a variety of options designed to meet diverse needs and preferences. Standard PVC membranes lead the charge with their cost-effectiveness and resilience against harsh weather conditions, making them a go-to for many roofing projects. For those seeking additional benefits, fleece-backed PVC products emerge as a favorable option, cutting down on labor costs and offering flexibility in installation methods, which is particularly advantageous for complex roof landscapes.
For the discerning property owner, specialized PVC KEE (Ketone Ethylene Ester) membranes represent the pinnacle of PVC roofing technology. These advanced membranes boast increased long-term performance and stability, setting a new benchmark in the roofing industry for durability and reliability. Whether it’s the standard, fleece-backed, or KEE membrane, PVC roofing solutions provide the versatility to cater to the specific demands of any roofing project, ensuring that every building is protected and stylishly so.

Illustration of energy-efficient PVC roofing
The allure of PVC roofing systems isn’t just skin deep; beneath the surface lies a suite of benefits that make them an attractive proposition for any building owner or contractor. With a lifespan that can extend up to three decades, PVC roofing is not just incredibly durable; it’s also a cost-effective option over the long term, thanks to its low maintenance requirements. Its intrinsic waterproof properties and heat-welded seams provide unmatched protection against leaks, which is especially valuable in areas subject to severe weather conditions.
Moreover, PVC roofing materials boast the following advantages:
These benefits make PVC roofing a highly sought-after choice in the roofing realm.
In the quest for greener building practices, PVC roofs emerge as champions of energy efficiency. Endorsed with Energy Star and Cool Roof ratings, these roofing systems excel in reflecting sunlight, significantly reducing heat absorption and leading to a cooler building interior. This high reflectivity not only keeps indoor spaces more comfortable but also translates to tangible cost savings by lessening the reliance on air conditioning systems, particularly during the sweltering summer months.
The insulation qualities of PVC roofing offer several benefits, including:
These benefits solidify PVC roofing’s reputation as an energy-efficient solution.

Illustration of PVC roofing’s weather resilience
PVC roofing systems are built to last, engineered to withstand the fury of nature’s elements. With a breaking strength that exceeds ASTM requirements, PVC roofs show little to no damage even when pitted against high winds and hail, showcasing their superior resistance. The robustness of PVC also extends to its ability to resist UV damage, ensuring that the roof’s color and structural integrity remain intact over time.
Furthermore, PVC’s resistance to fire is a noteworthy feature. The material’s self-extinguishing properties mean that in the event of a fire, the flames will die out once the source is removed, offering peace of mind to property owners. Additionally, PVC roofing’s chemical resistance is a formidable defense against a broad spectrum of elements, debunking the misconception that it may degrade quickly when exposed to harsh substances.

Illustration of low maintenance PVC roofs
The charm of a PVC roof extends beyond its robustness and into the realm of practicality, with minimal maintenance being one of its most appealing attributes. Over the lifespan of a PVC roofing system, property owners can anticipate very little upkeep, translating into significant savings and convenience. Routine inspections, occasional cleaning, and prompt repairs of any punctures or tears are all that’s required to maintain the pristine condition of a PVC roof.
This low maintenance profile makes PVC an ideal roofing material for commercial buildings, where heavy foot traffic is the norm. From shopping centers to restaurants and office complexes, PVC roofs offer a practical and reliable covering that can endure the rigors of day-to-day operations. However, it’s important to note that while maintenance is typically low, immediate attention to issues like water pooling is crucial to preserving the roof’s integrity and performance.
As with any popular building material, PVC roofing systems are not immune to misconceptions and concerns that can cloud a property owner’s judgment. It’s crucial to explore these potential weaknesses and drawbacks, such as repairability and environmental impact, to make an informed decision about your roofing material. While PVC roofing is lauded for its many strengths, it is not without issues that, if not promptly addressed, could turn into long-term problems.
One of the greatest assets of PVC roofing is its chemical resistance, which counters the belief that it may easily degrade when in contact with harsh chemicals. However, roof shrinkage is a valid concern when PVC roofing systems are subjected to extreme temperature changes, and addressing this is essential to maintain roof integrity.
The narrative that PVC roofing is difficult to maintain due to repair challenges is one that deserves to be corrected. PVC roofing systems are intentionally designed for ease of repair, which is a significant factor in their overall longevity. The process of re-welding is a straightforward yet effective method for fixing PVC roofing, giving it an edge over other roofing membranes that may require more elaborate repair strategies.
This ease of repair is not merely theoretical; companies like RoofCrafters have been successfully implementing PVC roofing in a variety of projects for nearly three decades, demonstrating the material’s durability and dependability over time. This long-standing track record of performance challenges the myths and reaffirms the reasons why PVC continues to be a preferred roofing choice.
Environmental sustainability is a pressing concern in today’s world, and PVC roofing systems address this by being recyclable, thus contributing to a reduction in landfill waste. Some manufacturers have even initiated recycling programs specifically for PVC roofing, showing a commitment to minimizing the environmental footprint of their products. When it comes to the safe disposal of PVC, efficient combustion can break it down into mostly harmless byproducts such as water, carbon dioxide, and hydrogen chloride, which minimizes the production of harmful dioxins.
The misconception that PVC contributes significantly to dioxin production in the environment has been debunked, with studies indicating that the majority of environmental dioxin is due to landfill fires and not PVC itself. This revelation is supported by the mapping of high dioxin concentrations corresponding to areas affected by open waste burning, rather than those with widespread PVC use.
When stacked against other roofing materials, PVC roofing systems showcase their superior qualities, outperforming options like TPO and traditional materials across several metrics. Some of the advantages of PVC roofing systems include:
These qualities make PVC a compelling choice for those in the market for a new roof, especially in regions with strict fire codes where the fire-resistant properties of PVC offer an extra layer of protection.
PVC roofs offer several advantages over traditional roofing materials:
Delving into the specifics, a side-by-side comparison of PVC and TPO roofing systems reveals key differences that could influence a property owner’s choice. PVC roofing consists of a smaller proportion of oil and petroleum products compared to TPO, a distinction that can impact both cost and environmental considerations. While TPO membranes may exhibit higher tear strength and break strength, making them potentially more robust in certain settings, PVC typically enjoys a longer lifespan thanks to its superior resistance to weathering, chemical exposure, and UV rays.
Both PVC and TPO roofing systems boast the potential to exceed the average commercial roof lifespan of 17 years, provided they are installed and maintained correctly. This ensures long-term service for building owners. However, PVC’s chemical resistance is non-reactive to many chemicals, an advantage in environments with potential chemical exposure, whereas TPO may suffer from contact with oils and certain exhausts.
TPO, on the other hand, is known for its flexibility in colder temperatures and high UV resistance, which can contribute to energy savings, especially during warmer periods.
When compared to traditional materials such as asphalt shingles and metal roofs, PVC roofing systems offer a bevy of benefits that make a compelling argument for their selection. Here are some of the advantages of PVC roofs:
Metal roofs, while durable, are prone to leaking over time, especially at seams and fasteners. In contrast, the heat-welded seams of PVC roofs provide a watertight bond that withstands the test of time, significantly reducing the risk of leaks. Furthermore, unlike metal roofing, PVC is not susceptible to corrosion or rust, making it an excellent choice for coastal areas where salty air or high pollution levels can wreak havoc on other roofing materials. This resistance to corrosion, along with the ability to reflect UV rays effectively, ensures that PVC roofs maintain their integrity and appearance for years to come, unlike some metal roofs which can absorb heat and increase cooling loads.
The success and longevity of a PVC roofing system are heavily influenced by the quality of its installation. Professional installation is paramount to avoid issues such as seam failures and leaks, which can compromise the roof’s performance and ultimately the protection it provides. Even the most exceptional PVC roofing material can fall short if not installed correctly, leading to critical problems like leaks and seam failures that can significantly reduce the lifespan of the roof.
The role of a skilled roofing contractor cannot be overstated when it comes to ensuring the structural integrity and longevity of a PVC roofing system. Poor workmanship not only accelerates the aging process of the roof but also increases the likelihood of premature problems, which is why the expertise of the installer is as important as the quality of the material itself. With a proficient contractor, you can ensure that your investment in a PVC roof yields the maximum return.
The journey to a successful PVC roofing installation begins with choosing the right roofing contractor—a decision that influences not only the roof’s performance but also your satisfaction with the entire project. A qualified contractor should be able to provide evidence of licensure and insurance, which are essential safeguards to protect homeowners during the roofing process. Additionally, investigating a contractor’s history through the Better Business Bureau (BBB) and understanding the details of their warranty offerings on PVC roofing installations can offer peace of mind and ensure you’re making the right choice.
Personal referrals from friends or family can be invaluable in finding a reputable contractor with a track record of successful PVC roofing experiences. Moreover, utilizing a contractor who is certified by the PVC membrane manufacturer can ensure that the installation adheres to the highest standards, which is often reflected in the comprehensive manufacturer warranties provided. These warranties not only emphasize the importance of a proper installation but also offer an added layer of protection for the building owner, solidifying the significance of making the right choice in your roofing contractor.
The performance and longevity of a PVC roof are deeply linked to the precision of its installation. Expert contractors are adept at heat welding PVC seams, a crucial process that ensures a leak-proof and durable finish. This technique also allows the roofing to adjust to the building’s expansion and contraction, which is vital for maintaining the roof’s integrity over time. With professional installation, PVC roofing systems can come with warranties extending up to 30 years, offering property owners reassurance in their long-term investment.
Professionally installed PVC roofs offer several benefits, including:
By choosing experienced contractors skilled in working with PVC, building owners can enjoy these advantages and have peace of mind knowing that their roof is in good hands.

Illustration of PVC roofing for different building types
PVC roofing systems are not a one-size-fits-all solution; they are incredibly adaptable, capable of meeting the specific needs of various building types, including commercial, institutional, and residential structures. The robust nature of PVC roofing, coupled with its minimal maintenance and aesthetic versatility, makes it a fitting choice for a wide range of architectural styles and functional requirements.
Institutional buildings such as schools and hospitals reap the benefits of PVC roofing, thanks to its durability, ease of maintenance, and energy efficiency, which contribute to a safer and more cost-effective environment.
The residential sector is also embracing PVC roofing, particularly for homes with flat or low-slope roofs. Here are some reasons why PVC roofing is becoming popular among homeowners:
This shift towards PVC roofing demonstrates its growing popularity and its ability to provide homeowners with a reliable, stylish, and energy-efficient roofing solution.
Whether it’s a sprawling commercial complex or a cozy suburban home, PVC roofing can be tailored to meet the demands and enhance the appeal of any building.
Flat or low-slope roofing structures are where PVC roofing systems truly shine. These roof types, common in commercial settings, are well-suited to the lightweight and versatile nature of PVC membranes. With easy installation and a track record of excellence in performance, PVC roofing is an uncomplicated choice for buildings that need a robust, long-lasting covering. Commercial entities, from condominiums to retail spaces and restaurants, often turn to PVC roofing to take advantage of its benefits, such as energy efficiency and the ability to customize the roof’s appearance to fit the brand or aesthetic of the business.
In addition to its aesthetic appeal, PVC roofing membranes are engineered to excel in low-slope commercial roofing applications where high resistance to fire, chemicals, and extreme wind conditions is a must. This makes PVC an ideal roofing solution for businesses that require additional protection due to their location or the nature of their operations. With PVC, commercial building owners can rest assured that their roof is equipped to handle whatever challenges the environment may present.
Real-world applications of PVC roofing provide a window into its versatility and effectiveness in meeting commercial and residential roofing needs. CoMo Premium Exteriors, known for their wide range of roofing services, has a proven track record of delivering high-quality PVC roofing installations that stand the test of time. A notable example includes a large medical facility that benefited from a PVC roofing system, ensuring a durable and weather-resistant solution that can handle the demands of a healthcare environment.
CoMo Premium Exteriors’ expertise is also evident in their work on a high-traffic shopping center, where they implemented a custom-designed PVC roofing solution that enhanced both the roof’s long-term performance and aesthetic appeal. The company’s success in applying PVC roofing to both flat and sloped roofs of commercial buildings, as well as residential homes, highlights the material’s adaptability and the satisfaction it brings to clients, especially regarding its minimal maintenance needs and lifetime performance. These case studies stand as a testament to the ability of PVC roofing to effectively meet a broad spectrum of roofing requirements, making it a smart choice for any building project.
In conclusion, PVC roofing systems offer an impressive array of advantages for both commercial and residential applications. From their durability and energy efficiency to their weather resistance and low maintenance requirements, PVC roofs stand out as an excellent choice for those seeking a long-term roofing solution. By addressing common misconceptions and comparing PVC to other roofing options, we’ve seen that PVC holds its own as a top contender. The importance of expert installation cannot be overstated, as it ensures the performance and longevity of the roof. With its ability to adapt to different building needs and styles, PVC roofing systems are poised to continue their reign as a preferred roofing option for years to come.
A PVC roof can last up to 30 years with proper installation and maintenance, making it a durable and cost-effective choice over time.
Yes, PVC roofing is considered environmentally friendly because it is recyclable and can break down into mostly harmless byproducts when combusted efficiently.
Yes, PVC roofing can definitely be used on residential buildings, especially for homes with flat or low-slope roofs, as it offers long lifespan and weather resistance.
PVC roofing has superior chemical resistance, making it non-reactive to many chemicals, while TPO may suffer negative effects when in contact with oils and certain exhausts. Therefore, PVC roofing is preferable in terms of chemical resistance.
PVC roofs require minimal maintenance, including routine inspections and occasional cleaning to ensure cost-effectiveness for property owners. Prompt repairs of any issues are also necessary.
If you own a commercial building or a home with a flat or low-slope roof in Central Missouri, you have probably heard of EPDM roofing. It is one of the most widely used flat roofing materials in the country, and for good reason. It is affordable, durable, and well-suited to the temperature extremes we experience in the Mid-Missouri region. But like any roofing material, it has both strengths and limitations worth understanding before you commit to a project.
At CoMo Premium Exteriors, we have installed and repaired EPDM roofing systems on properties throughout Columbia, Jefferson City, Fulton, and the surrounding areas. This guide covers what EPDM is, how it performs in our climate, how it compares to alternatives, and what you should know before making a decision.
EPDM stands for ethylene propylene diene monomer, a synthetic rubber membrane that has been used in commercial and residential flat roofing since the 1960s. It is manufactured in large sheets (typically 10 to 50 feet wide) that are rolled out across the roof surface and either adhered with adhesive, mechanically fastened, or held in place with ballast (gravel or pavers).
The material comes in two colors: black and white. Black EPDM is the traditional option and absorbs heat, which can be beneficial for heating in colder months. White EPDM reflects sunlight and reduces cooling costs in summer. Both perform well, and the choice often depends on the building’s energy priorities and local climate considerations.
According to the National Roofing Contractors Association (NRCA), EPDM remains one of the most common single-ply roofing membranes in North America, with an estimated 1 billion square feet installed annually.
Central Missouri’s climate presents specific challenges for flat roofing. We experience temperature swings from below zero in January to over 100 degrees in July, heavy spring thunderstorms, occasional hail, ice damming in winter, and high humidity through the summer months. EPDM handles these conditions well for several reasons:
There are three primary methods for installing EPDM roofing, and the right choice depends on the building’s structure, the roof’s slope, and the owner’s priorities.
The membrane is glued directly to the roof substrate (typically insulation board) using a bonding adhesive. This method provides the best wind uplift resistance and creates a smooth, uniform appearance. It is the most common choice for commercial buildings in the Columbia and Jefferson City areas where wind exposure is a concern.
The membrane is fastened to the roof deck with screws and plates along the seams. This is faster to install and works well on steel deck structures. It is a good option when the existing roof substrate is not suitable for adhesive or when budget is a primary concern.
The membrane is laid loose over the roof and held in place by a layer of smooth river rock (typically 10 to 12 pounds per square foot) or concrete pavers. This is the least expensive installation method and protects the membrane from UV exposure and physical damage. However, it adds significant weight to the roof structure, so the building must be engineered to handle the load.
A properly installed EPDM roof typically lasts 25 to 30 years, with some systems exceeding 40 years. That is significantly longer than modified bitumen (15 to 20 years) and competitive with TPO and PVC membranes. For Mid-Missouri building owners, this longevity translates directly to lower cost per year of service.
EPDM is generally the most affordable single-ply roofing option. Material costs run lower than TPO or PVC, and installation labor is typically less expensive because the large sheet sizes mean fewer seams to fabricate. For a typical 10,000-square-foot commercial roof in the Columbia area, EPDM can save 15 to 25 percent compared to TPO.
EPDM requires minimal ongoing maintenance. An annual inspection to check seams, flashings, and membrane condition is generally sufficient. Small repairs (punctures, seam separations, or minor damage) can be patched quickly with EPDM-compatible materials without requiring professional equipment.
White EPDM membranes reflect a significant portion of solar radiation, reducing rooftop temperatures and lowering cooling costs. When combined with proper insulation (polyiso board is the standard in our region), an EPDM system can meaningfully reduce a building’s energy consumption. Black EPDM absorbs heat, which can reduce heating costs in winter. That is a real consideration given that our heating season runs roughly from November through March.
No roofing material is perfect, and EPDM has some limitations worth understanding:
EPDM can be damaged by petroleum-based solvents, oils, and greases. If your roof has HVAC equipment, kitchen exhaust vents, or other sources of petroleum-based discharge, those areas need protective walkway pads or additional membrane protection. This is a common consideration for restaurants and commercial kitchens in the Columbia area.
EPDM seams are strong when properly installed, but they can separate over time, particularly in older installations that used liquid adhesive rather than modern seam tape. Annual inspection of seams is the best preventive measure. If caught early, seam repairs are straightforward and inexpensive.
Standard 45-mil EPDM can be punctured by sharp objects or heavy foot traffic. For roofs that require regular maintenance access (HVAC service, for example), upgrading to 60-mil membrane or FleeceBACK EPDM provides significantly better puncture resistance. Walkway pads should be installed along any regular traffic paths.
EPDM is a utilitarian material. It does not offer the design flexibility of metal roofing or the aesthetic options of architectural shingles. For most flat-roof applications this is not a concern since the roof is not visible from ground level. But for buildings where the rooftop is visible or used as occupied space, other materials may be more appropriate.
Here is how EPDM compares to the other common flat roofing options available in Central Missouri:
One of EPDM’s strongest selling points is how straightforward repairs are. Common repair scenarios include:
For annual maintenance, we recommend:
EPDM roofing systems can be enhanced with several accessories:
The quality of an EPDM installation depends heavily on the crew doing the work. When evaluating contractors in the Mid-Missouri area, look for:
At CoMo Premium Exteriors, we work with leading EPDM manufacturers including GAF and CertainTeed to deliver installations backed by strong manufacturer warranties. If you have a flat or low-slope roof in Central Missouri that needs attention, we would be glad to take a look and discuss your options. Call us at (573) 424-9008 or schedule a free inspection.
A properly installed EPDM roof typically lasts 25 to 30 years in our Central Missouri climate, with some systems exceeding 40 years. The key factors affecting lifespan are installation quality, membrane thickness (45-mil vs. 60-mil), and regular maintenance. Our region’s temperature extremes and storm activity make annual inspections particularly important for catching small issues before they become expensive problems.
Yes. EPDM is an excellent choice for residential flat roofs and low-slope roof sections. Many homes in Columbia and Jefferson City have flat-roof additions, sunrooms, or covered porches where EPDM provides reliable, long-lasting protection. It is also commonly used on carports and detached garages with flat or nearly flat roofs. For the main roof on a traditional pitched-roof home, conventional shingles or metal roofing would be more appropriate.
Standard 45-mil EPDM handles moderate hail (up to about 1.5 inches) without damage. For better protection in our hail-prone region, FleeceBACK EPDM with its 145-mil reinforced membrane can withstand hailstones up to 4 inches in diameter. If your building is in an area that sees frequent hail (Central Missouri averages 2 to 4 significant hail events per year), the thicker membrane is worth the additional investment.
In the Central Missouri market, EPDM typically costs $4 to $8 per square foot installed, depending on membrane thickness, installation method, and project complexity. This compares to $5 to $10 for TPO, $6 to $12 for PVC, and $3 to $7 for modified bitumen. While EPDM may not always be the cheapest upfront option, its combination of longevity and low maintenance costs often makes it the most economical choice over the full life of the roof.
EPDM is one of the lowest-maintenance roofing options available. We recommend an annual inspection (ideally in spring after winter weather and before our stormy season) to check seams, flashings, and overall membrane condition. Keep drains and scuppers clear of debris, address any ponding water issues promptly, and inspect after major storms. Small repairs like seam resealing or puncture patching are straightforward and inexpensive when caught early.
Absolutely. EPDM roofs are compatible with both ballasted and mechanically attached solar panel mounting systems. The membrane’s flexibility and durability make it a good substrate for solar installations. Many commercial building owners in Columbia are adding solar arrays to their EPDM roofs as energy costs rise. Just make sure the solar installer coordinates with a roofing professional to maintain the membrane warranty and ensure proper waterproofing at all attachment points.
Metal roofing (typically standing seam) can work on low-slope roofs but requires a minimum pitch of about 1:12 and costs significantly more than EPDM, often 2 to 3 times the price. Metal offers excellent longevity (40 to 60 years) and a more attractive appearance, but for true flat roofs (less than 2:12 pitch), EPDM is the more practical and cost-effective choice. For our Mid-Missouri roofing projects, we help each client evaluate which material makes the most sense for their specific building and budget.
Curious if a cedar shake roof is the right choice for your home? This article explores the benefits and drawbacks, helping you understand its unique appeal and what it takes to maintain one. Read on to find out if a cedar shake roof is worth the investment. Compared to asphalt shingles, cedar shake roofs offer superior longevity, durability in severe weather, energy efficiency, and eco-friendliness, but they come with higher costs and maintenance requirements.

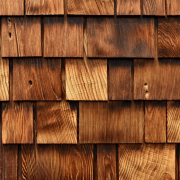
Illustration of a traditional cedar shake roof
Crafted from natural wood shingles, cedar shake roofs are treasured for:
As you contemplate the ideal roofing solution, consider the unique attributes of cedar shakes that blend seamlessly with a variety of architectural styles, enhancing both the aesthetic and functional value of your home. Compared to asphalt shingles, cedar shakes offer superior longevity, durability in severe weather, and energy efficiency, though they come at a higher cost and require more maintenance.
Cedar shake roofs, a popular type of cedar roofing, are more than just a protective covering; they are a statement of quality and a nod to sustainable living. Made from cedar, these roofing materials, including cedar shingles, embody durability, resistance to insects, and an aesthetic appeal that many homeowners find irresistible when considering cedar roofs as their choice of roofing material. Compared to asphalt shingles, cedar shake roofs offer superior longevity, durability in severe weather, and energy efficiency, though they come with higher costs and maintenance requirements.
Before we explore further, it’s essential to understand the fundamentals of cedar shakes, including their various types and the aesthetic appeal they add to any home.
Cedar shakes come in two distinct styles: hand-split, which showcases a rugged, textured look, and taper-sawn, which offers a smoother, more uniform appearance. They are also categorized into three grades: common, select, and the premium 100% straight grain.
The quality of the cedar directly influences the roof’s longevity; a roof made from the highest quality straight grain shakes will outlast those made from lesser grades. That’s why it’s essential to choose the highest quality cedar products for your roofing needs.

Illustration of a beautiful cedar tree in a forest
The charm of cedar shake roofs lies in their natural beauty, which integrates effortlessly with the surrounding landscape. Often chosen for historic homes, the wood’s inherent qualities allow each shake to develop a unique patina over time, giving your home a traditional yet distinct aesthetic that only nature can provide. It’s a choice that not only makes your house stand out but also connects it to the earthy tones of nature.
Aside from their striking natural beauty, cedar shake roofs boast a plethora of benefits that extend beyond their visual appeal. These include impressive insulating properties, energy efficiency, and an eco-friendly footprint. We will now examine the tangible benefits of cedar shakes, making them an attractive option for those aiming for a balance of aesthetics and functionality in their roofing choices. Compared to asphalt shingles, cedar shakes offer superior longevity, durability in severe weather, better energy efficiency, and a more eco-friendly nature.
When properly installed and maintained, a cedar shake roof is more than just a covering; it’s a legacy that can shelter your home for decades. With a natural resilience to extreme weather conditions, including high winds and heavy rain, cedar shakes maintain their integrity over the years. This durability is further enhanced by cedar’s innate resistance to decay and insects, ensuring a roof that can reach up to 50 years of age with the right care.
Cedar shakes are nature’s answer to energy efficiency. Their benefits include:
For most homeowners looking to reduce their carbon footprint, the energy-efficient attributes of cedar shakes are a compelling factor.

Illustration of eco-friendly renewable resources
Choosing cedar shakes means making a decision that respects the environment. These shakes are crafted from 100% natural cedar wood, free from synthetic materials and chemicals, making them an eco-conscious roofing choice. Not only are they biodegradable, but the sustainable harvesting practices employed in their production ensure a reduced environmental impact, preserving the planet for future generations.
While cedar shake roofs offer a multitude of benefits, it’s important to consider certain drawbacks before making your decision. The initial investment, ongoing maintenance, and climate sensitivity are factors that might influence your choice. Compared to popular alternatives like asphalt shingles, cedar shakes are generally more expensive and require more maintenance.
It’s time to discuss potential challenges associated with a cedar shake roof and how they could impact its performance and lifespan.
The allure of cedar shake roofs comes with a price tag that reflects their premium quality. Compared to other roofing materials, cedar shakes require a higher upfront investment, both in terms of material costs and the specialized installation process. While the expense may be considerable, ranging from $4 to $7.25 per square foot installed, it’s a reflection of both the material’s quality and the craftsmanship required to properly install these beautiful roofs.
The natural beauty of cedar shakes necessitates a commitment to regular maintenance. Every 2 to 4 years, homeowners must undertake measures to preserve their shake roofs, such as inspections for pests, and the prevention of moss, mold, and mildew growth.
Neglecting maintenance can result in a shortened lifespan for the roof, making it essential to stay proactive in caring for your cedar shakes.
The performance of cedar shake roofs can be heavily influenced by the climate in which they’re installed. Here are some factors to consider:
It’s crucial to consider the climatic conditions of your area when choosing a cedar shake roof.
When pondering the installation of a cedar shake roof, several key considerations come to the forefront. These include:
Taking these factors into account will help you make an informed decision that aligns with your home’s needs and your personal preferences.
The artistry of cedar shake installation cannot be overstated. It requires a level of precision and expertise that only experienced professionals can provide. Incorrect installation can lead to numerous problems, such as gaps and moisture seepage, which could ultimately compromise the roof’s durability.
Therefore, selecting a skilled roofing contractor is as important as choosing the quality of your cedar shakes.
Not all climates are created equal when it comes to cedar shake roofs. Regions with moderate to cool temperatures and low humidity are ideal, as they allow the shakes to perform at their best. Conversely, areas with high humidity or extreme temperature fluctuations may not be as suitable, as these conditions can affect the cedar’s ability to dry properly and may shorten its lifespan.
While the initial cost of a cedar shake roof might be higher than other materials, it’s crucial to view it as a long-term investment. The enduring appeal and longevity of cedar shakes can significantly elevate the value of a property, providing both aesthetic and financial returns over time.
As such, investing in a cedar shake roof is a strategic decision that can offer lasting benefits.
The roofing market offers a variety of alternatives to natural cedar shakes, including synthetic options that mimic their appearance. While these alternatives provide some advantages, such as lower maintenance and improved fire resistance, they may not fully capture the authentic beauty of real cedar shakes.
We’ll now compare synthetic cedar shake roofing to the natural product to understand their differences and similarities.
Synthetic cedar shake roofing products are crafted from recycled resins and polymers, offering homeowners a durable and environmentally friendly option. Brands like Brava and CeDUR are at the forefront of this market, producing shakes that not only look like natural cedar but also boast features such as fire resistance and high impact ratings.
The innovation of these products allows for a cedar shake look without the traditional drawbacks associated with natural wood, as they are naturally resistant.
Synthetic cedar shakes are lauded for their performance, especially in regions with challenging weather conditions. However, for many homeowners, the aging process of natural cedar shakes, which adds character and depth to the roof’s appearance, is irreplaceable.
Synthetic shakes, while offering a similar initial look, may not develop the same visual richness over time, a factor that can be crucial for those seeking the authenticity of natural wood.

Illustration of the cedar shake roof installation process
Installing a cedar shake roof is a meticulous process that requires careful planning and skilled execution. From the selection of materials to the finishing touches, each step must be approached with precision to ensure the roof’s longevity and performance.
We will now navigate through the installation process, emphasizing the preparation, steps, and post-installation care necessary for a successful cedar shake roof.
The first step in a cedar shake roof installation is to:
By following these steps, you can ensure a successful cedar shake roof installation.
The actual installation of a cedar shake roof involves a series of steps that must be meticulously followed. From the crucial first layer of shingles to the correct positioning of battens and keyway spacing, every detail matters. Ensuring proper installation techniques, such as the ‘broken bond’ pattern and avoiding nail gun use, are essential to the roof’s structural integrity.
Finishing touches like flashing, ridge caps, and trim give the roof its final shape and function, all of which are verified during a final inspection.
Once the cedar shake roof is meticulously installed, the journey to preserve its beauty and functionality begins. Regular inspections are key to identifying potential issues early, while cleaning and maintenance, including the removal of debris and organic growth, are essential to extend the roof’s life.
Post-installation care, such as applying protective treatments, not only safeguards the cedar shakes from the elements but also ensures that the roof continues to provide reliable protection for years to come.
Maintaining a cedar shake roof is paramount for ensuring it remains a lasting feature of your home. Regular inspections, appropriate cleaning, and timely treatments all play a role in preserving the roof’s integrity and appearance.
We will now highlight the best maintenance practices for cedar shake roofs to assist you in keeping your roof in optimal condition.
An ounce of prevention is worth a pound of cure, especially when it comes to cedar shake roofs. Annual inspections by professional roofers are crucial for detecting early signs of damage such as mildew, moss, rot, and algae. These inspections should also include checks for missing, cracked, or broken shingles and potential leaks.
Addressing issues promptly ensures the cedar shake roof continues to perform its protective duties without interruption.

Illustration of cleaning and treating a cedar shake roof
Cleanliness is next to godliness, and this adage holds true for cedar shake roofs. Here’s how you can clean your cedar shake roof:
By following these steps, you can keep your cedar shake roof clean and well-maintained.
Periodic treatments with water-repellent coatings, stains, sealants, and preservatives help protect the roof against water, UV rays, and pests, extending its lifespan.
As the seasons change, so do the maintenance needs of your cedar shake roof. Here are some important tasks to keep in mind:
By following these maintenance tips, you can keep your cedar shake roof in good condition throughout the year.
Seasonal maintenance not only keeps the cedar shakes looking great but also fortifies them against the elements.
Embarking on the cedar shake roof journey is an adventure in both aesthetics and functionality. From understanding the natural beauty and types of cedar shakes to weighing the benefits and drawbacks, this guide serves as your compass. Whether you’re considering the long-term investment of natural cedar or the practicality of synthetic alternatives, the importance of installation expertise, maintenance, and climate suitability are central to your decision. Remember, a cedar shake roof is not just a covering—it’s an investment in the future of your home, promising enduring beauty and protection.
Cedar shake roofs are a popular choice for homeowners because of their natural beauty, durability, resistance to insects and decay, and insulating properties, making them both aesthetically pleasing and practical.
Yes, cedar shake roofs are eco-friendly because they are made from natural, renewable, and recyclable cedar wood, and sustainable harvesting practices reduce their environmental impact.
You can expect your cedar shake roof to last around 30 years with proper installation and maintenance, and potentially up to 50 years, due to its natural resistance to decay and insects.
To maintain a cedar shake roof, regular inspections for pests, cleaning to remove debris and organic growth, and treatments with water-repellent coatings and preservatives are necessary. Regular maintenance every 2 to 4 years is recommended.
The climate directly impacts the longevity of a cedar shake roof. Moderate to cool climates with low humidity are best for maintaining the roof’s lifespan, as extreme heat can cause cracking and high humidity can lead to moisture retention, shortening the roof’s life.
Understanding roof cricket is essential for any homeowner dealing with potential water damage on their roof. These structures are pivotal for diverting water and preventing accumulative damage, especially around your roof’s more vulnerable features. This article offers a straightforward walkthrough of what roof crickets are, when and why they’re needed, and how they’re installed and maintained to bolster your roof’s defense against the elements.

Illustration of a roof cricket diverting water away from a chimney
Roof crickets are the guardians of your roof, standing watch at the most vulnerable points where water loves to gather. These triangular structures are meticulously crafted to guide water away from places like chimneys, skylights, and other roof protrusions, ensuring that water flows harmlessly towards your gutters instead of causing mischief. Their role is crucial; by preventing ponding, they extend the lifespan of your roofing materials and protect the underlying structure from the insidious creep of water damage. Think of them as your personal roofing sentinels, deflecting the elements and preserving the integrity of your home.
Installing roof crickets is not just a practicality; it also translates into a wise economic choice. Each redirected raindrop equates to potential savings on future roof repairs. Their strategic placement behind roof penetrations like chimneys plays a critical role in mitigating the risk of leaks and structural damage by ensuring that water doesn’t have a chance to pool and penetrate. With roof crickets installed, you can rest assured that your home is well-protected.
A roof cricket’s design is a masterclass in efficiency and simplicity, especially for a low slope roof system. Picture a triangular structure snugly installed behind a chimney or skylight, its sloping sides and a small ridge on top working in concert to redirect water away from your roofing system’s critical elements. The cricket’s gable design isn’t just for aesthetics; it’s engineered to match the slope of your roof, allowing water to flow smoothly towards drainage points.
Whether your roof is a steep mountain or a gentle hill, crickets can be tailored to fit. They can mirror the pitch of your roof or offer a steeper angle for more aggressive water diversion, referred to as ‘saddles’ in the roofing vernacular. The ridge must be level, and the sides must align with your roof’s slope, creating an effective channel that prevents water from pooling against the chimney and inviting issues.
Although traditional roof designs serve their purpose, they often lack in their ability to prevent water and debris accumulation at critical points. This design shortcoming is addressed by roof crickets. They stand as a bulwark against the potential damage caused by standing water, ensuring that even heavy rainfall is managed and redistributed to safeguard your roofing materials from deterioration. In addition to roof crickets, roof curbs can also play a role in enhancing the overall protection of your roofing system.
It’s this proactive approach to water management that sets roof crickets apart. By eliminating water ponding and the risk of structural damage that comes with it, they not only extend the lifespan of the roof but also offer a cost-effective preventative measure.
The difference is clear: worthwhile investment roof crickets are not just an addition to your roof; they are a strategic enhancement that serves to protect your investment for years to come.

Illustration of roof crickets installed behind a chimney
The choice to install a roof cricket is significant and not a ubiquitous necessity for all rooftops. These architectural features are most effective when placed behind chimneys, particularly those that boast a width of 30 inches or more and find themselves on the downslope of your roof. If you’re the custodian of a commercial building, roof crickets become even more imperative. Their presence ensures that water is channeled into the drainage system, away from areas that would otherwise be prone to damage.
In regions graced by heavy snowfall, the addition of a metal or plastic cover over the roof cricket can offer an extra layer of defense against water ingress, preventing the roof structure from sagging under the weight of the elements. This is especially important for wood framed structures covered by these materials. It’s about creating a roof that’s not just weather-resistant but weather-wise, ready to handle whatever the skies deliver.
The necessity of roof crickets isn’t merely dictated by practicality; legal requirements also play a role. Building codes have weighed in on the matter, requiring the installation of a roof cricket on the ridge side of chimneys wider than 30 inches — a clear mandate to ensure proper water drainage. These regulations underscore the essential nature of roof crickets in maintaining the integrity of your roofing materials and preventing their degradation due to water accumulation.
Following building codes goes beyond mere compliance; it’s about crafting a durable cricket with accuracy and proficiency. Roof cricket building codes on certain chimneys aren’t just recommended; they’re mandated, highlighting their importance in the grand scheme of roof construction and regulatory compliance.
Some zones of your roof are more susceptible to the whims of water than others. Areas around large rooftop units like HVAC systems and unprotected skylights are particularly vulnerable to ponding, as water seeks out any opportunity to collect. It’s in these high-risk zones that contractors often install roof crickets, positioning them on the higher side of chimneys or at the meeting point of different roof sections to ensure that water is diverted rather than accumulated.
For chimneys that sit at the bottom of a roof slope or are surrounded by slopes that direct water towards them, the installation of a roof cricket is critical to prevent leakage. In regions with substantial rainfall or snow accumulations, the design of chimney crickets is customized to ensure that water is effectively steered away from the chimney base. Identifying these zones is the first step to fortifying your roof against the elements.

Illustration of different materials for roof crickets
Creating a roof cricket resembles the selection of suitable battle armor; chosen materials should be sturdy, durable, and prepared to withstand any weather conditions. For steep-sloped roofs, the traditional wood framework provides a sturdy foundation, while metal flashing or asphalt shingles shield it from the elements. On the other hand, low-sloped roofs, such as a flat roof, might call for a more specialized approach, utilizing sloped rigid insulation beneath the membrane roofing system for optimal protection.
Metals such as copper and galvanized steel are often the materials of choice for roof cricket construction, thanks to their exceptional resistance to rusting and corrosion. In the commercial realm, tapered insulation panels are frequently employed as a roofing material to create the necessary slope for water diversion, marrying functionality with a keen awareness of the roofing system’s specific needs.
The interdependent relationship between a roof cricket and the roofing system it safeguards is of paramount importance. The materials used for the cricket must be in harmony with the roof’s slope and the maximum acceptable length to width ratio, a calculation that varies depending on the roof’s surface slope. For the flat and low-slope roof systems that are common in commercial buildings, materials such as insulation are typically chosen for their compatibility.
A metal roof cricket, seamlessly integrated with a metal roof, is a prime example of this compatibility in action. The necessity of roof crickets on flat or low-slope roofs is particularly evident, as they play a pivotal role in preventing water collection and ensuring proper runoff. Moreover, taking into account the roofing materials and regional weather conditions, such as high snowfall areas and extreme temperatures, is essential for the cricket’s compatibility and effectiveness.
The true test of a roof cricket lies in its ability to endure. The materials selected must be durable and capable of withstanding diverse weather conditions over extended periods. That’s where metals like copper and galvanized steel come into play, offering high resistance to the elements and ensuring the roof cricket remains steadfast through seasons of rain, snow, and sunshine.
Incorporating metal flashing into the cricket’s construction is not just about durability; it’s a crucial step in creating an impenetrable barrier against water seepage into the roof deck. This preventive measure is key to averting potential leaks and the associated structural damages they can bring about.

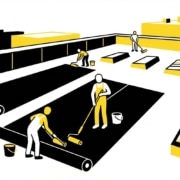
Illustration of contractors installing roof crickets
The roof cricket installation involves several steps:
The process of installing a cricket on a chimney includes the following steps:
By following these steps, you can effectively prevent water damage and maintain the integrity of your roof.
Safeguarding a roof cricket from the elements requires a collection of specialized techniques. Strong wind gusts are no match for a cricket that’s been securely fastened to the home, a non-negotiable aspect of installation. Beneath the cricket, a rubber ice and water shield serves as a waterproof underlayment, ensuring no leaks threaten the sanctity of your abode.
To achieve a watertight seal around the chimney, contractors employ methods such as creating reglets for chimney apron and counterflashing, securing with lead wedges, and meticulously installing shingles and step flashing. It’s also essential to ensure that all fasteners on the cricket are securely tightened to prevent the weakening of the structure over time, thus maintaining its effectiveness and integrity.
The success of a roof cricket hinges on its ability to:
The recommended slope of the roof for a roof cricket, such as the one exemplified by installations by WNC Roofing, is often 1/2 inch per foot, a specification that ensures adequate drainage and the cricket’s performance.
Chimney crickets, in particular, require a design that considers the unique structure and positioning of the chimney, often resulting in a slope that’s double that of the roof itself. This design choice is crucial in preventing water ponding and the formation of ice dams. The effectiveness of the cricket’s water diversion also relies on the slope of the cricket valley, which must be independently evaluated from the material slope to guarantee proper drainage.

Illustration of a roof cricket being inspected and cleaned
a roof cricket holds equal importance to its installation. Timely maintenance ensures that the cricket continues to operate efficiently, allowing for the early detection of issues and their swift resolution. Regular inspections are key, with particular attention to signs of wear or damage such as gaps in the shingles or loose fasteners. Addressing these issues immediately can prevent them from escalating and causing further damage.
Moreover, maintaining the cricket’s sealing is necessary to prevent moisture penetration, which could compromise the roof’s structure. Ensuring that all fasteners remain secure is vital to maintaining the structural integrity of the roof cricket over time, safeguarding the roofing system from failures due to inadequate support.
Additionally, periodic removal of debris or moss buildup on the cricket is crucial to prevent water from pooling and to ensure the cricket performs its role of water diversion effectively.
To avert issues before they arise, contractors suggest inspecting the area around a chimney and roof cricket at least once a year or every two years. Such regular checks can reveal potential problems that could impede water flow. As part of ongoing maintenance, it’s vital to clear away any debris and moss that may have accumulated, ensuring that water can flow unobstructed and prevent any blockages that could lead to damage.
Prompt action is the best defense when it comes to maintaining your roof cricket. Addressing repairs as soon as wear or damage is detected can prevent more extensive and costly repairs down the line. Inspecting for signs of damage such as gaps or loose fasteners and repairing them immediately is crucial for the longevity of your roof cricket and, by extension, your entire roofing system.
Frequent inspections and swift responses to signs of wear or damage, such as gaps in the shingles or loose fasteners, are essential to keep your cricket in top form.
Investment in roof crickets goes beyond immediate advantages; it forms part of a long-term plan for roof preservation. While the installation cost, which typically ranges between $3,000 to $6,000, may seem steep, it’s a drop in the bucket compared to the potential savings on future roof repairs. The upfront cost is influenced by several factors, including:
All of these are worthwhile considerations when it comes to protecting your property.
Moreover, adding crickets during roof remodeling or replacement offers several benefits:
It’s a strategic move that pays dividends in the form of a sturdy, reliable roof.
Roof crickets are not only functional but also possess a beautiful versatility. They can be tailored to fit the unique contours and features of your roof, ensuring that every nook and cranny is protected from water damage. In areas such as near parapet walls, crickets become necessary to prevent water from pooling in places that scuppers and the general roof design may neglect. It’s this custom approach that elevates a standard roofing system to one that’s fully equipped to handle the specific challenges posed by your property’s architecture.
Whether you’re dealing with a steeply pitched roof or one with a multitude of angles and intersections, roof crickets can be designed to fit seamlessly. This adaptability ensures that water is efficiently diverted away, safeguarding your home or commercial property against the risks of water ingress. By considering the unique architectural features of your property, you can ensure that your roof is not only water-resistant but also tailor-made to handle the specific demands of your environment.
To conclude, roof crickets are an essential component of a well-designed roofing system. They play a crucial role in diverting water away from vulnerable areas, preventing damage, and extending the lifespan of your roof. Whether you’re dealing with steep slopes, low-slope systems, or unique architectural features, there’s a roof cricket solution that can be customized to meet your needs. Investing in the installation and maintenance of roof crickets is not only a wise decision for the structural integrity of your property but also a cost-effective strategy for long-term savings.
To determine a roof cricket, remember the general rule of making the cricket panel slope twice that of the roof field or tapered slope for effectiveness. The cricket valley slope is a critical aspect in determining the cricket’s effectiveness.
A roof cricket is a triangular structure installed behind chimneys or other roof protrusions to divert water away and prevent potential damage. Consider installing it at points on the roof where water is likely to accumulate.
Building codes mandate the installation of roof crickets for chimneys wider than 30 inches to ensure proper water drainage and prevent roofing material degradation. Compliance is essential for both regulation and functionality.
Roof crickets are commonly constructed from wood, metal, or rigid insulation, and are covered with metal flashing or roofing materials like asphalt shingles to protect against the elements.
Inspect and maintain your roof cricket at least once a year, especially after severe weather events, to ensure proper water flow and prevent blockages. Regular cleaning to remove debris and moss is also important.

If you’re a homeowner in Jefferson City thinking about a new roof, metal roofing deserves a serious look. Between Missouri’s spring hail, summer heat, and winter ice storms, your roof takes a beating year after year. A metal roof can handle all of it — and last decades longer than most alternatives.
This guide covers what Jefferson City homeowners need to know about metal roofing materials, panel types, costs, and finding the right contractor. Whether you live near the Capitol, out toward Wardsville, or in one of the older neighborhoods off Lafayette Street, a metal roof can be a smart long-term investment.
Need a roofing estimate in Jefferson City? CoMo Premium Exteriors has been helping Mid-Missouri homeowners choose the right roof for years.

Various metal roofing materials available for Jefferson City homes
Metal roofing has grown steadily more popular across Cole County and the broader Mid-Missouri region. There are a few practical reasons for that:
Durability: A well-installed metal roof can last 50 to 70 years. Compare that to asphalt shingles, which typically last 15 to 25 years in Missouri’s climate. That means fewer replacements over the life of your home.
Energy savings: Metal reflects solar heat rather than absorbing it. During Jefferson City’s humid summers, that can reduce cooling costs by 10–25%. Homes near the Missouri River bluffs or in sun-exposed neighborhoods notice the difference.
Storm resistance: Missouri averages significant hail events each year, and Jefferson City saw the devastating EF-3 tornado in May 2019. Metal roofs resist wind up to 140 mph and handle hail far better than traditional shingles. They’re also fire-resistant — a real advantage when severe storms bring downed power lines.
Low maintenance: Unlike wood shakes that need regular treatment or asphalt shingles that lose granules over time, metal roofs need very little upkeep. An annual inspection and occasional gutter cleaning are usually enough.
Not all metal roofs are the same. The material you choose affects cost, lifespan, weight, and appearance.
Steel is the most common and affordable metal roofing material. Galvanized steel (coated with zinc) resists rust well and works for most Mid-Missouri homes. Galvanized steel is the workhorse of the metal roofing industry — strong, reliable, and available in dozens of colors and profiles.
Galvalume steel (zinc and aluminum alloy coating) offers even better corrosion resistance. For Jefferson City homes within a few miles of the Missouri River, where moisture exposure is higher, Galvalume is often the better choice.
Aluminum is lighter than steel and naturally corrosion-resistant. It costs more, but it’s a good fit for homes with weight limitations or for homeowners who want maximum rust protection. Aluminum is also easier to form into complex profiles, giving you more design flexibility.
Copper roofs are premium. They develop a distinctive green patina over time and can last well over 100 years. You’ll see copper roofing on some of Jefferson City’s historic buildings and churches. It’s beautiful, but the price tag puts it out of reach for most residential projects.
Zinc is self-healing — minor scratches seal themselves through a natural patina process. It’s durable, environmentally friendly (100% recyclable), and lasts 80+ years. Like copper, zinc is a premium material that makes the most sense for high-end or historically styled homes.

Exposed fastener metal roof panels on a Jefferson City home
The panel type determines how your roof looks, how it’s installed, and how much it costs. Here are the three main options.
These are the most affordable metal roofing option. Metal sheets overlap and are screwed directly through the face into the roof deck. You can see the screw heads on the surface.
Pros:
Cons:

Standing seam metal roof panels
Standing seam is the gold standard for residential metal roofing. Panels lock together at raised seams, and all fasteners are hidden underneath. This creates a clean, modern look and eliminates exposed penetration points.
Standing seam handles thermal expansion well — an important factor in Jefferson City, where roof surface temperatures can swing 150°F between summer peaks and winter lows. The interlocking design also sheds water and snow effectively.

Metal shingles that resemble traditional roofing materials
If you want the durability of metal but prefer the look of traditional shingles, wood shakes, or clay tiles, metal shingles and tiles are the answer. Stone-coated steel shingles are especially popular in Mid-Missouri — they look like conventional roofing from the street but perform like metal.
These are a good option for neighborhoods with HOA guidelines or for homeowners who want their home to blend in rather than stand out.
Metal roofing costs more upfront than asphalt, but the math changes when you factor in lifespan and maintenance.
For a typical 2,000 sq ft Jefferson City home, a standing seam steel roof runs roughly $16,000–$28,000, while an asphalt shingle roof costs $8,000–$15,000. But the metal roof may last three times as long, making it cheaper per year of service.
Insurance is another factor. Some Missouri homeowners insurance carriers offer premium discounts for impact-resistant metal roofs — worth asking your agent about.
There’s no single “best” metal roof. The right choice depends on your budget, your home’s architecture, and your priorities.
Jefferson City sits in USDA Zone 6a with hot, humid summers and cold winters. Any metal roofing material handles this climate well, but standing seam panels have an edge for thermal cycling. If your home is in a flood-prone area near the Moreau River or Missouri River bottoms, corrosion-resistant coatings matter more.
Aesthetics matter. Standing seam gives a contemporary look. Metal shingles blend with traditional neighborhoods. For older homes in Jefferson City’s historic Munichburg district or near the Governor’s Mansion, metal shingles or copper accents can complement the architecture without looking out of place.
If budget is tight, exposed fastener panels on a simple roof line can give you metal roof performance at a fraction of standing seam cost. If you’re planning to stay in your home long-term, investing in standing seam or stone-coated steel pays off.
Metal roofs and solar panels are a natural pairing. The long lifespan of metal means you won’t need to remove panels for a roof replacement partway through your solar system’s life. Standing seam panels are especially solar-friendly — mounting clamps attach directly to the seams without penetrating the roof surface.
With Ameren Missouri rebates and federal tax credits still available, Jefferson City homeowners adding solar to a new metal roof can see meaningful energy savings.

Metal roof maintenance tips for Jefferson City homeowners
Metal roofs are low maintenance, but they’re not no-maintenance. Here’s what to do:
Schedule a professional roof inspection at least once a year, ideally in late spring after storm season wraps up.
Most metal roofs last 50 to 70 years in Mid-Missouri. Standing seam steel and aluminum handle our freeze-thaw cycles, hail, and humidity well. Copper and zinc can last over a century. The key is proper installation and choosing the right coating for your specific exposure.
For many Jefferson City homeowners, yes. While the upfront cost is roughly double, a metal roof lasts three to four times longer than asphalt. You also save on cooling costs, face fewer repairs, and may qualify for insurance discounts. If you plan to stay in your home more than 10 years, the lifetime cost often favors metal.
Modern metal roofs installed over solid decking and proper underlayment are no louder than asphalt shingles during rain. Hail on any roof is audible, but the sound difference between metal and shingle is minimal with today’s installation methods. Attic insulation also dampens noise significantly.
In many cases, yes. Jefferson City building codes generally allow one re-roof over existing shingles if the structure can handle the weight. This saves on tear-off costs. However, a full tear-off lets your contractor inspect the decking for rot or damage, which is especially important on older homes. Your roofer can advise based on your specific situation.
No. Metal roofs do not increase the risk of a lightning strike. Lightning strikes the highest point in an area regardless of material. If a metal roof is struck, it actually disperses the energy safely across the surface — and because metal is non-combustible, there’s no fire risk from a strike.
Stone-coated steel shingles or metal tiles are usually the best fit for homes in Jefferson City’s historic neighborhoods like Moreau Heights or Old Munichburg. They give you the durability of metal while maintaining a traditional appearance that respects the home’s character. Standing seam works well on ranch-style and mid-century homes throughout the area.
Did you know that the color of roof shingles not only impacts the appearance of your home but also its value and energy efficiency? A well-chosen roof color can enhance curb appeal, blend harmoniously with your home’s architectural style, and even save on energy bills. Let’s explore the world of roof shingle colors and discover how to choose the perfect hue for your home.

A variety of roofing shingle colors displayed on a house showcasing popular options like weathered wood dark brown and dark gray
The perfect roof shingle color balances factors like climate, architecture, and personal preferences, augmenting curb appeal and home value. Popular brands like Owens Corning provide a broad spectrum of color options, ensuring a suitable shingle color for every home and style, including Owens Corning roofing shingles. How do we sift through these choices? Let’s simplify it into distinct aspects.
Did you know that the color of your roof shingles can impact your home’s energy efficiency? Lighter shingle colors are ideal for hot climates, as they reflect sunlight and keep your home cooler during hot summer months. This can help maintain a comfortable indoor temperature and potentially reduce energy costs. On the other hand, darker shades of shingles are capable of absorbing more heat from sunlight, making them suitable for colder climates. They can also enhance the property’s visual appeal.
In coastal cities in the Pacific Northwest or Upper East coast, darker roofs are not only aesthetically pleasing but also help to conceal algae and moisture stains that are common in more humid climates. Therefore, your region’s climate should factor into your roof shingle color choice for both energy efficiency and visual appeal.
A significant factor in choosing the appropriate roof shingle color is its compatibility with your home’s architectural style and design elements. Here are some popular roof shingle colors and recommendations based on different architectural styles:
The color of roof shingles can enhance architectural features by providing a cohesive aesthetic, helping to keep the home cool, and complementing the home’s exterior design and natural surroundings. Therefore, consider your home’s architectural style when choosing a roof shingle color to foster unity and cohesion.
Color psychology plays an essential role in our daily lives, affecting our emotions, moods, and even physiological responses. Different hues can elicit particular emotions and influence our decisions and performance. For example, red may suggest anger or arousal, while green can evoke feelings of freshness and elation.
Considering the psychological impact of color on mood and perception is significant when choosing roof shingle colors. Light-colored roofs can provide a sense of serenity and luminosity, while darker colored roofs may evoke feelings of comfort and homeliness. Understanding the psychological effects of color aids you in choosing the ideal roof shingle color for your home.

A selection of trending roof shingle colors for 2024 featuring earth tones bold blacks and cool grays
As we approach 2024, certain roof shingle colors are gaining popularity among homeowners. Earth tones, black hues, and cool grays are among the top trends for the upcoming year, offering a variety of options for homeowners looking to update their roof’s appearance.
Let’s examine these trending colors more closely.
Earth tones are gaining popularity for their natural and warm appearance, blending seamlessly with various home styles. These colors, including dark grays, blues, greens, and even black, are inspired by nature and replicate the colors found in the earth. Earth tone shingles harmoniously complement brick exteriors, traditional homes, and homes with blue or gray siding.
Embracing earth tones for your roof shingles can cultivate a warm and natural look for your home, enhancing its attractiveness and harmonizing with the natural environment. This makes earth tones an ideal choice for homeowners looking for a timeless and versatile roof color.
Black shingles offer a bold and modern look, suitable for various architectural styles. They provide a visually appealing appearance and can make the structure look fresh and well-maintained. Black shingles coordinate with any architectural style, providing various exciting exterior design possibilities.
Besides, black shingles have the ability to absorb and retain heat, which can speed up snow melting compared to lighter-colored shingles. This makes them not only visually appealing but also practical for homeowners living in colder climates or those looking for a striking, timeless aesthetic.
Gray shingles provide a cool and calming effect, making them a versatile choice for many homes. They are available in various shades, including dark grey and light grey options such as:
These options allow homeowners to find the perfect shade to complement their home’s exterior.
A light gray color roof can create a modern and sophisticated aesthetic when paired with wood siding or other natural materials. It can also provide a pleasant contrast and add visual appeal to homes with bright or contrasting siding colors. Gray shingles are an excellent option for homeowners seeking a versatile and visually appealing roof color.

A house with white siding paired with complementary shingle colors demonstrating the versatility of white siding with various shingle options
When choosing the ideal roof shingle color, it’s important to contemplate its coordination with your home’s siding. By matching shingle colors with different siding types, you can create a cohesive and harmonious exterior for your home. Let’s examine some common siding types and the shingle colors that complement them best.
White siding pairs well with a wide range of shingle colors, allowing for creative and contrasting combinations. Some examples of shingle colors that provide a striking contrast against white siding are:
These contrasting combinations can make the house more visible and improve its aesthetic.
When selecting a roof shingle color for a home with white siding, consider the overall appearance of the house and the colors of the neighboring homes. Neutral tones such as black, gray, and brown are classic and can likely appeal to a wide array of buyers, ensuring that your home stands out and creates a favorable impression.
Wood siding can be complemented by darker shingle colors, such as black or dark brown, for a cohesive and natural look. Darker brown or black shades coordinate well with weathered wood siding, resulting in a unified and natural aesthetic.
When pairing shingle colors with wood siding, consider the natural tones of the wood and the overall style of your home. By choosing a shingle color that enhances the natural tones of the wood siding, you can create a visually appealing and harmonious exterior for your home.
Beige houses can be accentuated with dark roof colors, such as brown, gray, or blue, for a harmonious appearance. These colors provide a pleasing contrast and complement the light exterior color of the house.
When selecting a roof shingle color for a beige house, consider the overall style and color scheme of your home’s exterior, as well as the roofing and siding pairings. By choosing a roof shingle color that complements your beige siding, you can create a unified and visually appealing exterior for your home.
Beyond traditional roof shingle colors, innovative color options and materials are available to consider when choosing the ideal roof color for your home. From flexible asphalt shingles to eco-friendly alternatives, let’s examine some of the recent advancements in roofing materials and color options.
Asphalt shingles offer a wide range of color options, making them a popular choice for homeowners. These shingles are available in a variety of hues, including classic black or charcoal for a sophisticated look, as well as dark colors that can easily blend with darker house colors such as blues, greens, and browns for a traditional aesthetic.
Asphalt shingles are also known for their durability, longevity, and ability to withstand the elements. With so many color options and benefits, it’s no wonder that many homeowners opt for asphalt shingles when selecting the perfect roof color for their home.
For homeowners who are environmentally conscious or focused on energy efficiency, there are eco-friendly and energy-efficient shingle materials and colors to consider. Some options include:
These materials are considered sustainable options that have a minimal effect on the environment.
When selecting a roof shingle color, consider lighter-colored shingles, such as white or light gray, which are more energy-efficient than darker-colored ones due to their ability to reflect sunlight and heat, thereby reducing the amount of heat absorbed by the roof and keeping the interior of the building cooler.
Choosing eco-friendly and energy-efficient shingle materials and colors can help you establish a sustainable roofing solution for your home.

A visually appealing roof color enhancing the curb appeal of a home contributing to its marketability and resale value
A wisely chosen roof color can enhance the appearance of your home and elevate its resale value. By selecting a roof color that enhances curb appeal and marketability, you can attract potential buyers and increase the resale value of your home.
Let’s examine how the choice of roof color can influence your home’s resale value.
A well-chosen roof color can significantly impact a home’s curb appeal, attracting potential buyers and increasing the perceived value of your home. By matching the shingle color to the trim of your house, you can create a cohesive look and add visual appeal to the exterior of the house.
When selecting a roof shingle color, consider the overall appearance of your house, the neighboring homes, and the colors of the surrounding environment. By choosing a roof color that complements and enhances the overall aesthetic of your home, you can improve its curb appeal and increase its resale value.
In the competitive real estate market, it’s essential to select a roof color that appeals to a broad range of buyers, ensuring your home stands out in the market. Popular neighborhood roof colors can be appealing to prospective buyers, and research indicates that a color-coordinated exterior, including the roof color, can contribute to the perceived value of a home.
Consider lighter-colored roofs, such as gray, which can create a modern and contemporary aesthetic, or black roofing shingles, which can provide a classic and traditional look when paired with light gray or white siding. By choosing a roof color that enhances your home’s curb appeal and marketability, you can increase the resale value of your property.
Your home mirrors your personal style and taste, so why not customize it with the ideal roof shingle color? By considering factors such as climate, architecture, and personal preferences, you can choose a roof shingle color that reflects your individual style and creates a harmonious exterior for your home.
Let’s examine how to individualize your home with roof shingle colors.
When choosing a roof shingle color that represents your personal taste and complements your home’s overall aesthetic, take into account factors such as:
Ultimately, selecting the right roof shingle color is a personal choice, so ensure you choose a color that you love and that reflects your personal style. Whether you prefer a bold and vibrant color or a more subtle and classic hue, there’s a perfect roof shingle color for every taste and style.
It’s important to consider how lighting conditions can influence the color’s appearance when choosing your roof shingle color. Here are some factors to keep in mind:
By being mindful of how lighting conditions can affect the appearance of your roof shingle color, you can ensure that your chosen color looks great in all settings. This will not only enhance the overall aesthetic of your home but also ensure that you are satisfied with your roof color choice for years to come.
It’s important to understand environmental codes and regulations when choosing a roof shingle color to ensure your selected color complies with local constraints and guidelines. This includes adhering to the guidelines set by homeowners associations (HOAs) or local building regulations.
Let’s examine how to navigate environmental codes and regulations when choosing a roof shingle color.
It’s necessary to study local restrictions and guidelines on roof shingle colors to ensure compliance with building codes. Begin by examining the covenants, conditions, and restrictions (CC&Rs) of your local homeowner’s association (HOA), which often include guidelines and approval processes for home changes, including roof shingle color. Additionally, consult your local regulations or governing body to determine if there are any specific requirements or restrictions on roof shingle color in your area.
By understanding local restrictions and guidelines, you can ensure that your chosen roof shingle color adheres to the regulations and creates a harmonious exterior for your home.
Cooperating with your HOA is important when choosing a roof shingle color to ensure your selected color aligns with community standards and enhances your home’s appearance. Review the HOA guidelines to guarantee that the chosen shingle color is compliant and contributes to the overall aesthetic of your neighborhood.
By working with your HOA and adhering to their guidelines, you can create a unified and visually appealing exterior for your home while also complying with community standards. This not only improves the aesthetic of your home but also helps maintain property values within your neighborhood.
In conclusion, choosing the perfect roof shingle color involves considering factors such as climate, architecture, personal preferences, and local regulations. By selecting a color that enhances curb appeal, complements your home’s style, and adheres to environmental codes and regulations, you can create a harmonious and visually appealing exterior for your home. So, take the time to explore your options and find the perfect roof shingle color that reflects your personal style and enhances the value of your home.
For a traditional home, gray, brown or white shingles are best, while bolder red or dark blue colors will work for more modern homes. Make sure the color you choose doesn’t clash with any other colors on the property.
Contrasting colors are generally recommended, with a darker roof and lighter siding being the most common choice. However, light siding and a dark roof can also look very attractive.
Match roof shingles color by keeping in mind that warm colors work best with other warm colors, and cool colors with other cool colors. Always select a shingle color that complements yet contrasts with your home’s exterior elements to create an interesting overall look, and be mindful of the size and shape of your roof. For example, pair brick red or rusty tan roof shingles with tan, beige or brown siding, and black or slate gray shingles with blue, gray or green siding.
Architectural asphalt shingles are the most popular roof shingle today, commonly seen on residential rooftops for their ability to provide a random pattern and simulate the look of a wood-shake roof.
In warmer climates, it’s best to choose lighter colored shingles to reflect the sunlight and keep your home cool. Conversely, darker colors are more appropriate for colder climates as they absorb heat from sunlight.