Benefits of Roof Ventilation
Benefits of Roof Ventilation
What Is Roof Ventilation? Understanding Its Benefits
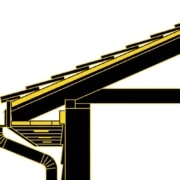
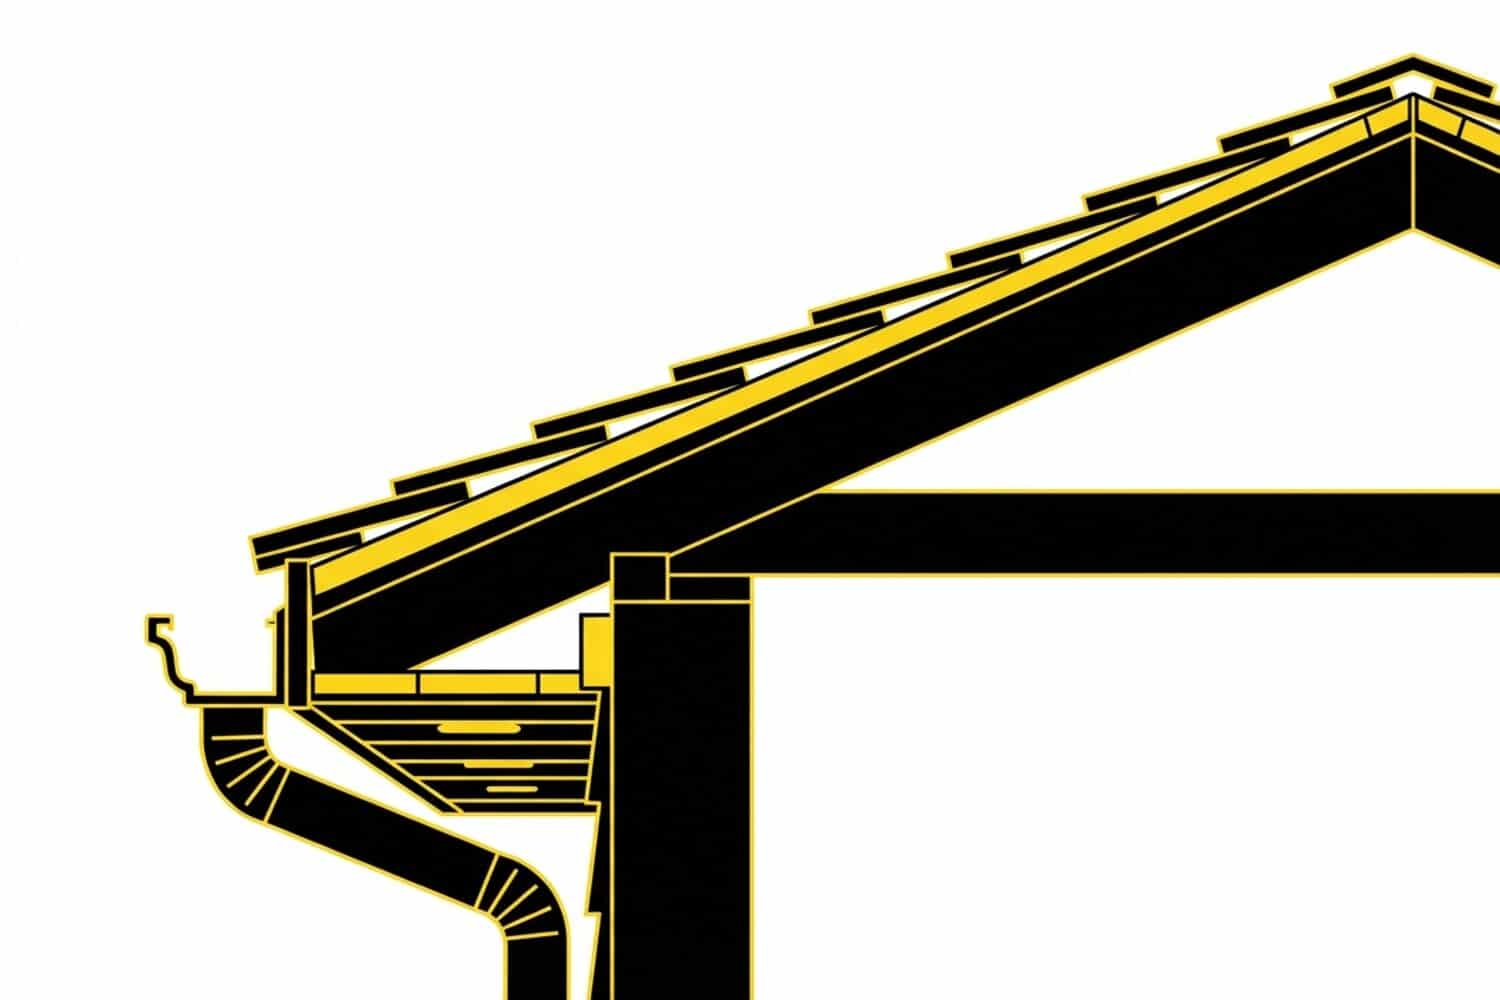
Roof ventilation is the system of vents installed in your attic and roofing structure to facilitate the natural flow of air. Roof venting is the process of allowing air to move through the roof space to regulate temperature and moisture. It typically combines intake vents (also known as eave vents, placed along the soffits or eaves) and exhaust vents (a type of attic vent and exhaust vent, placed near or at the ridge of the roof). This setup allows cooler outside air to flow in while letting warm, moist air escape—creating continuous circulation that protects your home. Roof vents work by facilitating this airflow, helping to maintain a balanced attic environment and prevent issues caused by heat and moisture buildup.
How Roof Ventilation Works
Roof ventilation works by creating a continuous flow of air through your attic space, which is essential for maintaining a healthy and efficient roofing system. The process starts with intake vents—often installed as soffit vents along the eaves—that allow cooler outside air to enter the attic. As warm air rises inside the attic, it naturally moves upward and escapes through exhaust vents, such as ridge vents located at the peak of the roof. This cycle of air circulation ensures that hot air and moisture are constantly being pushed out, while fresh, cooler air is drawn in. By allowing hot air to escape and preventing moisture buildup, proper attic ventilation helps regulate attic temperature, reduces the risk of ice dams, and protects your roofing system from damage. The key is a balanced system of intake and exhaust that keeps the flow of air moving efficiently throughout the entire attic.
Types of Roof Vents
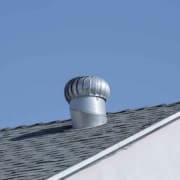
There are several types of roof vents designed to provide proper ventilation for different roofing systems and climates. Ridge vents are installed along the roof’s peak and allow hot air to escape evenly across the entire roof line. Soffit vents, placed under the eaves, bring in cooler air from outside, working in tandem with ridge vents for optimal air flow. Power vents use electric or solar-powered motors to actively pull hot air out of the attic, making them a good choice for larger or more complex roofs. Box vents, also known as roof louvers, are static vents installed on the roof deck that provide exhaust venting in specific areas. Solar-powered vents harness energy from the sun to drive ventilation, offering an energy-efficient solution. The right type of roof vent for your home depends on your roof’s design, local climate, and your specific ventilation needs, but all are aimed at providing proper ventilation and allowing hot air to escape.
Key Benefits of Proper Attic Ventilation
1. Reduces Heat Buildup in Summer
Attics can reach temperatures of 140°F or higher during Mid-Missouri summers. The temperature in the attic can significantly impact the comfort and energy efficiency of your home. Without proper ventilation, hot and humid air becomes trapped, radiating heat downward and forcing your cooling system to work overtime. A properly ventilated attic reduces the workload on your air conditioner and air conditioning system, helping to lower energy costs. Ventilation allows hot air to escape and brings in cool air from outside, which helps regulate attic temperature and further improves indoor comfort.
Learn how roof upgrades can lower utility costs (https://comoexteriors.com/roofing/columbia-mo-roof-repair/)
2. Prevents Moisture and Mold Problems
Moisture buildup is a major threat to roofing systems. In winter, condensation forms when warm air from inside the house meets a cold roof deck. Without ventilation, this moisture gets trapped—leading to mold, mildew, and wood rot. Poor ventilation can also result in mold growth, which poses health risks and can damage your home. The presence or absence of a vapor barrier in your attic insulation plays a crucial role in controlling moisture and preventing condensation. Ventilation helps maintain dry conditions, especially crucial during snowy or icy weather.
3. Extends the Life of Your Roof
Trapped heat and moisture can break down roofing materials prematurely. Roof shingles are particularly susceptible to damage from excessive heat and poor ventilation, which can cause them to curl and adhesives to fail. Decking may weaken, and roof sheathing can also warp or deteriorate due to trapped heat and moisture, further compromising the roof’s durability. A properly ventilated roof stays cooler and drier, which significantly extends the lifespan of your investment.
4. Protects Against Ice Dams
Ice dams form when heat escapes into the attic and melts snow on the roof—only for it to refreeze at the edges. This process, known as ice damming, can cause significant water damage to exterior walls, interior walls, and the roof system if not addressed. When hot air rises and enters the roof space, it can melt snow unevenly, leading to ice damming. Proper ventilation allows cold air to circulate in the attic, keeping the roof temperature consistent and reducing the risk of ice damming. This helps protect the attic floor insulation and the overall roof system.
5. Improves Indoor Air Quality
Roof ventilation also supports overall home health by reducing indoor humidity and stale air buildup. Especially for households with allergies or respiratory concerns, this added airflow can make a noticeable difference in air quality.
Designing a Roof Ventilation System
Designing an effective roof ventilation system involves balancing several important factors to ensure your attic space receives adequate ventilation. The size and type of your roof, local climate conditions, and the amount of attic insulation all play a role in determining the best approach. A balanced attic ventilation system provides equal amounts of intake and exhaust venting—typically with intake vents installed in the soffits or eaves and exhaust vents placed at the roof ridge or on the roof deck. The number and size of vents should be calculated based on the total square footage of your attic space and the insulation level, ensuring the entire roof benefits from proper air flow. A well-designed roof ventilation system helps reduce energy costs, prevents moisture buildup, and extends the life of your roof by maintaining a consistent environment under the roof deck.
Energy Costs and Roof Ventilation
Proper roof ventilation can have a significant impact on your home’s energy costs. By regulating the temperature and humidity in your attic, a well-ventilated roof helps keep your living space cooler in the summer, reducing the need for air conditioning and lowering your cooling bills. In the winter, effective attic ventilation prevents the formation of ice dams and reduces the risk of moisture buildup, which can lead to costly roof repairs and increased heating expenses. A balanced attic ventilation system also protects your roofing materials from excessive heat and moisture, extending the life of your roof and providing long-term savings. Investing in a quality roof ventilation system is a smart way to make your home more energy efficient and comfortable year-round.
Signs Your Home May Need Better Roof Ventilation
These issues are often signs of poor ventilation in your roof system:
- You notice hot, stuffy attic conditions year-round
- You see mold, mildew, or wood rot in the attic or roof decking
- Your energy bills spike in summer or winter
- Shingles show signs of premature curling or damage
- Ice dams appear frequently during winter months
- You have too few attic vents or a poorly ventilated attic, which can lead to these problems
If any of these sound familiar, it’s time to call in a roofing expert to evaluate your system.
How CoMo Premium Exteriors Can Help
With over 15 years of experience serving Columbia, Jefferson City, and communities throughout Mid-Missouri, CoMo Premium Exteriors understands how local climate affects your roof. Our team specializes in roofing systems designed to maximize ventilation, extend durability, and lower energy costs—all backed by a 5-Year Craftsmanship Warranty.
We’ve got you covered—from inspections to full roof replacement, we offer honest assessments and solutions tailored to your home.
Take Action Today
Optimize your home’s performance and protect your investment with proper roof ventilation. Whether you’re building a new home, replacing an aging roof, or looking to prevent moisture issues, ventilation should be part of the plan.
Request a free roof inspection in Columbia, MO or anywhere in Mid-Missouri—call (573) 424-9008 or schedule online today.